...
DNS Zones
...
Editing a Zone Record is done on the Zone View page. You can access this page two different ways:
- From the DNS Gadget, click on the Action Menu (Wrench Icon) and select "View Zone" or "Edit Zone". This will take you directly to the Zone View page.
- Click on the zone name from the DNS Tab, DNS Gadget, or the DNS Admin Bulk Zone search. The name links directly to the Zone View page.
Areas of the Zone View page include:
| Table of Contents |
|---|
Zone Management:
This area is at the top of the screen and provides direct access to confirm zone file changes.
...
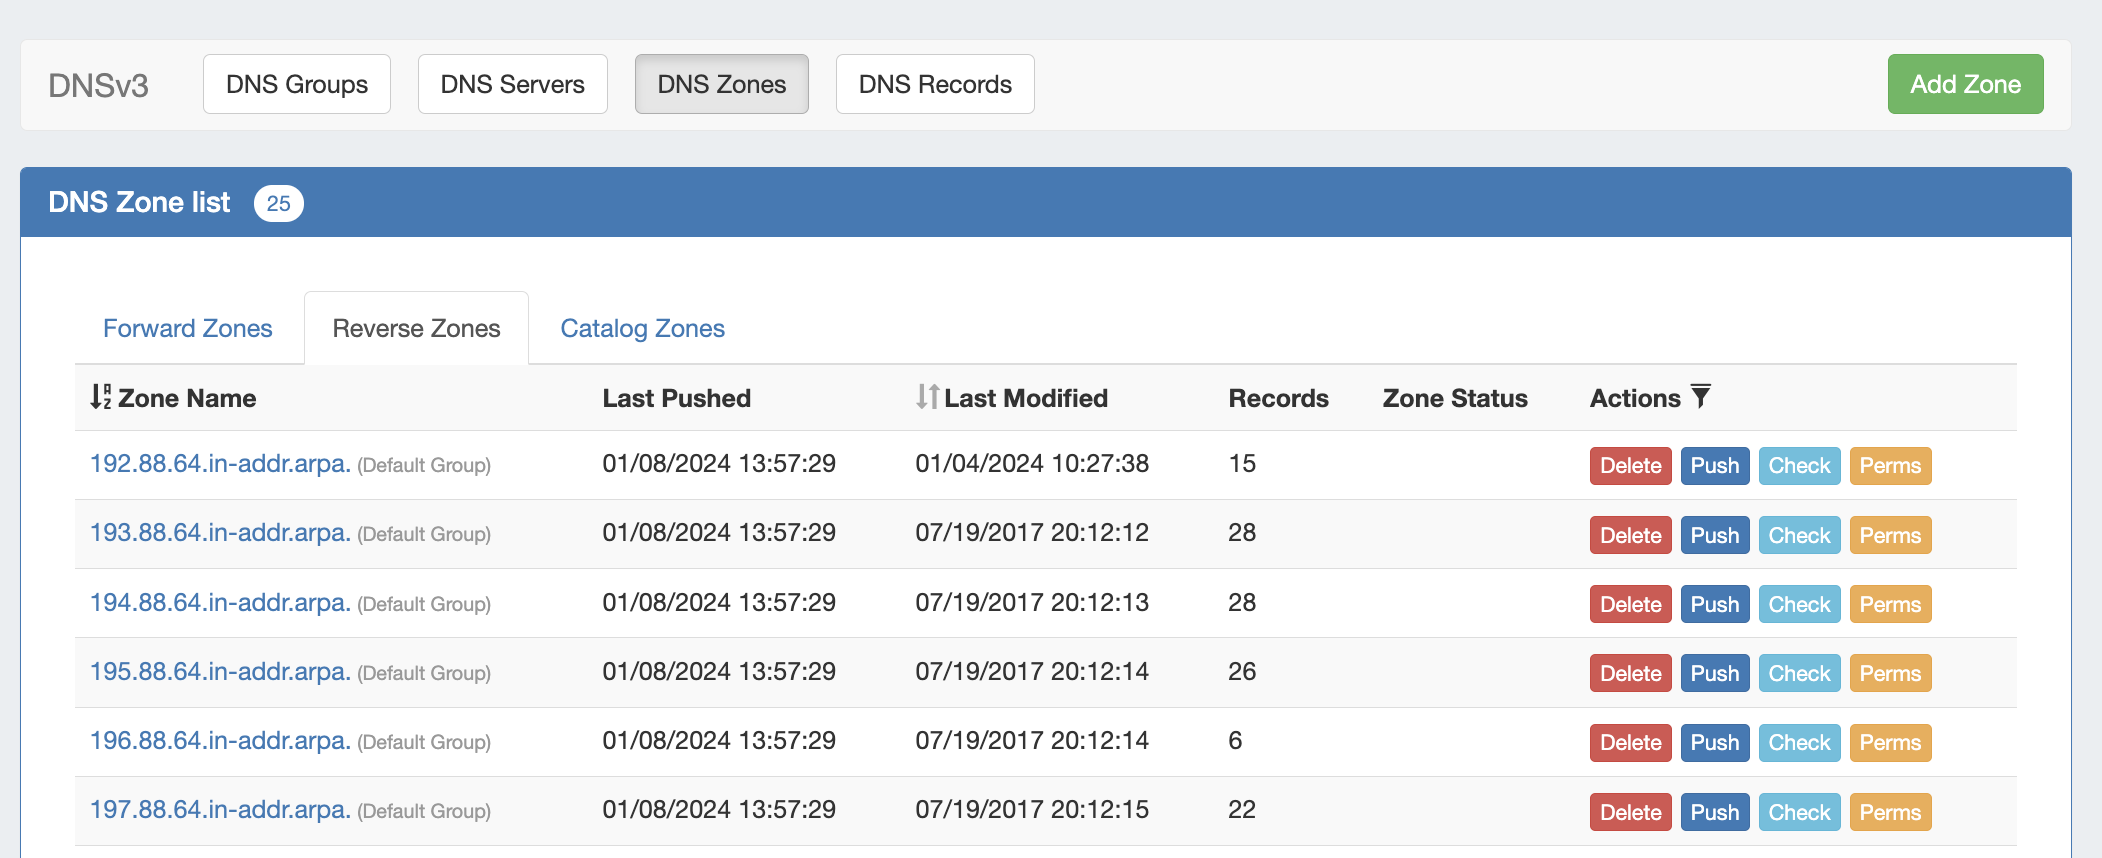
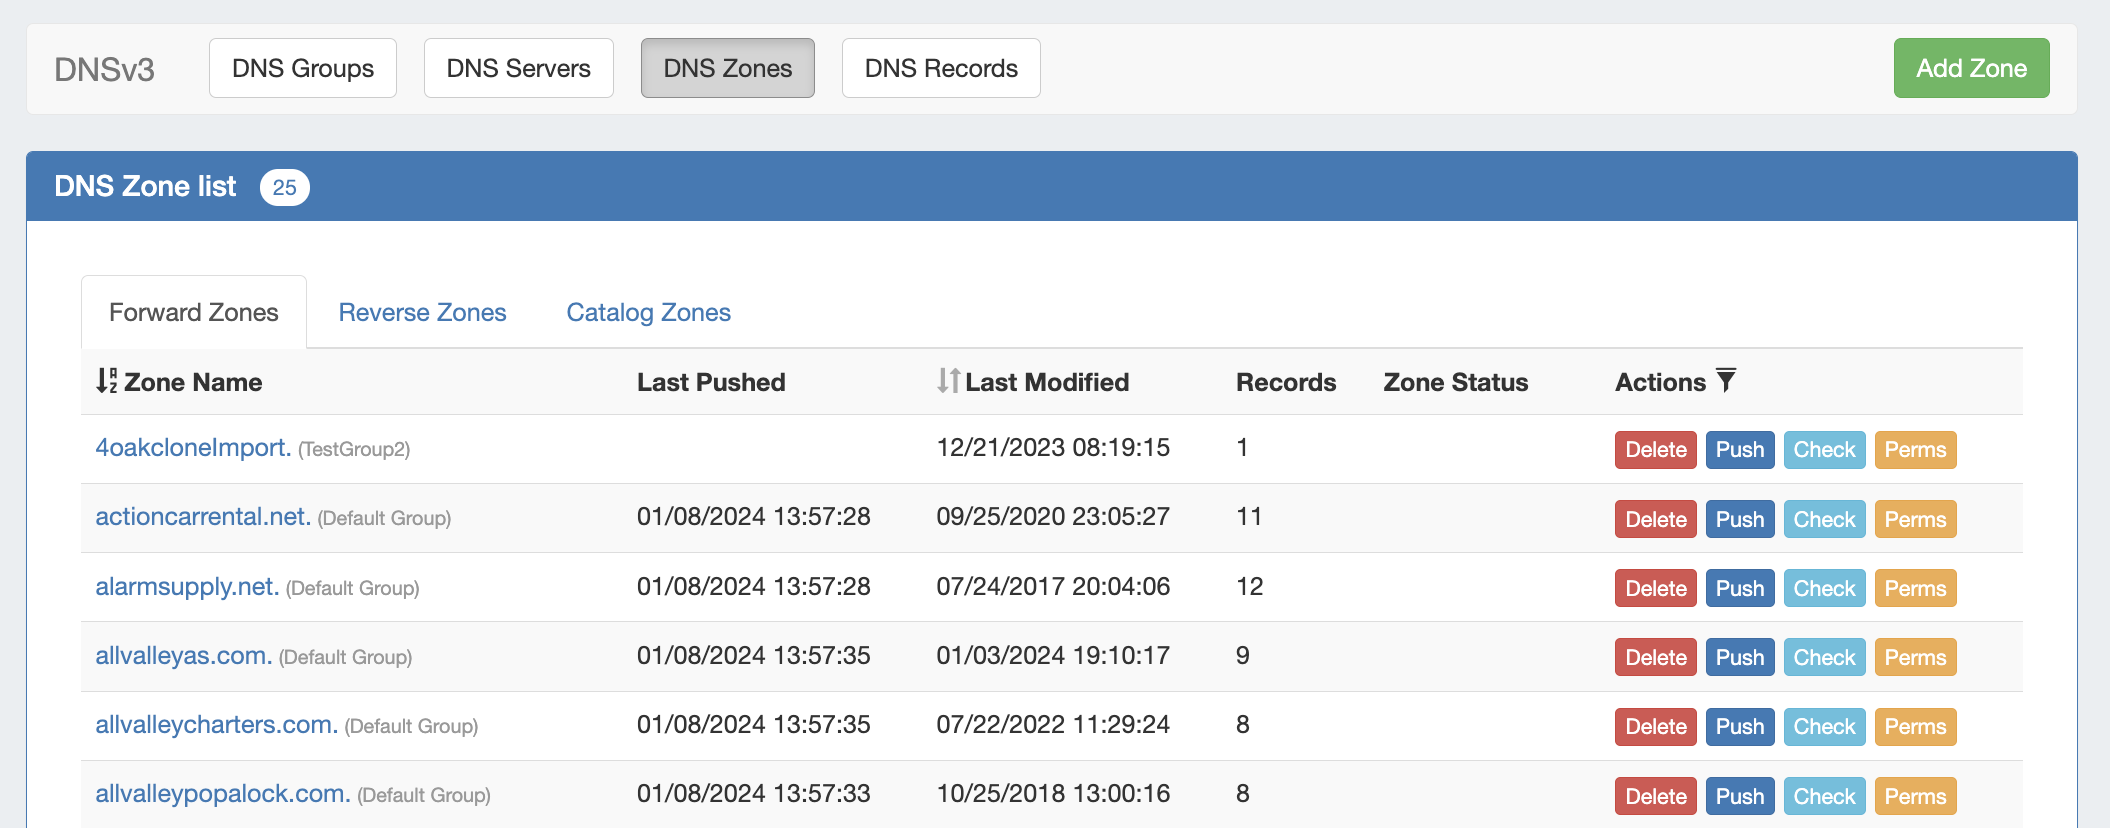
DNS Zones are accessed under the DNS tab, DNS Groups or DNS Zones sub-tabs. The DNS Zones sub-tab features the DNS Zone List - a straightforward list of all existing zones, including those not attached to DNS Groups. From here, you can create a new zone, view all Forward, Reverse, and Catalog zones, delete, push, check, view pending approvals, or edit permissions (admin only) on a zone.
This page focuses on a general UI overview of the DNS Zones and Zone View pages.
For detailed instructions on how to perform specific zone tasks, see Working with DNS Zones - Common Tasks.
| Table of Contents |
|---|
DNS Zone List Interface
The DNS Zone List shows all existing zones, organized into three tabs - Forward, Reverse, and Catalog Zones.
By default, the zones load in ascending alphabetical order with 25 zones per page, with the zone's group displayed in parenthesis next to the zone name.
To switch between the two lists, simply click on the tab for the desired zone type.
Sort / Filter the Zone List
The Zone list may be sorted by either "Zone Name" or by "Last Modified" time.
To sort the Zone List, click on the up/down arrows next to either column header to toggle between ascending/descending order.

To filter the Zone List, click on the filter icon next to "Actions".

Then, type in all or part of the zone name and select "Partial" or "Exact Match" from the dropdown, or select zone status. Click "Filter."

The zone list will filter the zones to only those fitting the selected criteria.
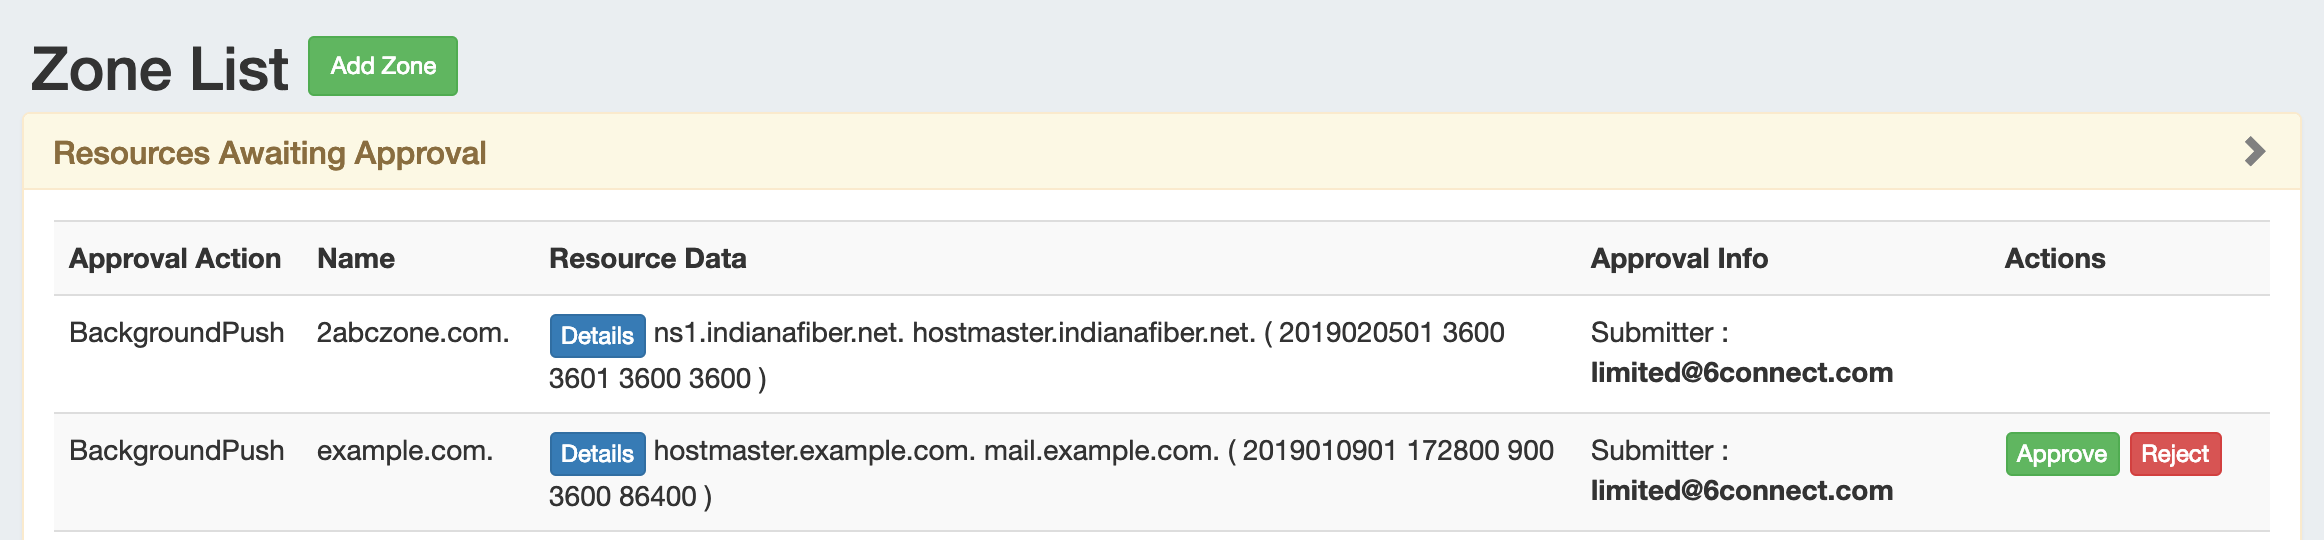
Resources Awaiting Approval
If the Approval system is in use, pending zone approval items will be shown in a "Resources Awaiting Approval" module above the Zone List.
Users who submitted a change for approval will see the details of their change request in this module.
Admin users with permissions to approve or reject the request will have the option to Approve or Deny the change.
View Zone Details (Zone View Page)
To view details or manage a zone, click on the zone name from any Zone List to go to the Zone View page.

Additional information on the Zone View page is available in the next section, Zone View.
Additional Information:
For more information on working with DNS Zones, Groups, and Servers, see the following sections:
- Zone View
- Working with DNS Groups
- Working with DNS Zones - Common Tasks
- DNS Administration
- Import DNS Zones
- Approvals
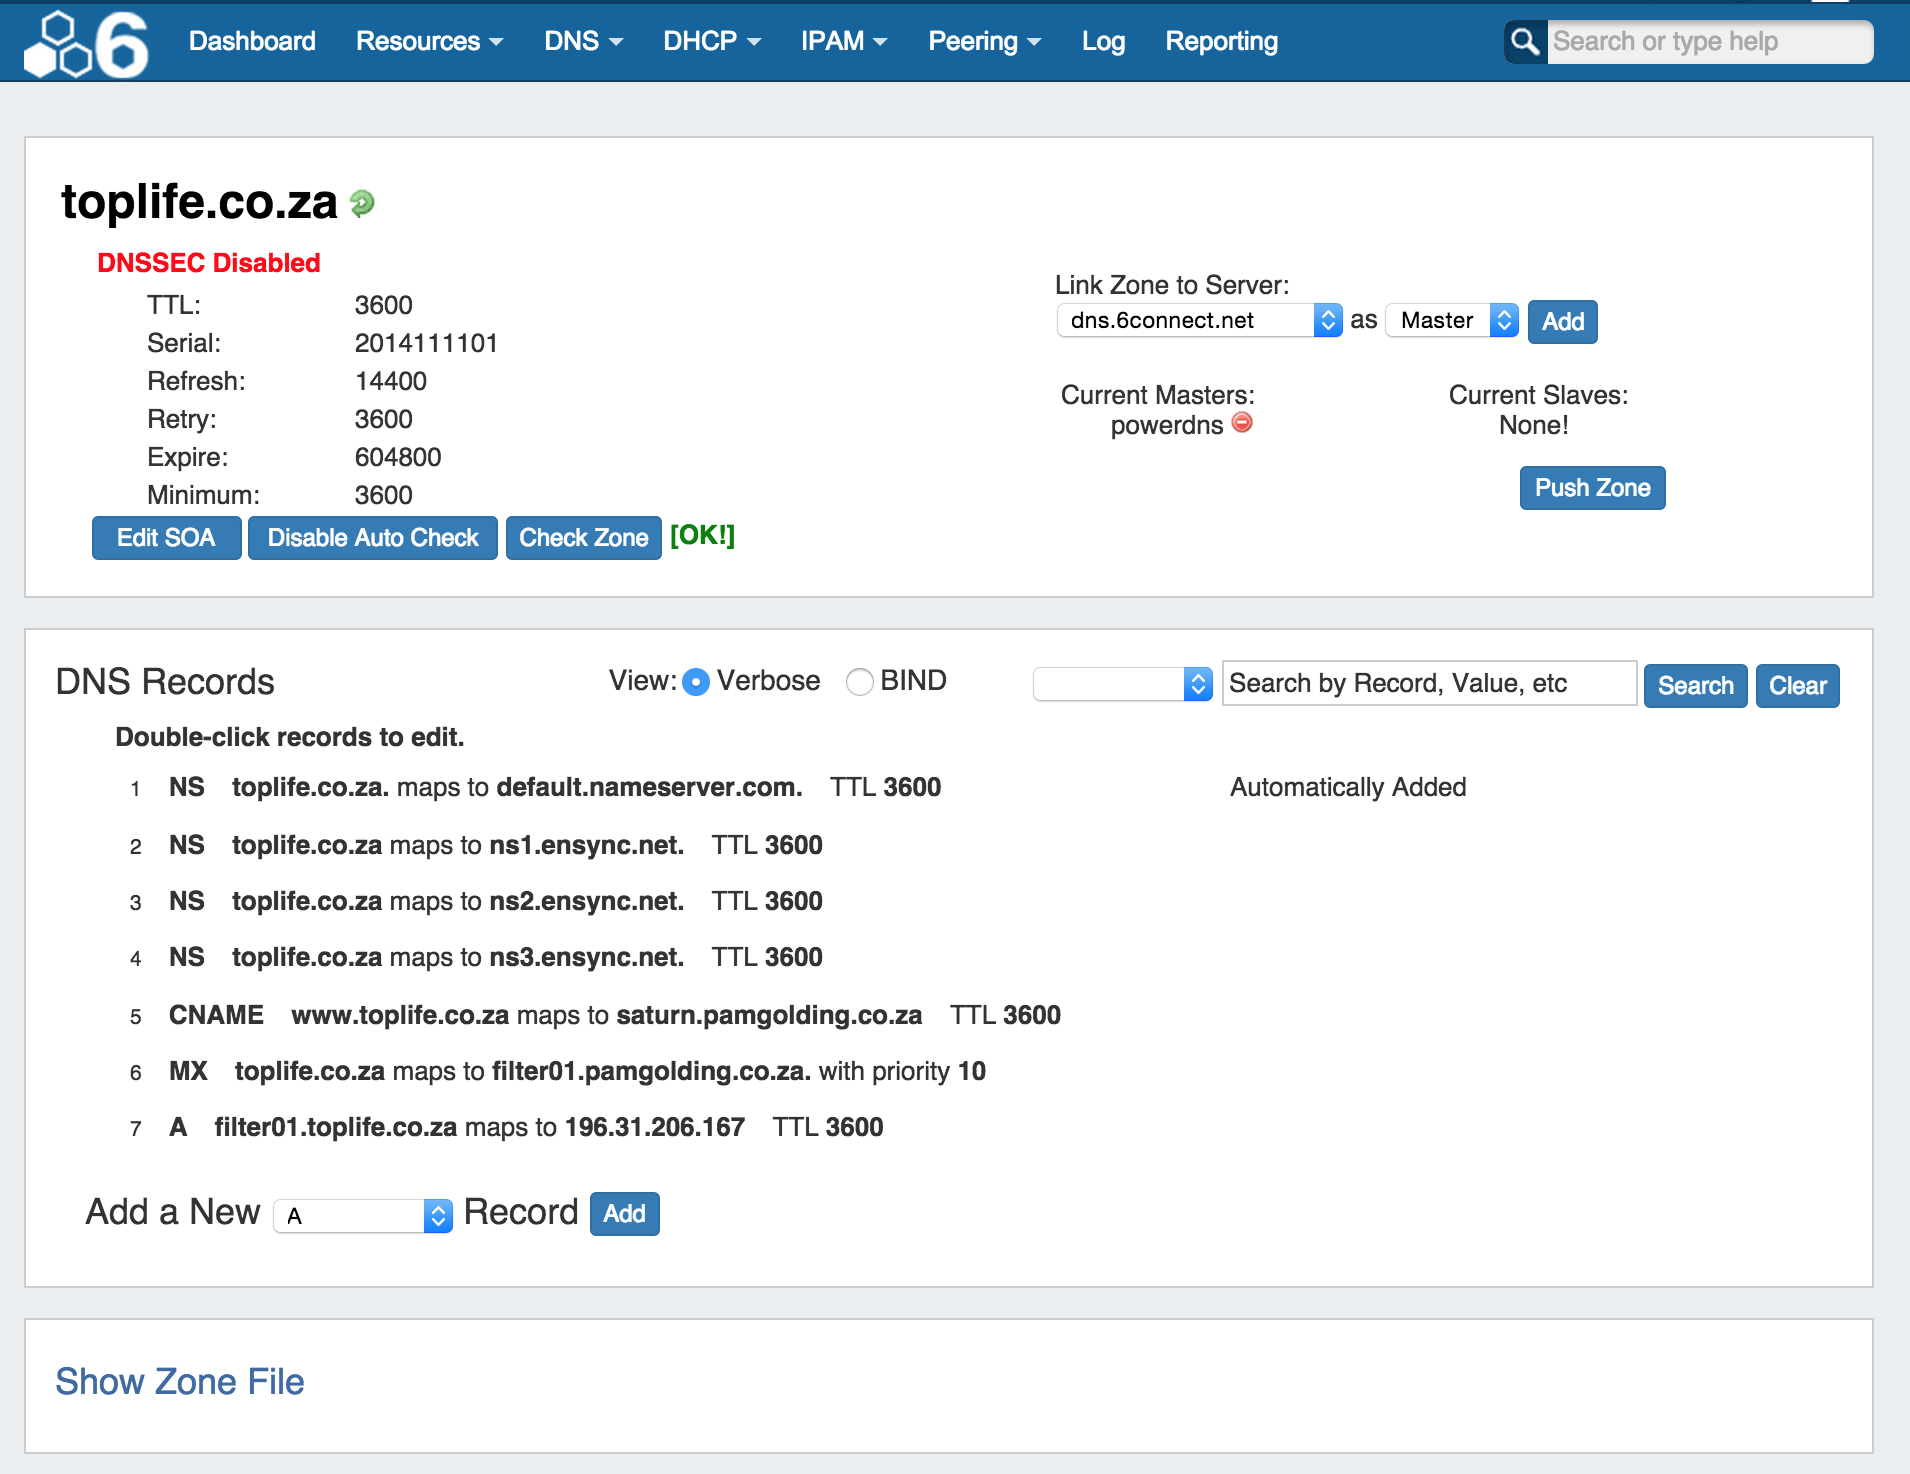
Enable / Disable DNSSEC
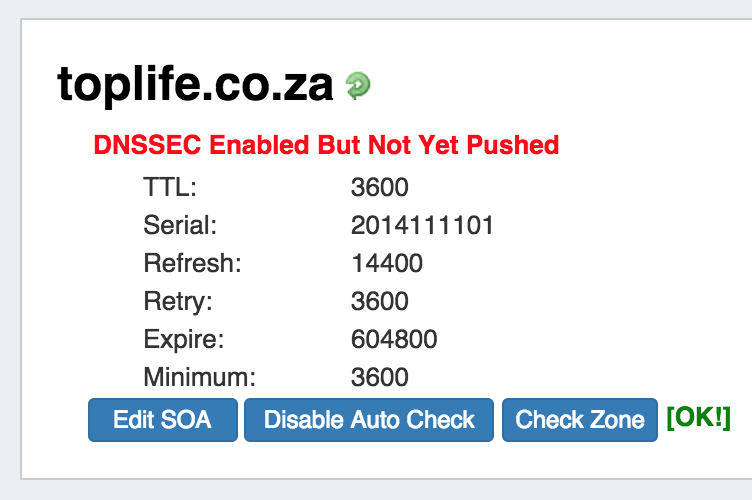
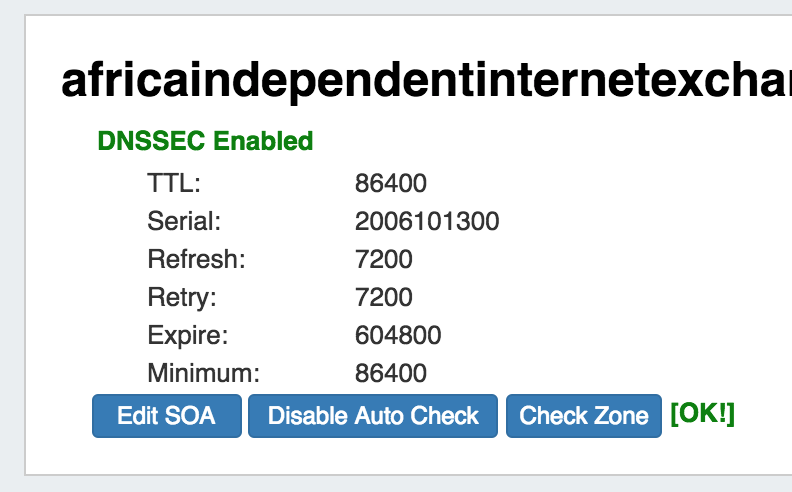
DNSSEC for a zone can be enabled / disabled by clicking on the DNSSEC status below the zone name.
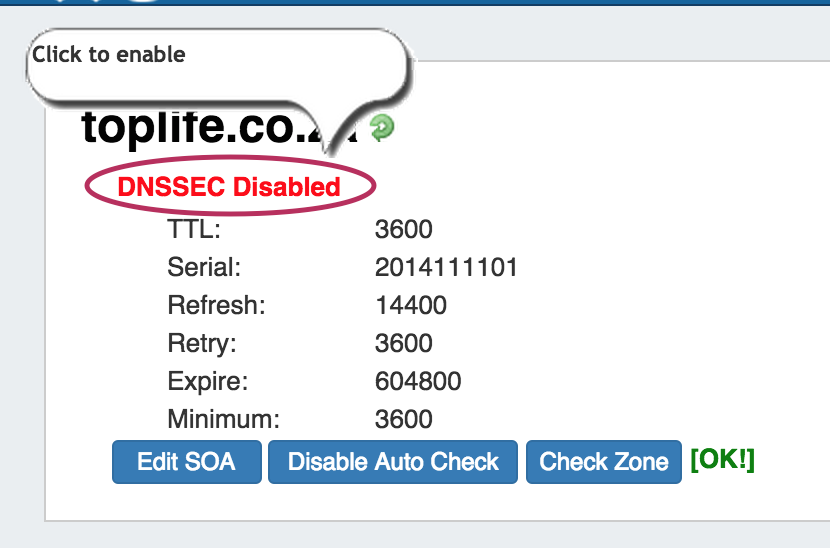
Once enabled, the message will change to either "DNSSEC Enable but not yet Pushed" or "DNSSEC Enabled" if pushed.
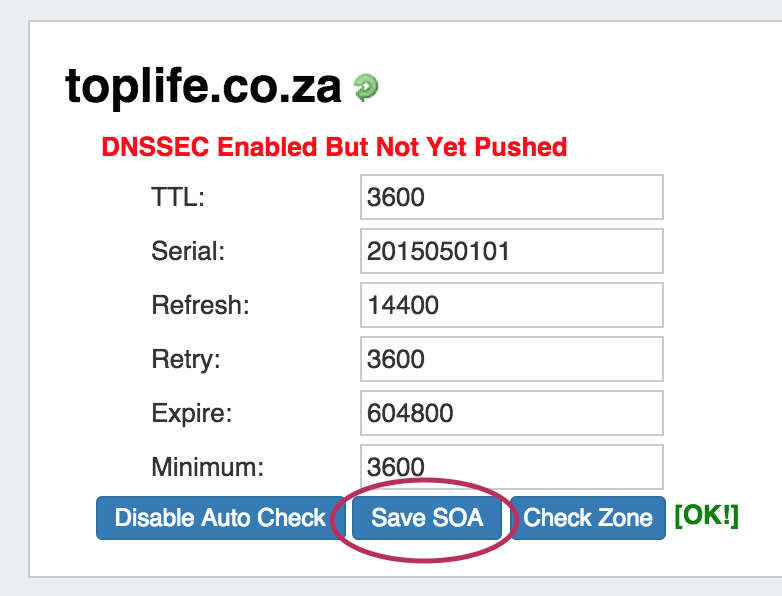
Edit SOA
Click on the "Edit SOA" button to make the SOA fields editable. Make your changes, then click "Save SOA" to save your changes.
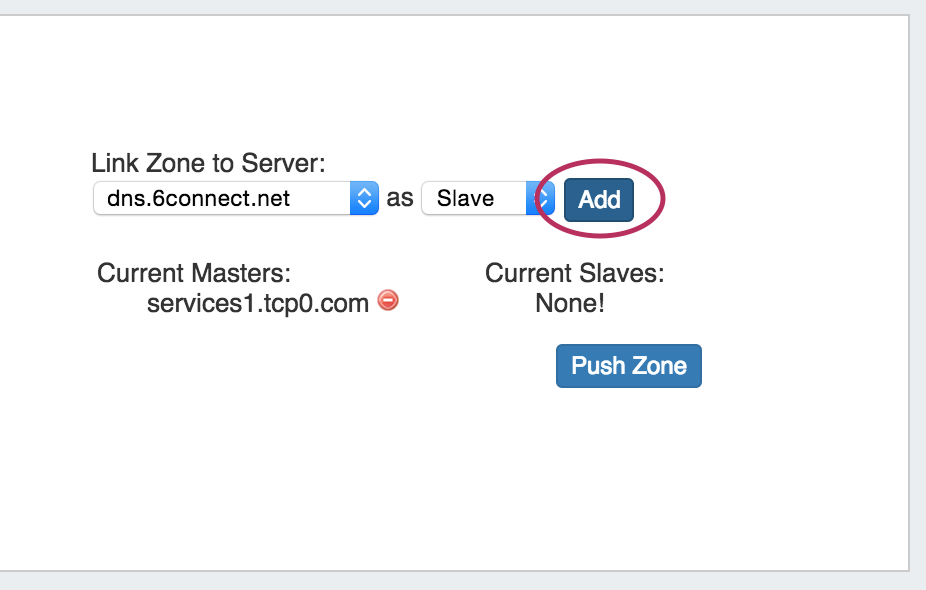
Link Zone to Server
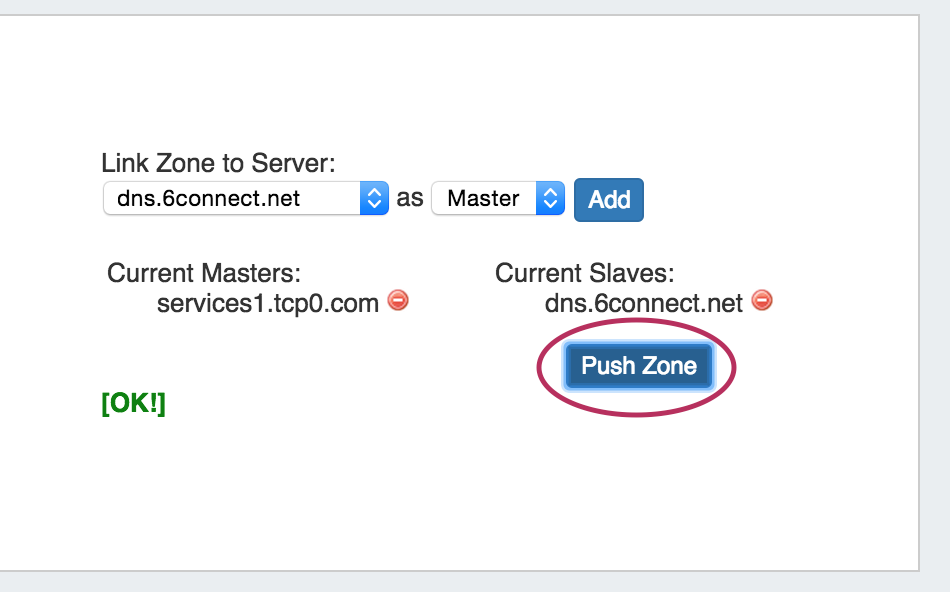
To Link the zone to a server, select the sever from the dropdown list, and then specify whether it should be a "Master" or "Slave". The, hit the "Add" button. The desired server must already be created in the DNS Admin Tab.
When done adding Master / Slave servers to the list, hit "Push Zone Now". If the push is successful, you will see an "OK!" message pop up under the linked server list.
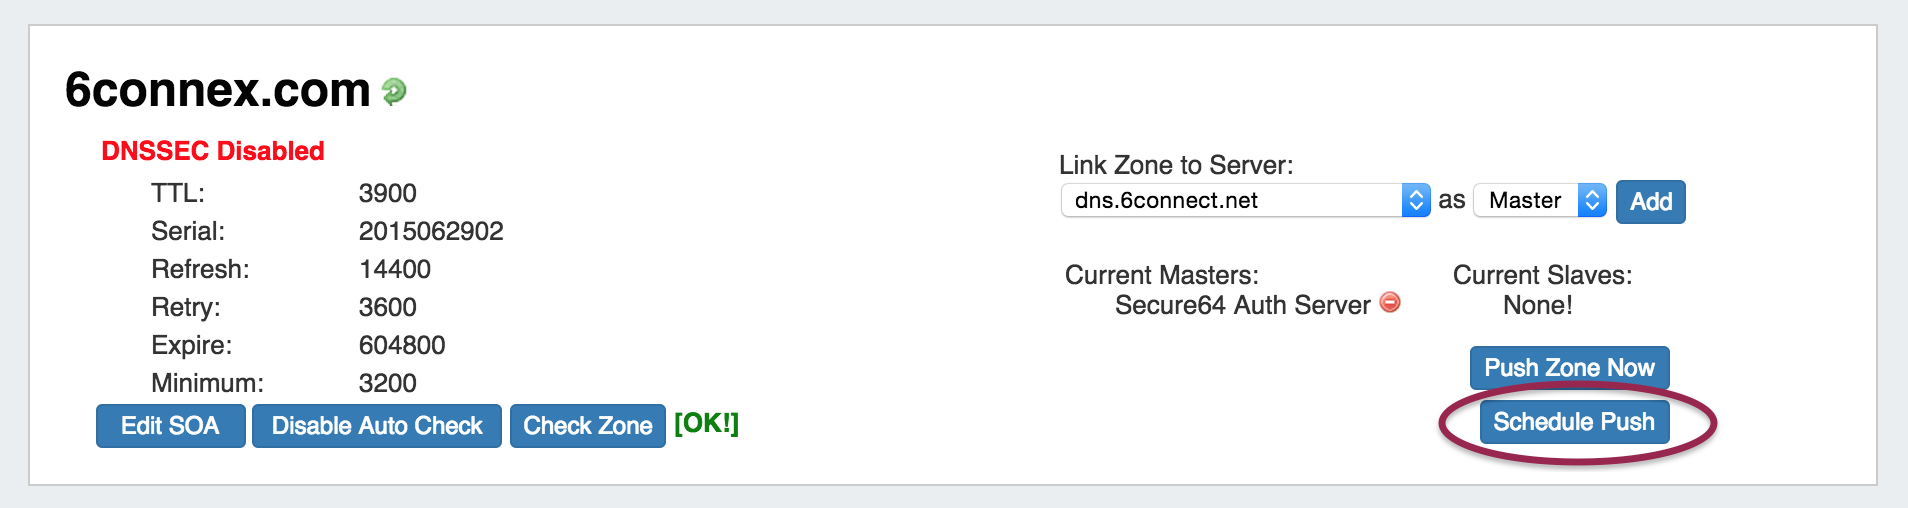
Schedule Push
If you have Admin access, a "Schedule Push" button will be visible below the "Push Zone Now" Button. To schedule a DNS Zone push, hit "Schedule Push".
Select the desired UTC time and fill in the notification email address. When done, click on "Schedule Push".
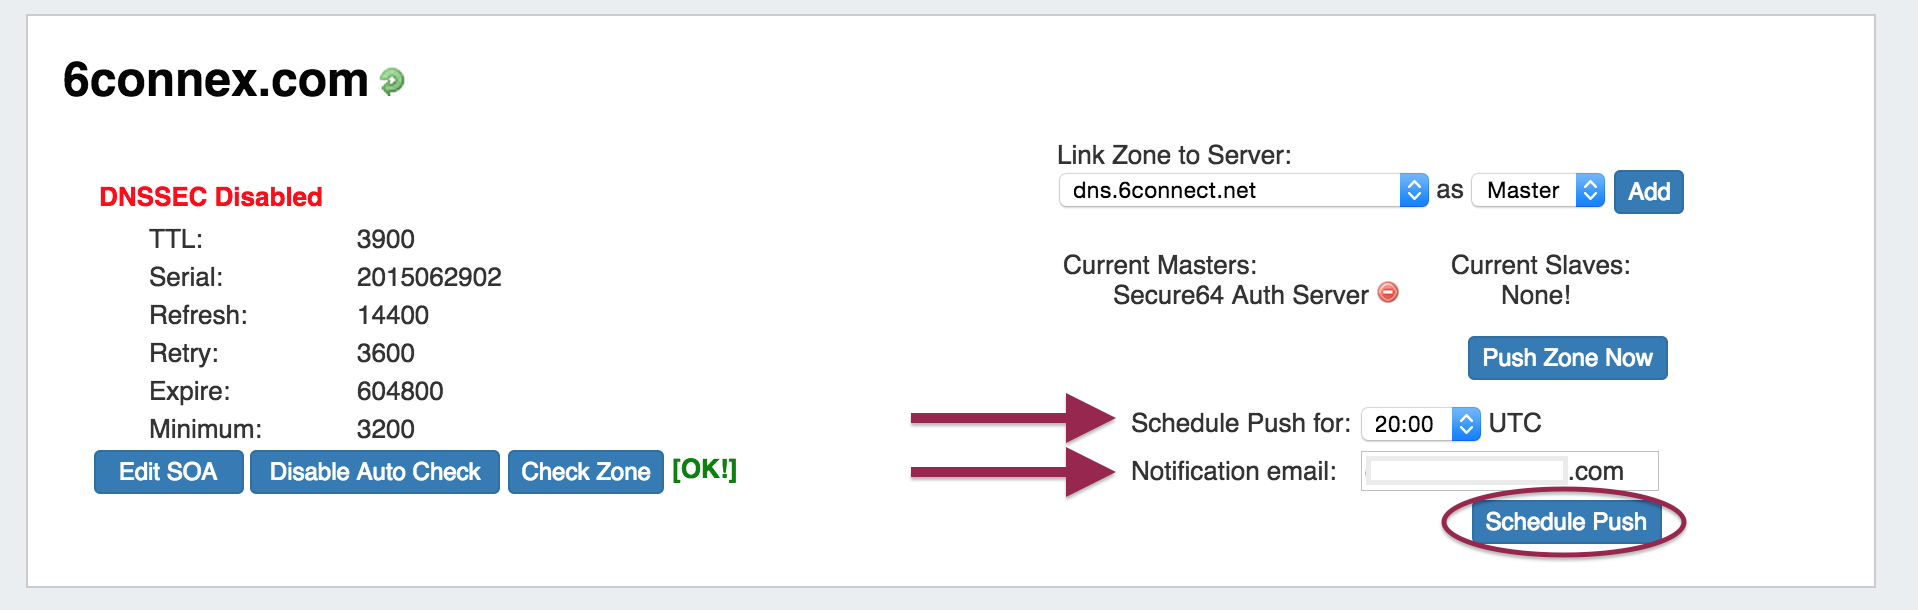
When done, you will see a notification that a push is scheduled. It will also show in the scheduled task list on the Admin Scheduler.
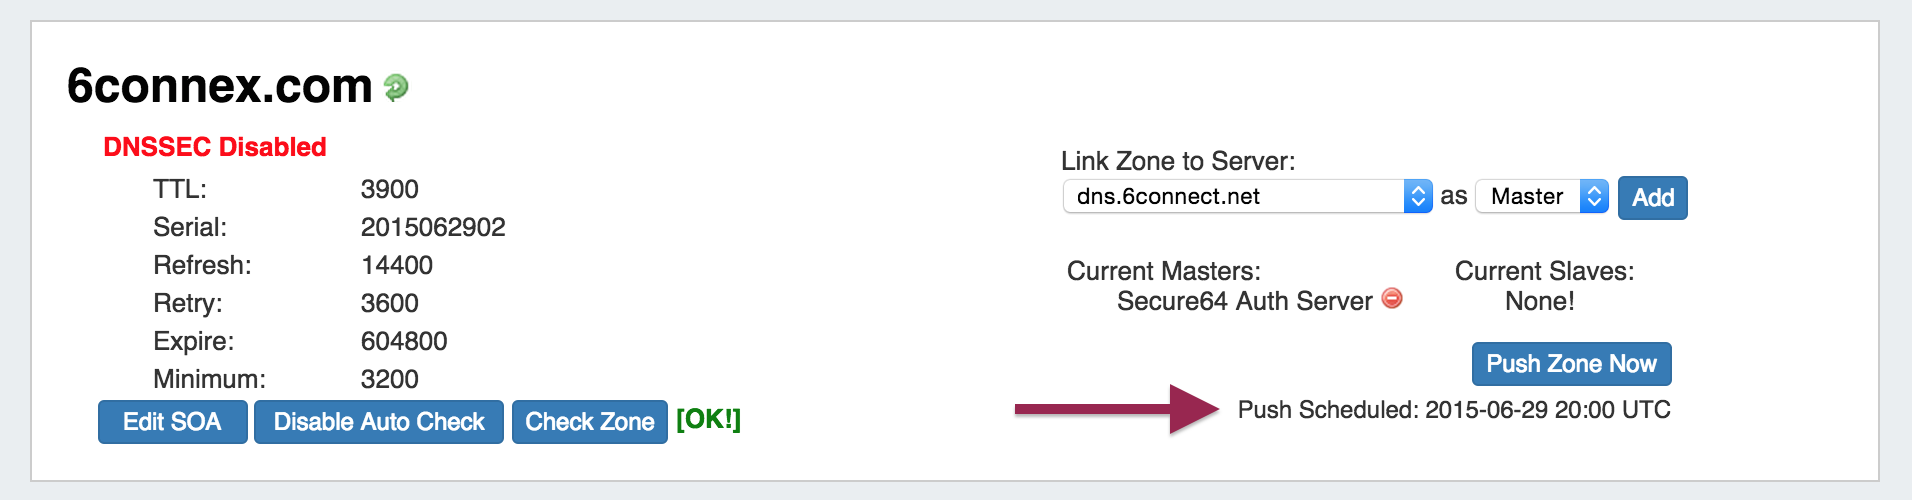
You may edit or delete the scheduled push via the Scheduler, similarly to any other scheduled task.
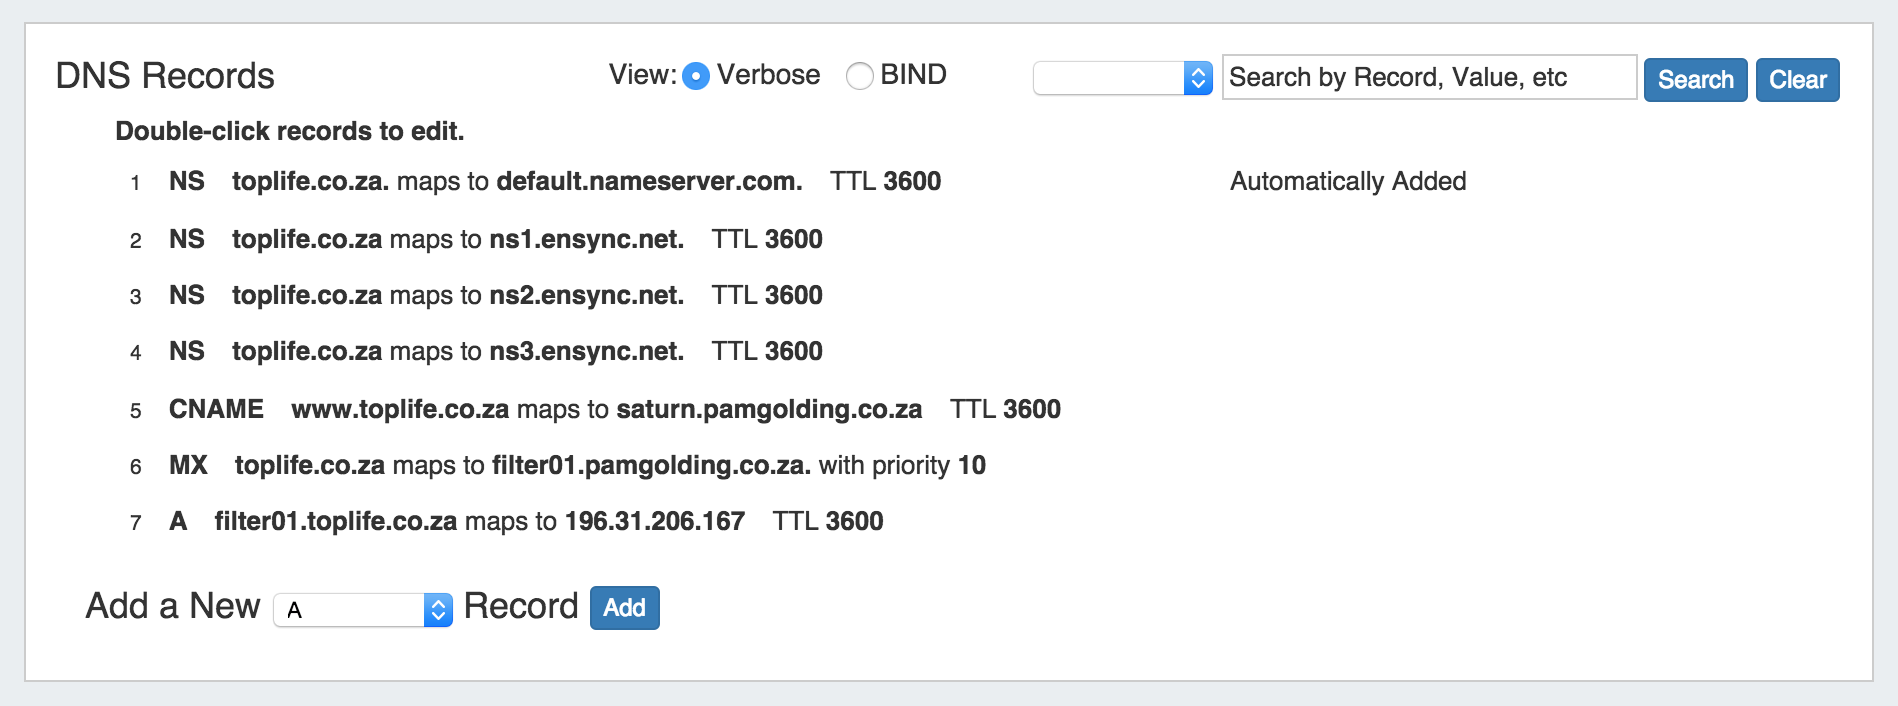
DNS Zone Record Data:
You have two modes for viewing/editing Zone Record Data. The Verbose view and a BIND view allow for varying levels of comfort with DNS editing tools.
The Search window also allows the user to filter the list by using multiple parameters. You can use the dropdown next to the search box to narrow the list to a specific Record type. After a search, revert back to the default record list by hitting the "Clear" button.
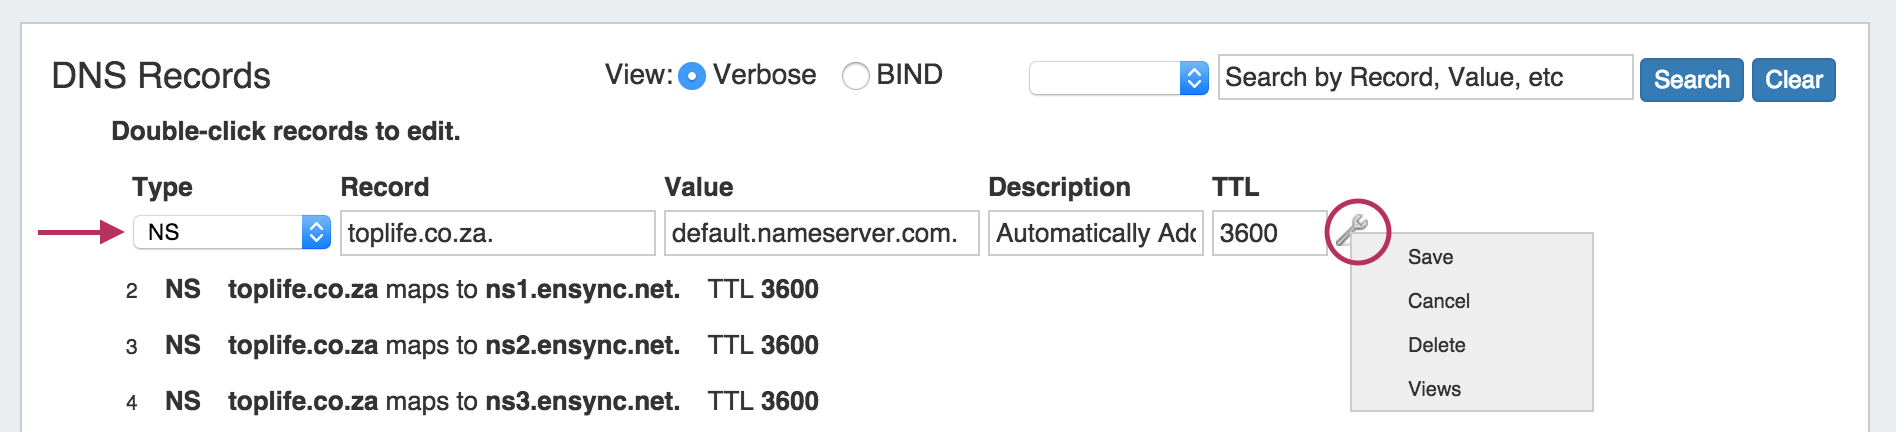
Edit a Zone Record
To Edit a Zone Record, simply double-click on it the entry and make any required edits. Use the "Wrench" icon for the action context menu to:
1) Save your changes to the zone records
2) Cancel your edits to the zone record
3) Delete the zone record
4) See Views set up (if applicable) and apply to the record.
| Info | ||
|---|---|---|
| ||
If Views are enabled and created on the DNS server assigned to this zone, you will also have the "Views" option that will bring up the view assignment menu. You will be able to select the existing View(s) that you wish to apply to the zone record here. After selecting the view, click the Action Menu (wrench icon) to save your changed. Note: If views are enabled on the DNS server assigned, but not yet created with a View Name, no list will appear.
For more information on setting up Split Horizon/Views support - go here. |

Show Zone File:
Click on the "Show Zone File" link to open the view.
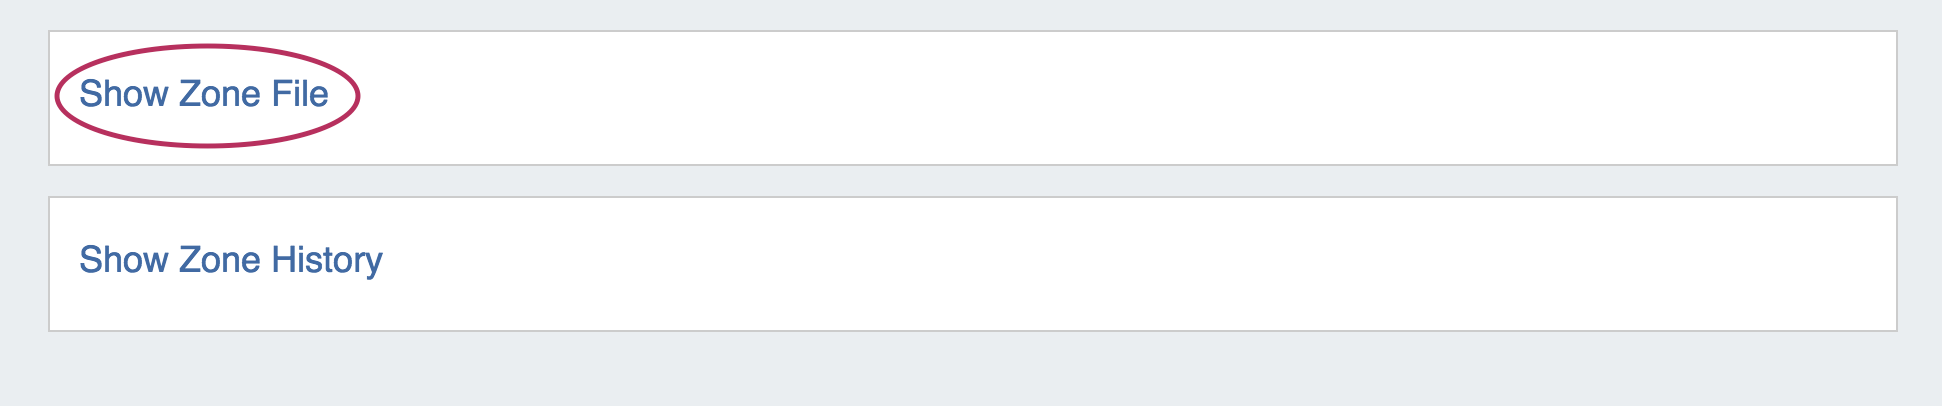
This view gives you a "CLI type" view of the zone file. If views are enabled, you will see those zone files as well. Please note that this is a read only screen.
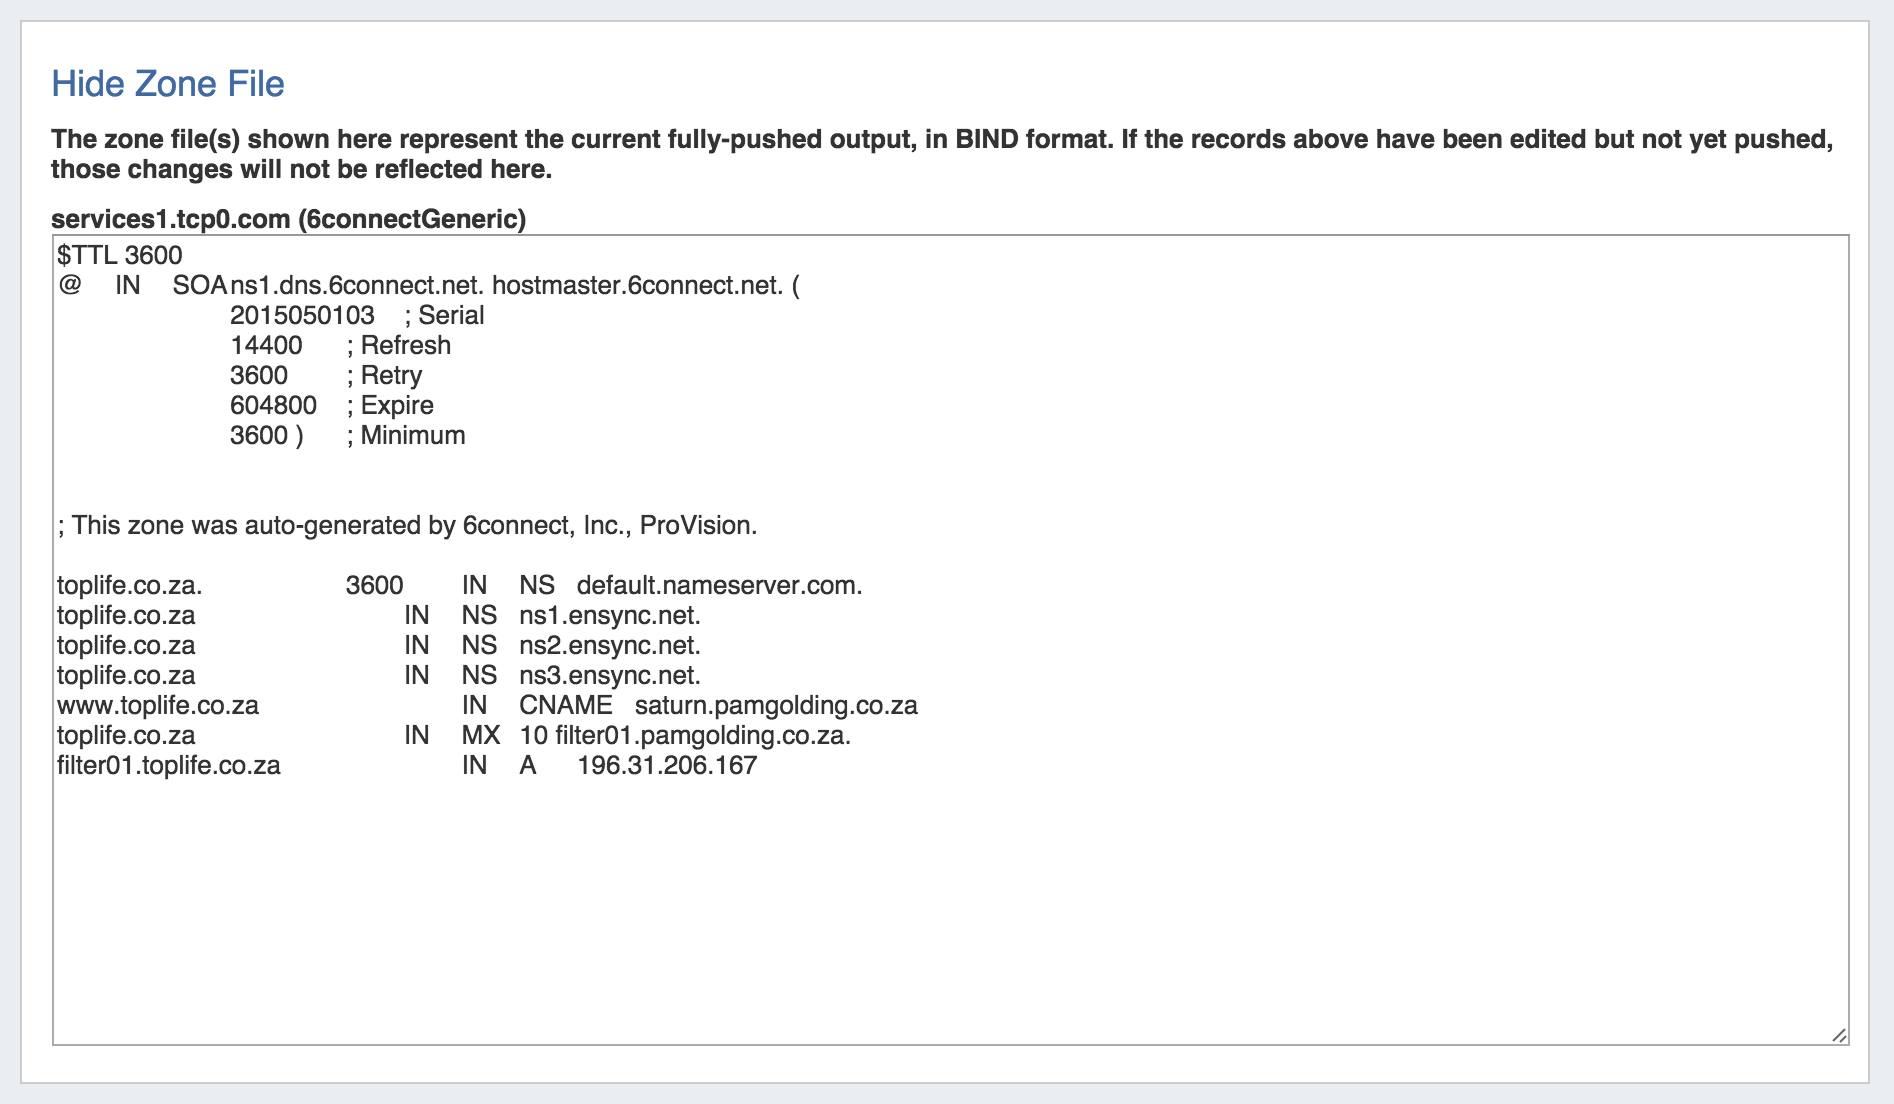
When done viewing the zone, you can click "Hide Zone File" to once again collapse the view.
Show Zone History
Click on the Show Zone History link to expand the view. Note that the zone has to actually be pushed for the Zone History area to show up on the screen.

...