LIR Manager
...
ProVision supports multiple LIRs (Local Internet Registries) in a single instance. This means that you have the ability to update SWIP/RPSL functions for a given allocation with the LIR information that you wish. When you select the "SWIP" function for a given IP block, you will be presented with a menu where you can select the data that you want to use to update the block.
Table of Contents
LIR Setup and Use
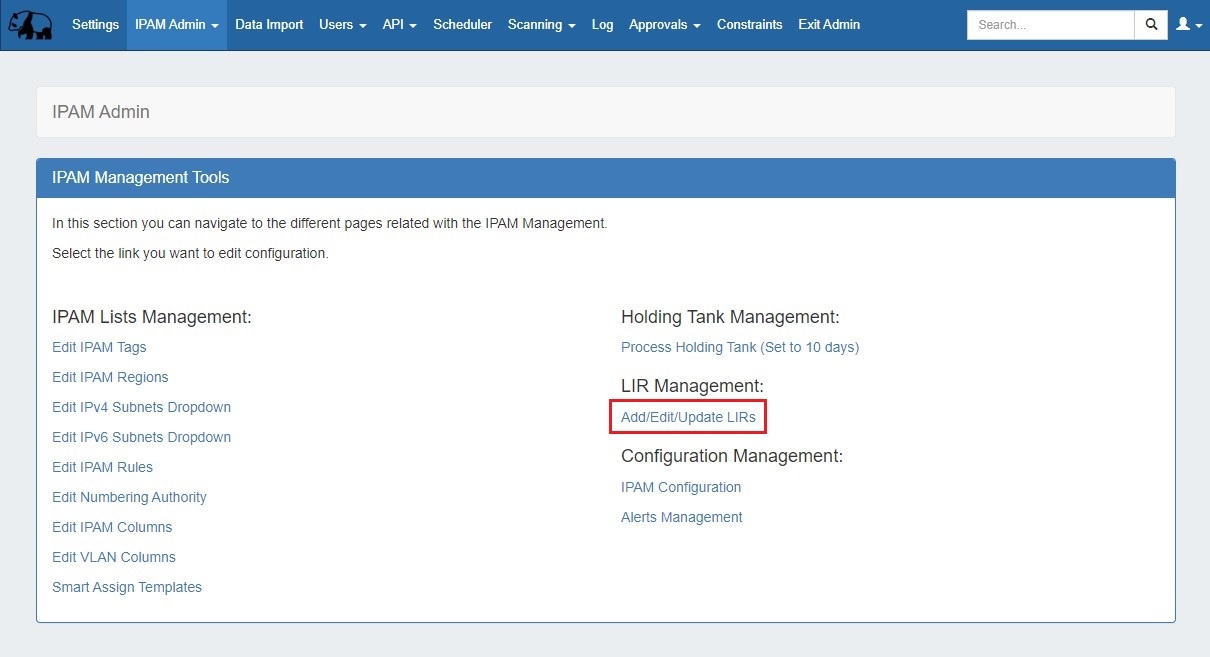
There is an The LIR Manager is available from the IPAM Admin page.
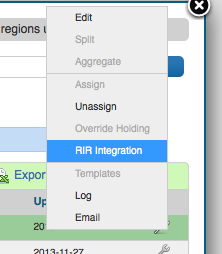
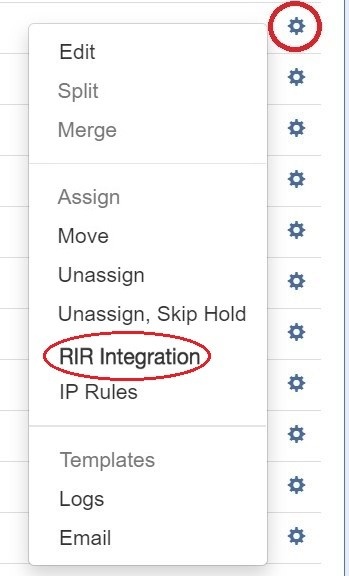
Once these have been configured, you will be able to use the RIR integration feature from the Action menu on the IPAM Manage screen or IPAM Gadget:
From the menu, you will be prompted to specify the LIR to use:

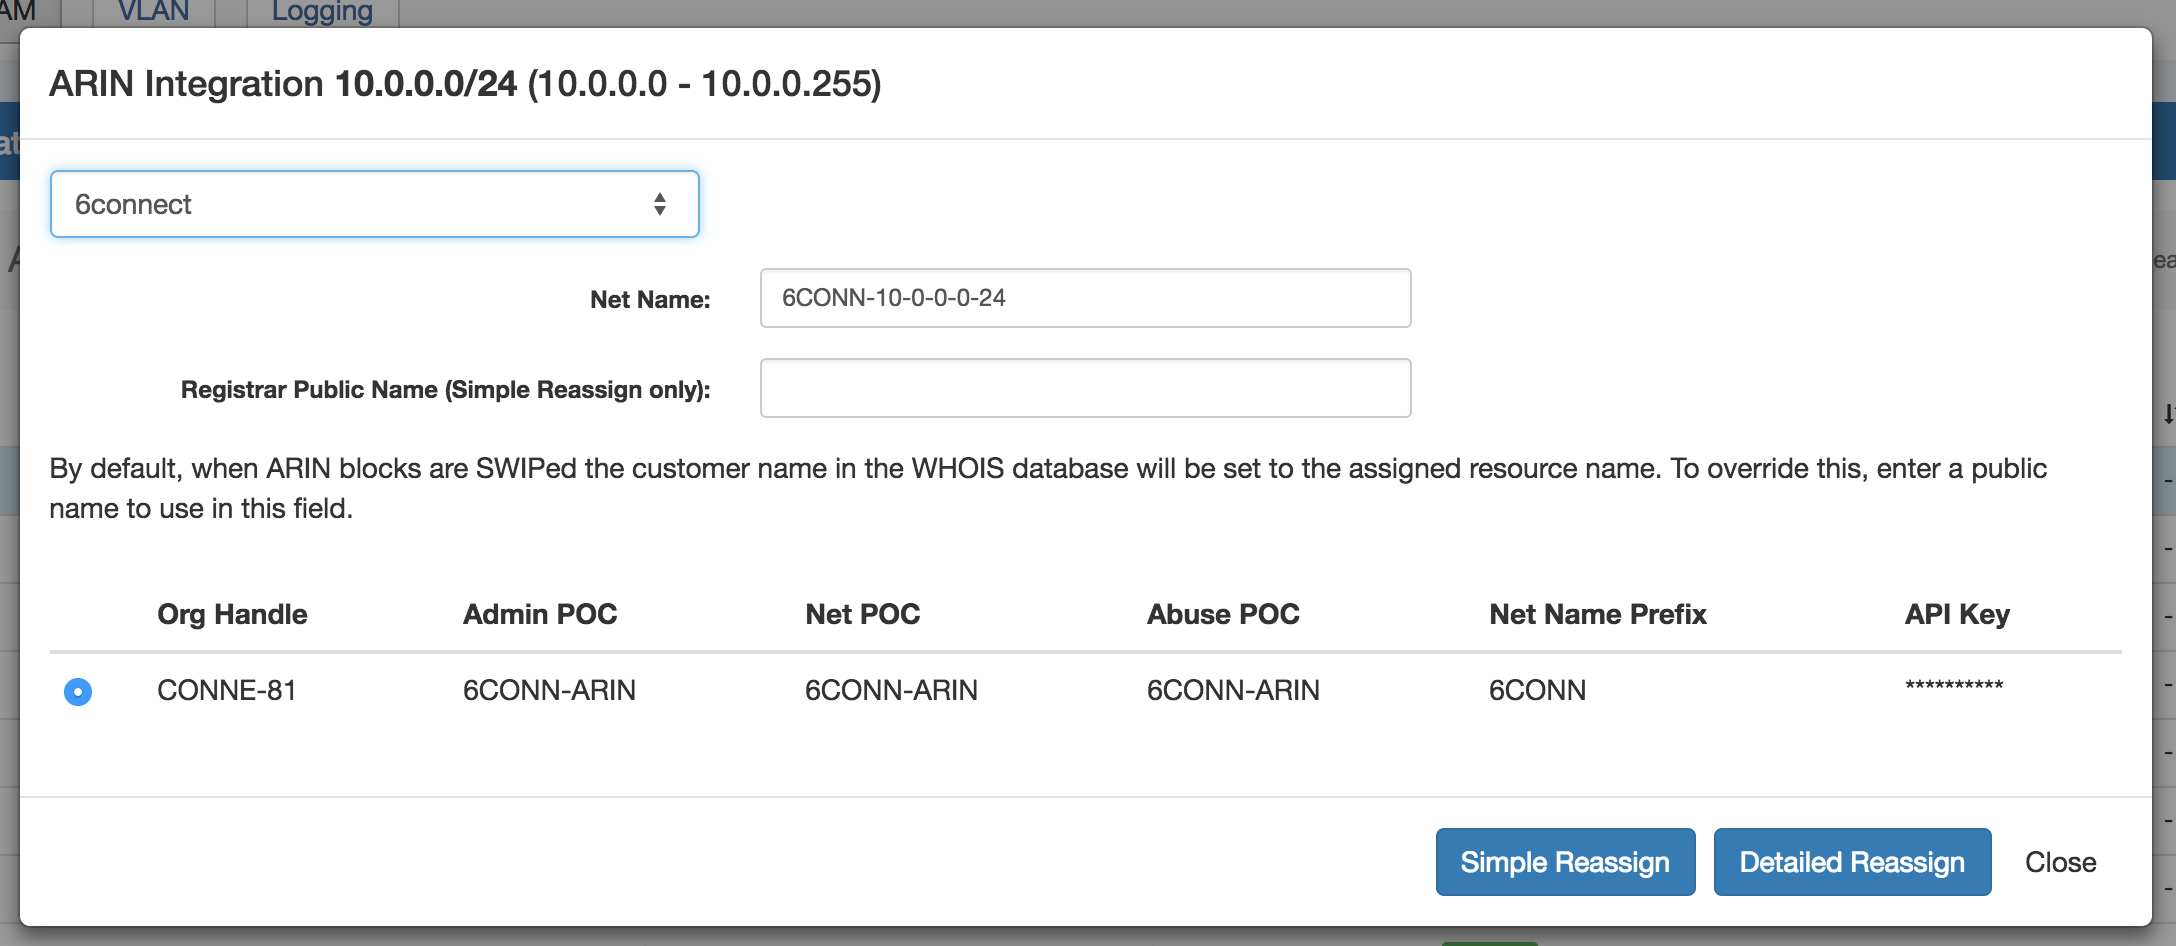
It will populate the area and then you will have the RIR specific options (see ARIN example below):

In the Admin section, select the IPAM Admin tab, then "LIR Management: Add / Edit / Update LIRs".
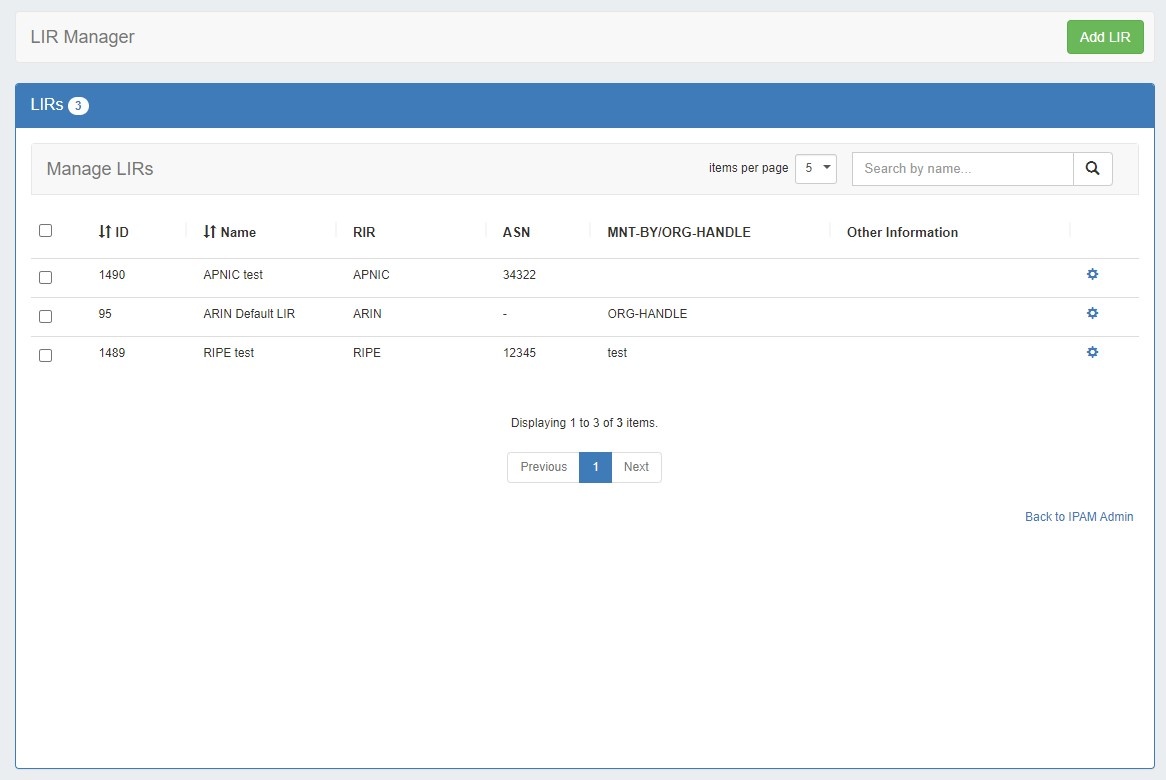
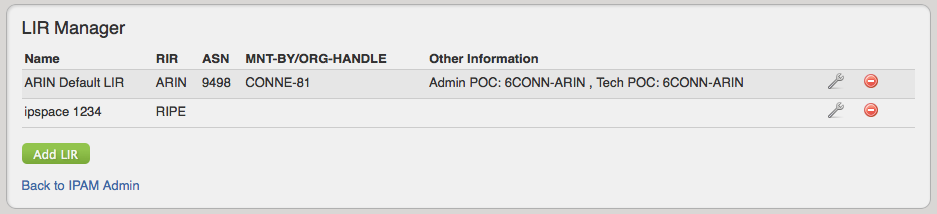
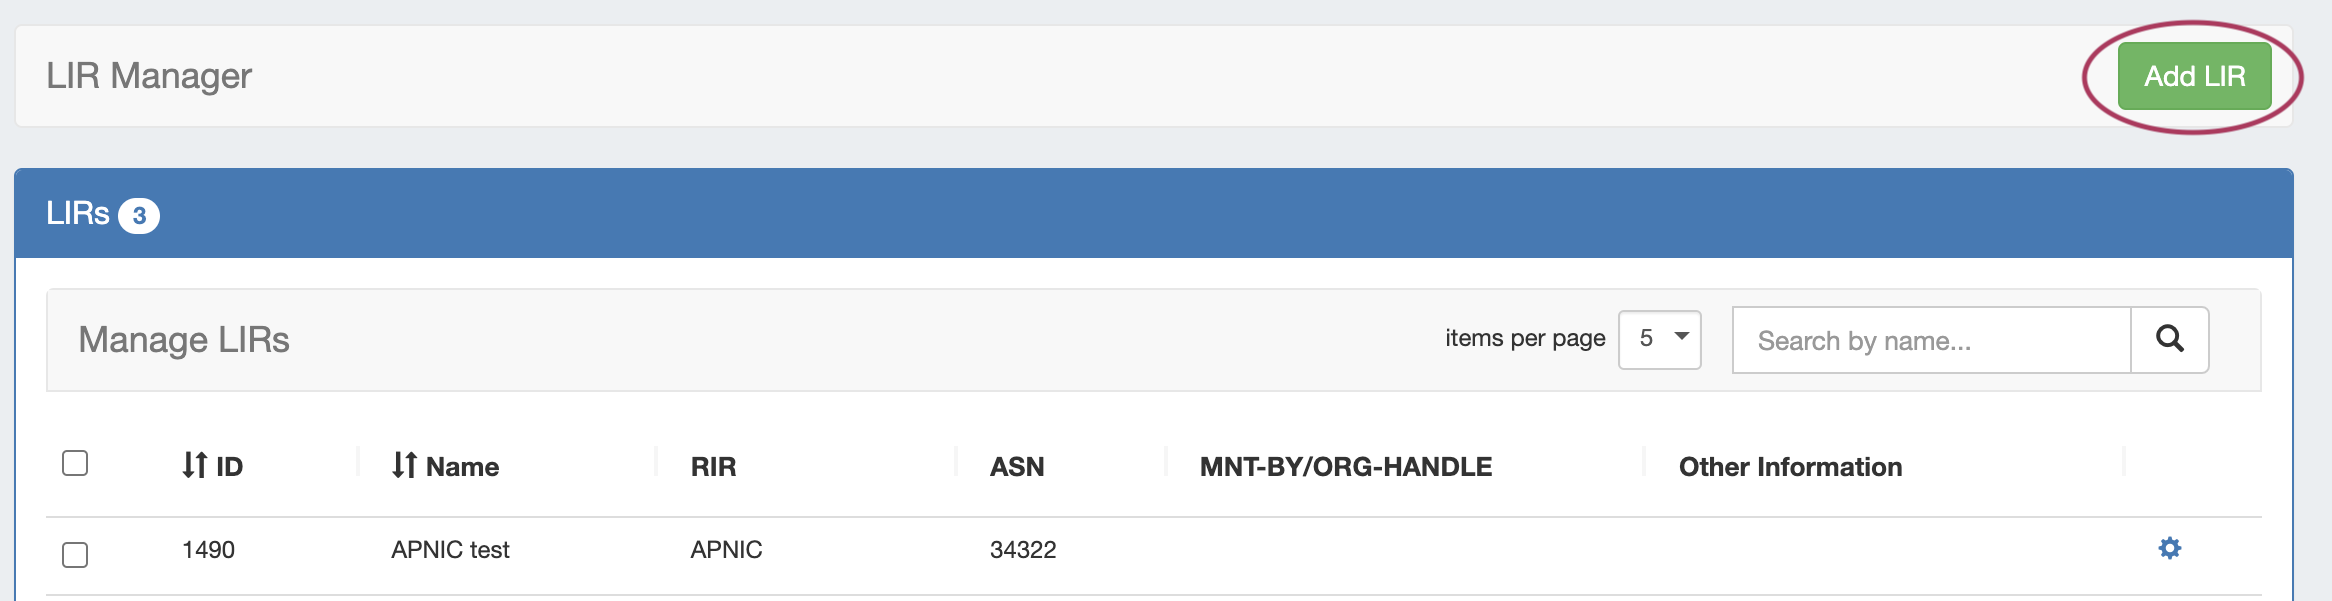
You will be taken to the LIR Manager page, showing your current LIRs.
You may Add LIRs from the top of the page, and edit or delete the individual LIRS by hitting the Action Menu (gear icon).
Add a LIR
After clicking on the Add LIR buttonAfter clicking on the Add LIR button, you can setup the required data for the specific RIR/LIR combination:
ARIN
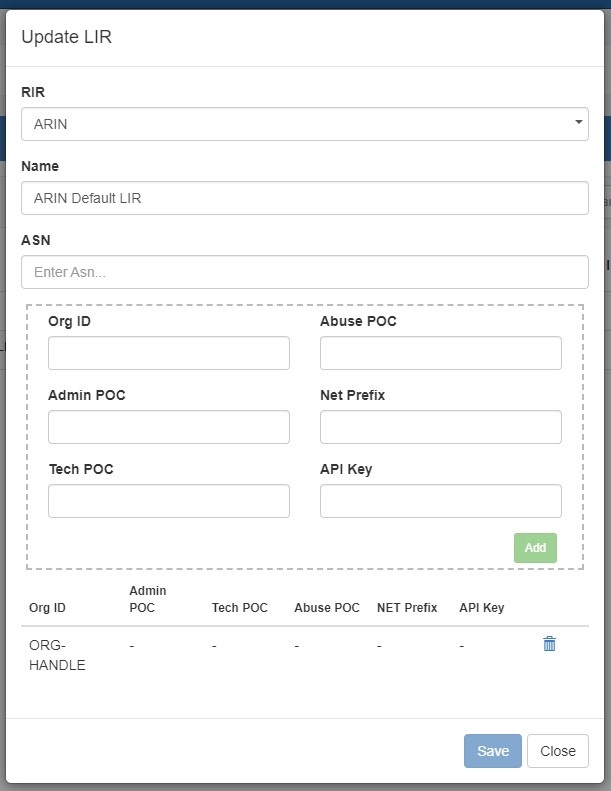
Adding a new LIR with ARIN selected for RIR will bring up the following fields.
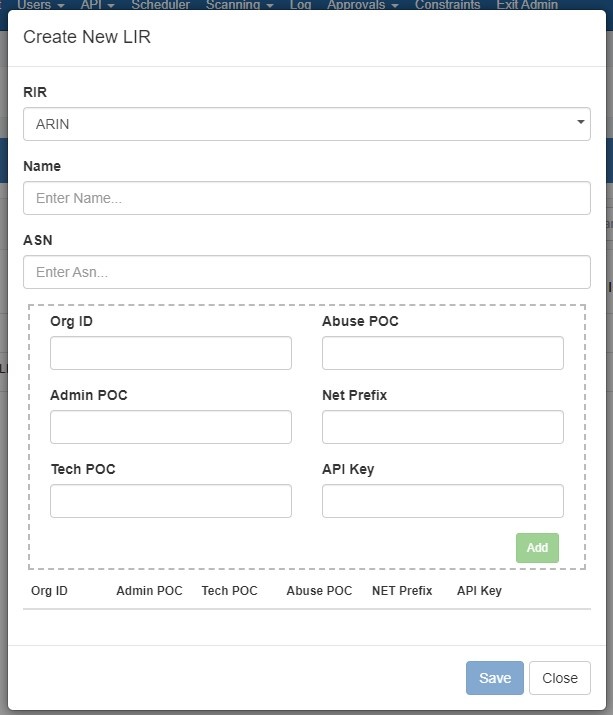
Enter the Name, ASN, ORG ID, POC information, NET Name Prefix, and API Key. Additional Orgs may be added by selecting the "Add Org" button.
Be sure to click the "Save" button when done to save your changes. 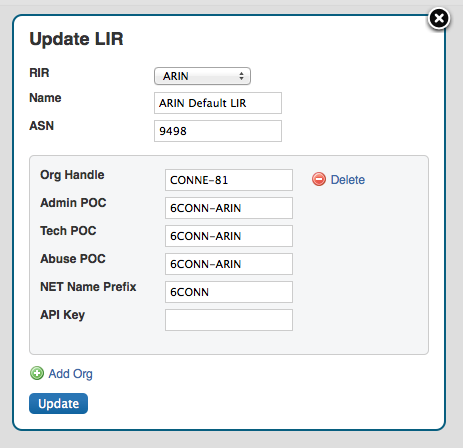
| Info | ||
|---|---|---|
| ||
| Make sure to press click the Update Save button or else the LIR data will not save. |
RIPE
Adding a new LIR with RIPE selected for RIR will bring up the following fields.
| Note | ||
|---|---|---|
| ||
You must be using an MD5 password to update RIPE |
...
objects from ProVision! Please refer to RIPE's authentication page for additional details: |

Enter the Name, ASN, Maintainer, Password, and Contact information. Additional Maintainers may be added by selecting the "Add Maintainer" button.
Be sure to click the "Save" button when done to save your changes. 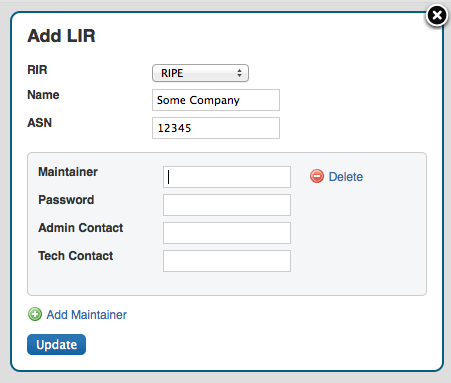
| Info | ||
|---|---|---|
| ||
| Make sure to press click the Update Save button or else the LIR data will not save. |
Edit a LIR
Edit a LIR by clicking on the Action Menu (gear icon) next to the entry in the LIR Manager.
The Update LIR dialog will open. From here, you can edit RIR, Name, ASN, and Org information, as well as add / delete Orgs.
Delete LIR(s)
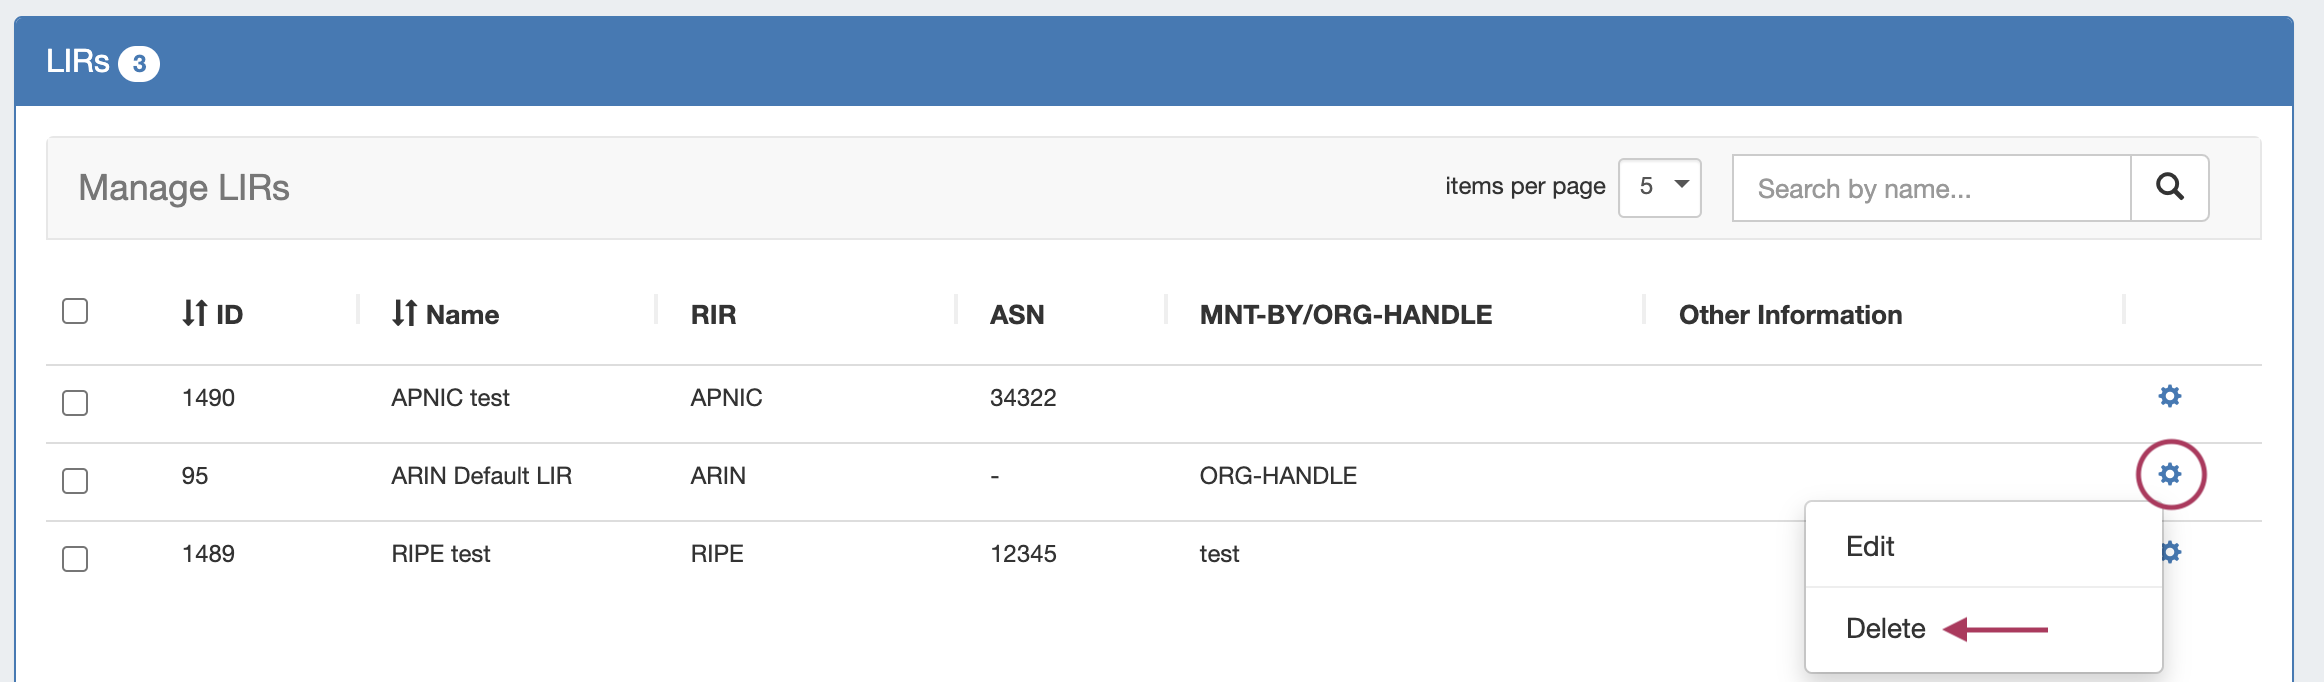
Delete a single LIR by clicking on the Action Menu (gear icon) next to the entry in the LIR Manager, and select "Delete".
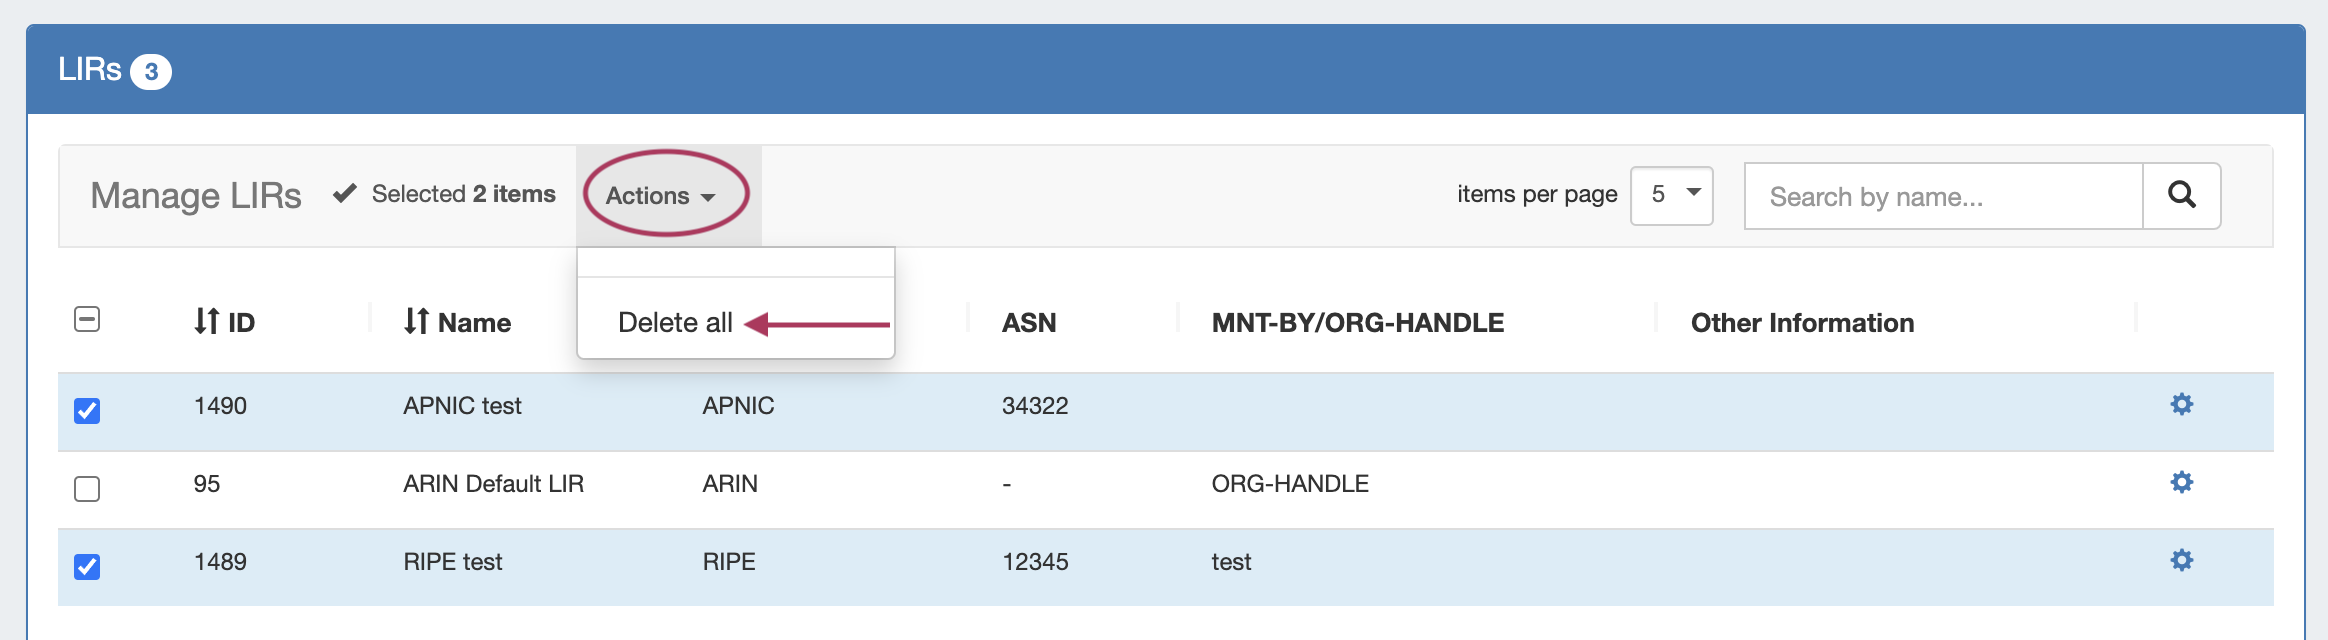
Delete multiple LIRs by clicking the checkboxes next to the desired LIRs to delete. Then, under "Actions" at the top of the page, select "Delete All".
You may also right click anywhere on the selected rows to open the multi-select context menu, where you may choose "Unselect All" or "Delete All". 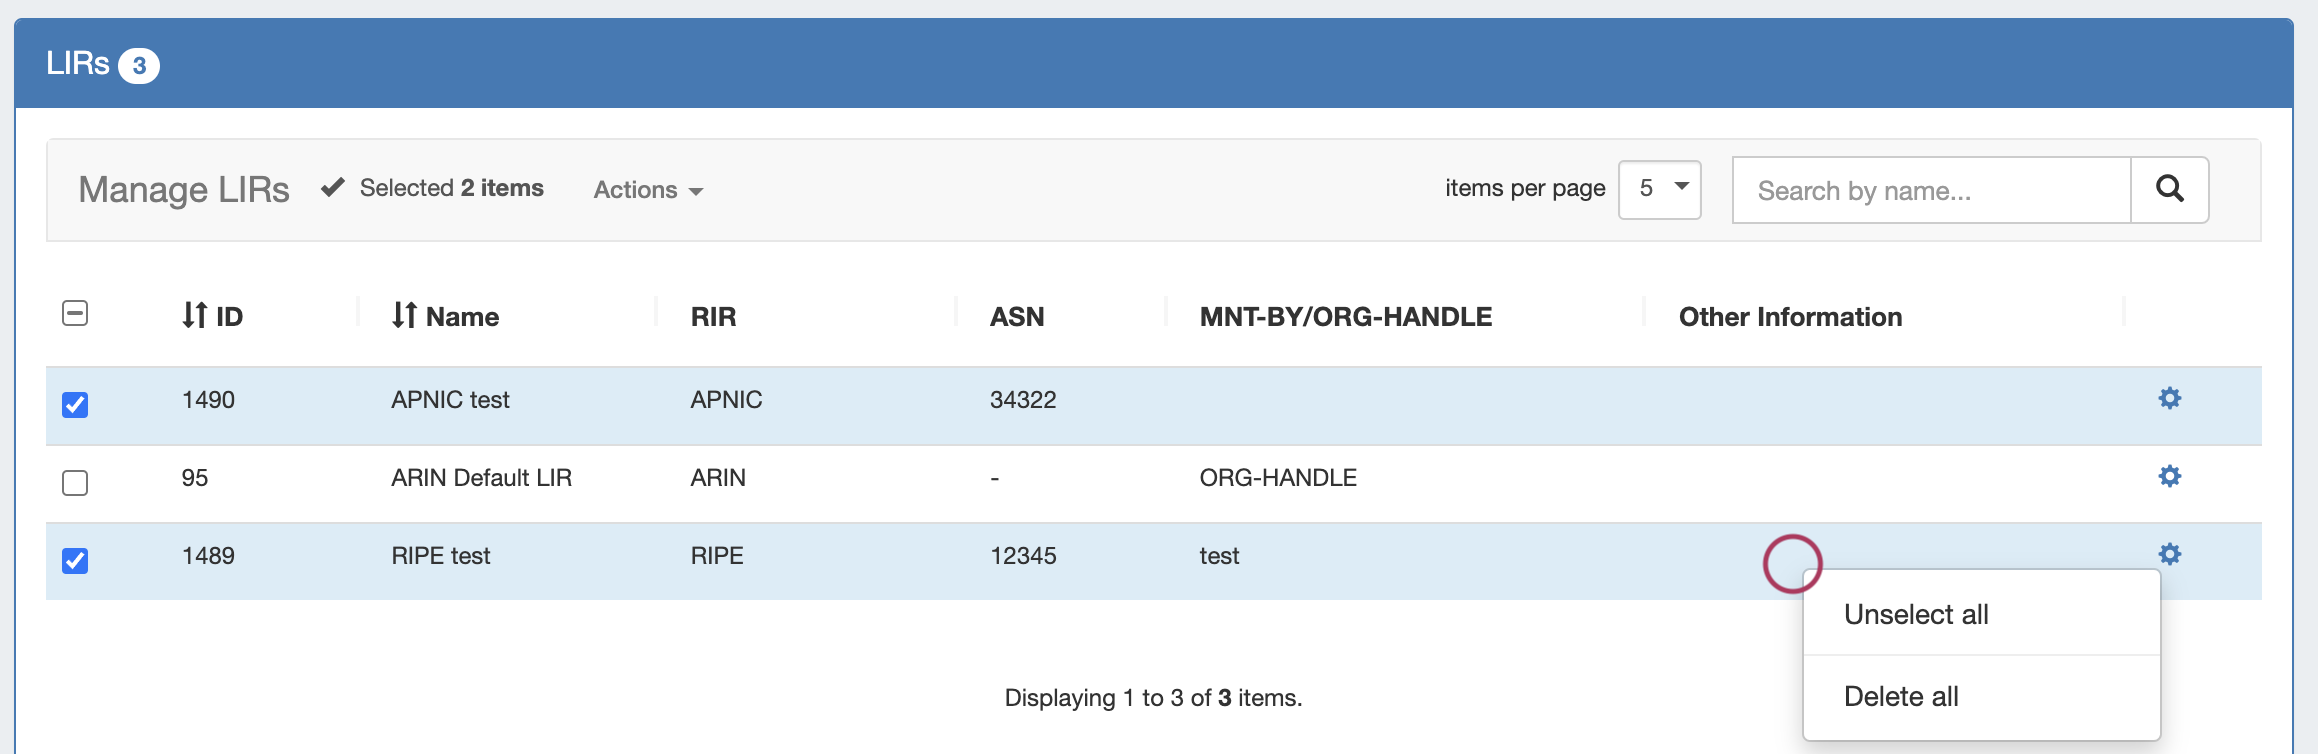
RIR Integration
Once these have been configured, you will be able to use the RIR integration feature from the Action Menu on the IPAM Manage screen or IPAM Gadget:
RIR specific options will pop up (see ARIN example below) and give the options for "Simple Reassign", "Detailed Reassign", or "Close" to exit.
Additional Information
For additional detail, continue on to:
Children Display all true