DNS Administration
DNS Administration in DNSv3 is primarily handled under the DNS tab DNS Servers sub-tab, with DNS Administrative settings available under the Admin Settings page.
Users with resource "read" permissions may view DNS Server information, however only those with either Admin
...
The DNS Admin tab contains 5 different functional areas: managing DNS server, performing bulk zone assignments to a resource, performing bulk record changes over all zones, managing default name server, transfering zones, and a collection of links for other useful DNS functions.
DNS Functions
Defaults and Options
...
Default TTL: in seconds, default value is 3600
...
Default Refresh: in seconds, default value is 14400
...
Default Retry: in seconds, default value is 3600
...
Default Expire: in seconds, default value is 604800
...
Default Minimum: in seconds, default value is 3600
...
Default SOA: Server Of Authority and hostmaster contact. E.g. ns1.domain.com. hostmaster.domain.com.
...
$GENERATE IPv4 by default: Set to '1' to generate reverse IPv4 DNS hostnames for non specific PTRs. This is similar to $GENERATE in standard bind.
...
$GENERATE IPv4 Suffix: Set to forward suffix to append to PTR for $GENERATE Example: .available.domain.com.
permissions or granted group-level server permissions can manage DNS server creation, edits, and deletion.
Additional DNS Admin tasks occur in other areas, and not all management tasks require Admin-level permissions - some only require appropriate resource permissions on the DNS Groups, Zones, and servers involved. See additional sections on this page for more detailed information:
| Table of Contents |
|---|
DNSv3 Overview
DNSv3 reorganizes the DNS system into a more unified and accessible interface, combining both admin and non-admin DNS tasks together under the DNS tab.
In DNSv3, zones are gathered under DNS Groups, servers are attached to those Groups, and Nameservers, Default SOA values, and ACLs are managed at a per-Group level.
Users can then view and manage Groups, individual zones, default SOA values, ACLs, attach servers, and perform pushes all on the same page.
| Info | ||
|---|---|---|
| ||
Note: In DNSv3, zone name responses will enforce and return a trailing period (i.e., "example.com" will be converted and returned as "example.com."). |
DNSv3 is designed to reflect RFC 1035 standards for valid data formats and will return error messaging for data not meeting those formats.
DNSv3 Permissions
DNSv3 incorporates DNS zones and Groups into the Resource System. Zones and Groups are Resources just like Customers, Servers, Routers, or Contacts (See Resource Concepts 1 and Resource Concepts for a more detailed explanation of Resources).
This allows for DNS zones and Group permissions to be managed similarly to other resources, where users with Resource permissions (Create / Read / Update / Delete) on the parent resource of the DNS Group can create groups and zones, manage those groups and zones, push (if a server is attached), and delete.
A user with full Resource permissions on a DNS Server, as well as the parent resource of a Group, may view and attach that server to a Group.
Users with resource "read" permissions may view DNS Server information, however only those with either Admin permissions or granted group-level server permissions can manage DNS server creation, edits, and deletion.
For more information on setting up permissions groups, see Users & Permissions.
Permission Shortcut Button ("Perms")
Throughout DNS, a shortcut permissions button ("Perms") is available on a per-item level, accessible only to Admin users.
This permissions button allows for direct, point-of-use permissions adjustments to individual DNS Groups, Servers, Zones, and Records. It uses the same CRUD permissions and groups available in the Admin Users tab, but removes the need to remember and search for the DNS item name.
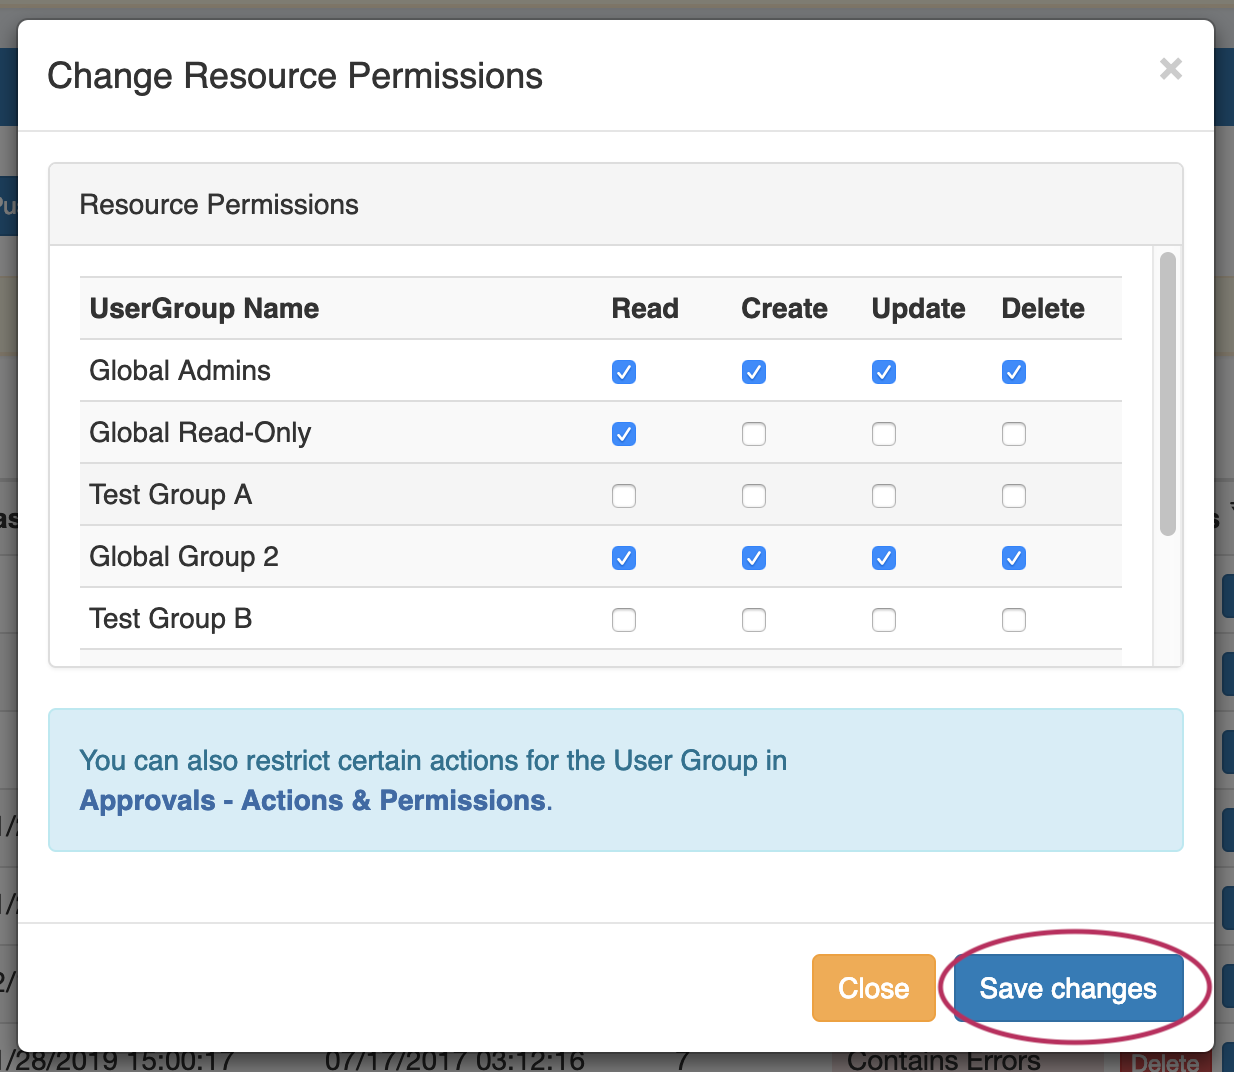
To open the Change Resource Permissions module, click on the "Perms" Button for any DNS item.

Edit the CRUD permissions for any user group by clicking the checkbox for the desired group and permission type.
When done, click "Save Changes". The permission changes will be also be reflected in the Admin User tab Group settings.
DNS Approvals
The Approvals module stores and queues DNS actions made by selected User Groups, and sends those actions to a Pending Changes list for administrative review. Later, an administrator (or combination of administrators) can approve or reject these stored actions.
Approvals is primarily set up and managed via the Admin Approvals Tab. See the Approvals for details on setting up and using Approvals from the Administrative viewpoint.
In the DNS Tab, a "Resources Awaiting Approval" module will display near the top of DNS Groups, DNS Zone Lists, and DNS Servers pages, if a change has been submitted on that page that is pending approval.
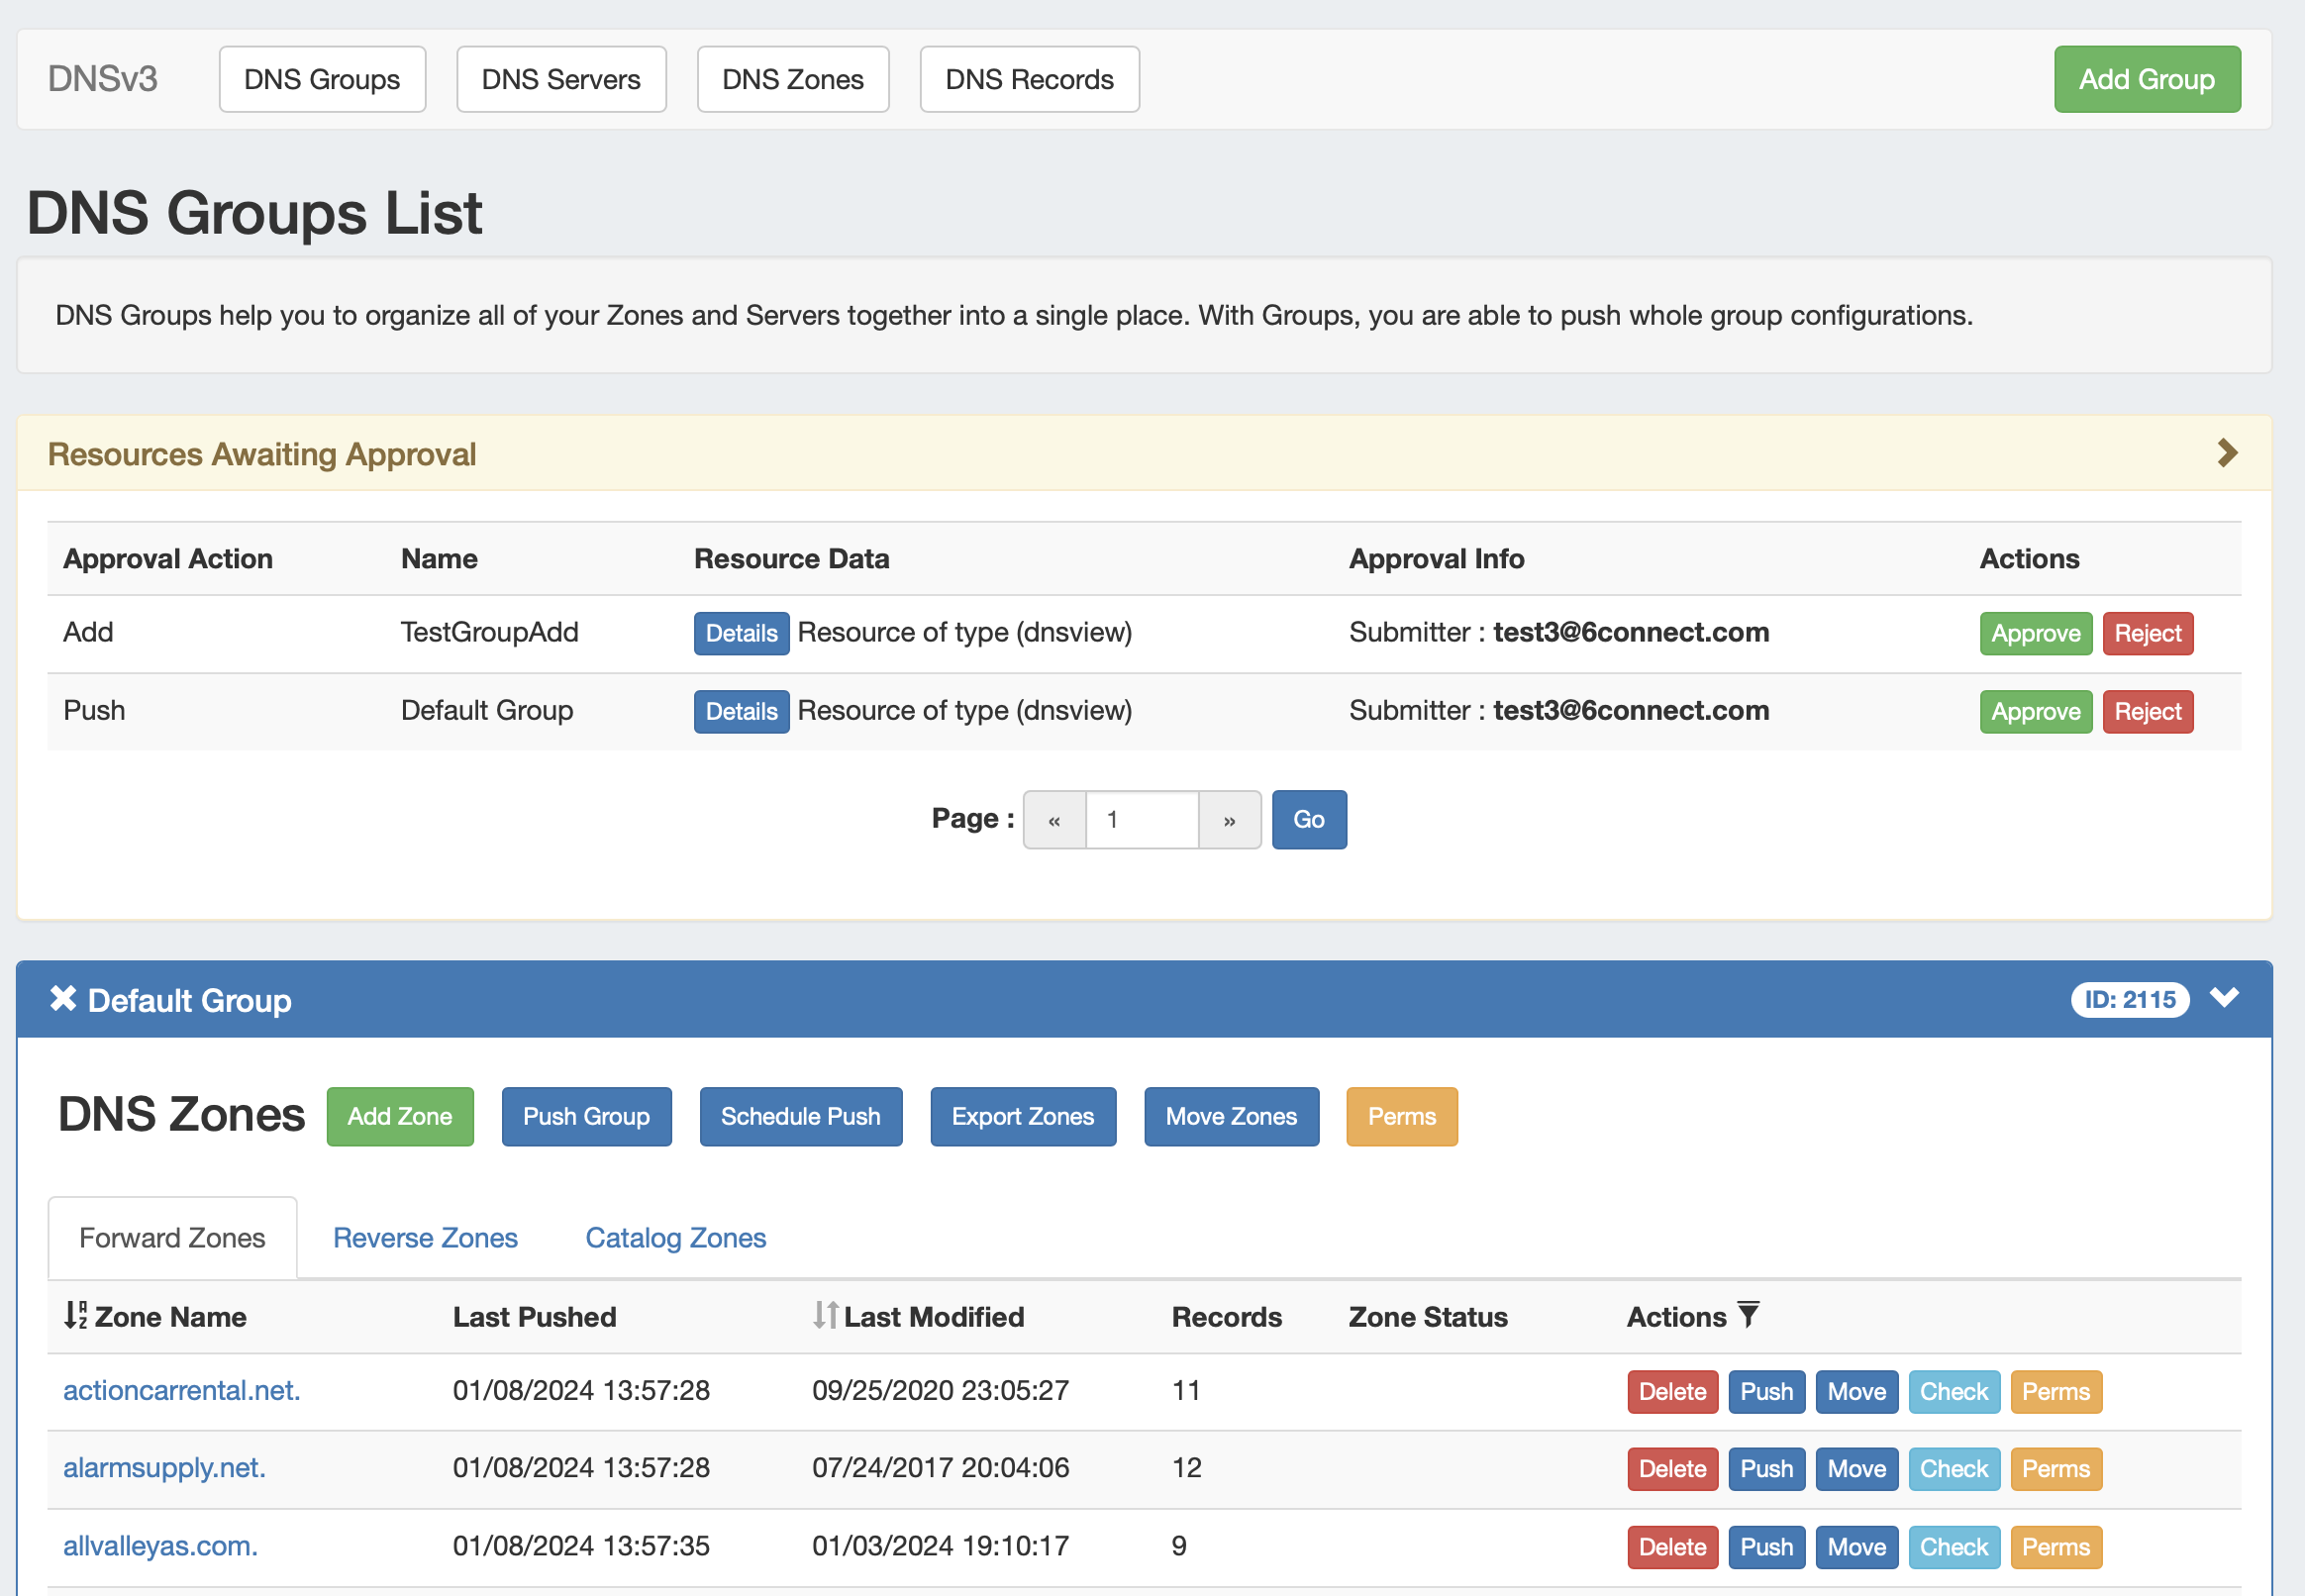
Users who submitted a change for approval will see the details of their change request in this module.
Admin users with permissions to approve or reject the request will have the option to Approve or Deny the change.
DNSv3 Administrative Tasks
Admin-only tasks in DNSv3 include setting DNS Globals, importing zones, scheduling pushes, managing DNS Servers, and managing DNS Approvals.
These tasks may be accessed in the following areas:
- DNS Global Settings: Admin Settings page.
- Importing DNS Zones: the Data Import tab, see Import DNS Zones.
- Scheduling DNS Pushes:
- May be set up from the Scheduler or,
- Set by server from the DNS Servers page, or
- Set by DNS Group from the DNS Groups page, or
- Set by individual zone from the View Zone page
- Managing DNS Servers: The DNS Servers page
- Approvals: The Approvals Tab.
Tasks such as working with zones, DNS Groups, adding ACLs, attaching servers to Groups, and manually pushing zones do not require Admin permissions.
Instead, these tasks simply require that the user be included in a User Group that has appropriate permissions (either direct, or inherited) on the DNS zones, Groups, and servers involved.
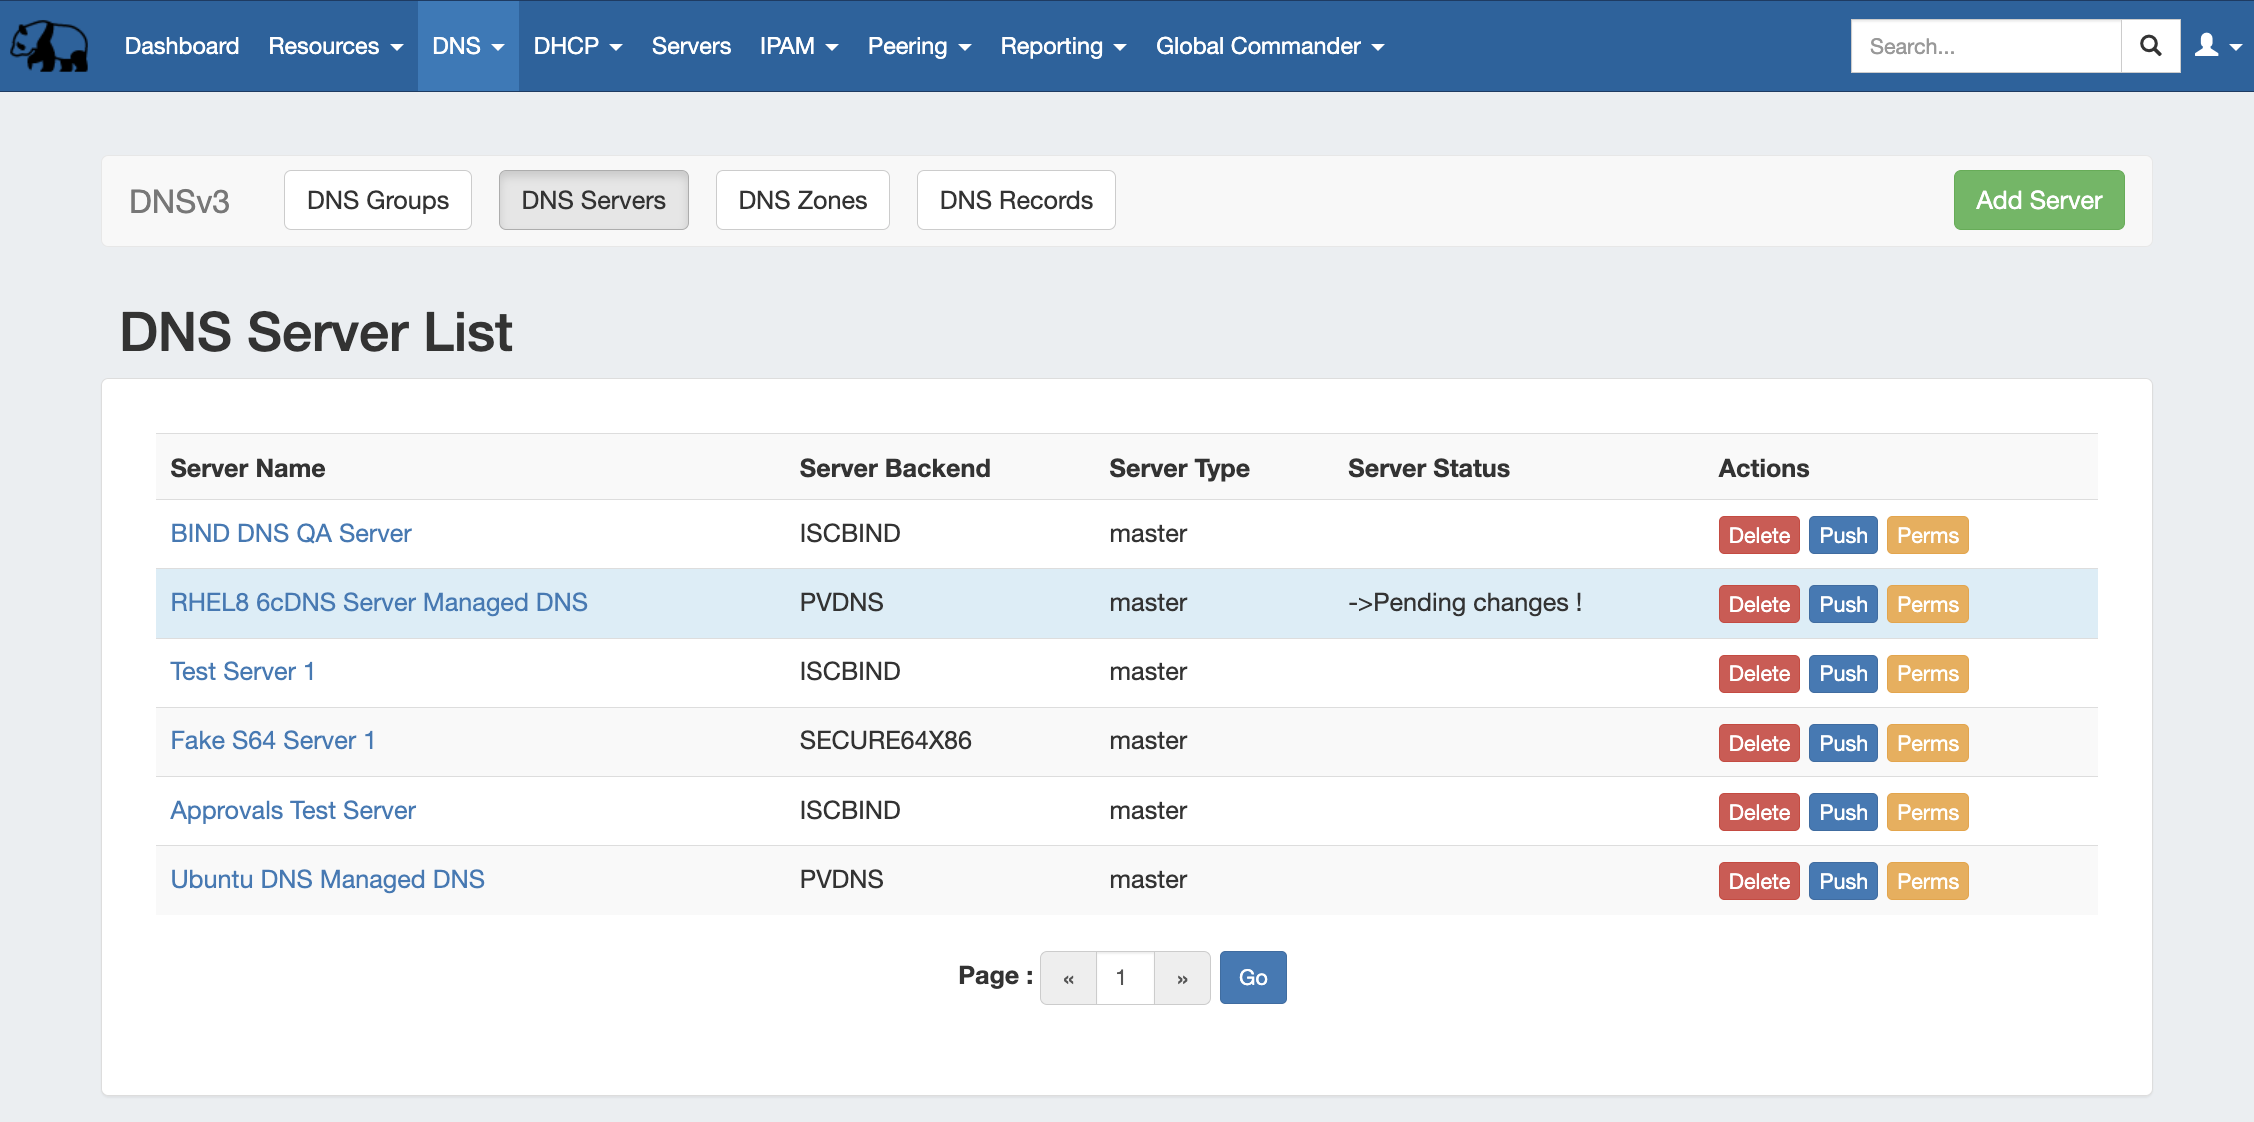
Manage DNS Servers
Adding, configuring, and managing DNS Servers occurs in the Admin-only DNS Servers page under the DNS Tab.
Supported DNSv3 server types include:
- ISC BIND
- Secure 64 (Authority, x86 Authority, KNOT Authority, Cache, Signer)
- PowerDNS (BIND and MySQL)
- InfoBlox
- Knot DNS
- NSD
- NS ONE
- DynDNS (Beta)
- DNSMadeEasy
- Cloudflare
- AWS Route53 (Beta)
- IRONDNS
- 6connect AnyCast
- Dummy (a fake server entry used for servers outside of ProVision access, in order to manage master / slave configurations)
Some server types may require outside subscriptions or accounts.
For detailed information on adding, editing, and deleting DNS Servers, see Working with DNS Servers.
ACLs / Views
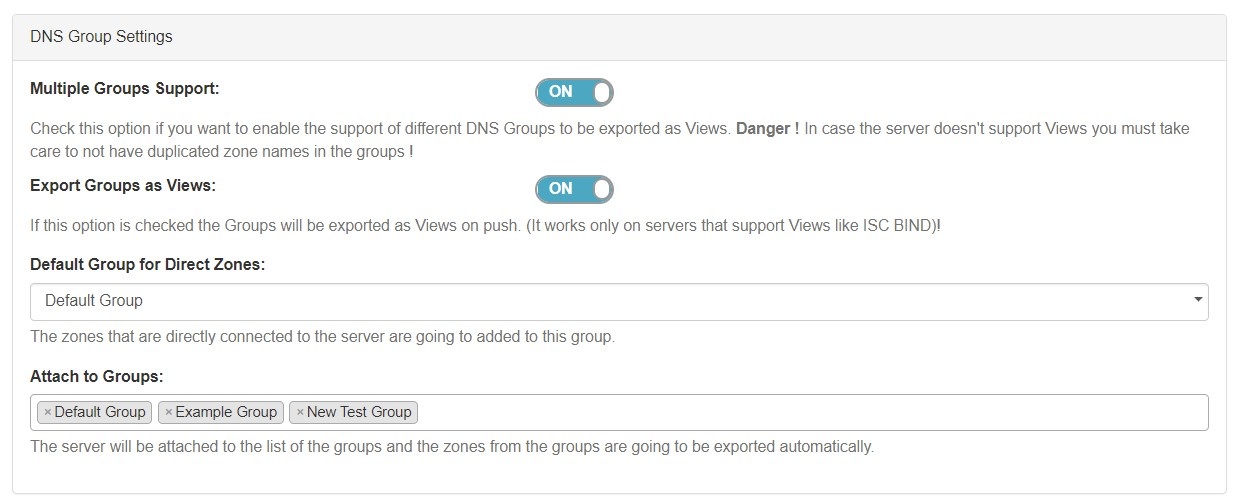
In DNSv3, Views may be created by selecting the "Export Groups as Views" toggle and selecting a DNS Group under the server details sections "DNS Group Settings".
ACLs are managed on a per-DNS Group level, and may be added, edited, or removed by any user with appropriate resource permissions on the DNS Group.
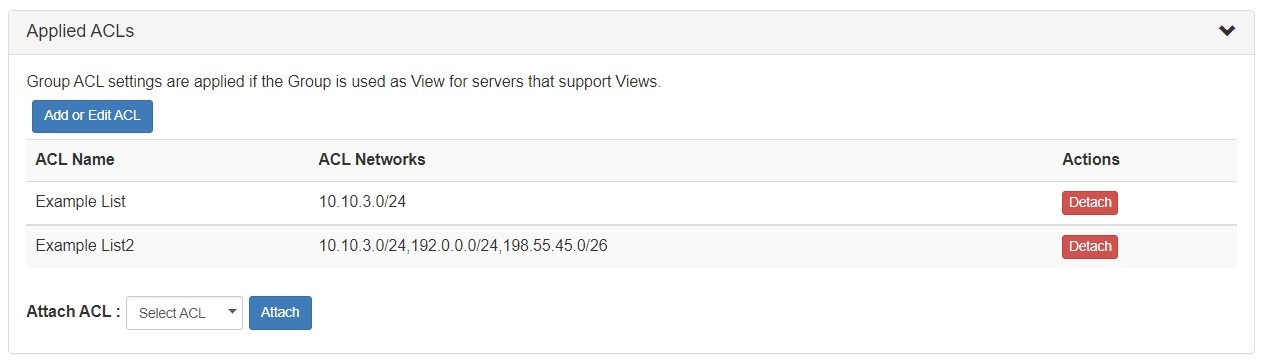
For details on working with ACLs, see Configuring Split Horizon and Views.
DNS Zone Transfers (Pushes)
In DNSv3, zones may be pushed manually or scheduled for a future time, and may be performed for a single zone, all zones in a DNS Group, or all zones on a server.
Scheduling DNS pushes requires administrative access, but manual pushes only require permissions on the DNS Group / DNS Zone, and the server(s) attached.
Manual DNS Pushes:
Manual pushes may be performed from the following locations:
- Single Zone: From the DNS Groups Zone list "Push" button.
- Single Zone: From the DNS View Zone page "Push Zone Now" button.
- Group: From the DNS Groups Zone list "Push Group" button.
- Server: From the DNS Servers list "Push" button.
- Server: From the DNS Server Settings page "Push Zones" button.
For details on performing pushes, see the following sections:
Scheduled DNS Pushes:
Scheduled pushes may be performed from the following locations:
- May be set up from the Scheduler for single zones, all zones in a Group, or all zones on a server.
- Set by server from the DNS Servers page, or
- Set by DNS Group from the DNS Groups page, or
- Set by individual zone from the View Zone page
DNS Record Types
ProVision supports 18 standard record types, as well as the ability to add a custom/arbitrary record type manually.
Available record types include the following:
| Expand | |||||
|---|---|---|---|---|---|
|
Any user with appropriate resource permissions on the DNS Zone / DNS Group may add, edit, or delete DNS Records.
See Working with DNS Zones - Common Tasks for detailed information on managing DNS Records.
Global DNS Settings (Local Installation Only)
DNS Global Settings is accessible from the Admin Settings page by users with Admin level permissions.
DNSSEC Settings
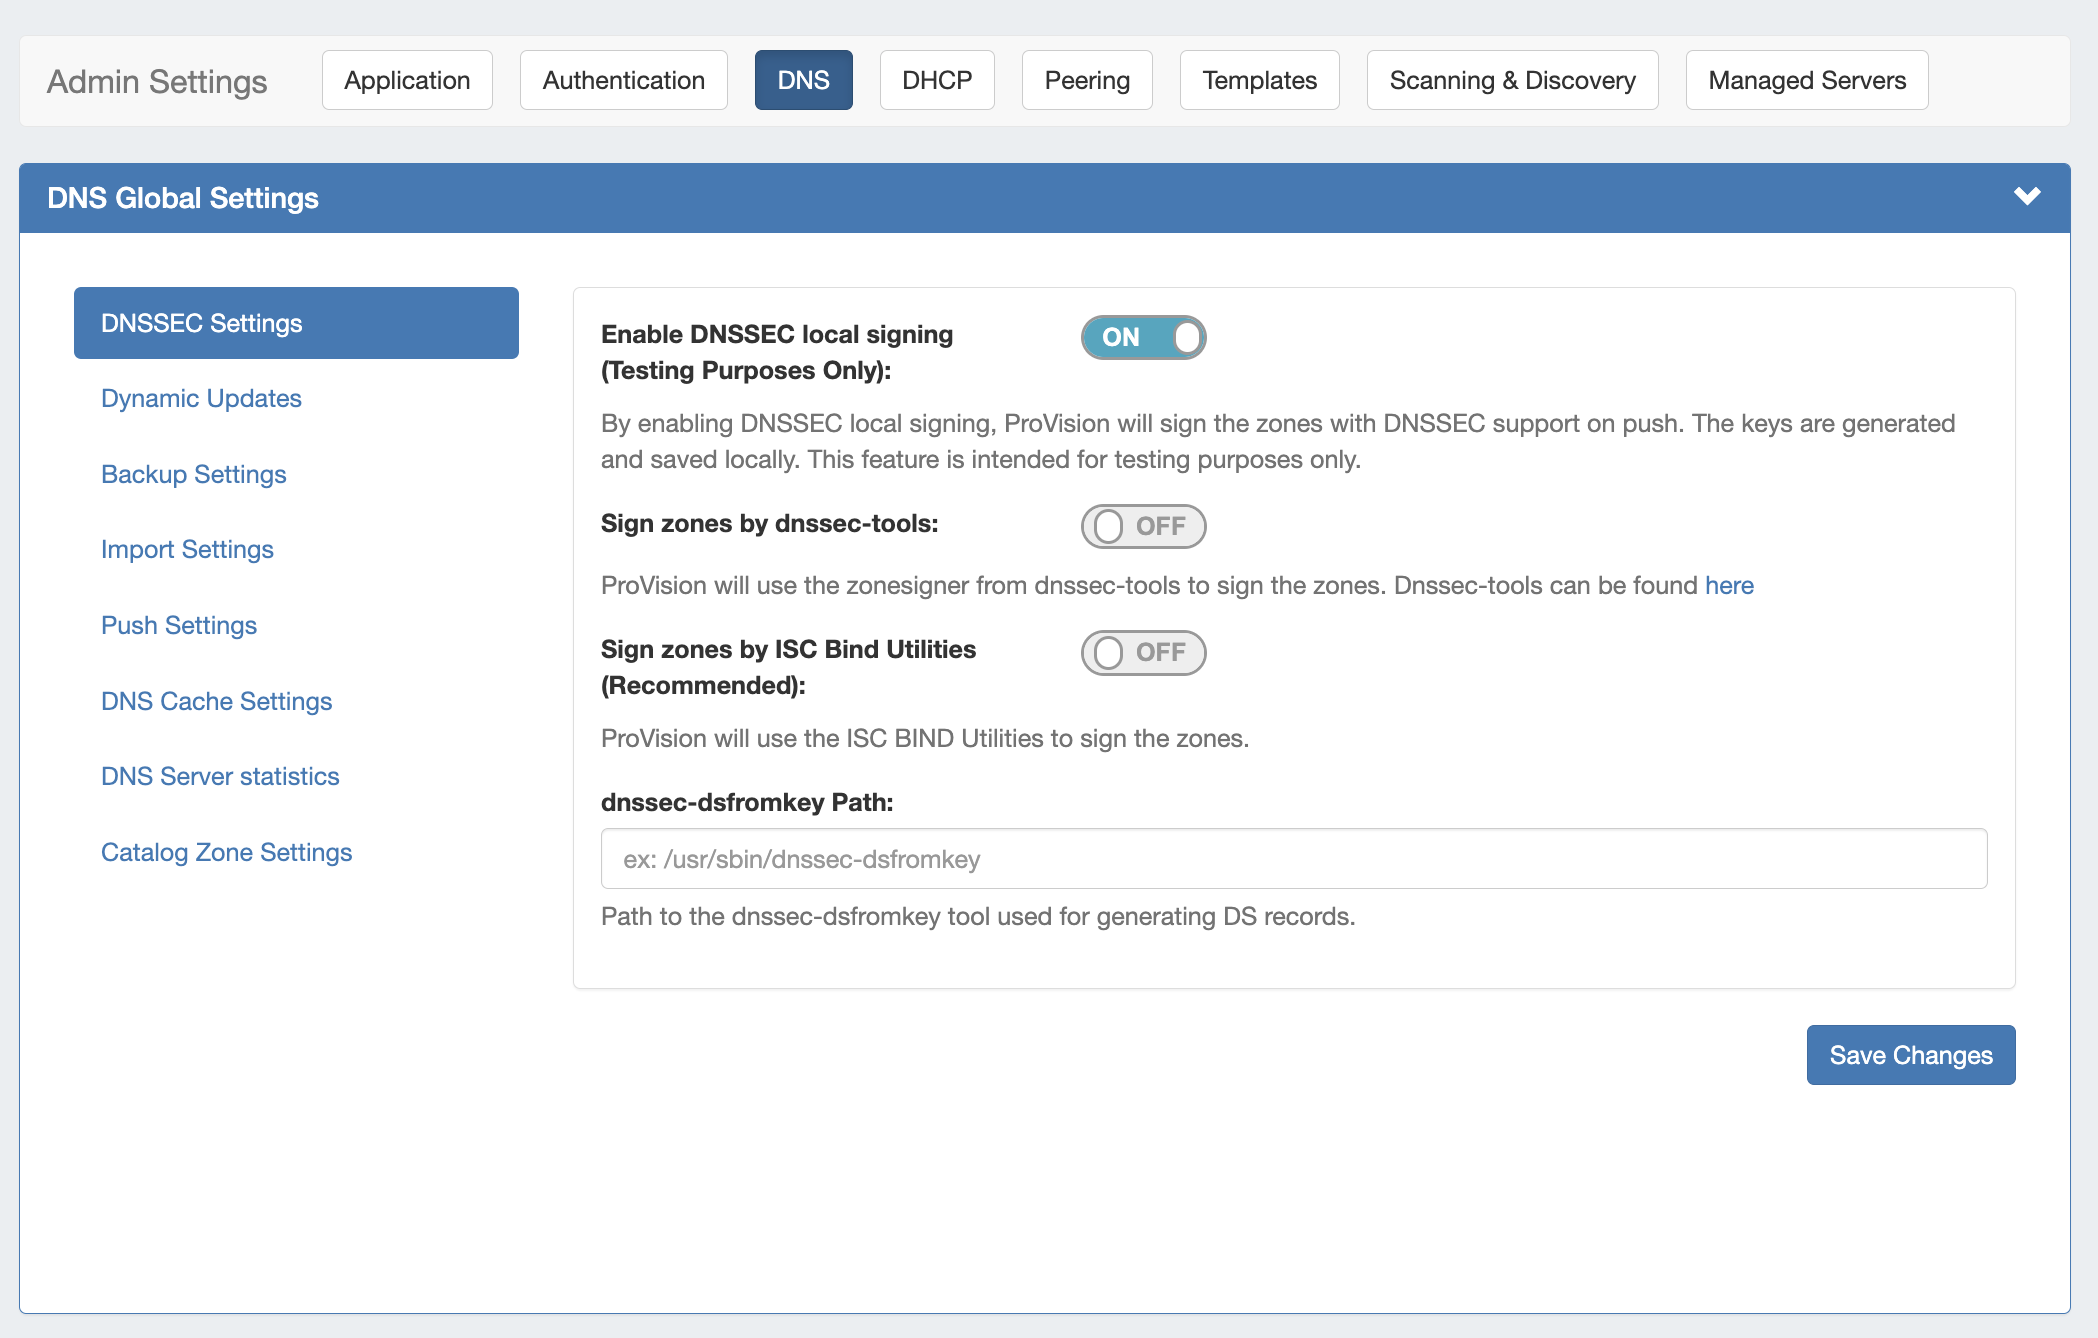
If using DNSSEC, select whether to enabled DNSSEC local signing, or sign zones by dnssec-tools, then enter the following information:
Sign zones by ISC BIND Utilities: Select whether to use ISC BIND utilities to sign zones.
dnssec-dsfromkey path : Enter the dnssec-dsfromkey path that will be used for DNS. Required in all cases.
| Info | ||
|---|---|---|
| ||
If delays occur due to lack of available entropy on servers, see the following article on how to set up additional entropy using haveged here: |
DNS Dynamic Update Settings
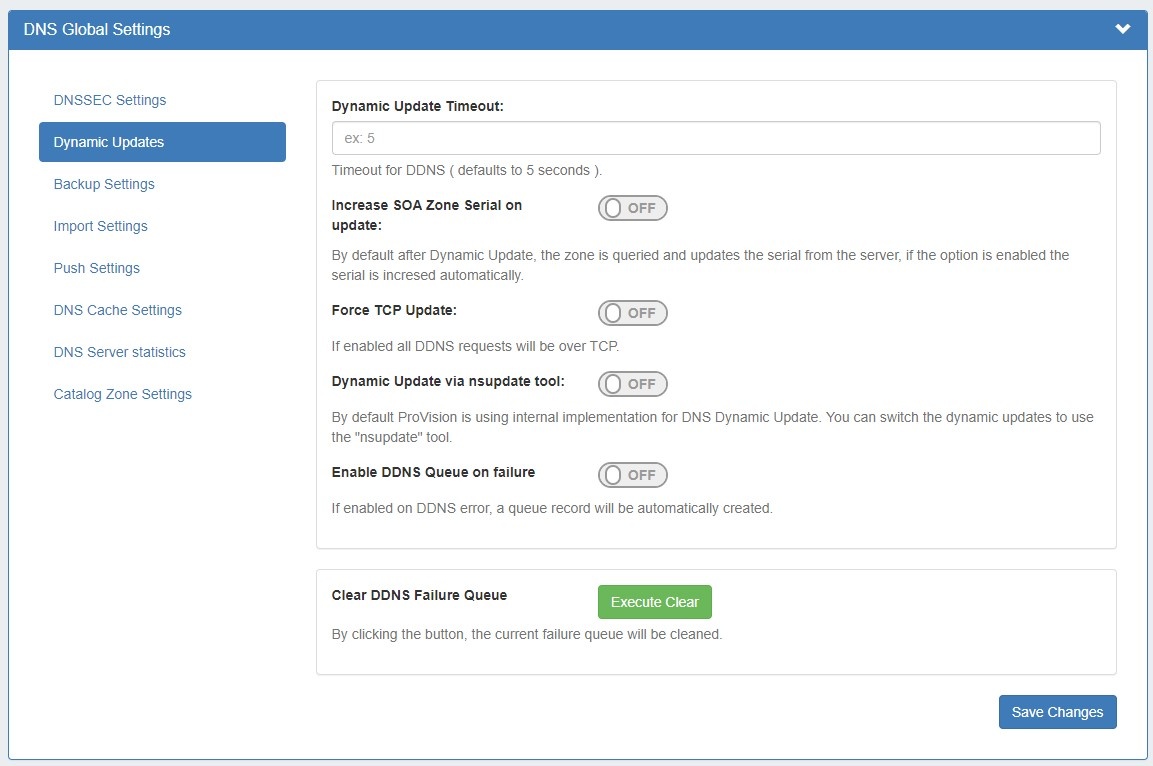
Dynamic Update Timeout: Timeout for DDNS (the default is 5 seconds).
Increase SOA Zone Serial on update: Toggle to "On" if you wish the zone serial to be increased automatically.
Force TCP Update: If enabled all DDNS requests will be over TCP.
Dynamic Update via nsupdate: Toggle to "On" if you wish to use Dynamic Updates via nsupdate, instead of ProVision's internal implementation.
Enable DDNS Queue on failure: Toggle to "On" if you wish to enable the automatic creation of a queue record on DDNS error.
Clear DDNS Failure Queue: Clears the current failure queue.
DNS Backup Settings
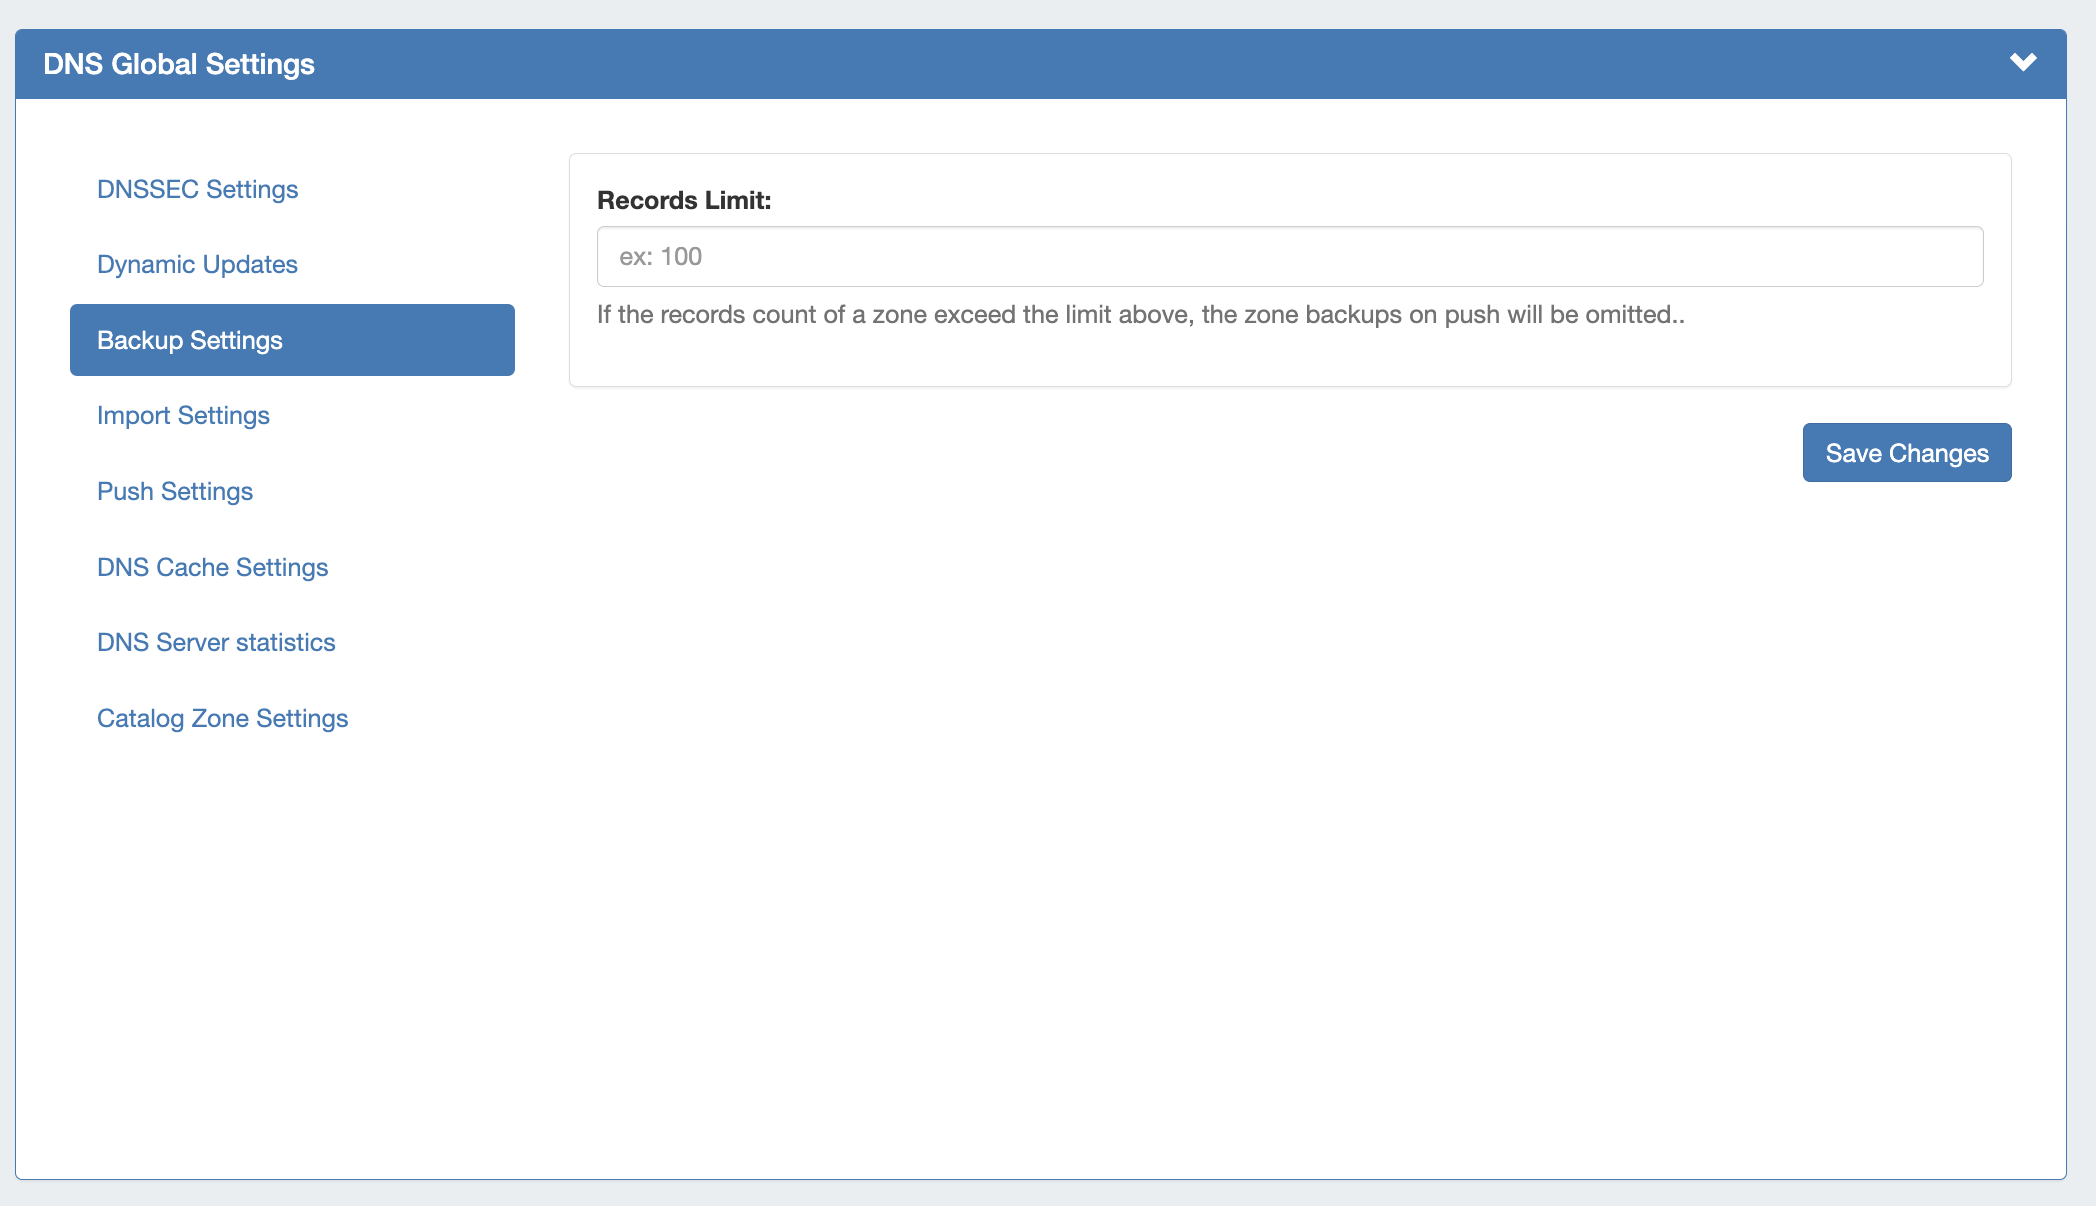
Records Limit : The limit for the number of records a zone may have for a zone to process a backup. If the records count exceed this number, zone backups will be omitted at zone push.
DNS Import Settings
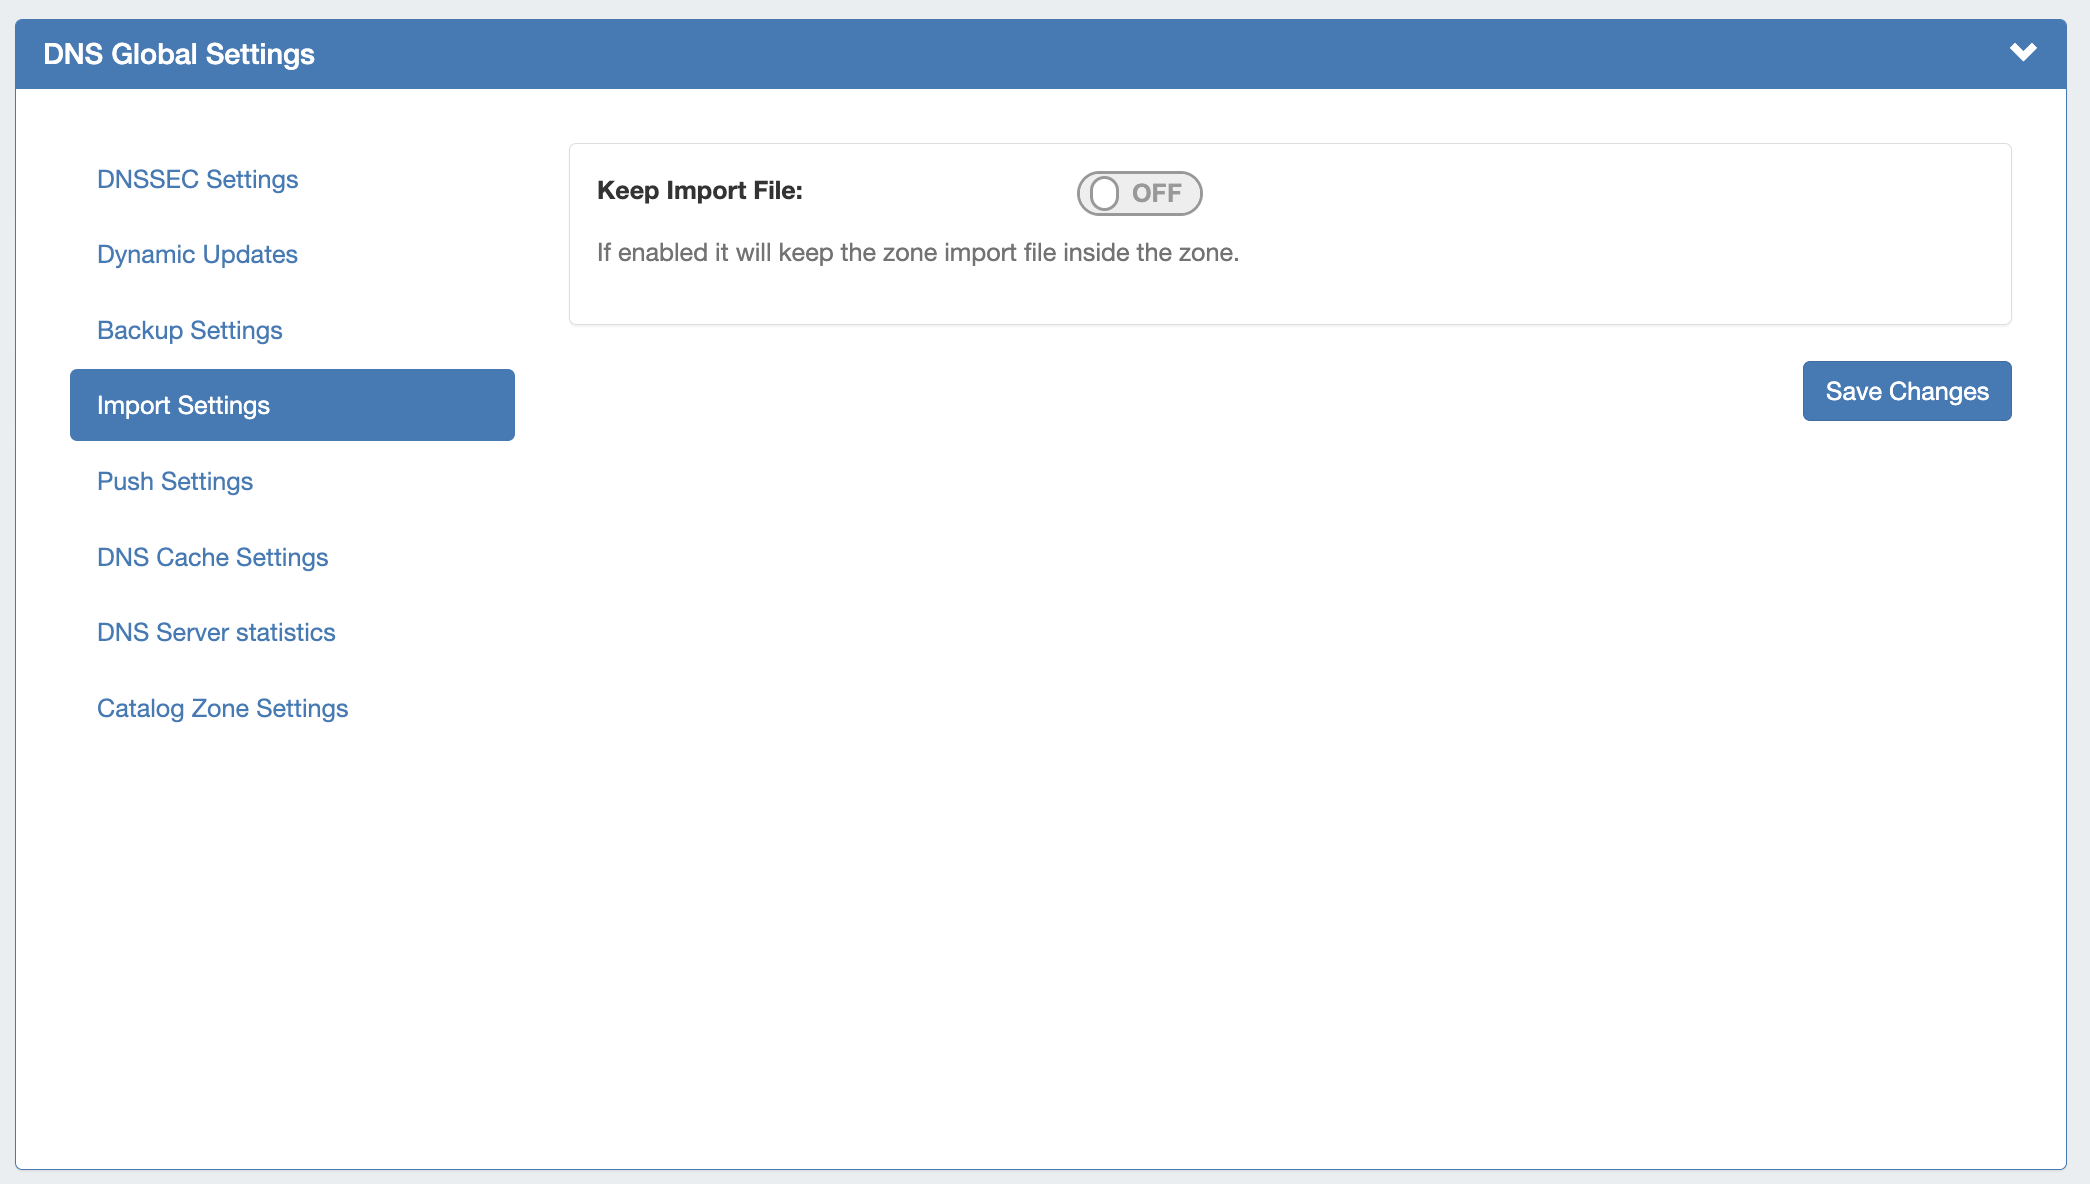
Keep Import File: Saves DNS zone import files to the zone's "Zone Backups and Attached Files" area, for later download. Optional.
Push Settings
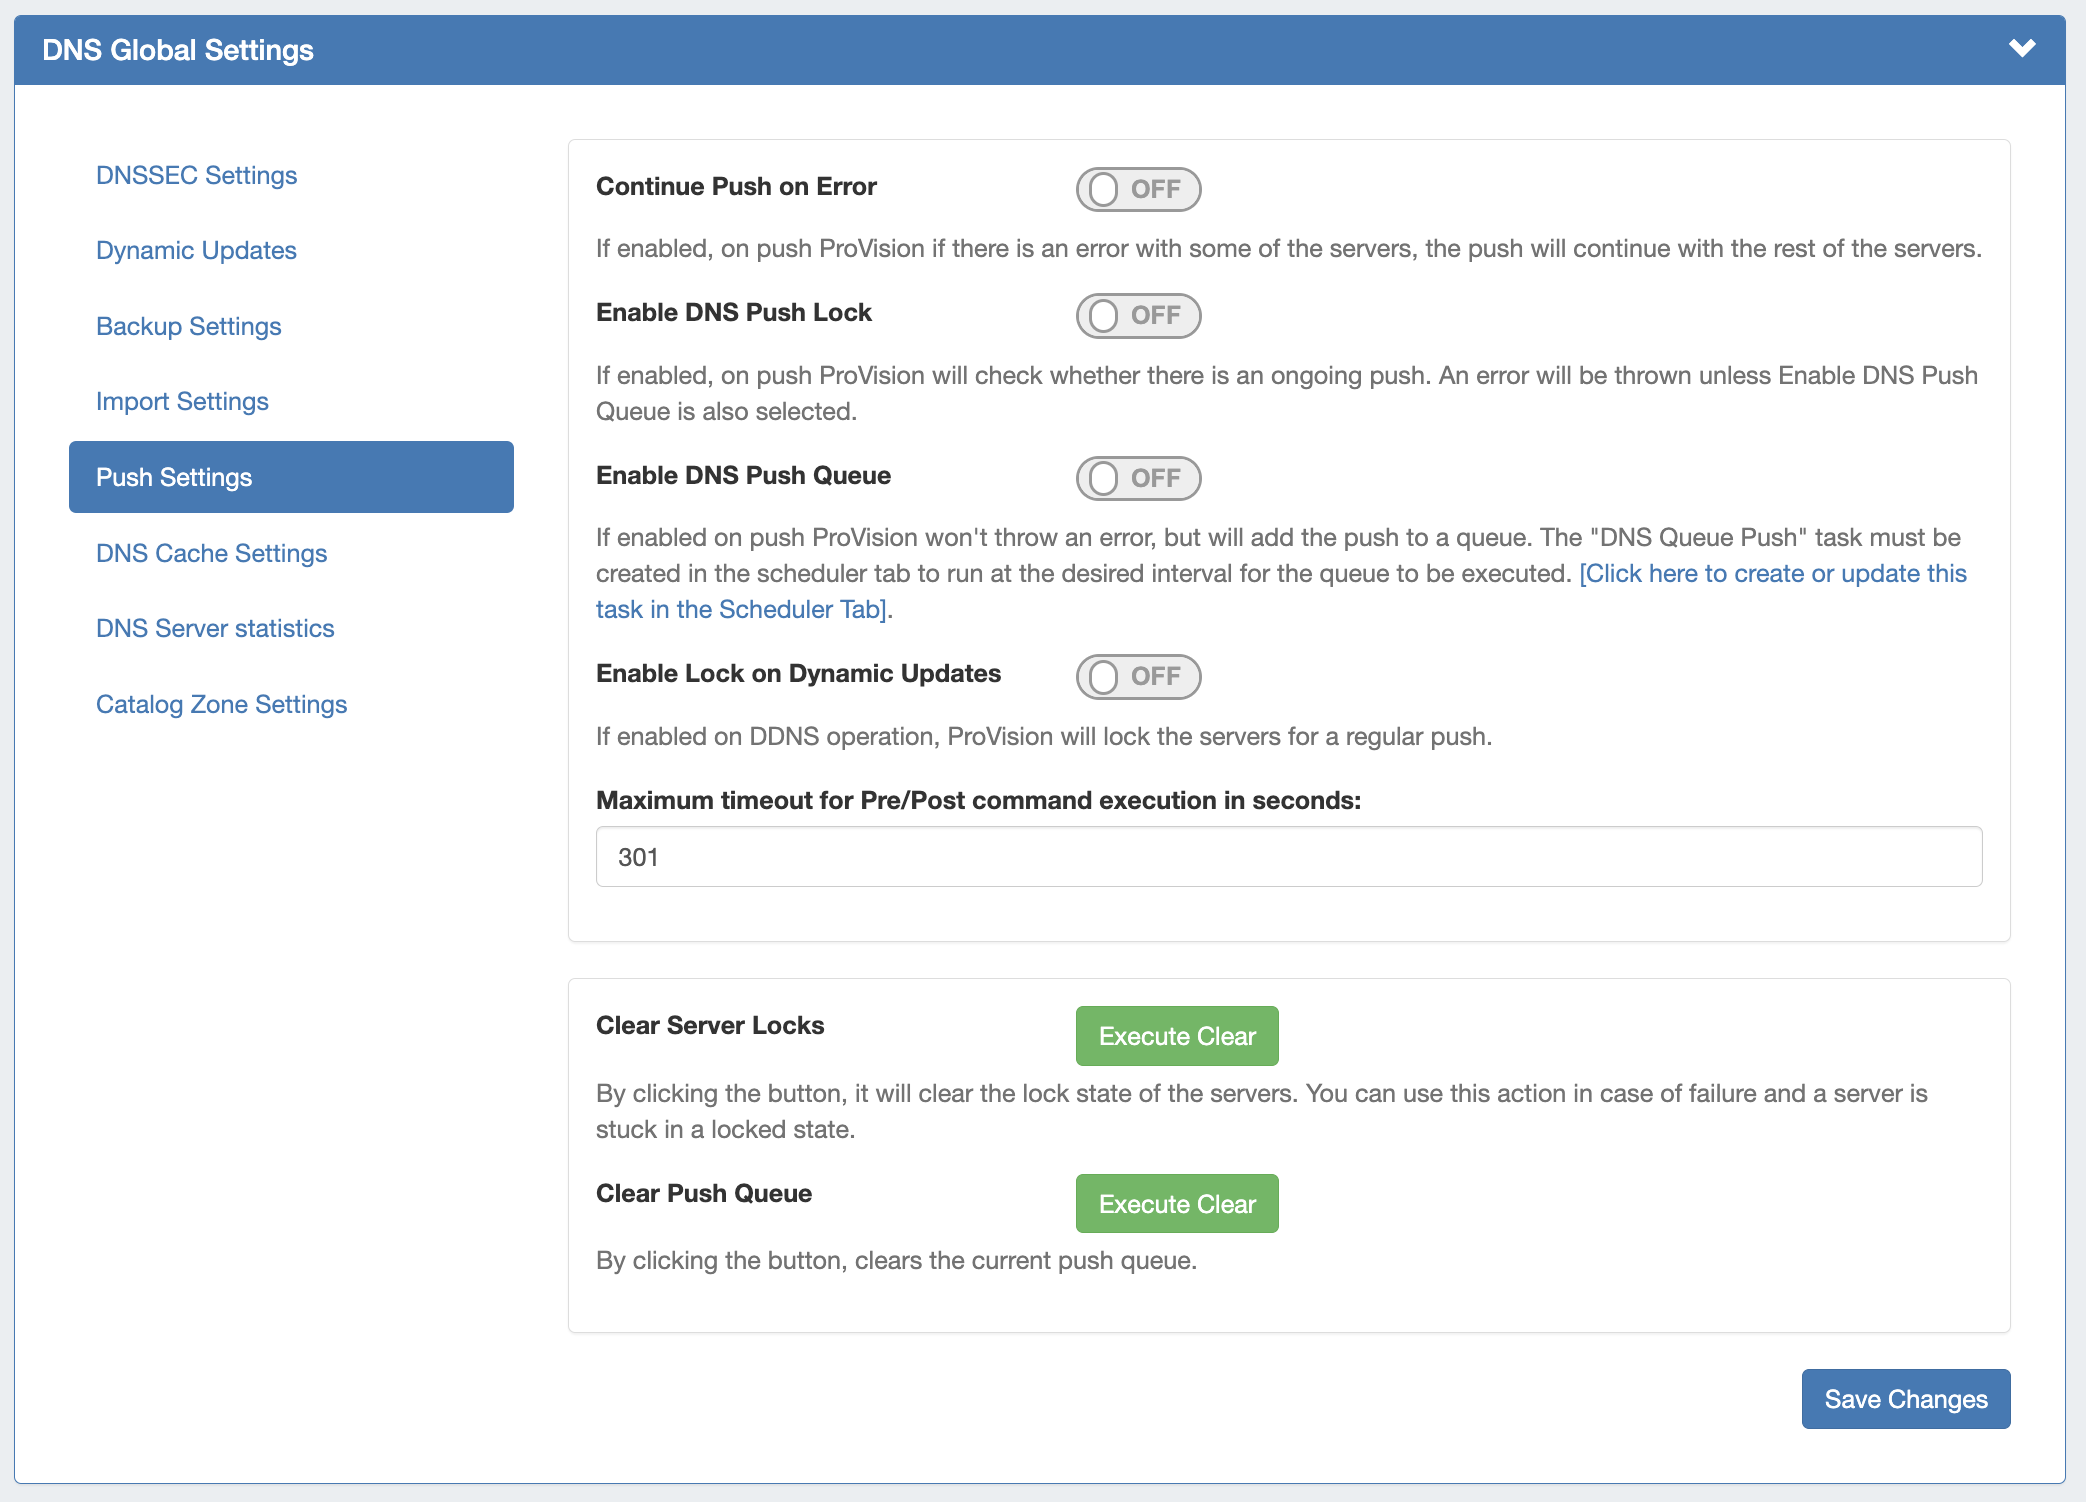
Continue Push on Error: If enabled, if there is an error on push with a subset of the servers, ProVision will continue to push the remaining non-erroring servers.
Enable DNS Push Lock: If enabled, on push ProVision will check whether there is an ongoing push. An error will be thrown unless Enable DNS Push Queue is also selected.
Enable DNS Push Queue: If enabled, on push ProVision won't throw an error, but will instead add the push to a queue. The "DNS Queue Push" task must be created in the scheduler tab to run at the desired interval for the queue to be executed.
Enable Lock on Dynamic Updates:If enabled on DDNS operation, ProVision will lock the servers for a regular push.
Maximum Timeout for Pre/Post Command: Enter the number of seconds for maximum timeout.
Clear Server Locks: Clears the lock state of the servers. You can use this action in case of failure, and a server is stuck in a locked state.
Clear Push Queue: Clears the current push queue.
DNS Cache Settings
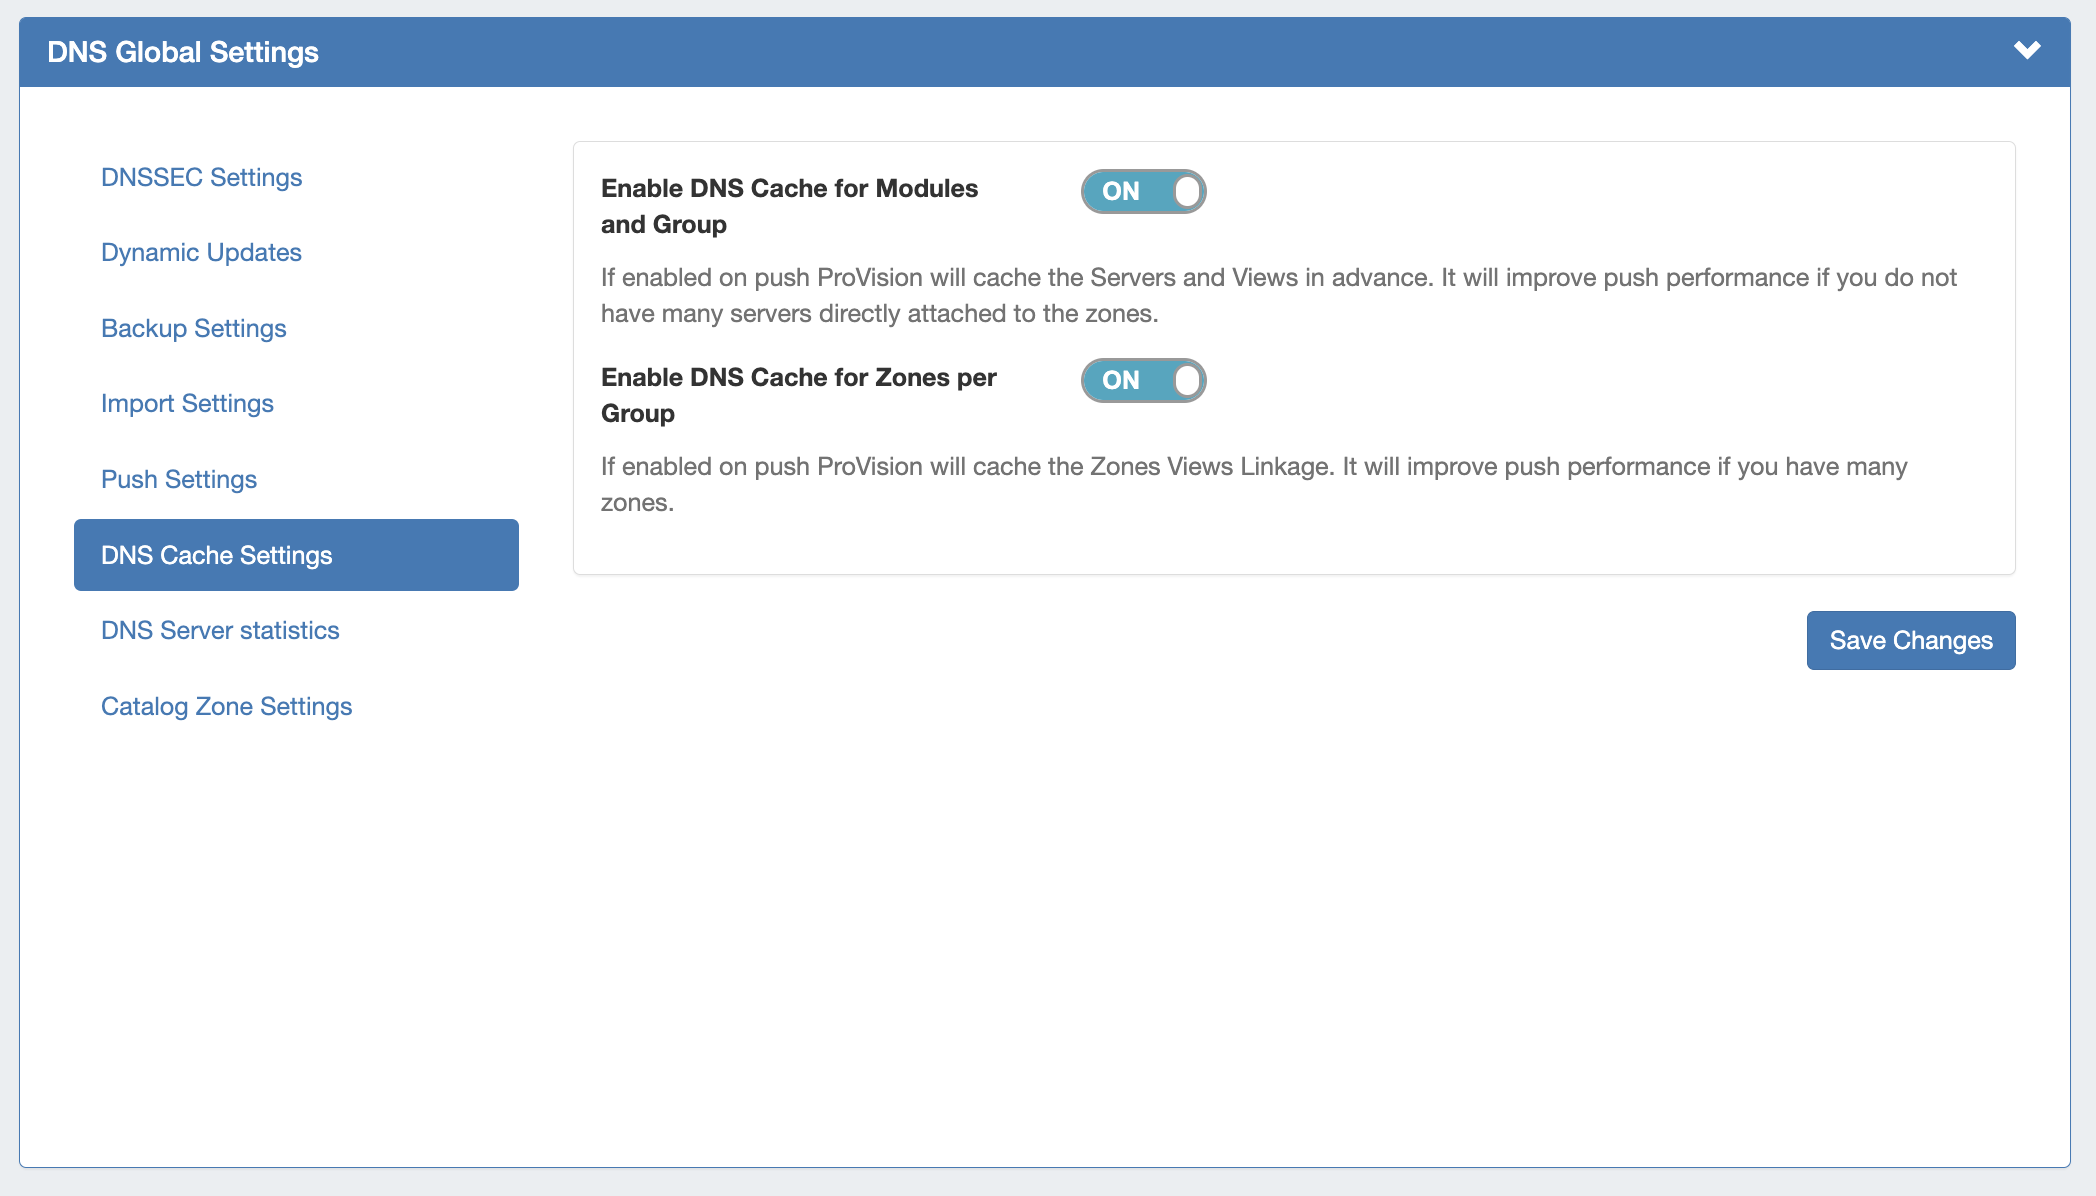
Enable DNS Cache for Modules and Group: If enabled, on push ProVision will cache the Servers and Views in advance. Improves push performance, if you do not have many servers directly attached to the zones.
Enable DNS Cache for Zones per Group: If enabled, on push ProVision will cache the Zones Views Linkage. Improves push performance, if you have many zones.
DNS Server Statistics
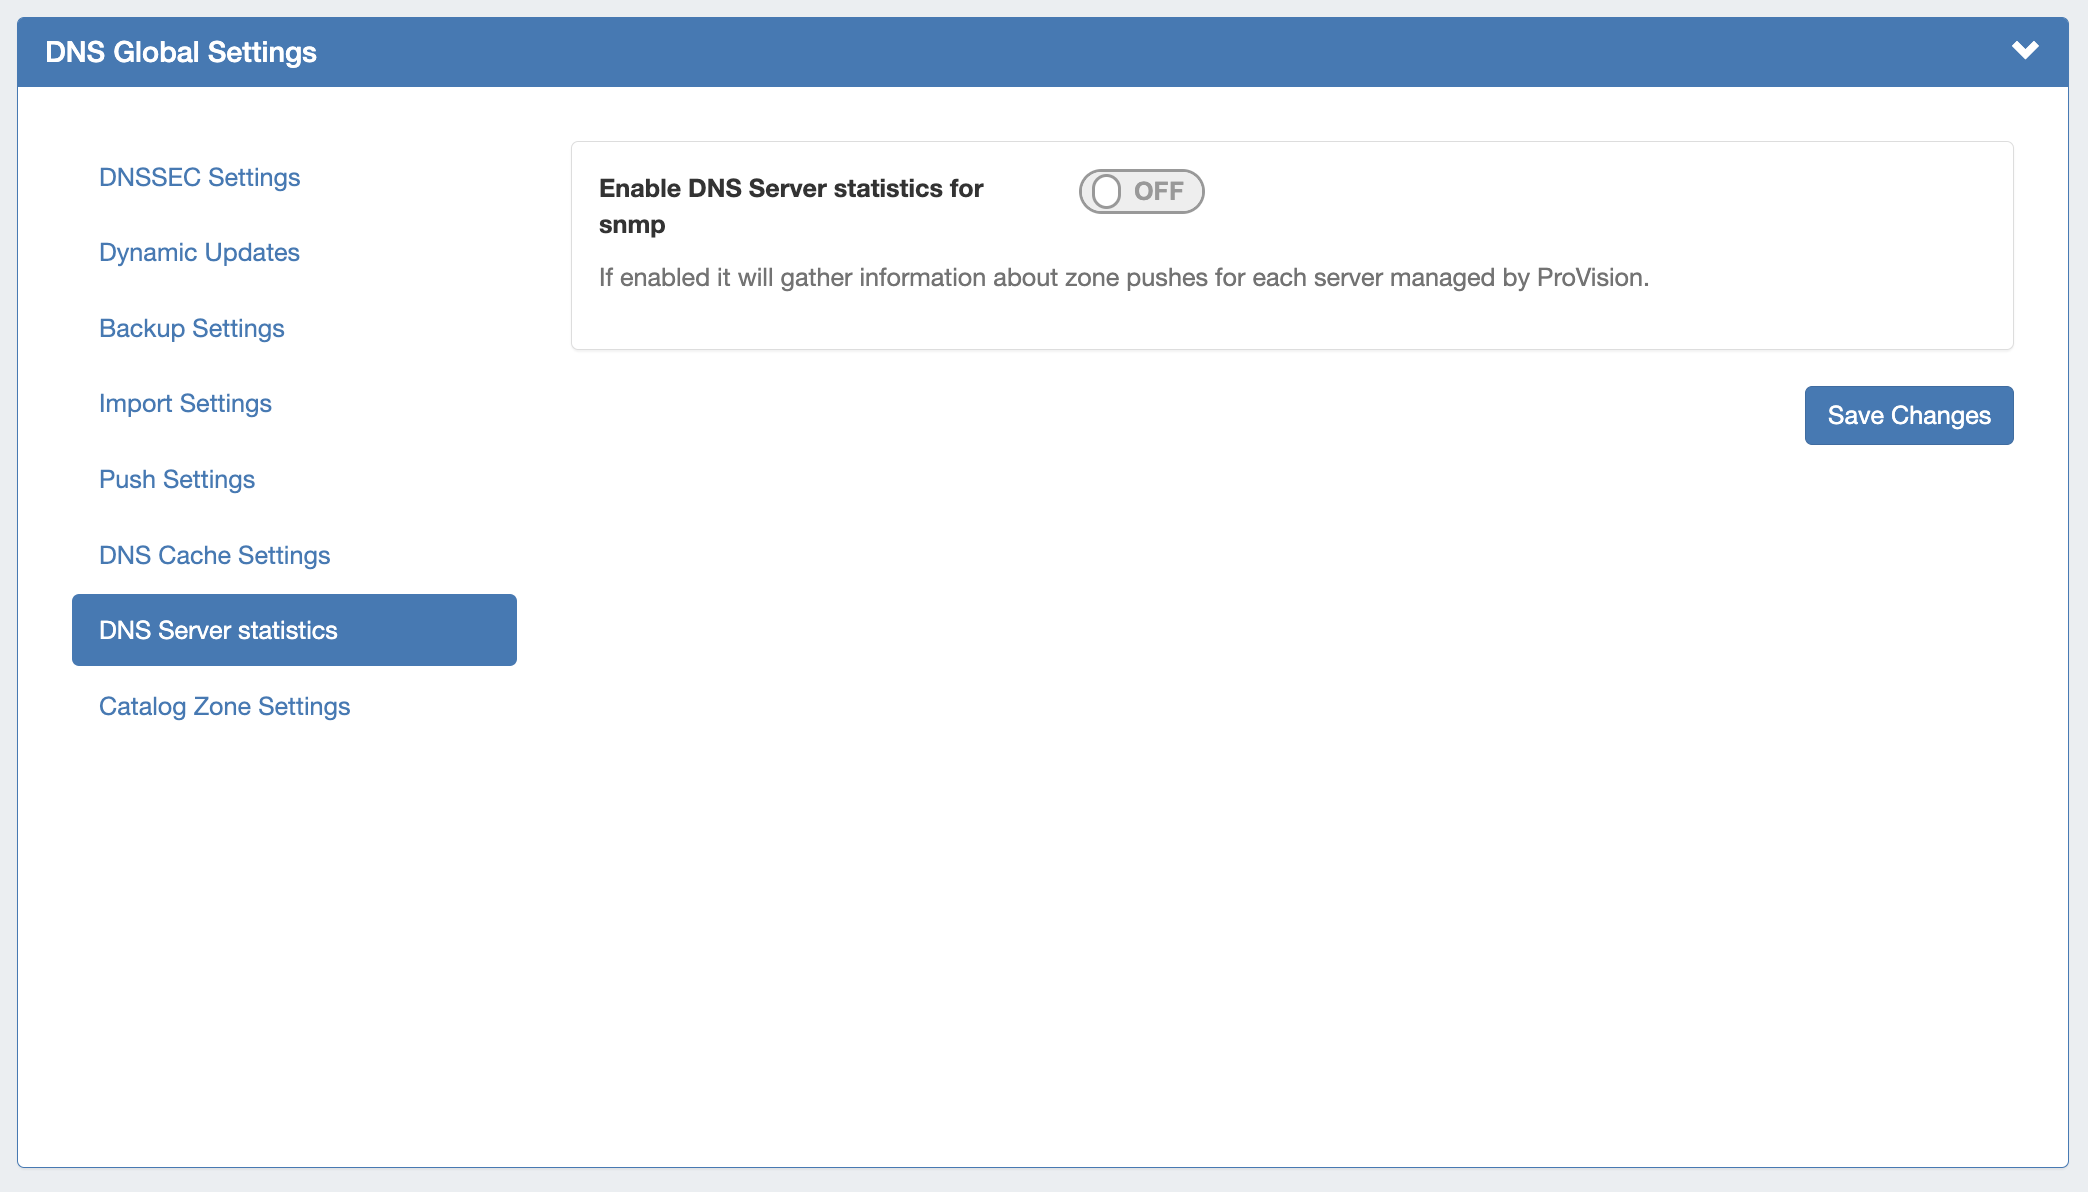
If enabled, it will gather information about zone pushes for each server managed by ProVision.
Catalog Zone Settings
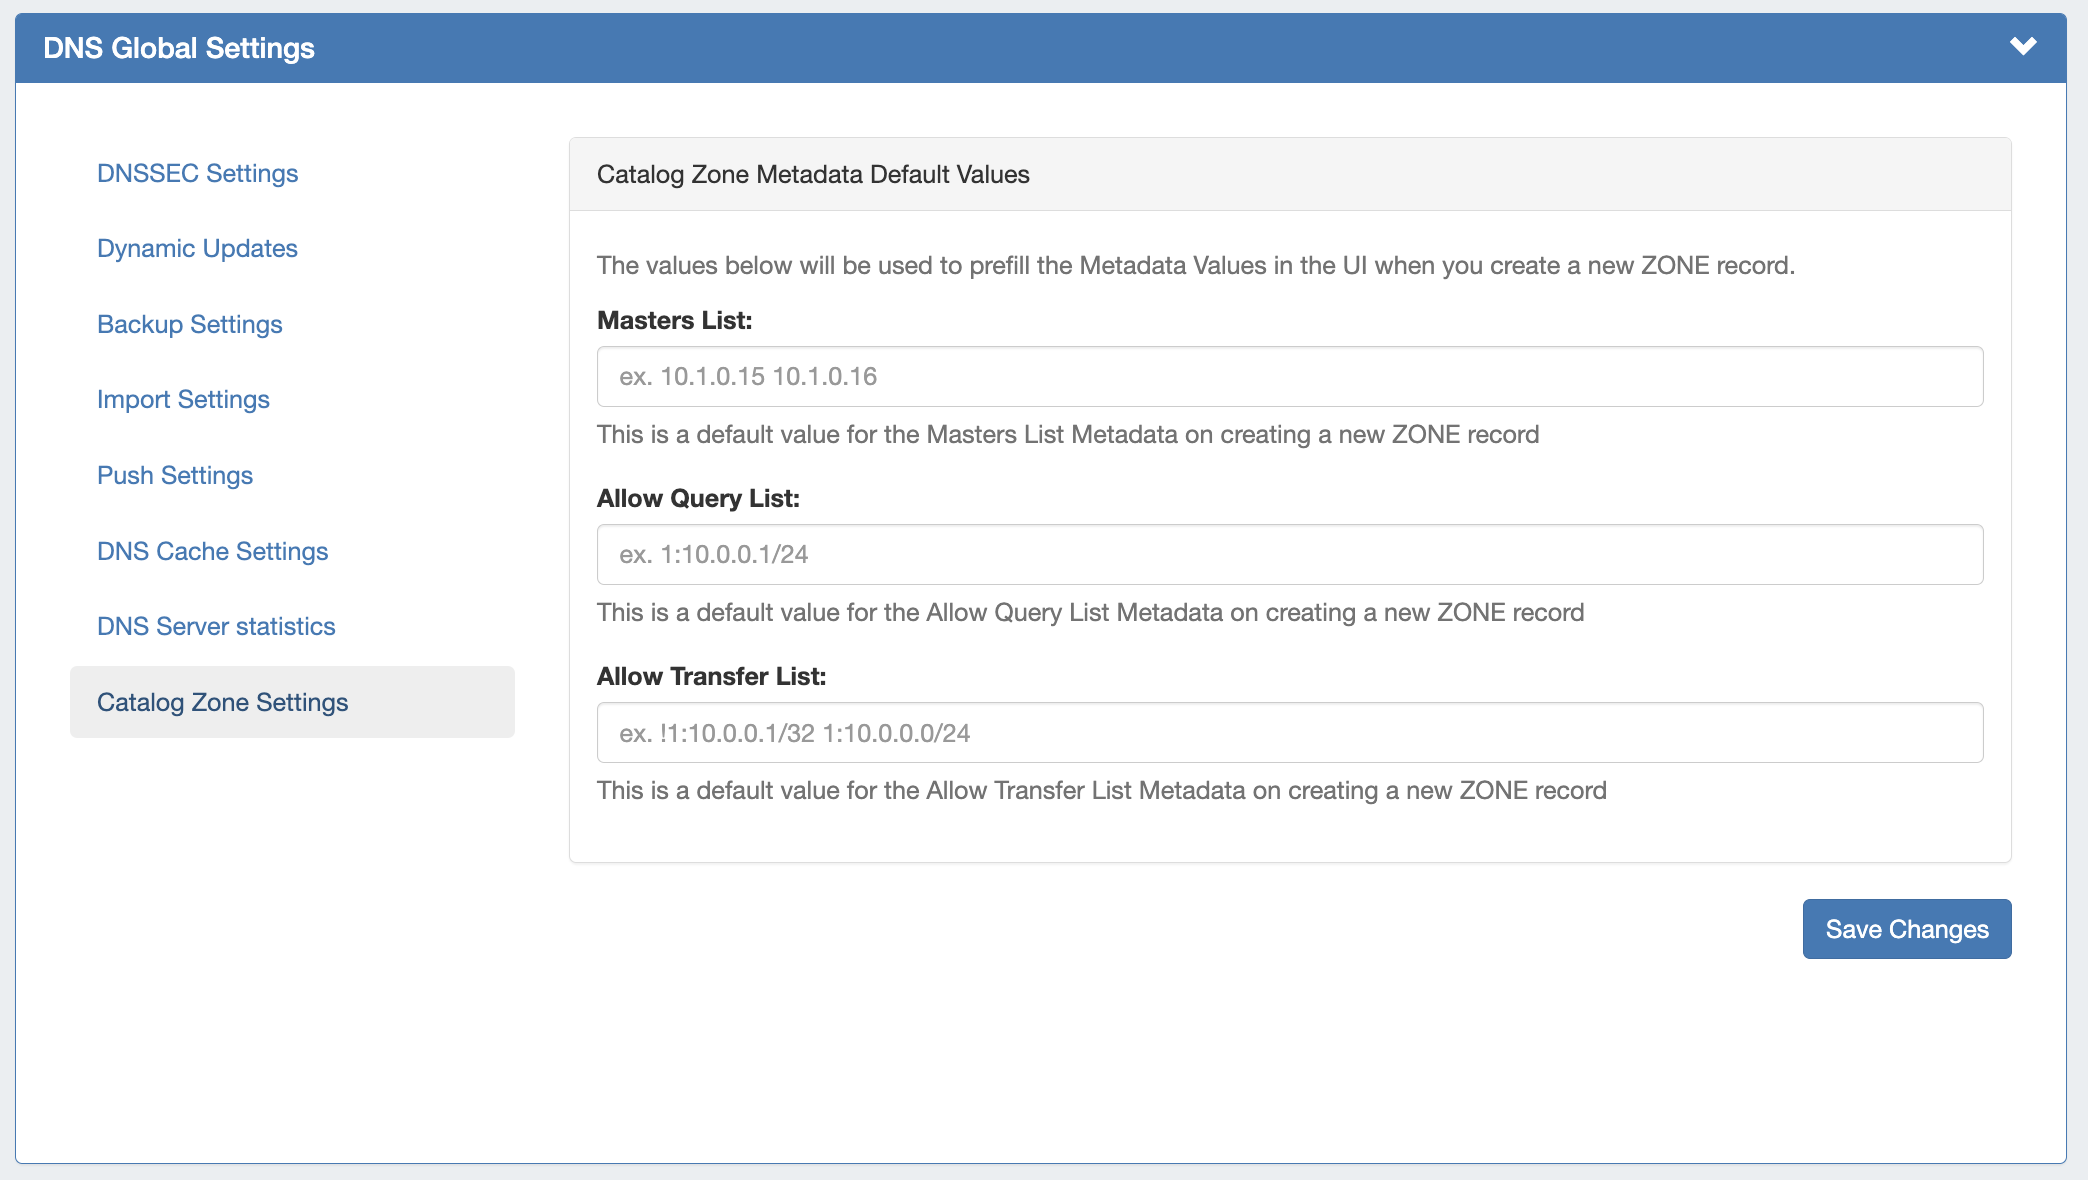
The default value for the Masters List Metadata on creating a new zone record.
DNS Export Functions
Exporting Zones
Individual Zones:
DNS zones may be exported individually from the zone's View Zone page "Export Zone" button, by any user with appropriate zone permissions (see: Editing DNS Zones).
Zones in a DNS Group:
All zones under a DNS Group may be exported from the DNS Group "Export Zones" button, by any user with the appropriate group permissions (see: Working with DNS Groups).
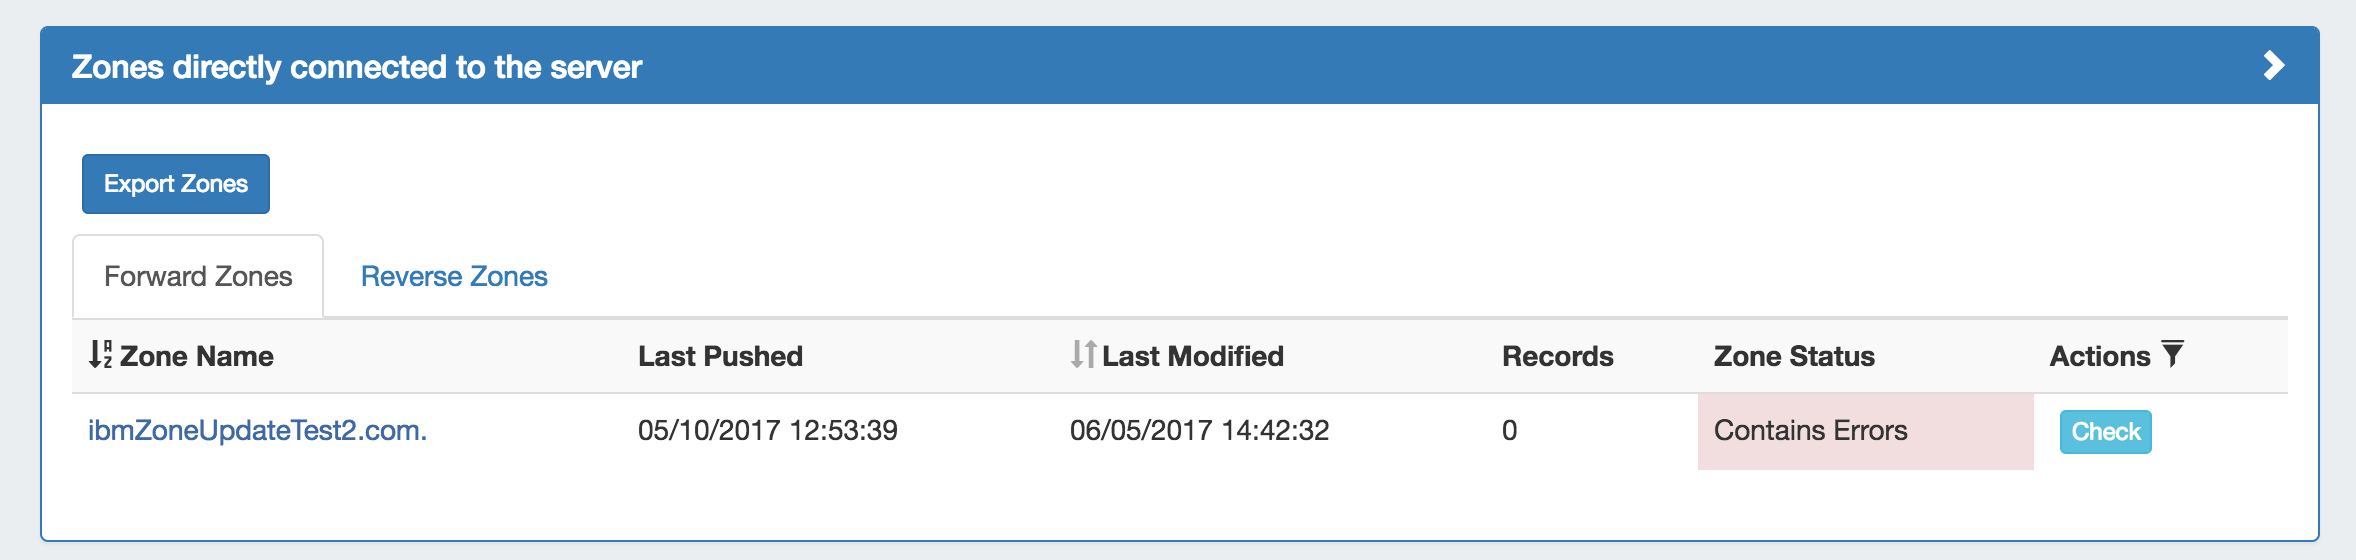
Zones directly connected to a server:
Zones directly connected to a server may be exported by Admin users from the DNS Server Details page, under the section "Zones connected directly to the server".
Expand the module by clicking the (>) arrow, and then click the "Export Zones" button.
Importing DNS Zones:
There are six DNS zone import options, available under the Data Import tab in the Admin section. For more information on importing DNS zones, see Importing your Data and Import DNS Zones.
BIND Zone Upload / Import: Imports DNS zones using the named.conf configuration file tied to the zones you are uploading, a .zip or .tar file of the zones themselves, and an optional .csv file mapping zones to customers and DNS Servers. This is the simplest and most commonly used import method. Refer to Import DNS Zones for more information.
PowerDNS Zone Import: This tool is available after configuring a PowerDNS server with a MySQL backend. The PowerDNS Import connects to the selected server and imports all zones.
InfoBlox Zone Import: Imports DNS zones using a provided Host, Username, and Password. The InfoBlox import pulls all zones on the InfoBlox LOCAL grid and adds them to a designated Group. It is advised to create a DNS Group prior to the import with default parameters and NS records to be inherited by the imported records.
NS ONE Zone Import: Imports DNS zones using a NS One API Key. It is advised to create a DNS Group prior to the import with default parameters and NS records to be inherited by the imported records.
Dyn DNS Zone Import: Imports DNS zones using a Dyn DNS Customer Name, Username, and Password. It is advised to create a DNS Group prior to the import with default parameters and NS records to be inherited by the imported records.
DNSMadeEasy Zone Import: Imports DNS zones using a DNSMadeEasy API Key and API Secret. It is advised to create a DNS Group prior to the import with default parameters and NS records to be inherited by the imported records.
IPPlan Zone Import: Imports DNS zones using IPPlan MySQL database options. It is advised to create a DNS Group prior to the import with default parameters and NS records to be inherited by the imported records.
Additional DNS import options may be available on a per-zone or per-server level, accessed from the DNS Tab:
DNS Zone Import: This tool is available on a zone's "View Zone" page, and allows the user to import additional zone/record information into an existing zone by uploading a zone file (.zone).
Expand From the View Zone page, a zone file (.zone) may be imported into a ProVision zone to populate record data. Click "Import Zone".

A Zone Import dialog box will open. Next to Zone File:, click "Choose File" and select your .zone file to import. Then, select an import policy to follow.
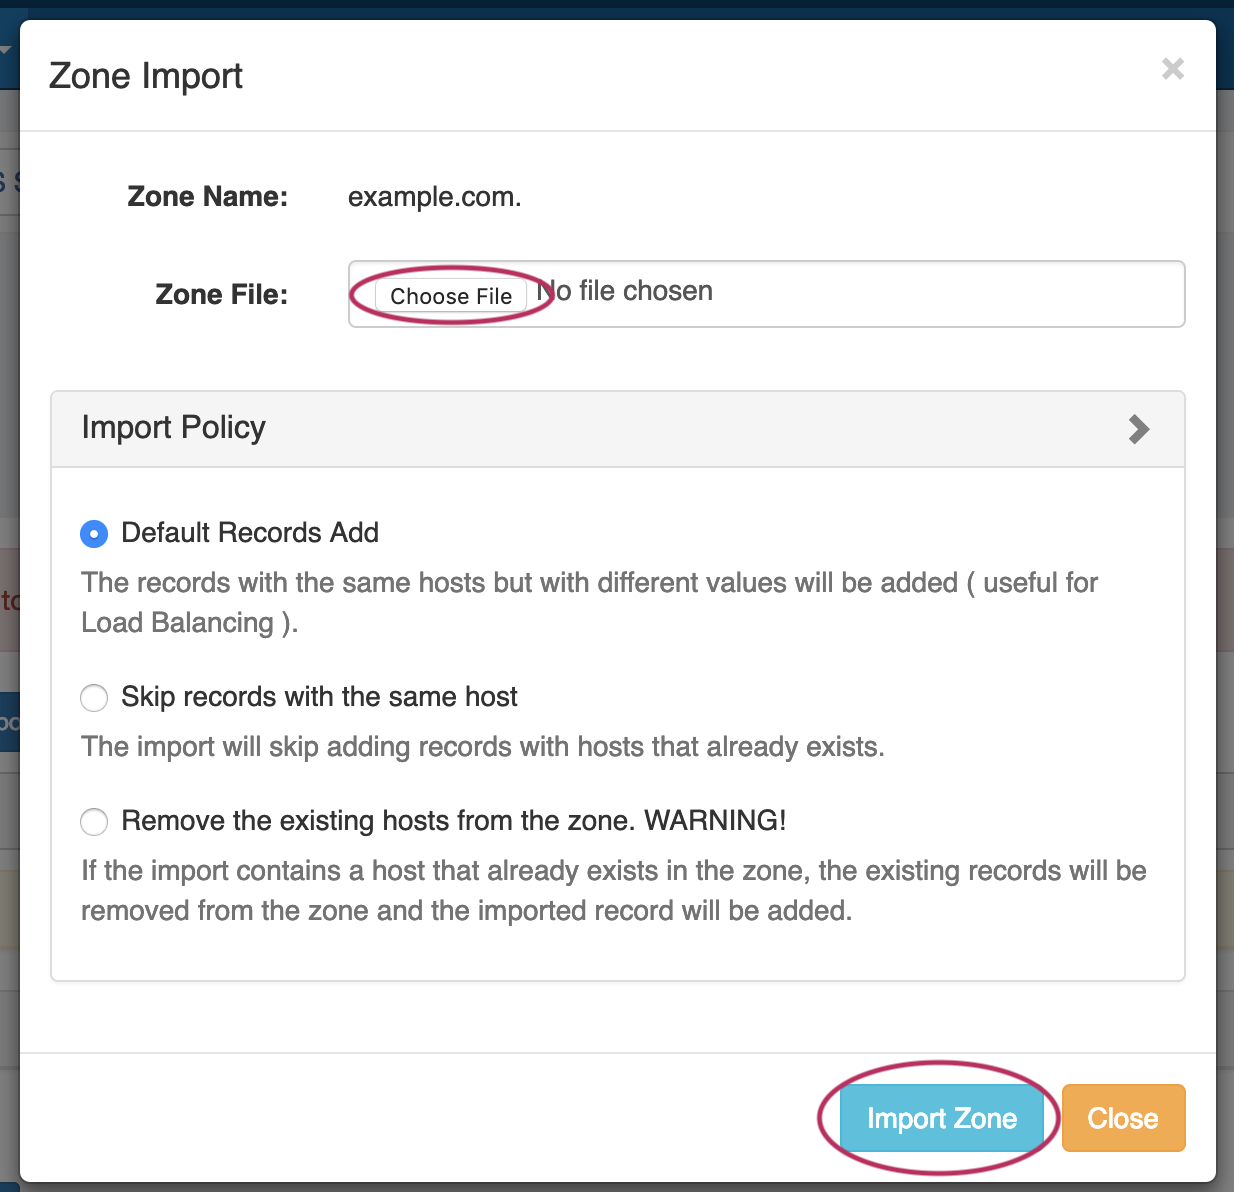
When done, Click "Import Zone".
Additional Information:
...
Edit DNS Record Types
The "Edit DNS Record Types" will allow you to manage what types of DNS records can be added in the system. The default values are:
- A, AAAA, MX, PTR, CNAME, NS, DIRECTIVE, DNAME, DNSKEY, DS, INCLUDE, IPSECKEY, COMMENT, TXT, KEY, SOA, and SRV
- The complete list of valid record types can be found the RFCs. Wikipedia provides a nice reference: http://en.wikipedia.org/wiki/List_of_DNS_record_types
Edit DNS Delegations
Generate all DS records for DNSSEC
- This link will generate and output all DS records in the database. This is provided to easily bulk upload all DS keys to your domain registrar.
Generate zip file of all zones
- This link generates a single .zip file containing all zones for download. Once a zip file has been generated, a quick link is provided at the bottom of this section with datestamp to be downloaded later if needed.
Increment All Serials
- Increment all zone serial numbers by one. All zone serials are automatically incremented on a zone push, but if there is ever any other requirement for an increment, it can be performed here.
DynECT Zone Import
- Imports and syncs ALL zones on the system with those in your DnyECT instance. This means any zones in ProVision not present in your DynECT instance will be removed and any changes lost.
PowerDNS Zone Import
- Option is available after configuring a PowerDNS server with a MySQL backend. Connects to the selected server and imports all zones.
DNS View ACL Management
- Manage ACLs for use in DNS Views.
DNS Zone Transfers
This section lists every server configured in the platform, along with how many zones are assigned to the server.
How to transfer zones:
- Check the boxes and click the Push the button to transfer zones to the target server.
Manage DNS Servers
This is where you configure DNS servers to transfer zones to from the ProVision platform. ProVision currently supports the following DNS server types: BIND, PowerDNS (using a bind backend), DynECT, and Secure64. The fields available for configuring servers are as follows:
- Server - The FQDN or ip address of the DNS server.

- Default - Specify if the server should be added to new zones by default or not.
- Transfer Type - SCP, Secure64, Secure64 Signer, and DynECT. Note that the SCP method should be used for PowerDNS with a Bind backend.
- Server Type - Specify if the server is a master or slave. Different configuration files are created master vs. slave on the Bind, PowerDNS/Bind, and Secure64 platforms.
- SOA - Start of Authority, should be in the format "SRI-NIC.ARPA. HOSTMASTER.SRI-NIC.ARPA.". For more information, see the RFC: http://tools.ietf.org/html/rfc1033
- Username - Login/username for the target DNS server. The specified account needs to be valid, and have write permission to the remote directory and execute permission for any pre/post commans.
- Password - Password for the target account. All passwords are stored encrypted in the database.
- Port - Port to contact the target server on. This is port used for SSH on Bind and Secure64 server types.
- Remote Directory - The target directory to transfer zone files to on the DNS system.
- Named Conf Path - The path to other zones on the Bind systems.
- Pre Command - Any valid system command on the target DNS system. This command will be run before any files are transferred.
- Post Command - Any valid system command on the target DNS system. This command will be run after any files are transferred. For example, on a Bind system you would need to run "rndc reload" to reload the zones.
The "Test Config" button will attempt to login to the target system and write to the target directory. If any failures are encountered, an error will be written with some detail. If the test is successful, the word "Success!" will show verifying that files can be transferred. This does not test if the user can execute pre/post commands. This needs to be checked manually.
Views
Enable Views - Select Yes to enable views on a particular server. You must click "Update Server" to show the view options.
To enable your Bind server to use zones transferred from 6connect, you must add the following to your named.conf.
include "/var/named/zones/6connect_named.conf";
When views are enabled on a server, all zones/records attached to a server are immediately put into the default view 6connectGeneric that contains a match any rule. For example, here is a sample of the named.conf include generated by ProVision:
view "6connectGeneric" in {
match-clients { any; };
zone ...
zone ...
};
All views attached to a server are displayed under the "Views" label. When you enable views on a Bind server, you must wrap all other zones in named.conf or any includes in view statements. The include line for the 6connect conf file should also be move above any other view statements. An example is below:
include "/var/named/zones/6connect_named.conf";
view "hints" {
match-clients { any; };
zone "." {type hint; file "named.root";};
};
view "zones-outside-of-6connect" {
match-clients { some-acl; };
zone ....
};
Adding a View
To add a view just type in the view name, and a description (for reference only). The config files transferred to the server will automatically be built according to the server type.
﹤insert image﹥
Adding Options to a View
Adding ACLs to Views
You can select an existing ﹤link to ip list creation﹥IP List﹤/link﹥ to create a view ACL. For a Bind server, this creates a corresponding line in the config: match-clients { 6connect_Internal; }; The 6connect_ is prefixed to all IP lists inserted by ProVision.
Bulk Zone Assignments
The Bulk Zone Assignment function allows you to assign multiple zones to a resource in one step. The system will perform a wild card style match for any text in the search box and return all matching zones and display them in a list. You can then assign all the zones found to a resource as either a master or slave.
Bulk DNS Changes
The Bulk DNS Editor allows an Admin to perform "find and replace" functions across all DNS zones. It will match the host and/or record type and/or record value across the entire zone database. Unless the "Strict Comparison" box is checked, it will use wildcard style matches for the host and record values.
Nameserver Management
This function controls the list of DNS servers used for pre populating DNS records with NS records.
Notes
...
System Information for Local Installations
Zones are stored in the 6connect web root under /zones.
DS keys are stored in the 6connect web root under /keys.
Global DNS Settings may be set from the Admin Settings page.
Additional Sections:
For more information on DNS and configurations, see the following sections:
Children Display