| HTML |
|---|
<div id="google_translate_element"></div>
<script type="text/javascript">
function googleTranslateElementInit() {
  new google.translate.TranslateElement({pageLanguage: 'en'}, 'google_translate_element');
}
</script>
<script type="text/javascript" src="//translate.google.com/translate_a/element.js?cb=googleTranslateElementInit"></script> |
DHCP Groups
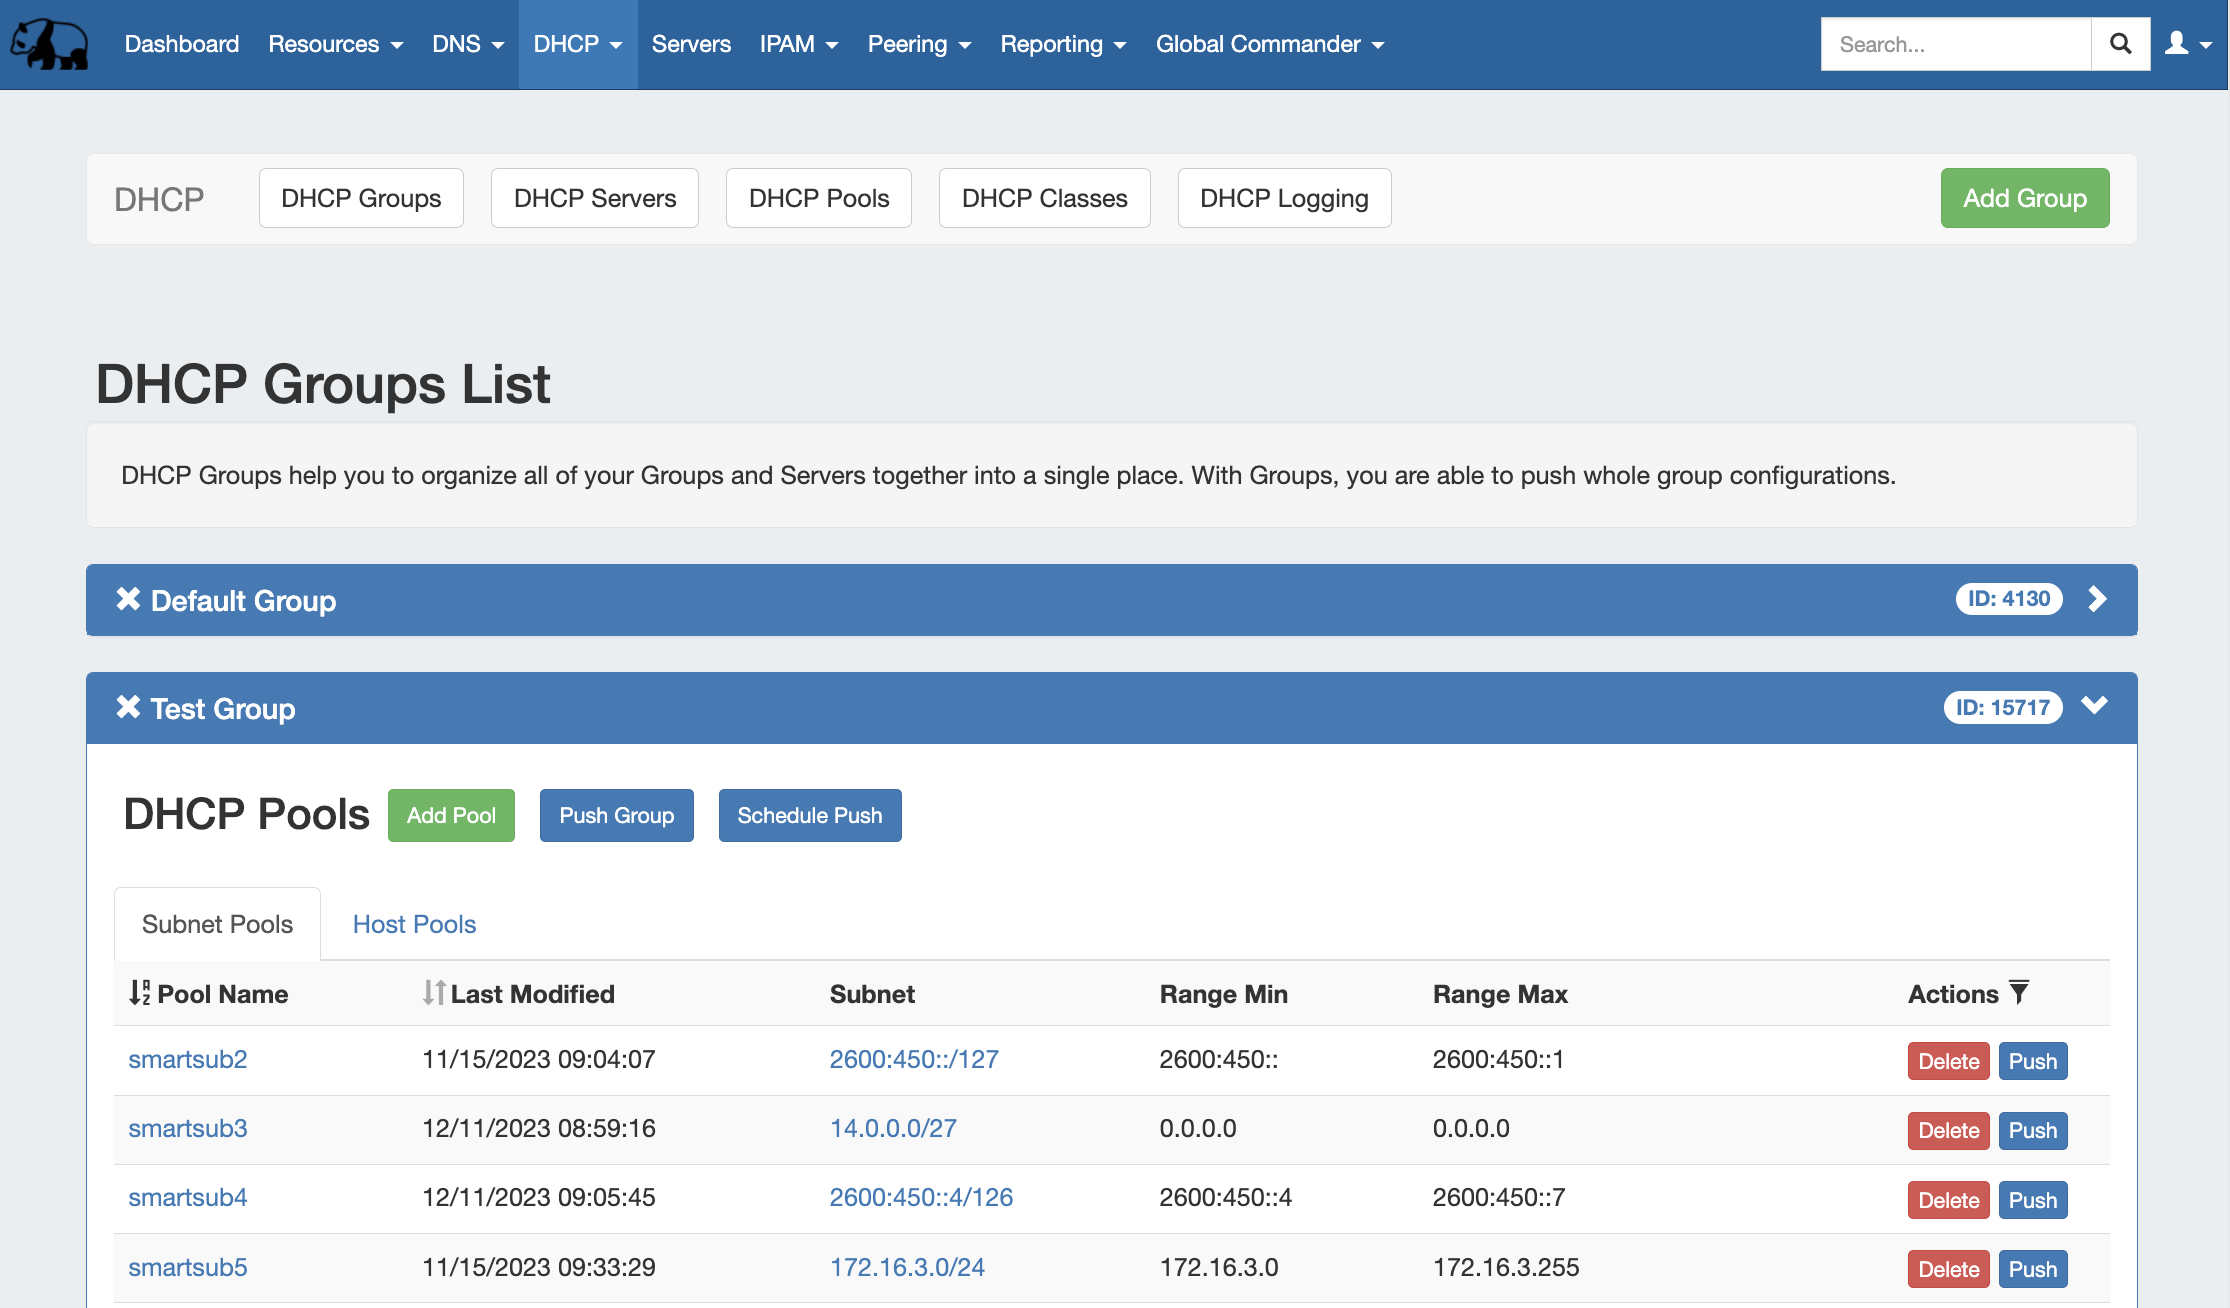
The DHCP tab DHCP Groups List allows allows you to create, view, and manage groups of DHCP Servers servers and Poolspools. Using groups, you can configure and push selected combinations of zones at one time.
...
Navigation: Move between the DHCP Groups, DHCP Servers, DHCP Pools, DHCP Classes, and DHCP Logging pages via the subtab buttons below the main navigation bar.
1) Add Group Button: Opens a dialog for creating a DHCP Groupgroup
2) Group Container: The Group group container header shows the group name. Expand or close the group container by clicking on the expansion arrow ( > ) on the far right of the header. Clicking on the X will delete the Group group and all zones included in the group. Rename the group by clicking on the name, then typing the desired changes and clicking outside of the name.
...
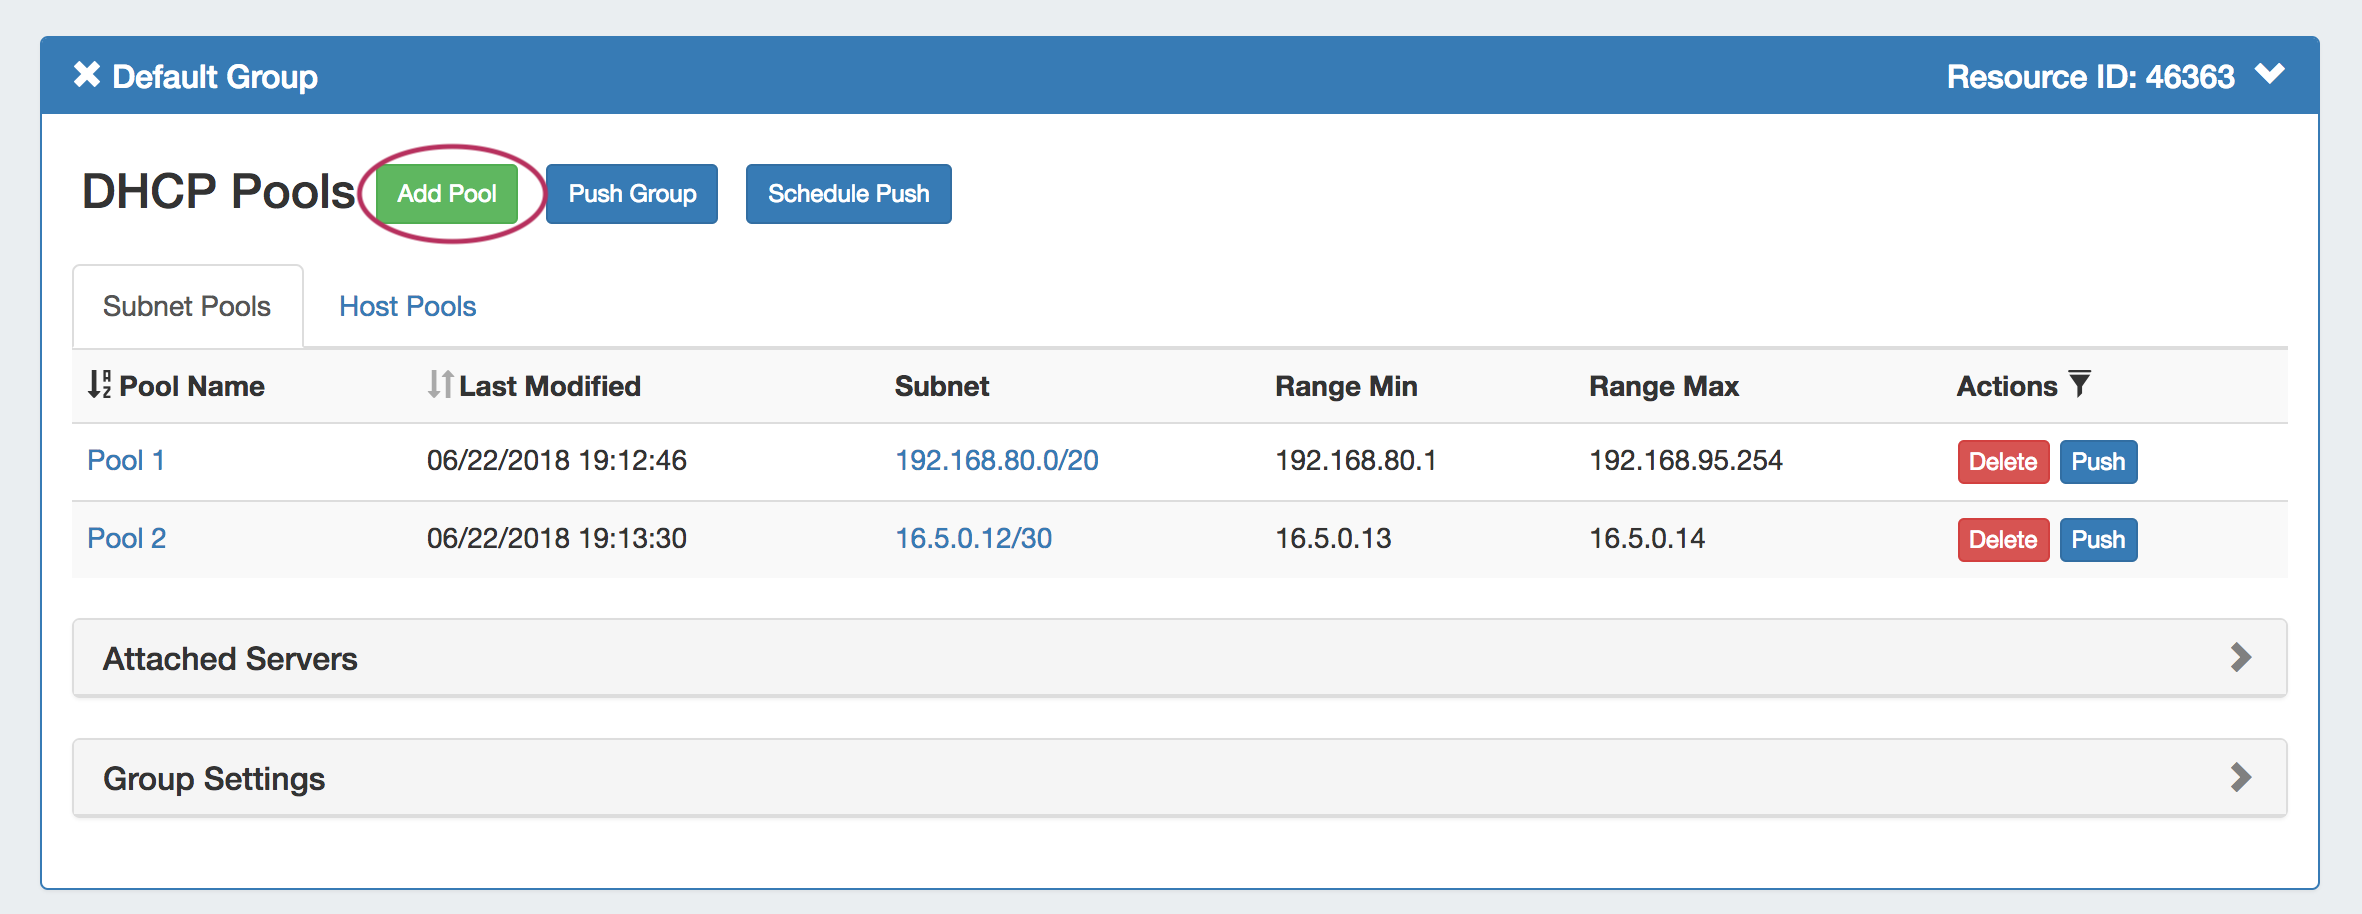
3) Add Pool Button: Opens a dialog for creating a DHCP Pool pool under that group.
4) Push Group Button: Pushes all pools in the group to the associated DHCP server.
5) Schedule Push Button: Schedules a push of all pools in the group to the selected day and time. Requires the scheduler tab / cron tasks to be enabled.
6) Pool List: Subnet and Host Pools host pools included in the Groupgroup.

7) Subnet / Host Pools Tabs: Shows zone list containing only forward or reverse zones, respectively.
...
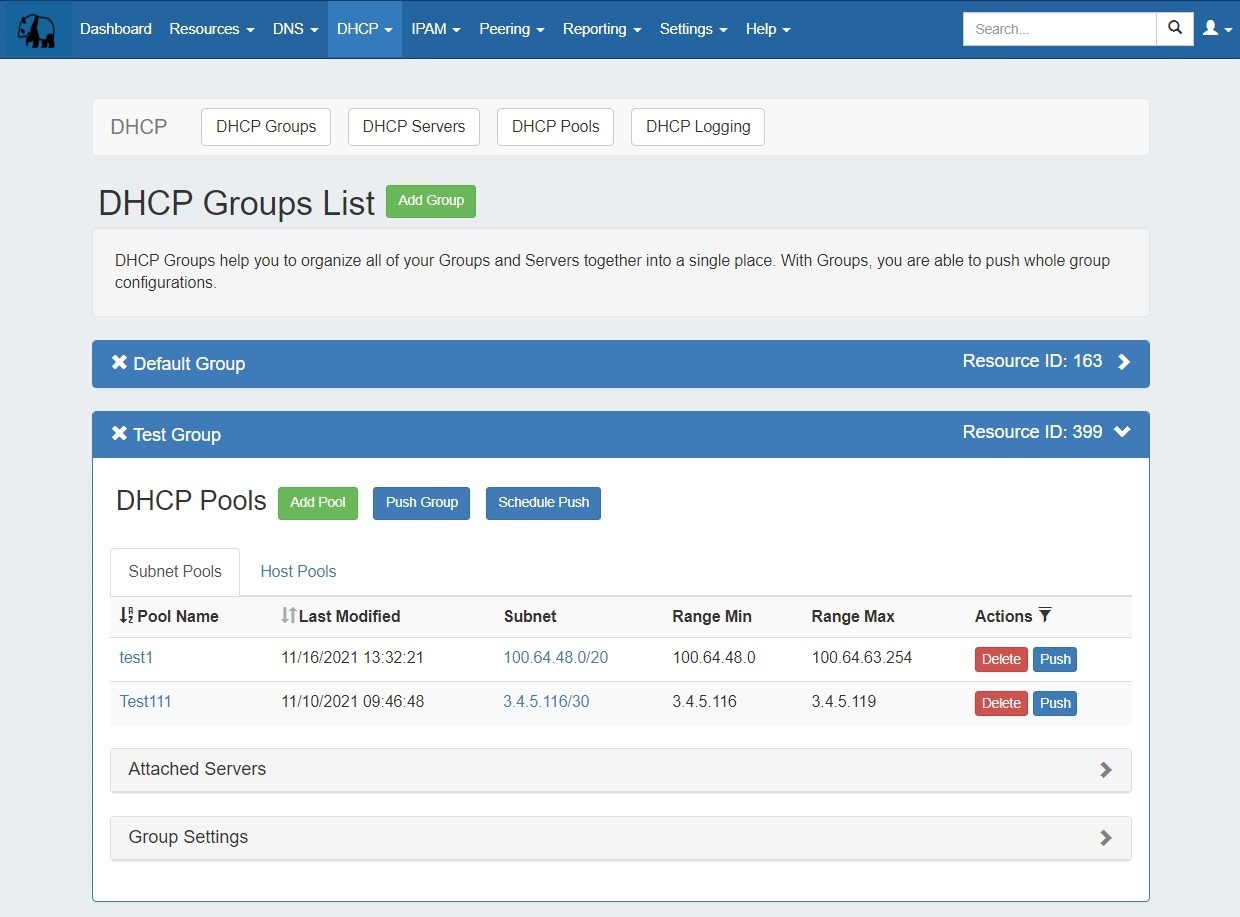
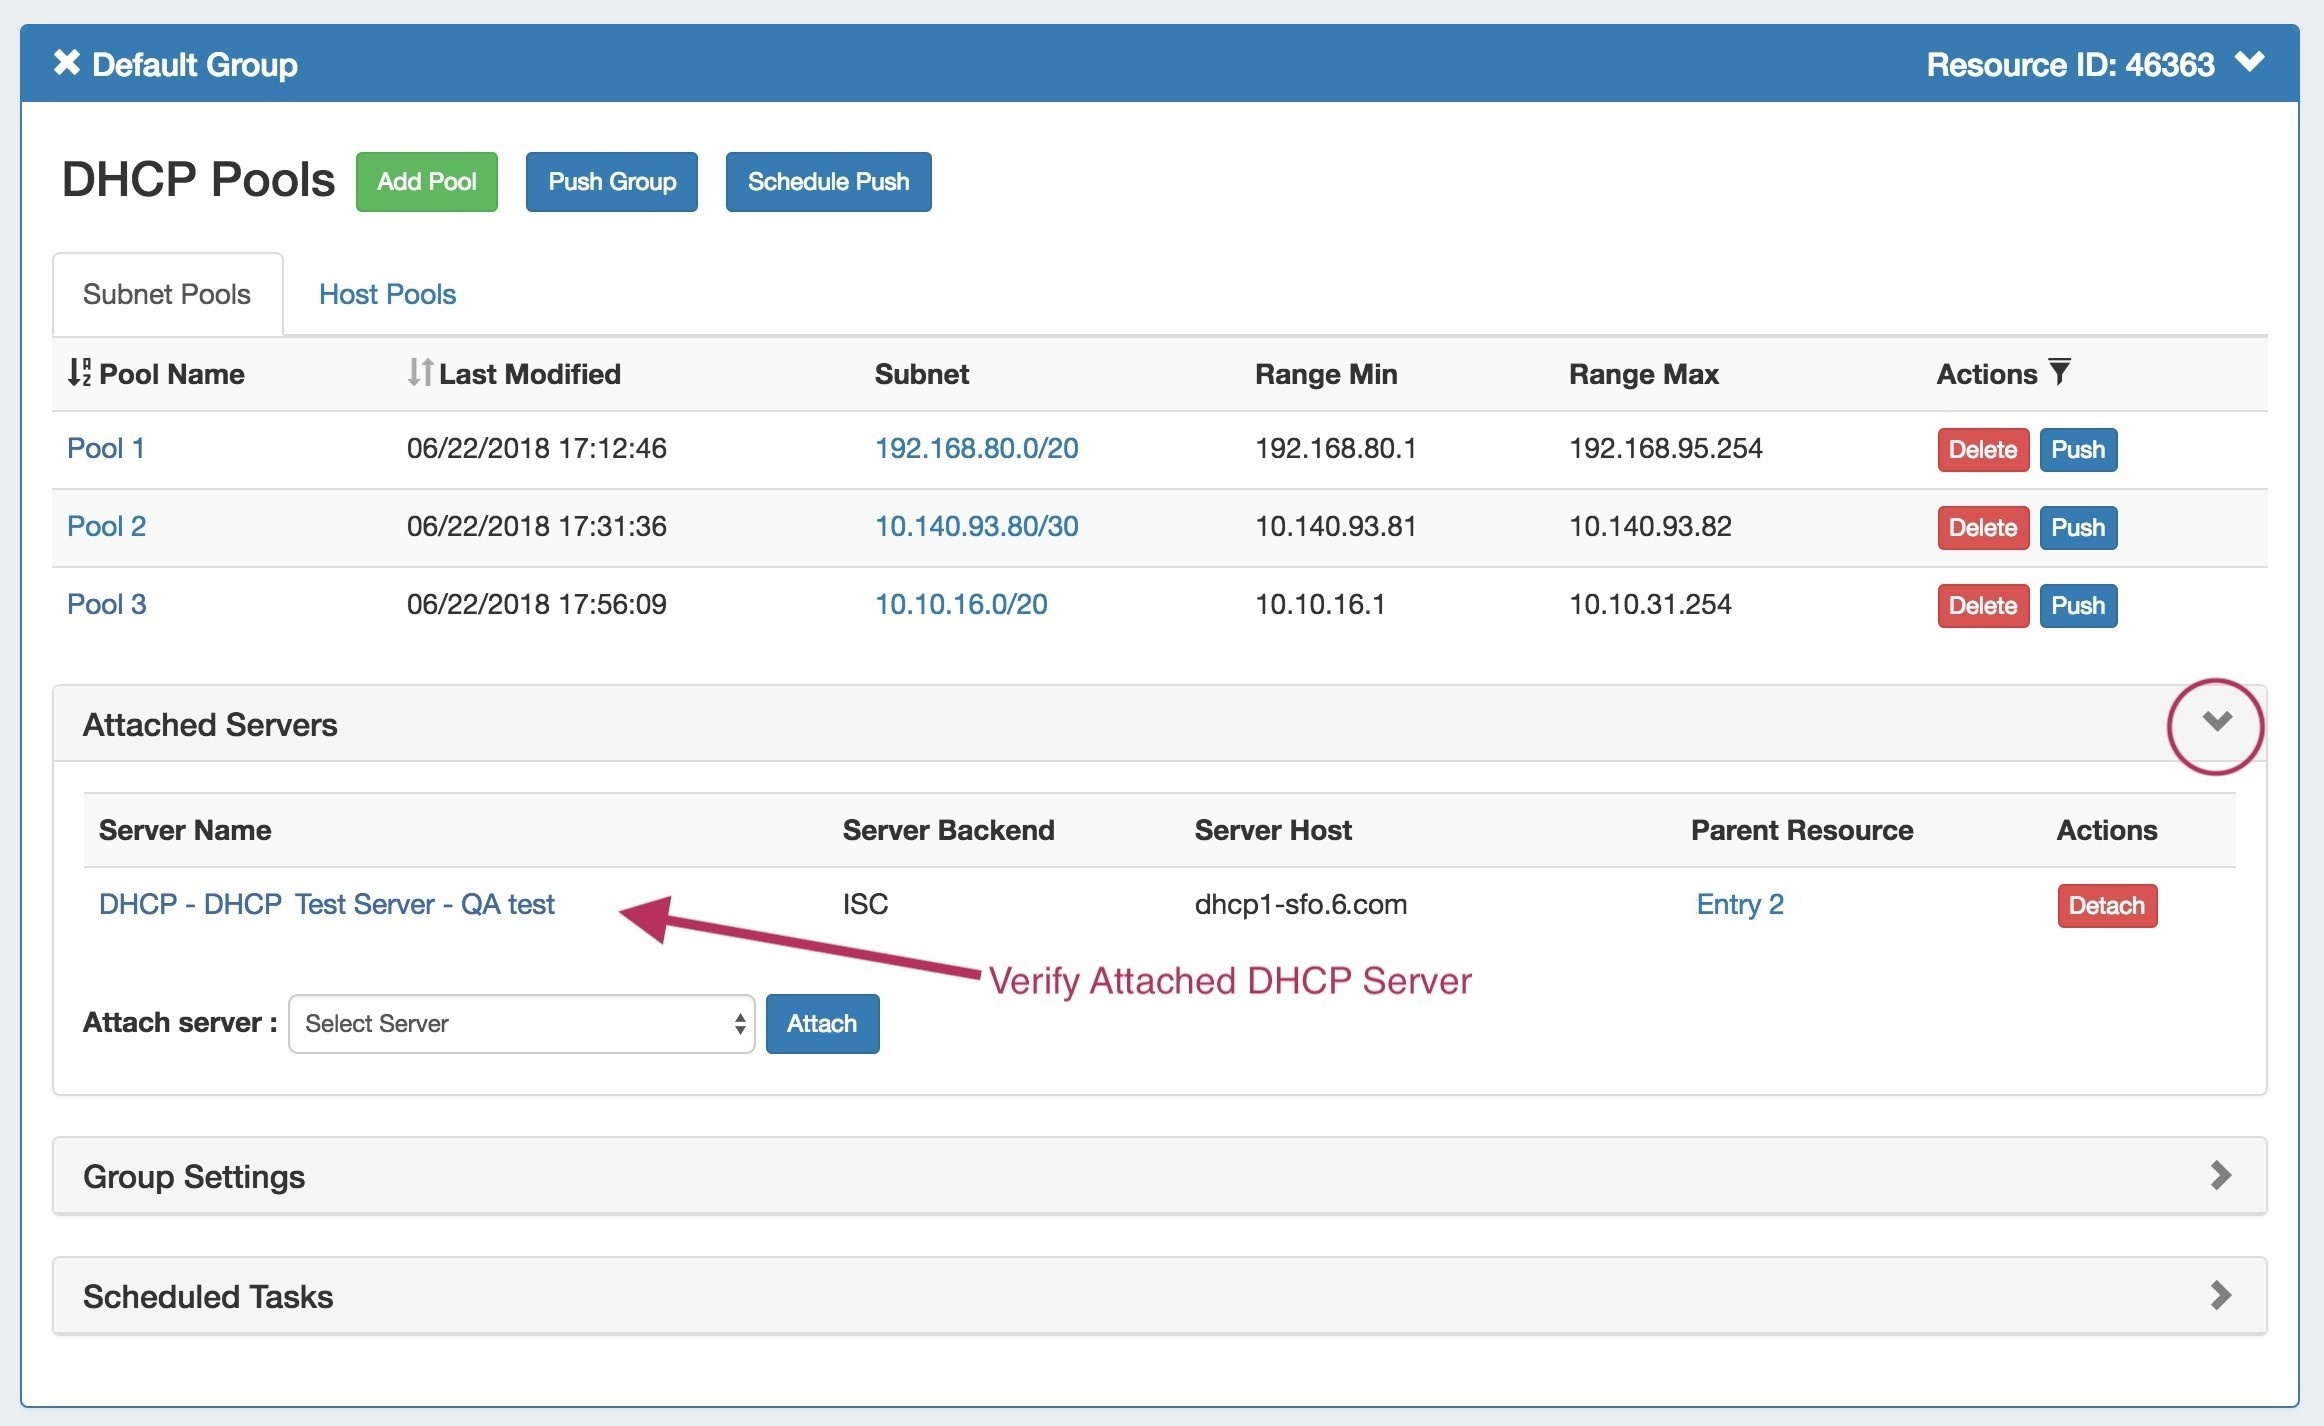
16) Attached Servers: Click on the header title or > to expand or collapse. View, attach, or detach a DHCP server from the group.


17) Group Settings: Click on the header title or > to expand or collapse. Edit default group settings including the Parent Resource and Failover name.
...
From here, you may review or delete scheduled group pushes.
Working with DHCP Groups
DHCP Groups groups allow for organizing multiple pools together and linking those pools with one or more servers. Pools may be pushed individually, as a Groupgroup, or at the server level.
ProVision automatically designates a A Default Group for pools to be imported or added into is automatically designated. Creating additional Groups groups is completely optional.
Add a Group
Create DHCP Groups groups by clicking the "Add Group" Button, then add subnet or host pools under the group by clicking "Add Pool" for the desired Groupgroup.
Pools may be pushed individually, as a part of a DHCP Groupgroup, or through pushing an entire DHCP Serverserver.
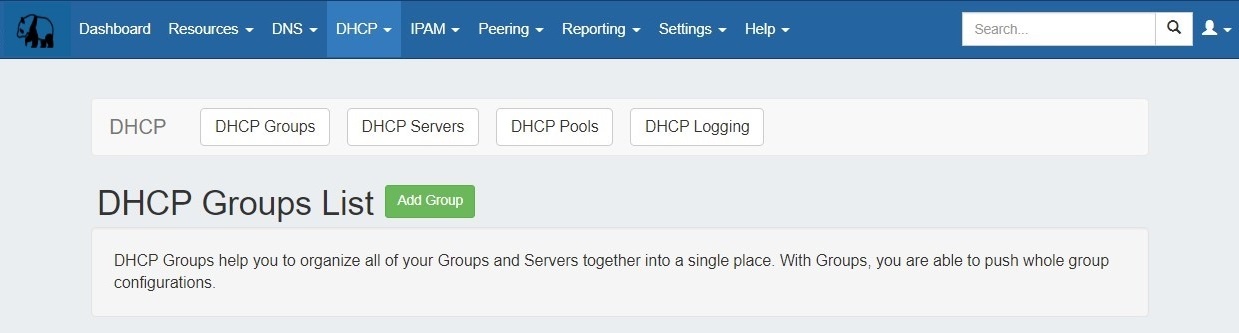
To create a new Groupgroup, from the the DHCP Tab Tab, select the the DHCP Groups sub sub menu. Then, click the "Add Group" button next to "DNS Groups List"at the top right of the page.

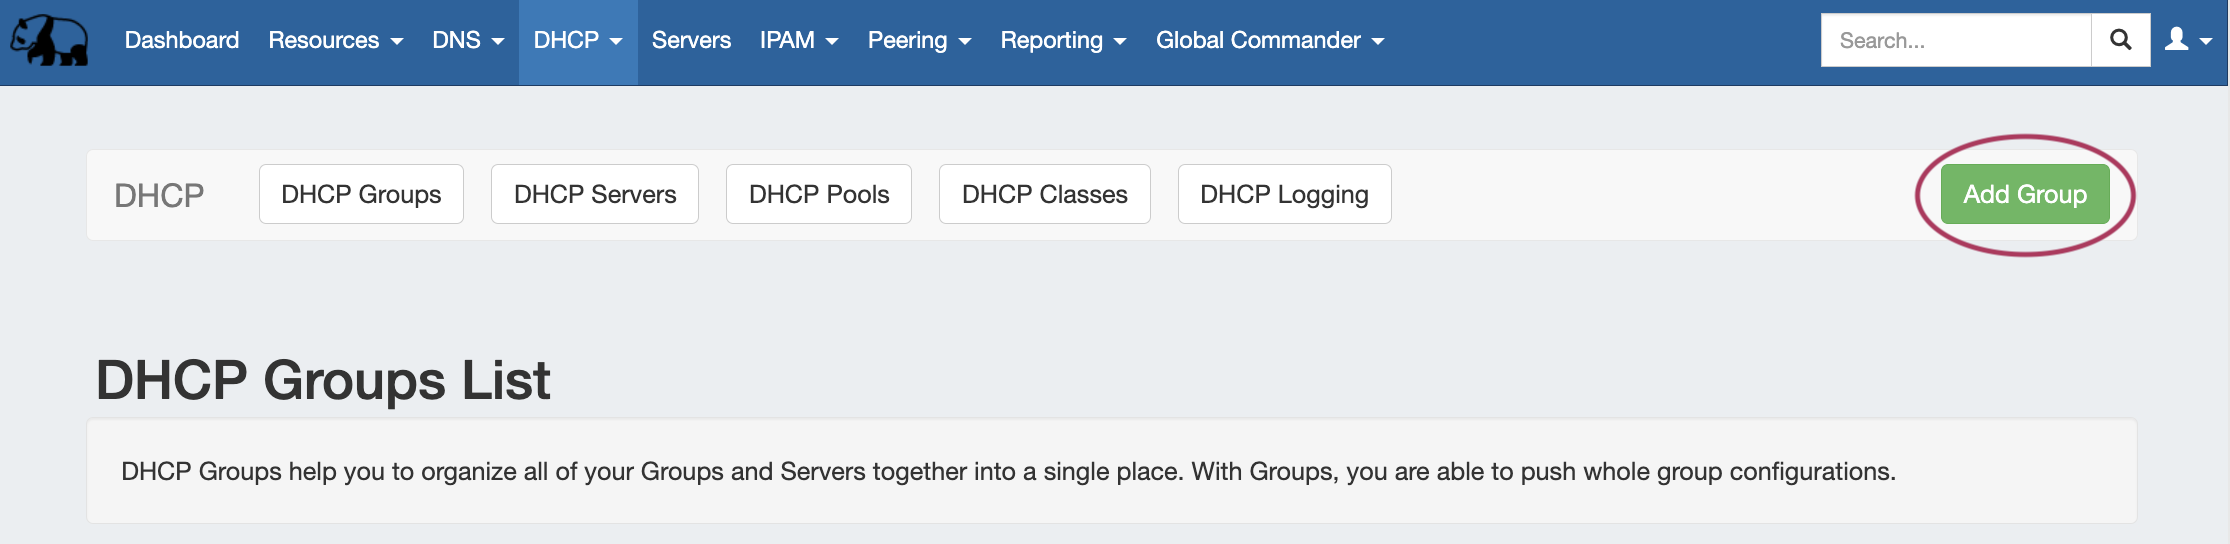
This will open the "Create New Group" dialog.
Enter the desired Group Name group name and select a parent resource.
...
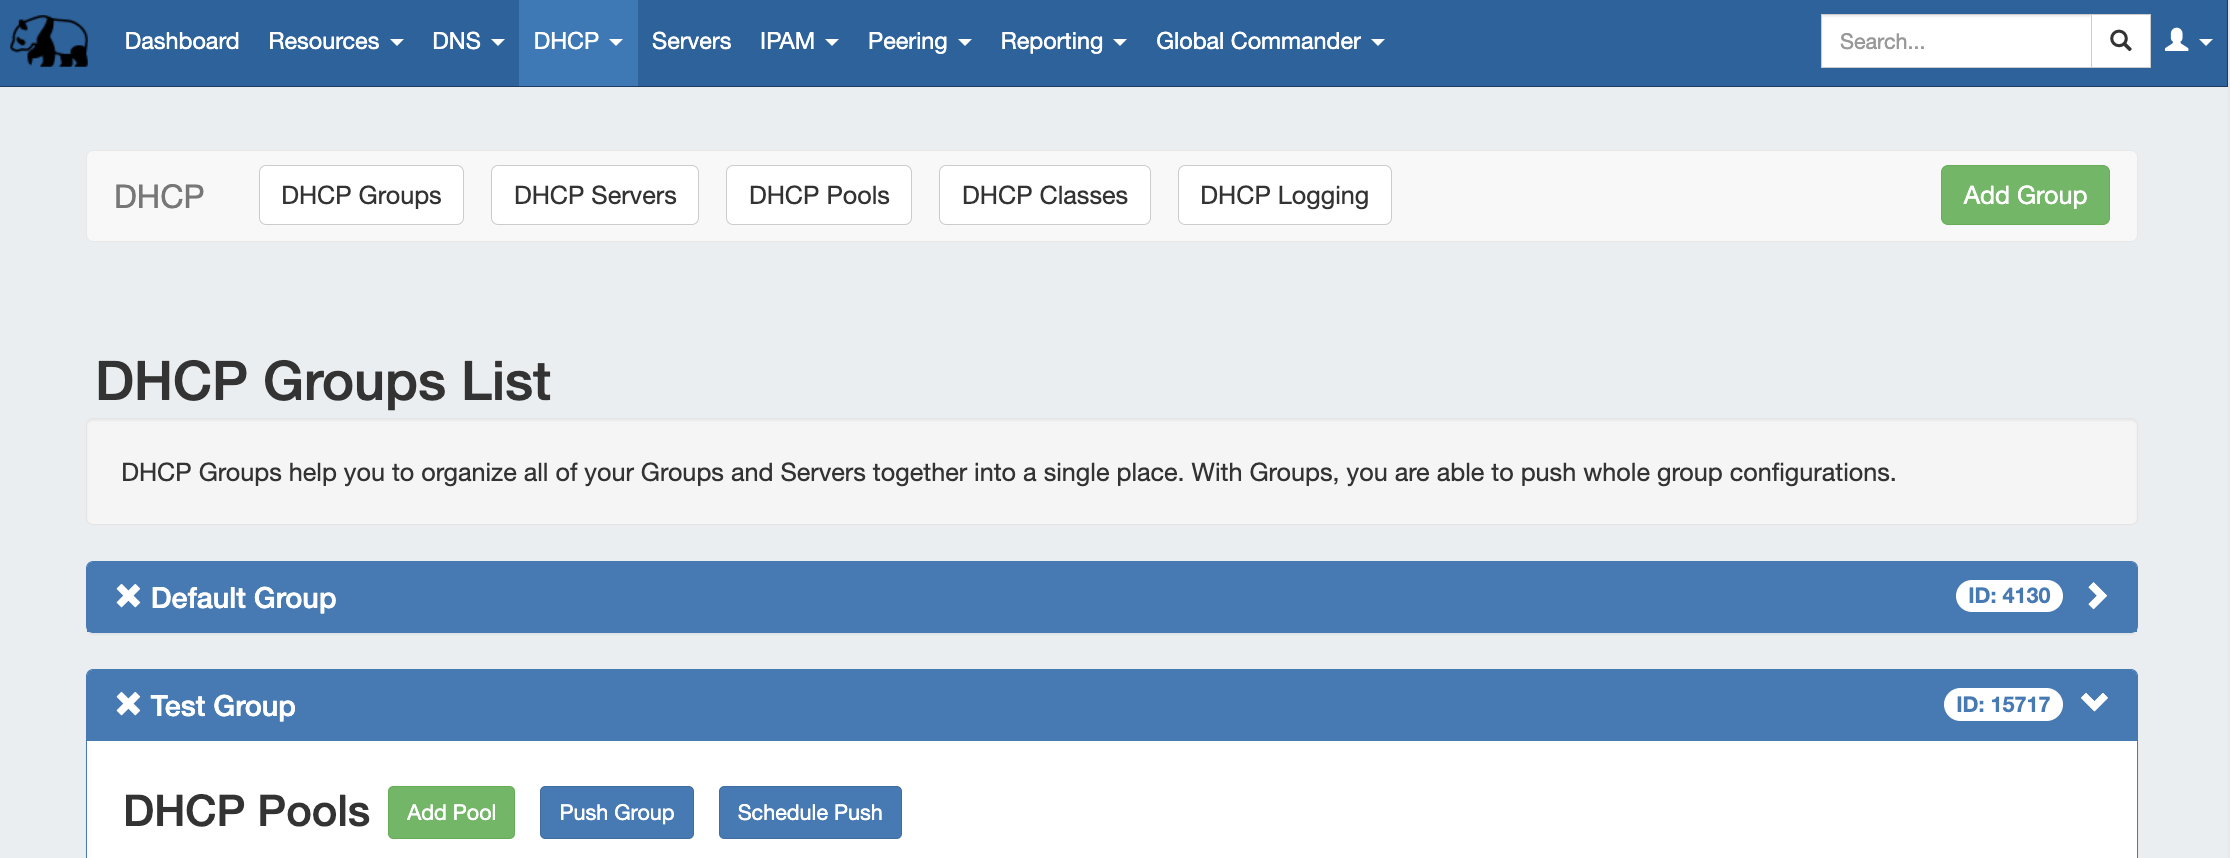
The new group will be added to the DHCP Groups List.
Open the Group group container for the new Group group by clicking on the expansion arrow at the top right corner of the header.
...
Edit a Group Name:
Edit the name for a Group group by clicking inside the Groupgroup's Namename. A highlight box will appear around the name, and a cursor inside the box.
...
Edit a Group's Settings:
Under the desired Groupgroup, expand the "Group Settings" module by clicking on the expansion arrow in the upper right corner of the header.
...
Change the parent resource for the DHCP Group group by searching and selecting the desired resource from the dropdown box.
...
To add a new pool to a DHCP Groupgroup, click the "Add Pool" button inside the desired Groupgroup.
Add a Subnet Pool
To add a new subnet pool to a DHCP Groupgroup, select "Subnet" as the Pool Type. Select the parent resource and type in a Subnet Namesubnet name.

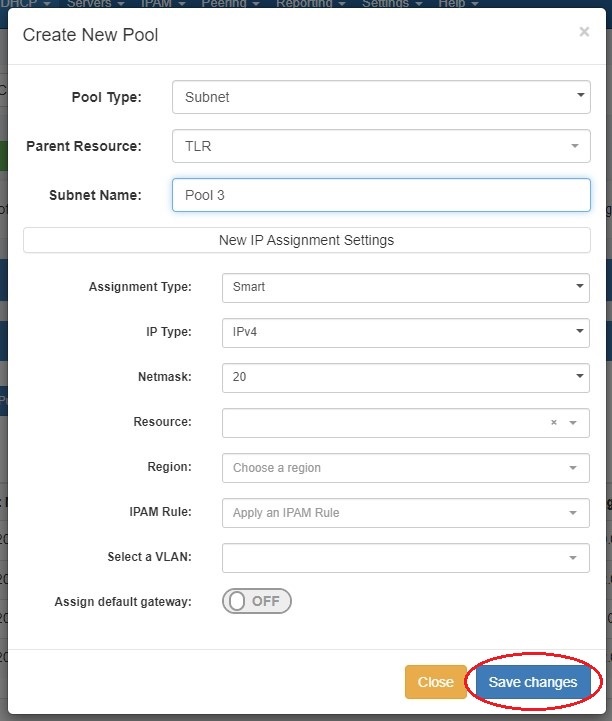
Next, choose an assignment type - you may either have ProVision smart assign a block for the pool that matches your provided criteria, or directly assign a specific block.
...
If no block matches the given criteria, a message will state so. Try either removing some criteria, or ensure that blocks exist in IPAM (with subassignments enabled!) with the given attributes.
Direct Assign

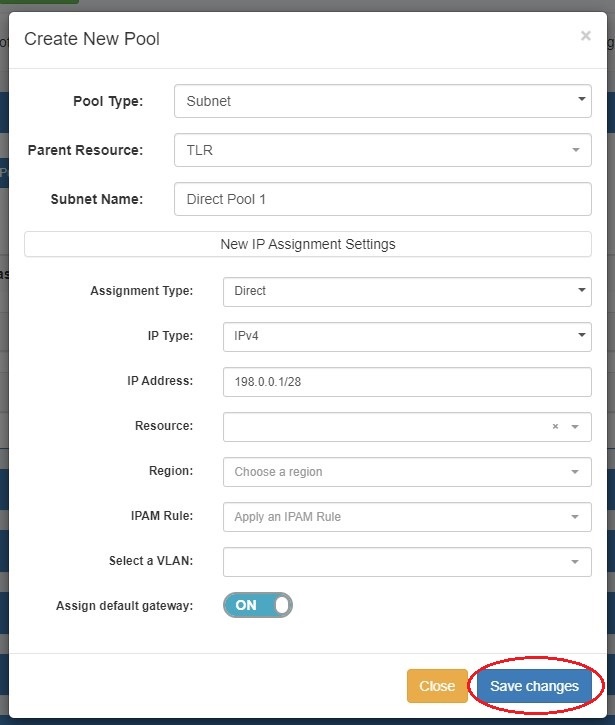
To Direct Assign a DHCP pool, select "Direct" for the Assignment assignment type, choose IPv4 or IPv6 for the IP type, then type in the desired IP Addressaddress.
All other fields are optional - Resource, Region, IPAM Rules, and VLAN may be selected to further narrow the block criteria, if duplicate blocks exist. If desired, toggle "Assign Default Gateway" on.
When done, click "Save Changes". If the typed block exists in ProVision , with subassignments enabled, and meets any additional criteria, that block will be assigned to the pool.
...
To add a new host pool to a DHCP Groupgroup, select "Host" as the Pool Typepool type. Select the parent resource, and add a Hostname hostname and MAC Addressaddress.


Next, choose an assignment type - you may either have ProVision smart assign a block for the pool that matches your provided criteria, or directly assign a specific block.
...
To Smart Assign a DHCP pool, select "Smart" for the Assignment assignment type and choose IPv4 or IPv6 for the IP type.
...
If no block matches the given criteria, a message will state so. Try either removing some criteria, or ensure that blocks exist in IPAM (with subassignments enabled!) with the given attributes.
Direct Assign

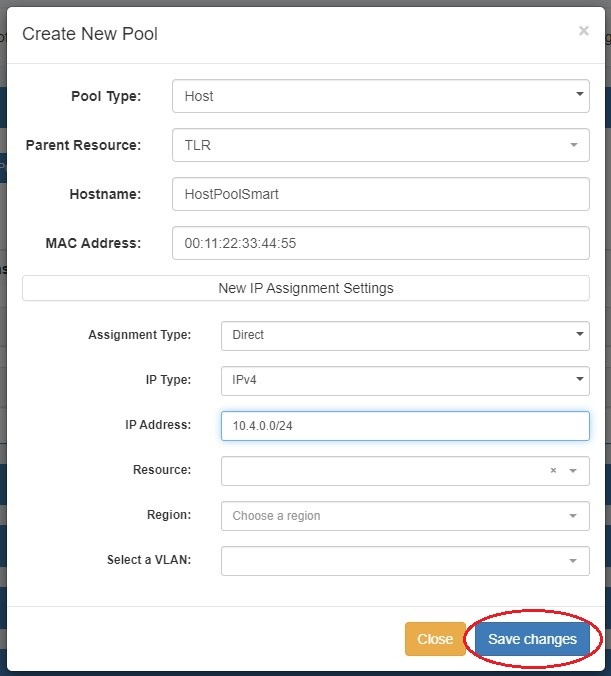
To Direct Assign a DHCP pool, select "Direct" for the Assignment assignment type, choose IPv4 or IPv6 for the IP type, then type in the desired IP Addressaddress.
All other fields are optional - Resource, Region, IPAM Rules, and VLAN may be selected to further narrow the block criteria, if duplicate blocks exist.
When done, click "Save Changes". If the typed block exists in ProVision , with subassignments enabled, and meets any additional criteria, that block will be assigned to the pool.
...
Before pushing a group, expand the "Attached Servers" section and verify that the correct server is attached to the DHCP Groupgroup.

Manual Group Push
After verifying the attached server, manually push the Group group by clicking the "Push Group" button under the desired DHCP Groupgroup.
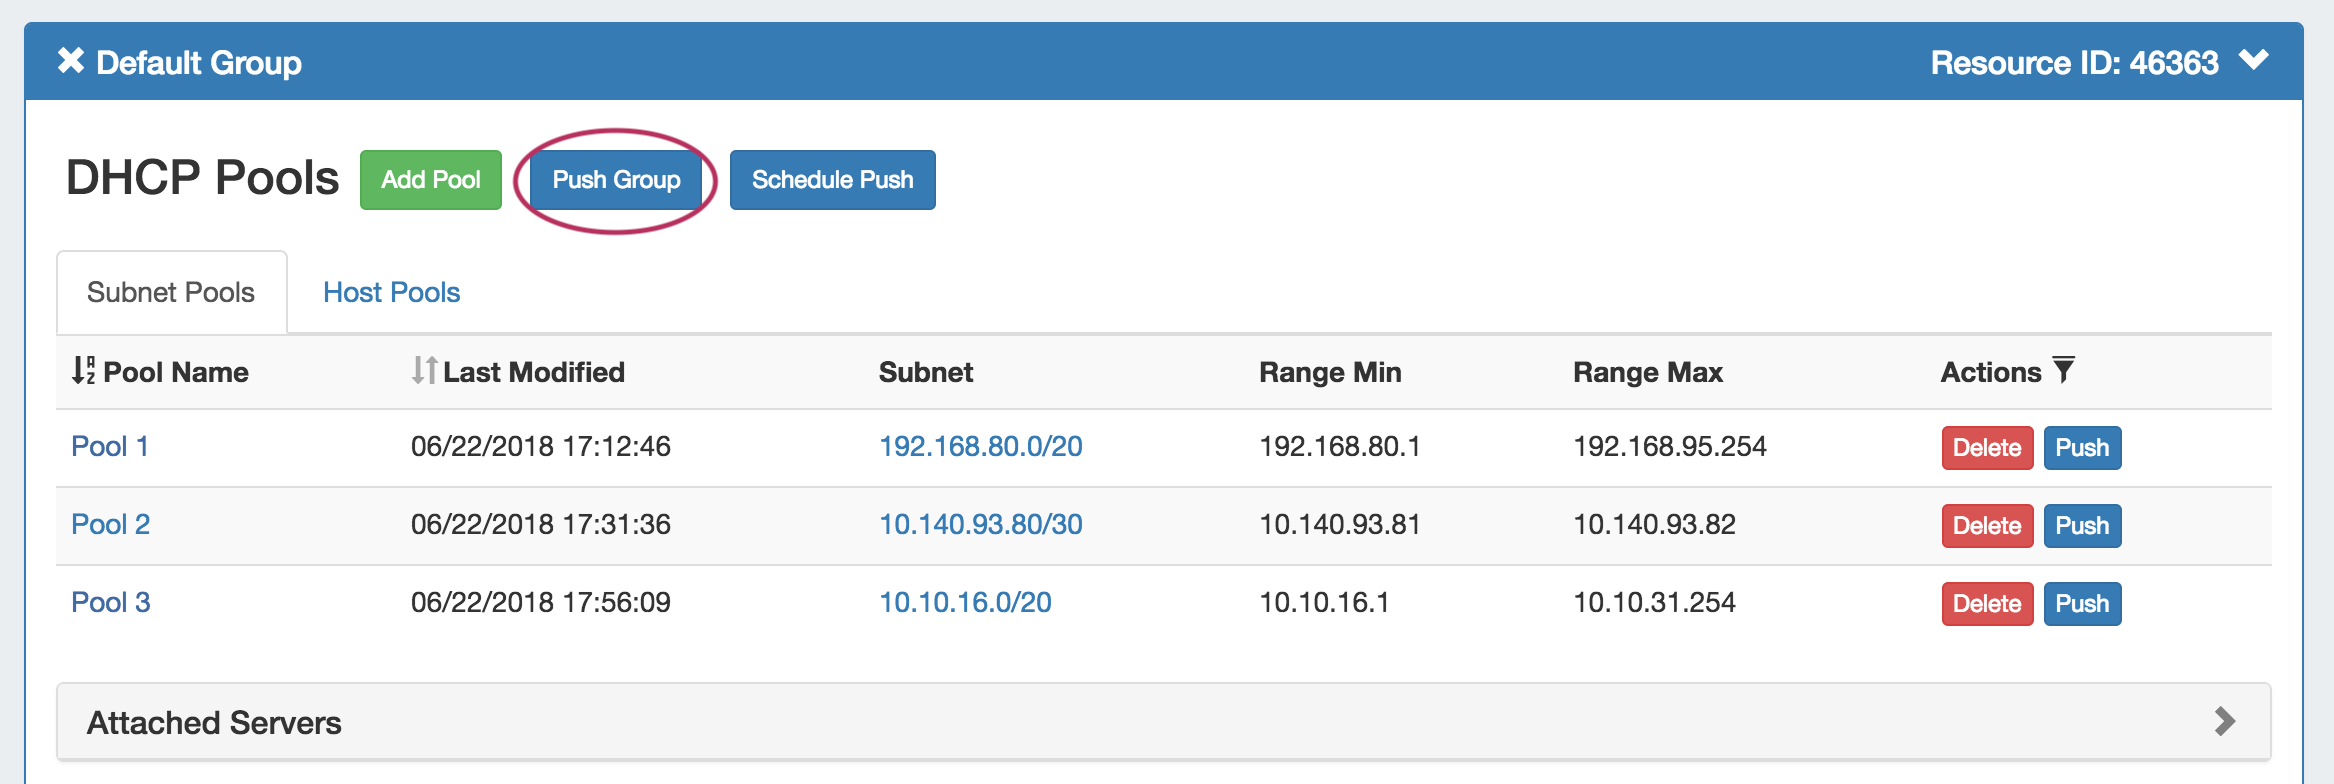
A DHCP Push Status window appears. If successful, a green "Finished DHCP Pushing Request" will appear as the final message.
...
Scheduled pushes may be set up through the "Schedule Push" button for the Groupgroup.
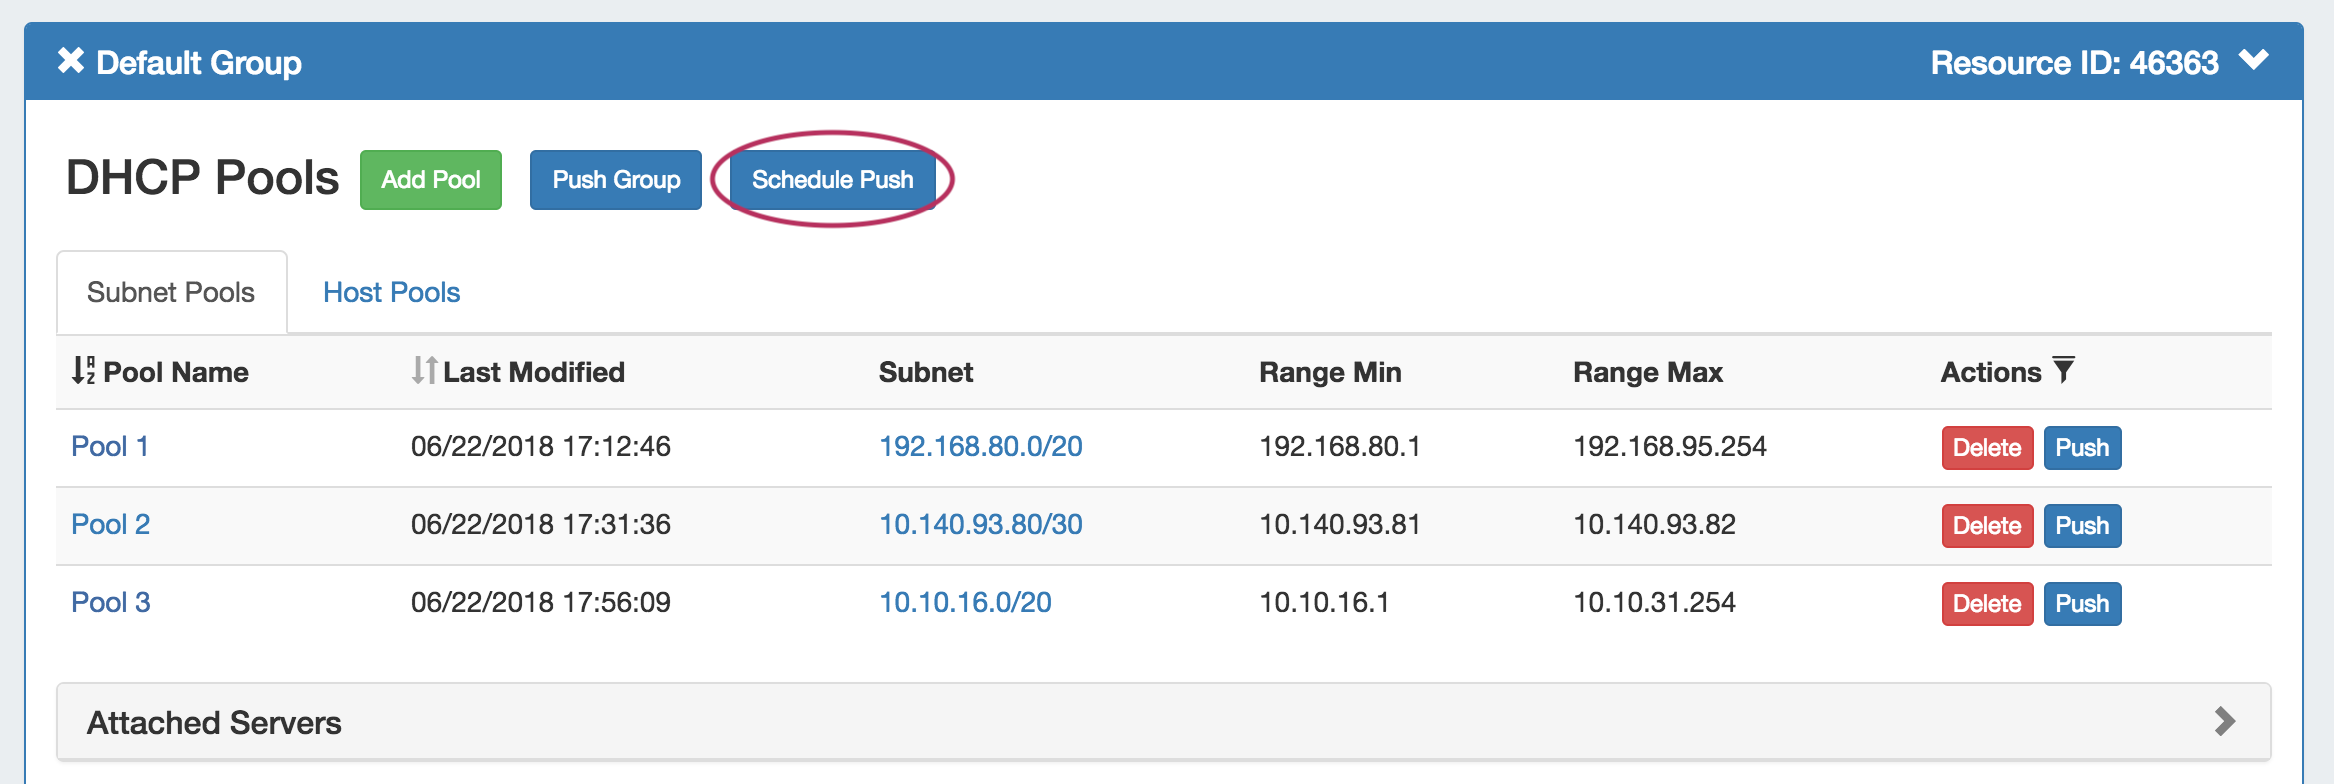
Click "Schedule Push" for the Groupgroup, then select a date, time (24 hour), add a notification email address, and click "Save changes".
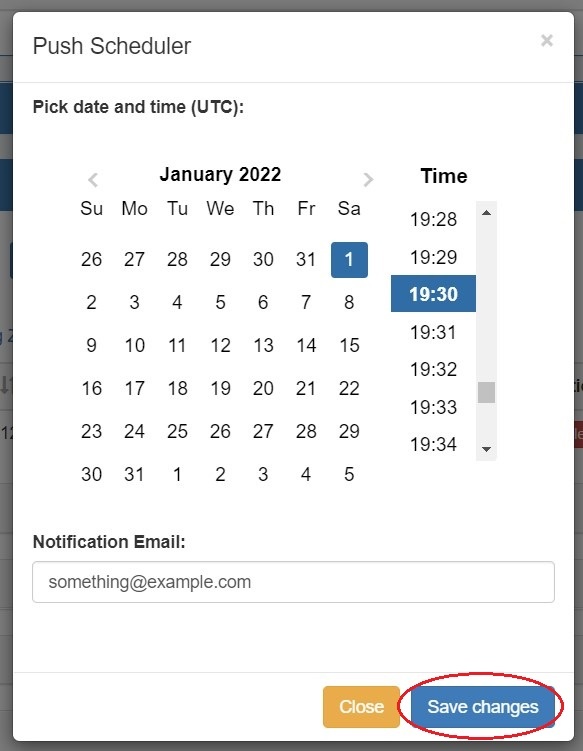
The Scheduled scheduled task will be shown in both the Group group details (under "Scheduled Tasks") and the the Admin Scheduler task list.
...
Delete a non-Default Group by clicking on the "X" to the left of the Groupgroup's name in the DHCP Groups List. When you delete a DHCP Groupgroup, pools under the group will not be deleted. They will no longer be associated with a DHCP Groupgroup, and can be managed from the DHCP Pools listList.


A confirmation message will appear, click "Confirm" to save your changes, or "Close" to exit without saving.
...
For more information on DHCP tasks, see:
Administrative Tasks: