Workflow Concepts
| Table of Contents |
|---|
IP Assignment Lifecycle
In ProVision, the IP assignment lifecycle starts with an available block. When assigning the block to a resource, there are multiple methods that may be used: Smart Assign, Direct Assign, or Manual Assign (Smart Browse). Once assigned to a Resource, blocks can be further subassigned via the same methods. When a block is unassigned, it proceeds into the Holding Tank, where blocks are held until either a set time has elapsed, or until they are manually reclaimed to 'available' status.
...
IP Management
IP Management is comprised of four basic functions: adding aggregates into ProVision, managing those aggregate blocks, assigning them to a resource, and deleting the aggregates.
...
Peering
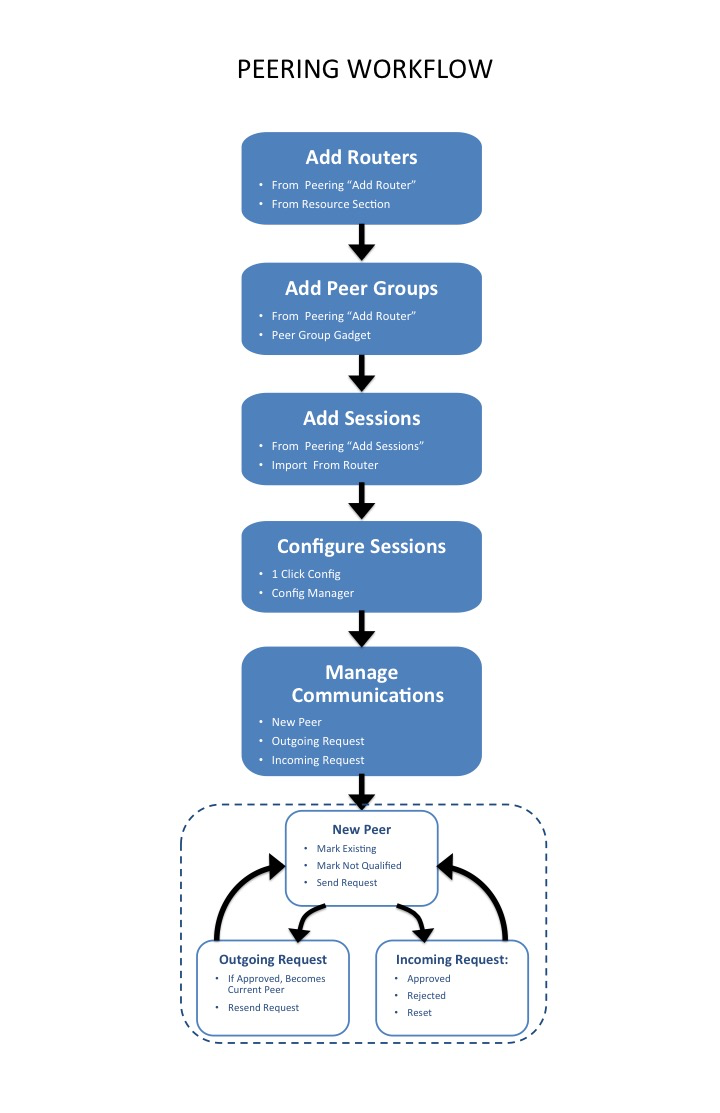
In ProVision, Peering starts with designating Routers. Routers may be added through the Resource system under a router Section, but the simpler approach is to add a new router via the "Add Router" button under the Peering Tab. Through this dialog, Peer Groups may be added at the same time.
After the router(s) and Peer Groups have been created in ProVision, Sessions need to be added. Sessions may be added manually through the "Add Session" dialog in the Peering tab, or Imported from a router (requires ProVision Admin permissions). Once a session has been created, it can be configured and managed through the Sessions list. The Peer that is associated with the session is added to the Peer Communications list, where communications and status may be managed.
For more information on performing tasks under Peering, see the following documentation sections:
