...
Go to the 6connect Admin area and click on the DNS Admin Tab. Click on the New Server button.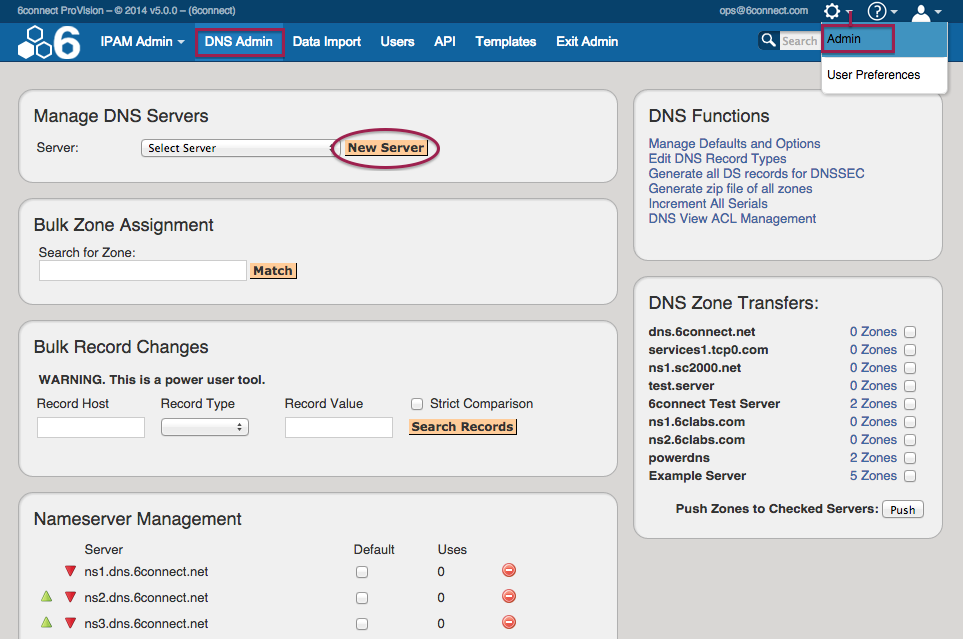

Then fill in the information for your Secure64 server (including any relevant SOA information):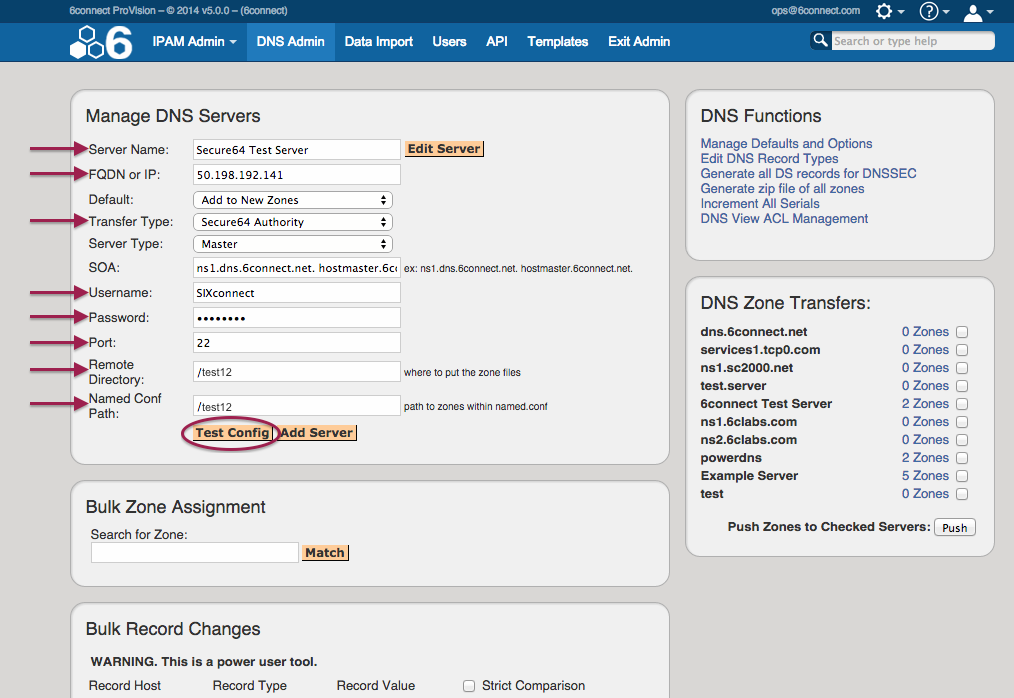

Step 4: Test the Secure64 DNS Server configuration
Press the Test Config button for the DNS Server you setup.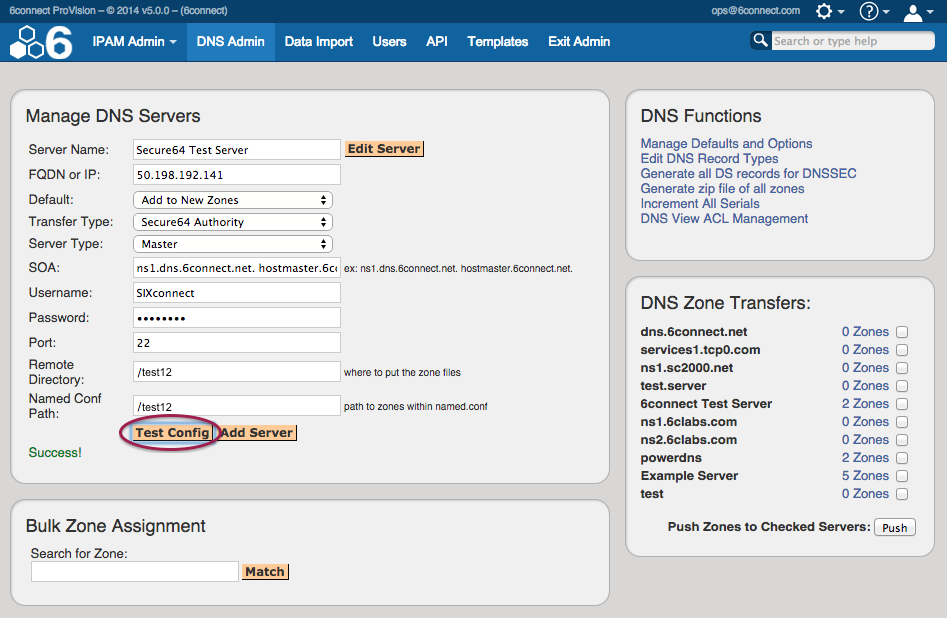

Success! Will show as depicted above.
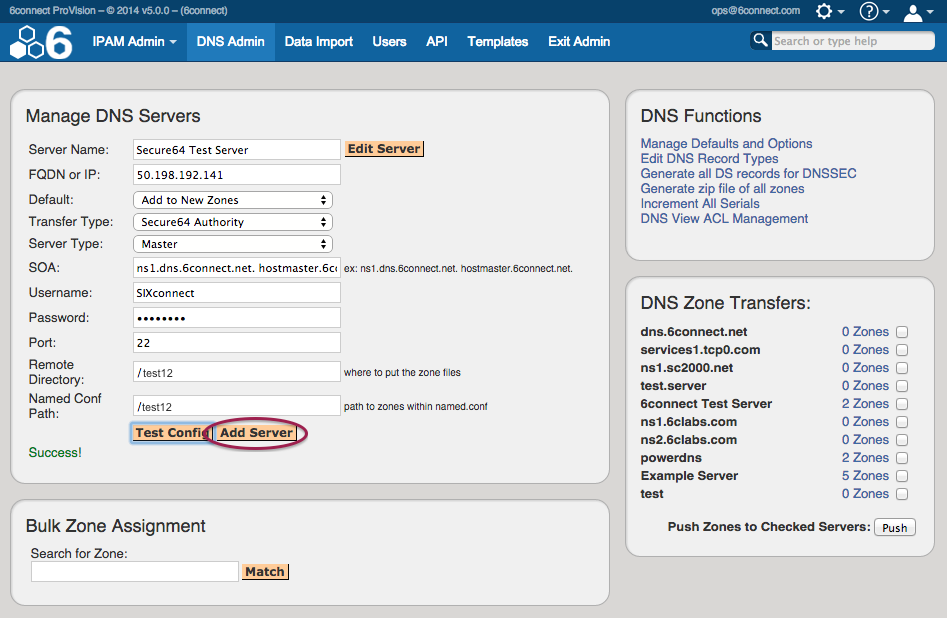
Click Add Server to add this server as a permanent entry in the dropdown menu. This server will now be available for assigning DNS zones to.

Step 5: Assign any imported/existing zones to your Secure64 DNS Server(s)
Select the "Bulk DNS Change Tools" link under the DNS Defaults and Tools section of the page.

Search for all available zones or enter in a value to find specific existing zones in the system. 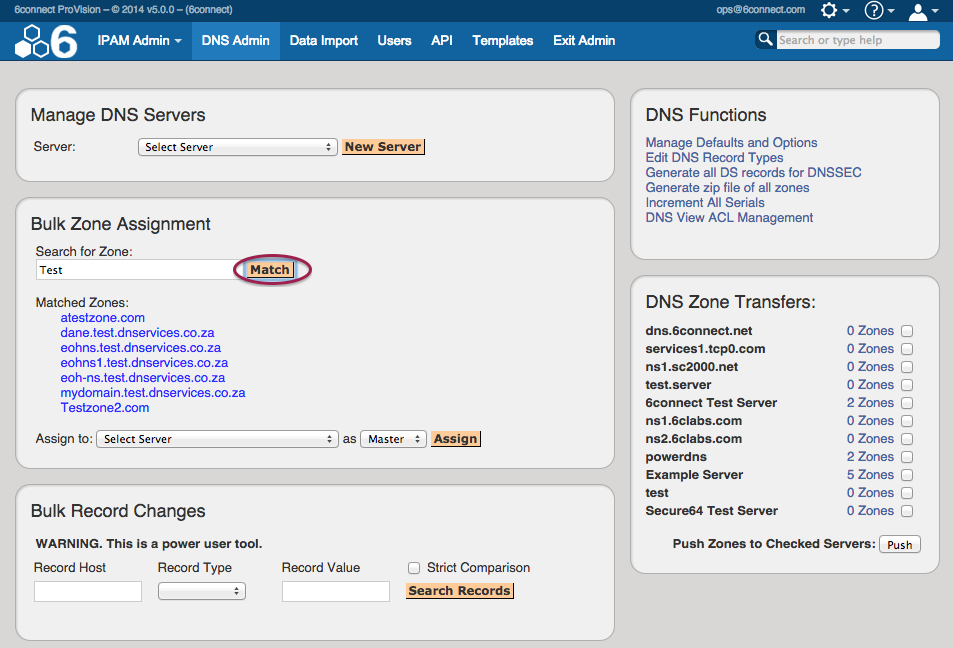 Click the "Match" button to see results.
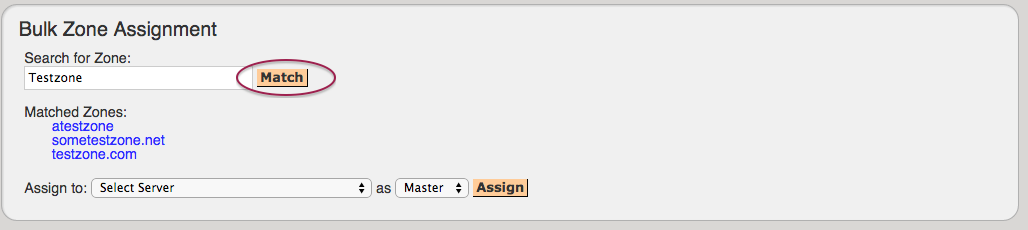
| Info | ||
|---|---|---|
| ||
No character in the search area indicates a search for all zones as shown below |
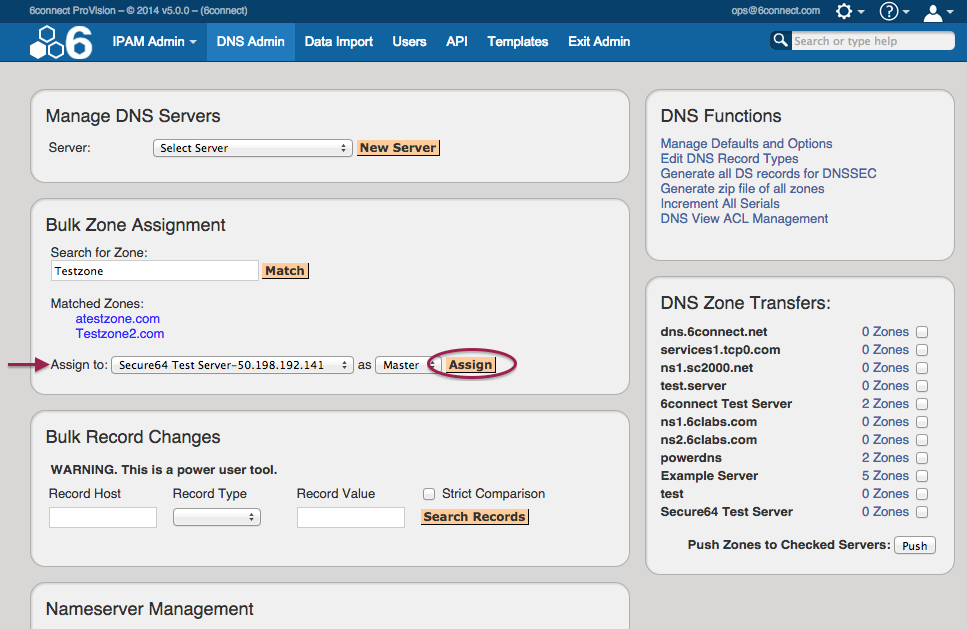
Select the Select Server and as Master dropdowns and Assign the Select the Secure64 server under Assign To, choose whether as a Master / Slave, and hit "Assign" to assign the above zones to this server.
Step 6: Push Zones to Secure64 Server(s)
Under DNS Zone Transfers, verify the server and the zones to transfer. To view the zone names, click on the # Zones link next to the server.
Check the # Zones box and click on the Push button to transfer the zones to this server.![]()

The system will present the following live progress bar.
Towards the bottom of the progress status will be the final indication of success or errors to correct.
...