...
| Expand |
|---|
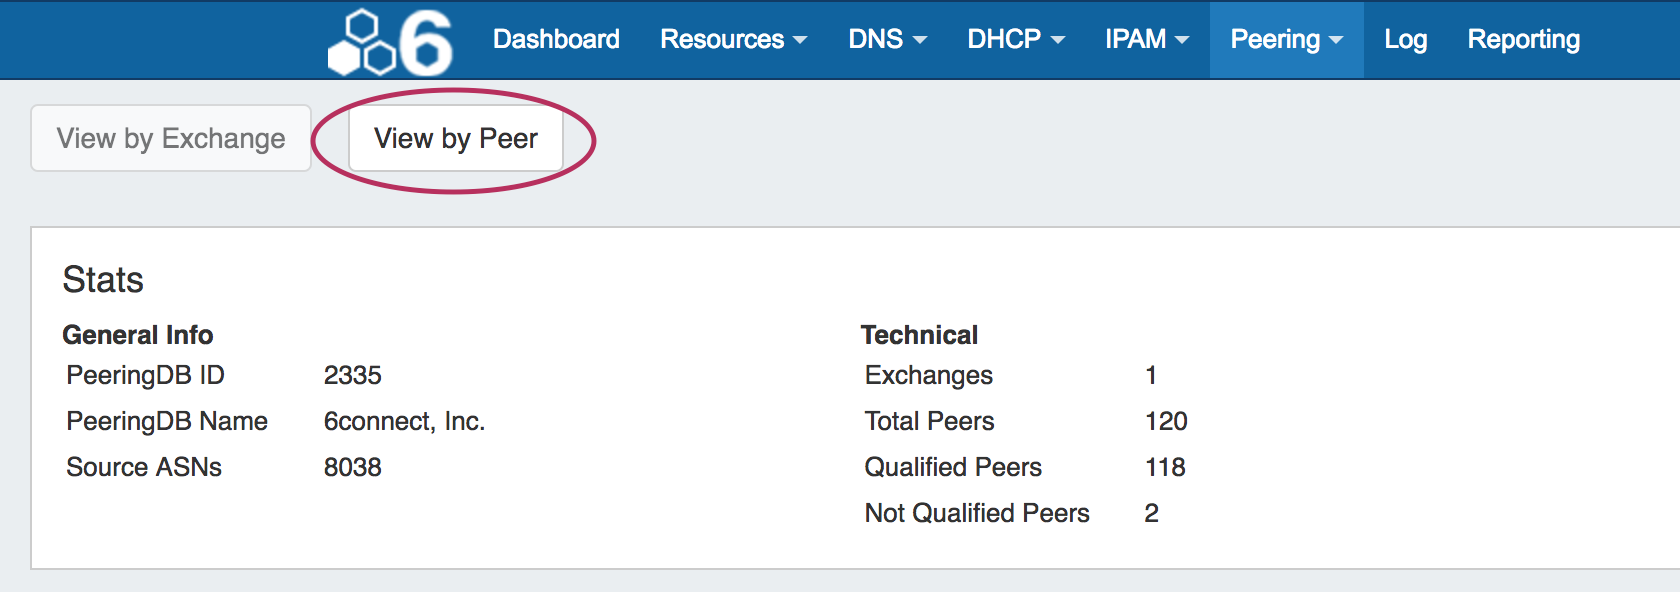
To see "View by Peer", navigate to the ProVision Peering Tab. At the top left of the page, click the "View by Peer" button.
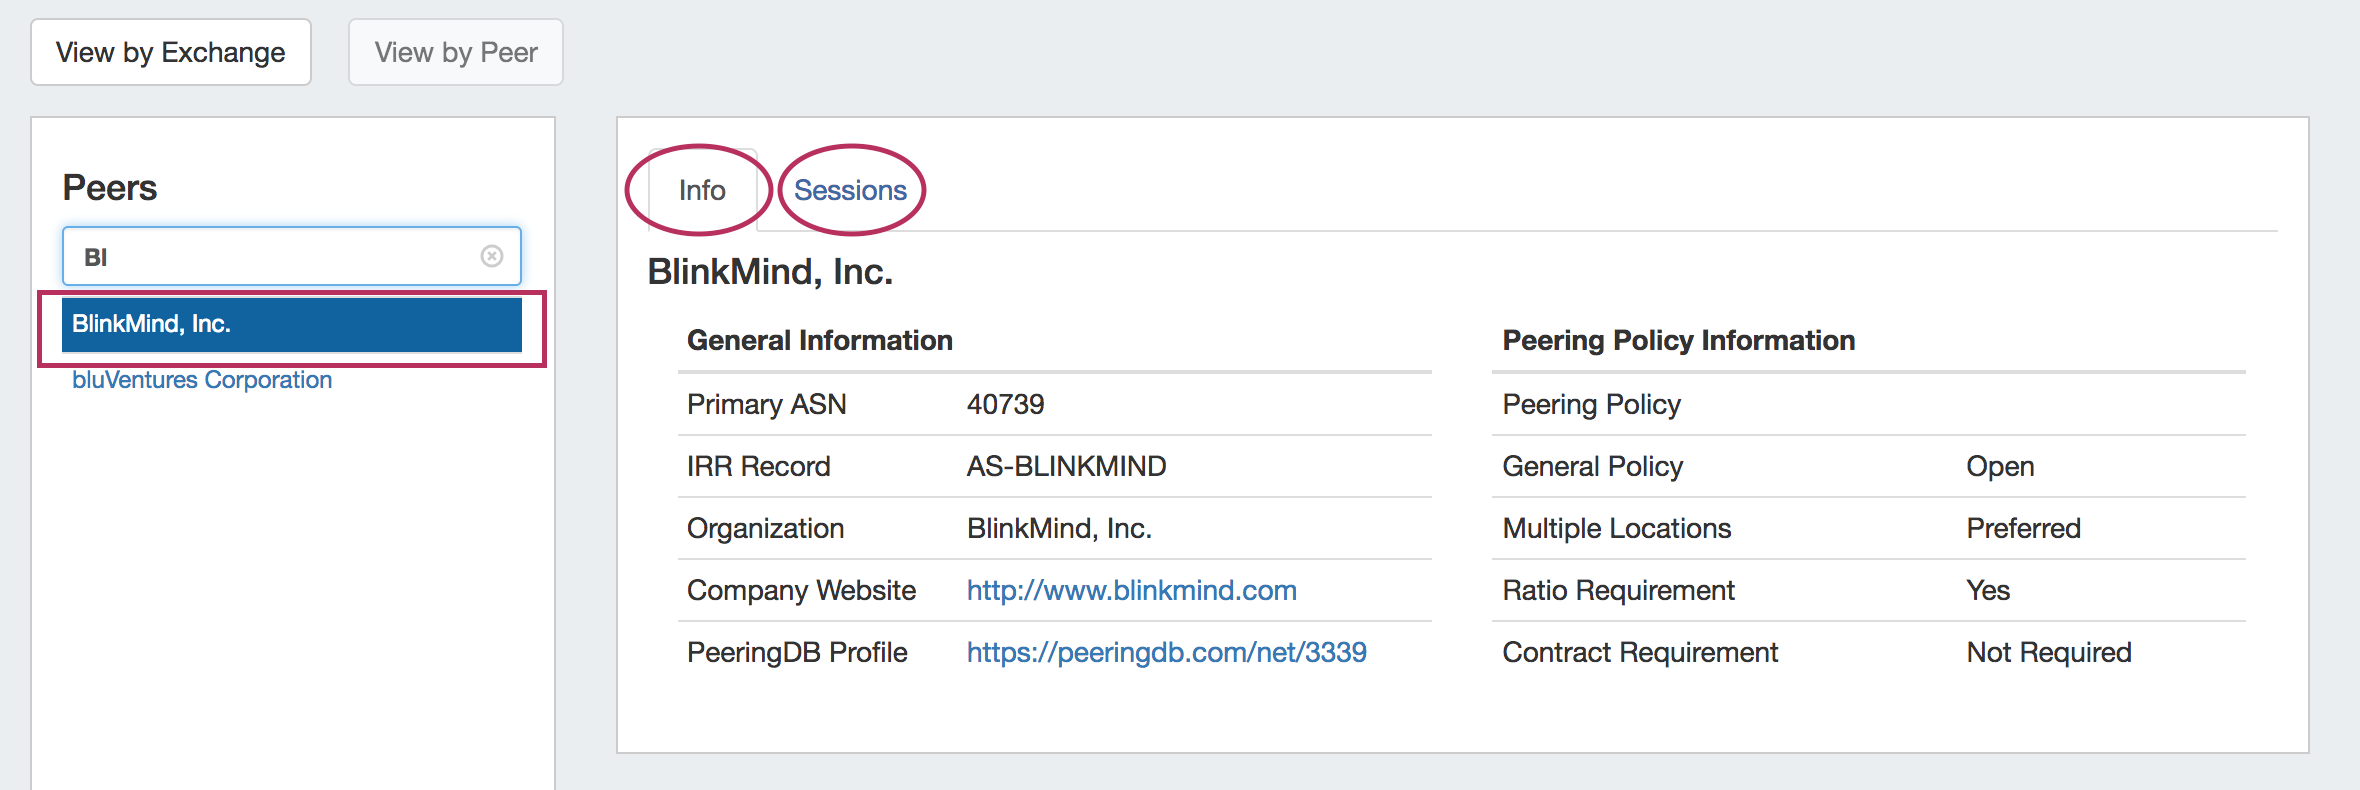
On the "View by Peer" page, click on a Peer from the list on the left. You may also filter the list by typing a few characters from the Peer name into the filter box. Once a Peer is selected, View information and sessions for that peer by clicking on the "Info" and "Sessions" tabs at the top of the center information panel.
When done, return to the main Peering Tab by clicking on the "View by Exchange" toggle at the top of the page. |
DNS Autogenerator Gadget
The DNS Autogenerator Gadget uses the Hostname field (6c-hostname-fqdn) of the Resource to generate a list of DNS forward and reverse zone entries based on the blocks assigned to the Resource in the IPAM Gadget It will generate a list of potential zone records - just select the ones you want to create, save the changes and you are ready to push the zones. See Gadgets - DNS Autogenerator for more details.
| Expand | ||
|---|---|---|
| ||
Enabling the DNS Autogenerator To set up this Gadget, ensure that the Section of the Resource (typically, "Resource Holder" ), has the "Hostname" field (6c-hostname-fqdn) and the DNS Autogenerator Gadget added to the Section. (See: Customizing Sections and Customizing Fields). Then, check that the Resource itself has information entered into the "Hostname" field. If the field is already filled out, it will show in the "Fields" information area at the bottom of the Resource Entry page. To add or edit the hostname, click "Edit" at the bottom of the resource entry page, add the information to the Hostname field, and click "Save". Once a hostname has been associated with a Resource, and the page refreshed, the DNS Autogenerator Gadget will be visible. |
| Expand | ||
|---|---|---|
| ||
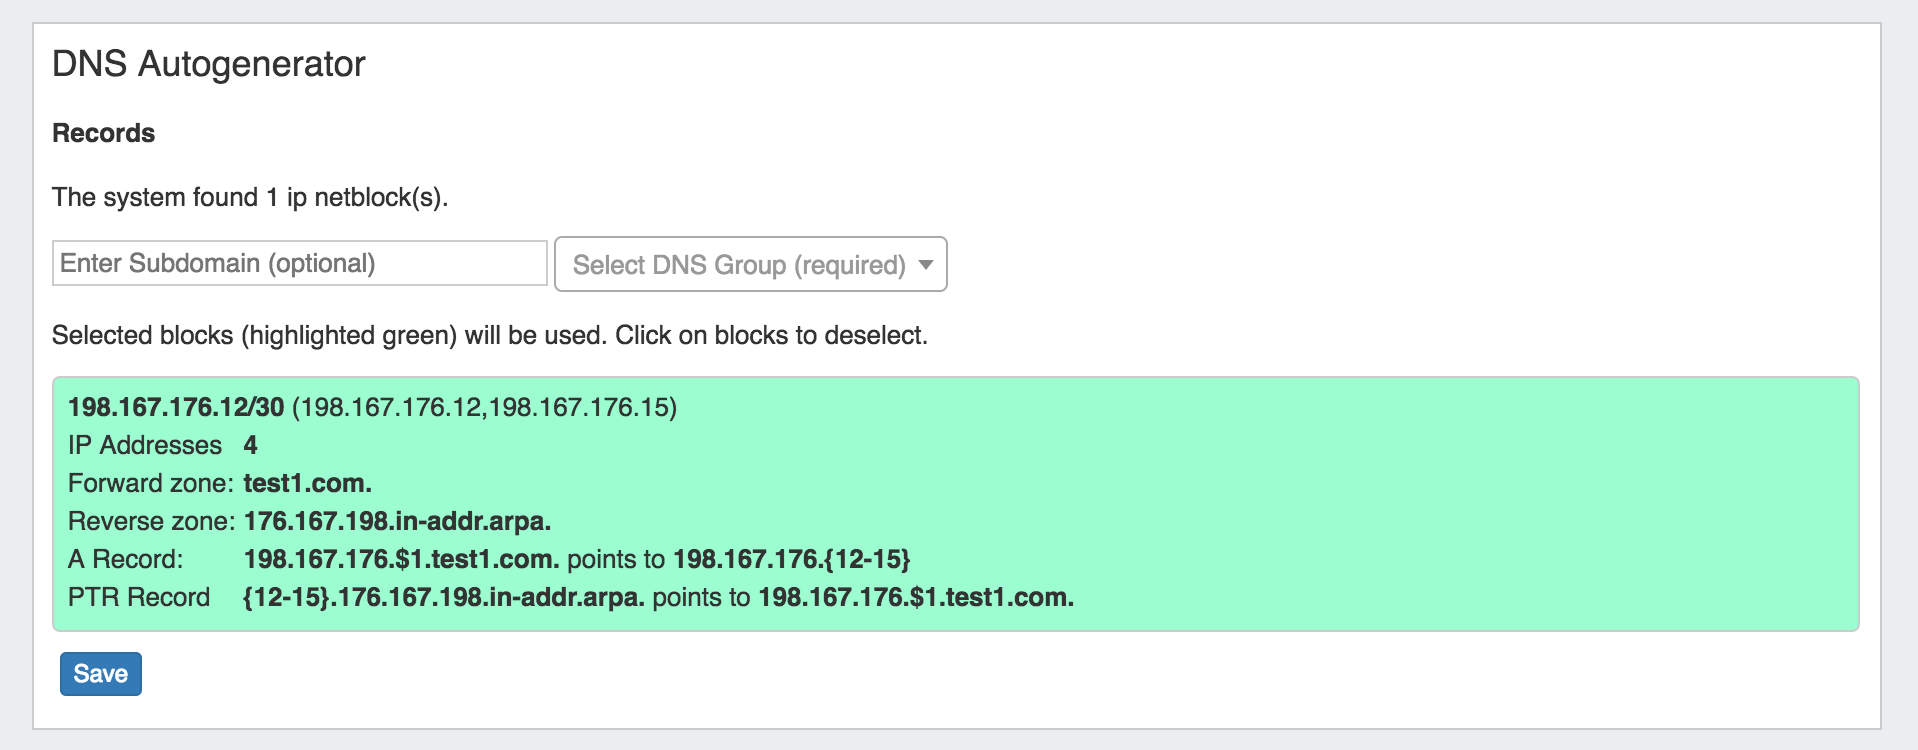
Working with the DNS Autogenerator One enabled and visible, the DNS Autogenerator Gadget will initially show a short description, the hostname, and a button to "Autogenerate Records".
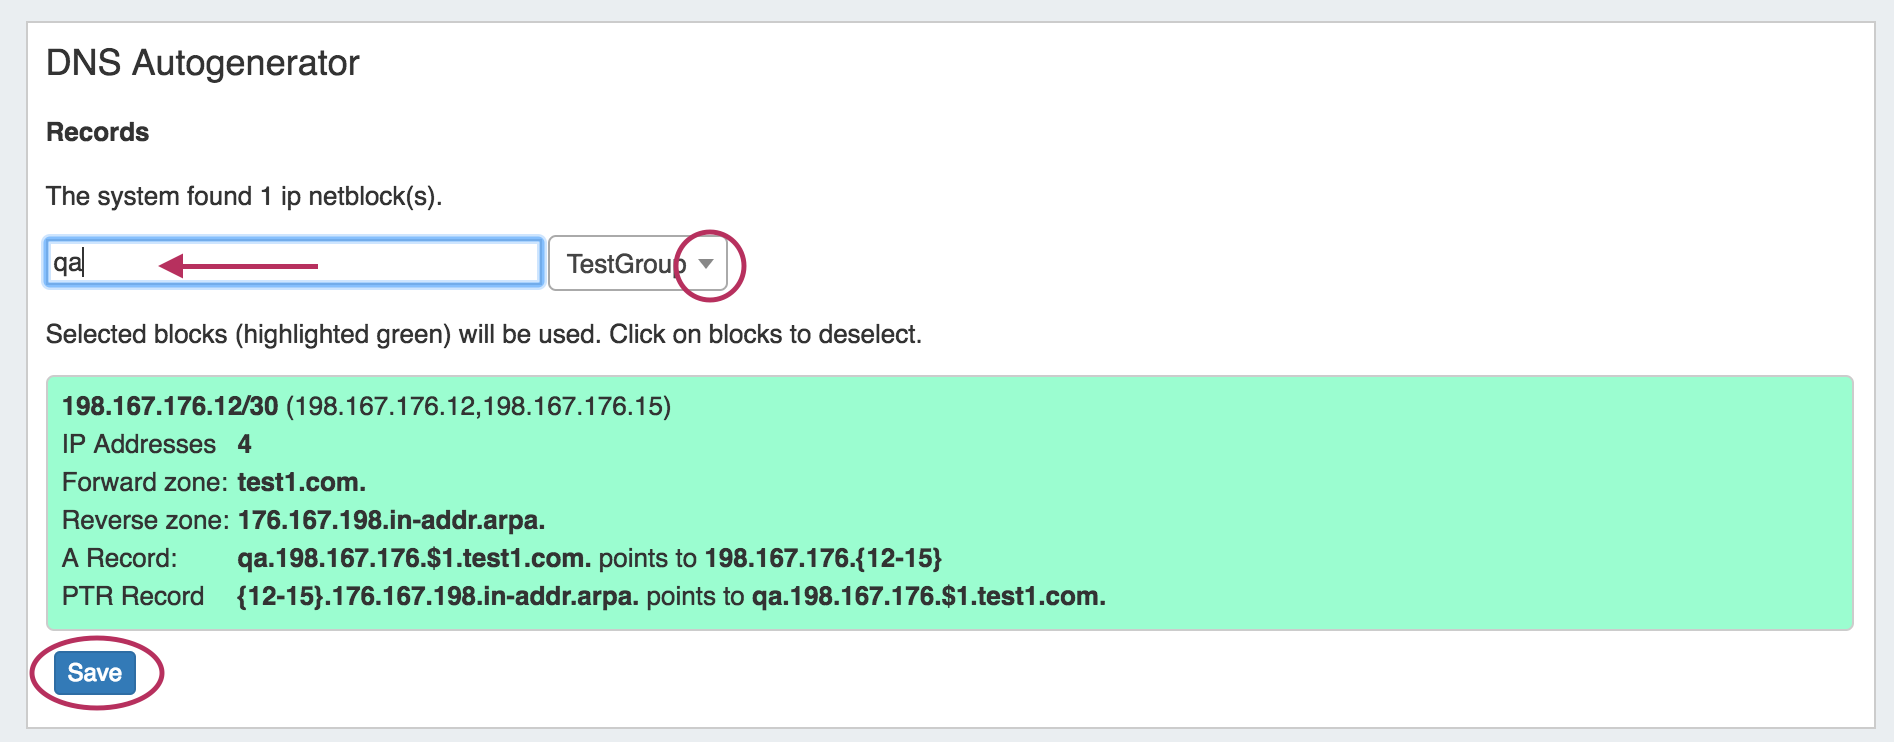
Before starting, check that the blocks assigned to the Resource in the IPAM Gadget are correct and up-to-date - the Autogenerator uses these blocks to create the records. If using a DNS Group other than "Default" to hold zones, ensure that the desired DNS Group to hold the generated records has been set up. (See: Working with DNS Groups). When ready, click the "Autogenerate Records" button. The Gadget will search through the blocks in the IPAM gadget and provide a list of found blocks. Next, add in a subdomain if desired (optional), and select the DNS Group to hold the records (required). Click on the listed blocks to select (highlighted green) or deselect (grey) for DNS zone / record creation.
Finally, hit the "Save" button at the bottom of the gadget - the selected forward and reverse DNS records will be created and added into the DNS Group, viewable in the DNS Tab. From there, you can choose to push / schedule push the newly generated zones, or re-run the generation if desired. |

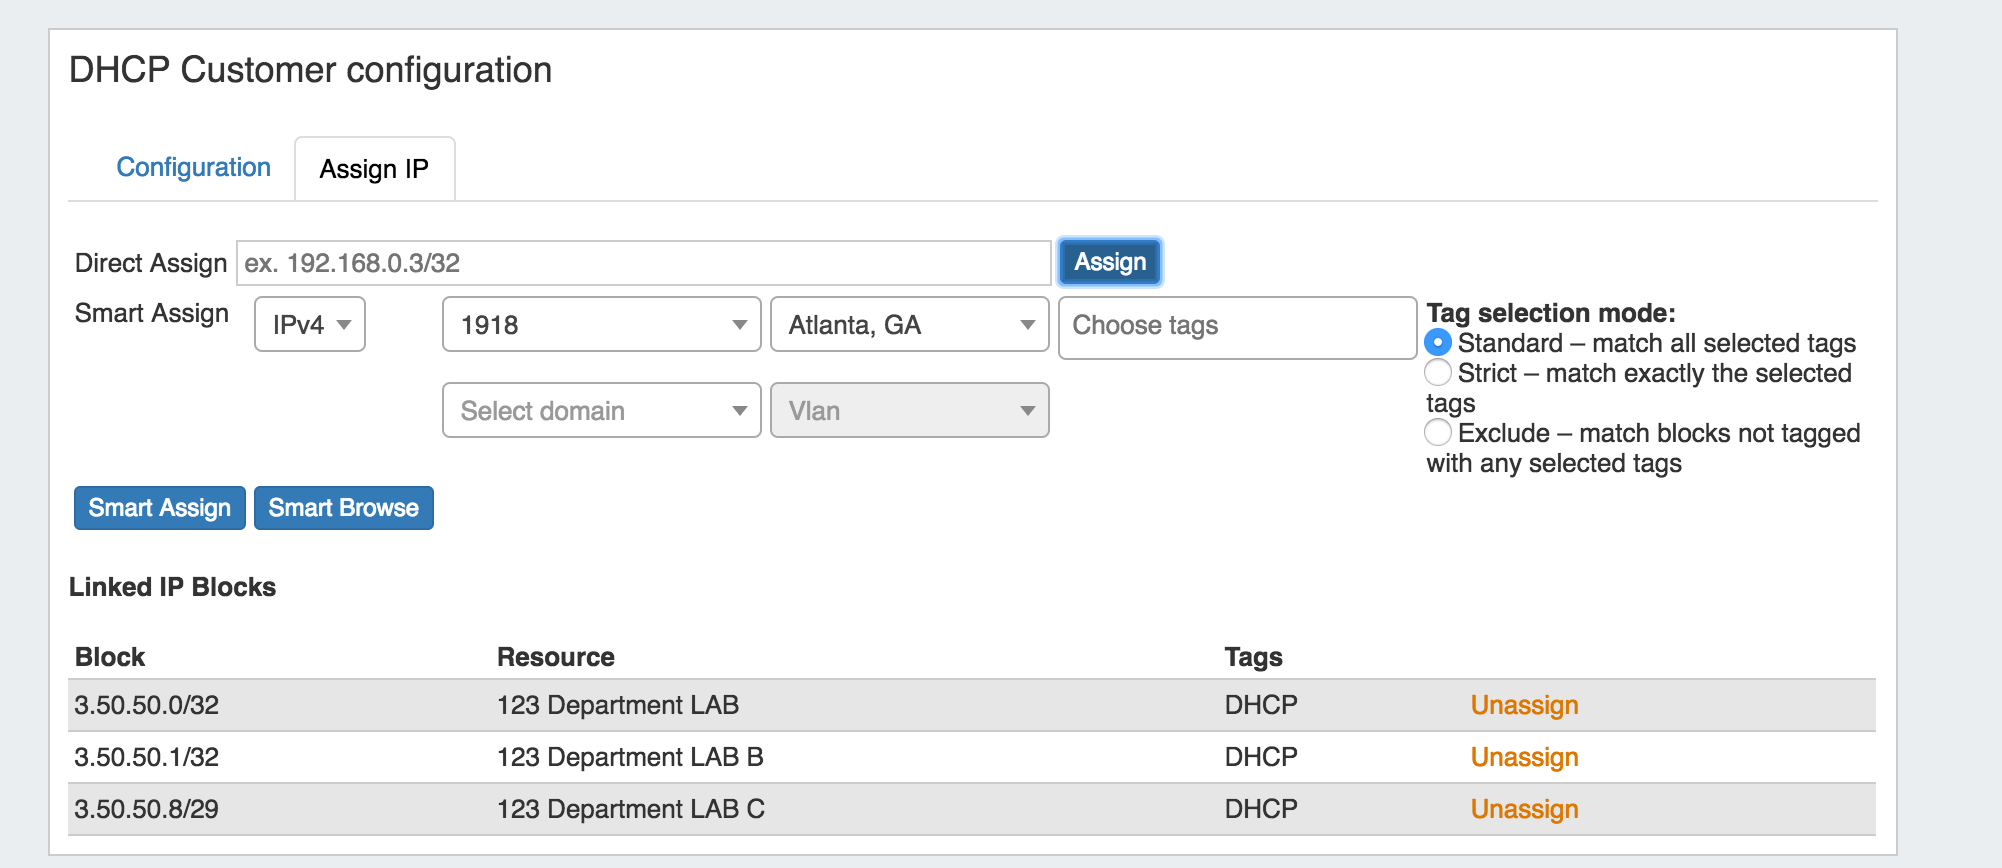
DHCP Customer Configuration Gadget
...