| HTML |
|---|
<div id="google_translate_element"></div>
<script type="text/javascript">
function googleTranslateElementInit() {
  new google.translate.TranslateElement({pageLanguage: 'en'}, 'google_translate_element');
}
</script>
<script type="text/javascript" src="//translate.google.com/translate_a/element.js?cb=googleTranslateElementInit"></script> |
Working with DNS Zones
...
This page details some common DNS tasks performed from the DNS tab and DNS Gadget. For tasks that require Admin access in ProVision, see Working with DNS Zones.
| Table of Contents |
|---|
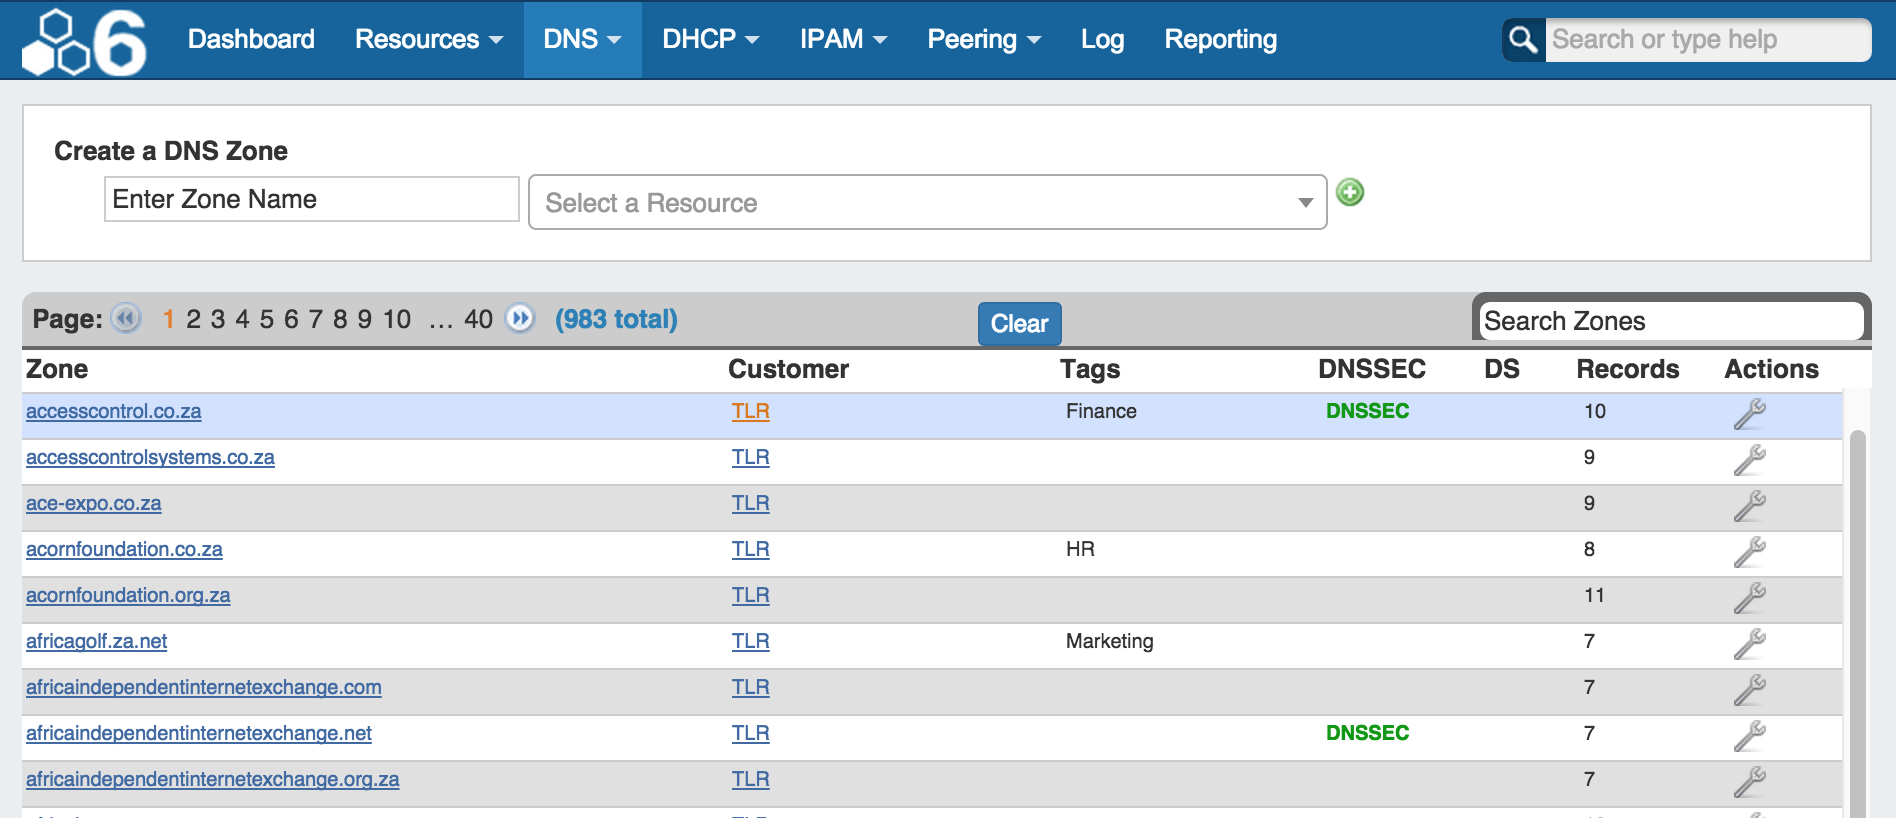
Creating/Adding Zones
After clicking on the main DNS Tab, at the top of the page will be the "Create a DNS Zone" UI. To create a zone, enter the name of the zone and select the Resource you want to assign the zone to. Click on the green plus sign to be taken to the newly created zone file. There you can edit the zone, assign views, etc.

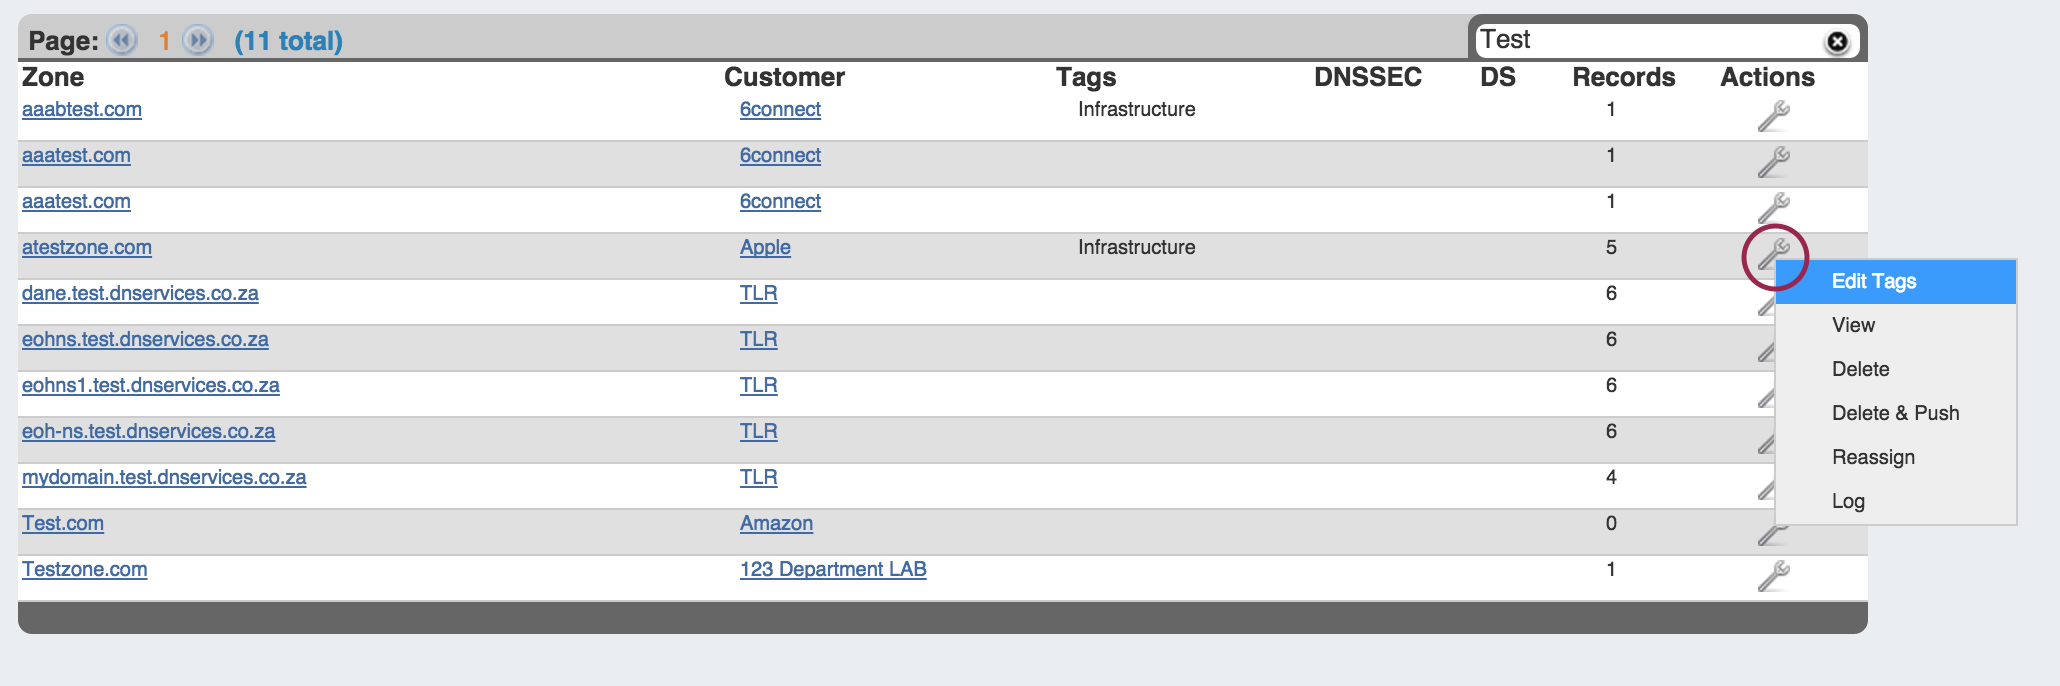
Editing DNS Tags
| Info |
|---|
| Before you are able to add tags to a zone, the list of available tags must be set up in the Admin - DNS Admin section. See our DNS Administration documentation for more information on managing the DNS tags list. |
To add tags to a zone, first find the zone in the DNS Tab zone list. Click on the Action Menu (wrench icon), and select "Edit Tags".
The "Edit Tags" interface will pop up.
Click inside the tag listing box, and select the desired tag(s) from the dropdown list. To remove a tag from the zone, click on the "x" in front of the tag. When you are done with your edits, hit the "Update" button.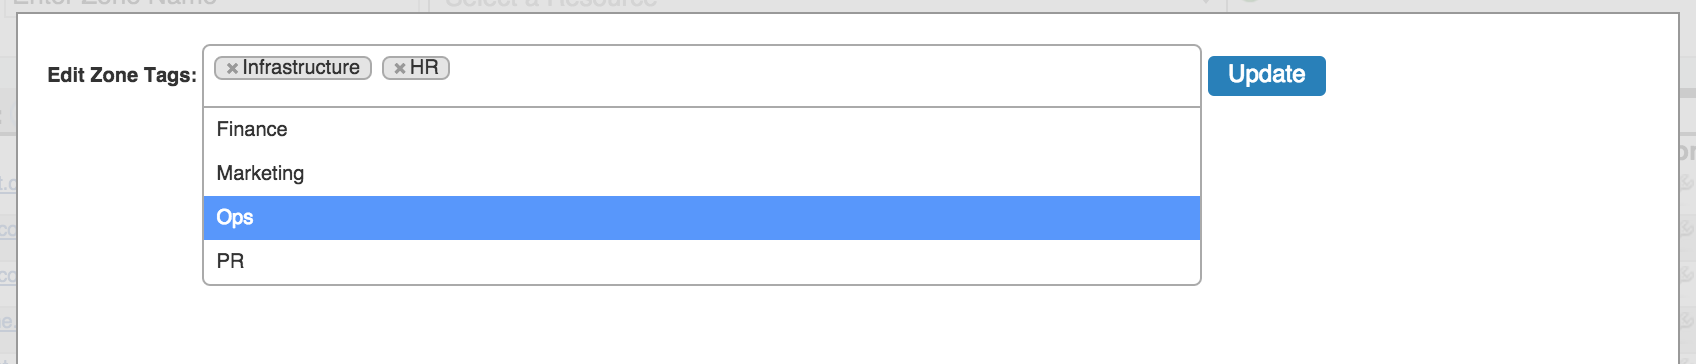
Using the DNS Gadget
When you have defined a Resource, you can assign the DNS Gadget to a given Section. This allows you a shortcut to DNS functionality without having to view it in the standard DNS Tab. Then, from the Resource's Entry page, you will see the DNS gadget and associated zones. From this interface, you can create new zones (with or without a Zone template) or assign Zone delegation specific information.
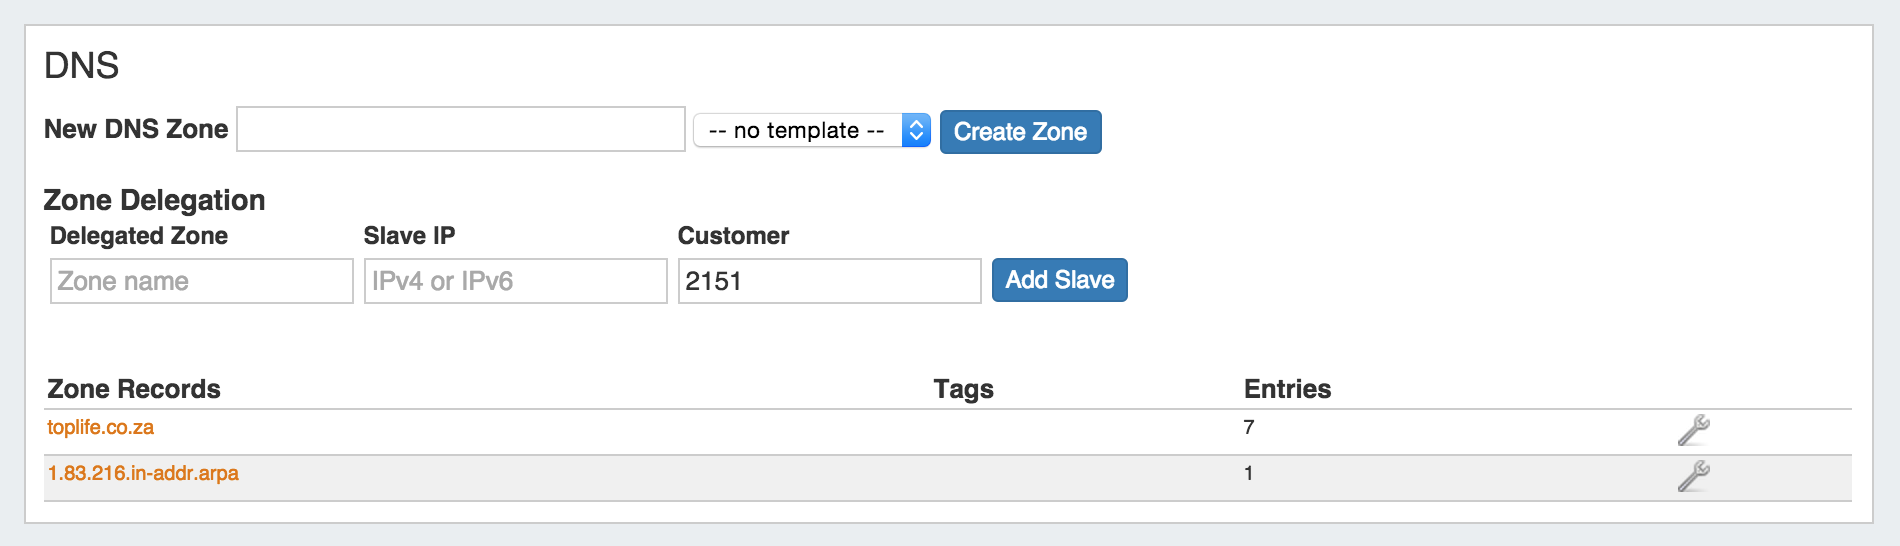
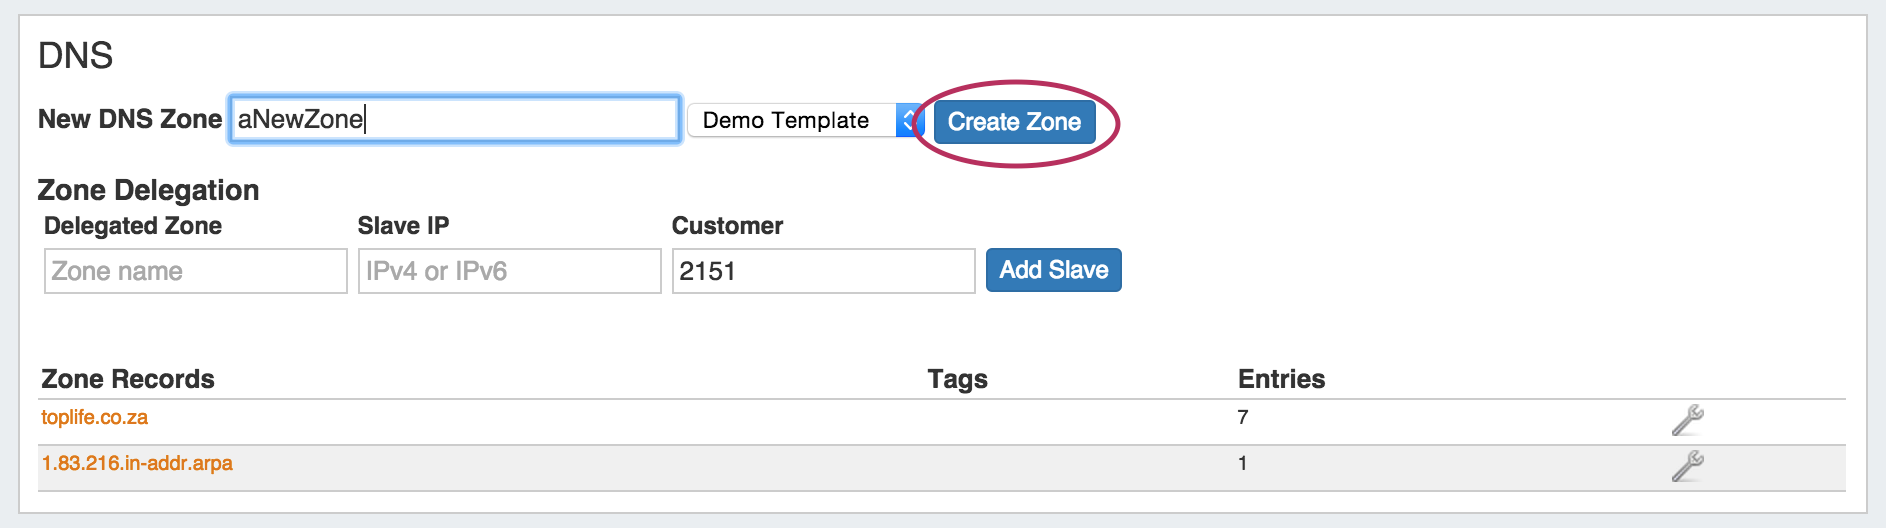
Creating/Adding Zones - DNS Gadget
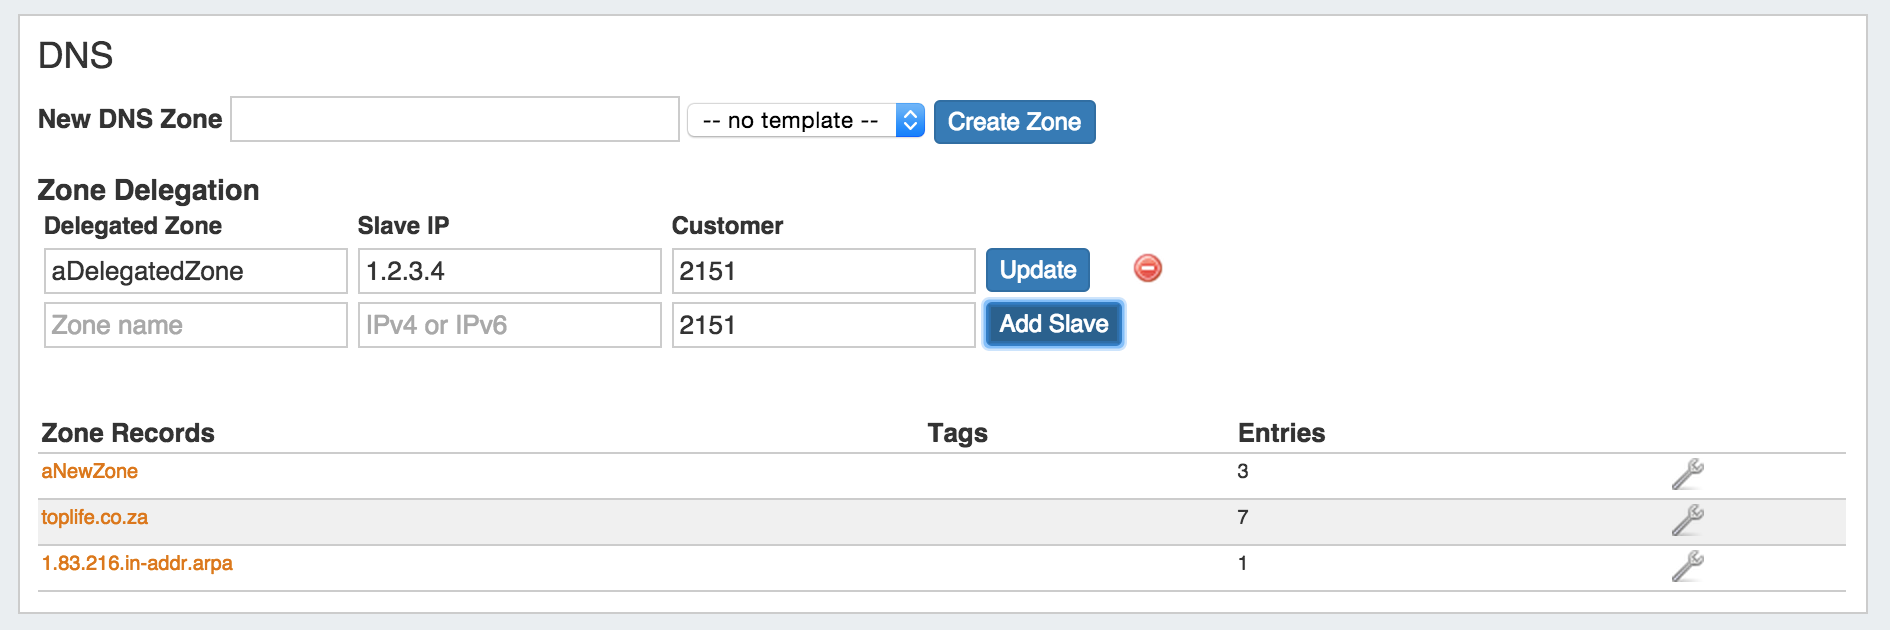
To add a new DNS Zone from the DNS Gadget, enter the zone name in the field next to "New DNS Zone", select a template if applicable, and hit "Create Zone".
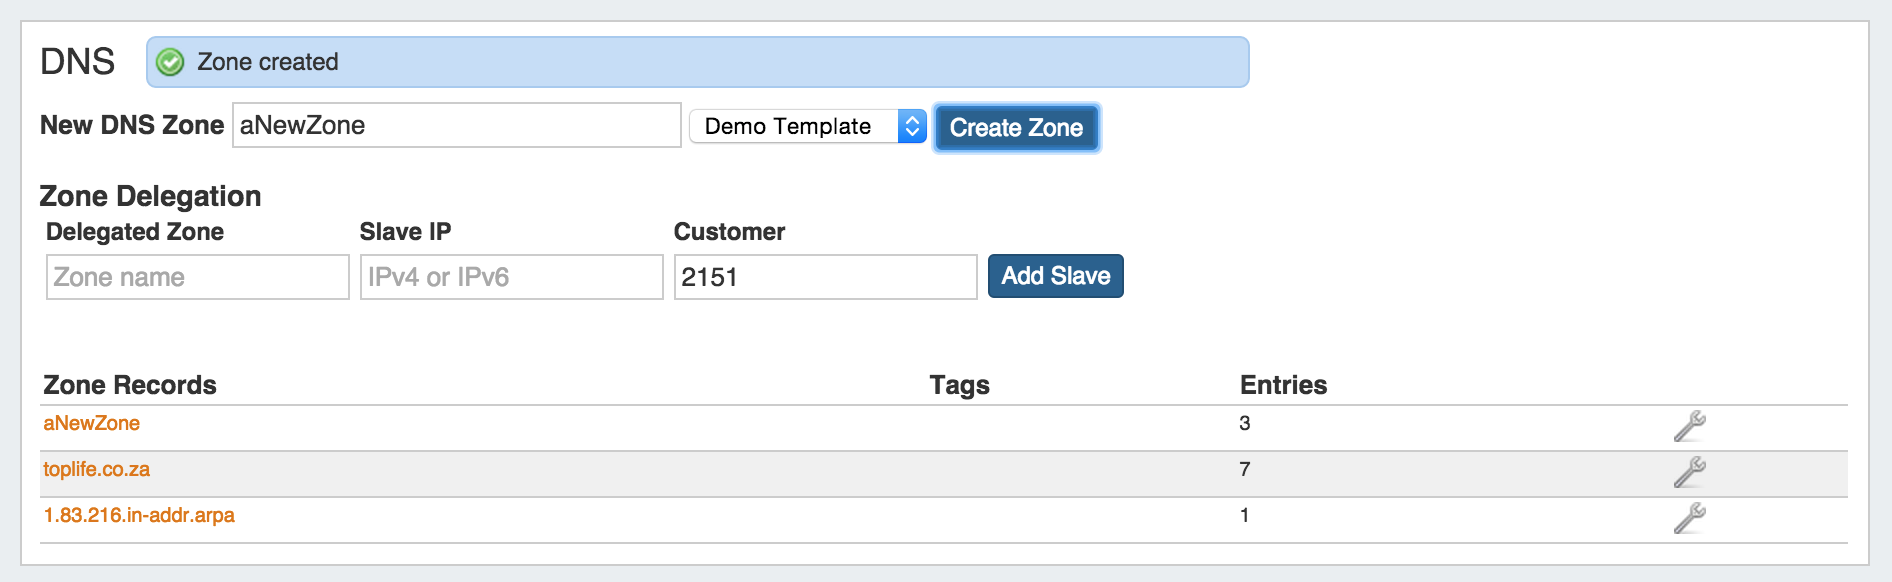
Your zone will be added to the list below, and a success message will appear at the top of the gadget.
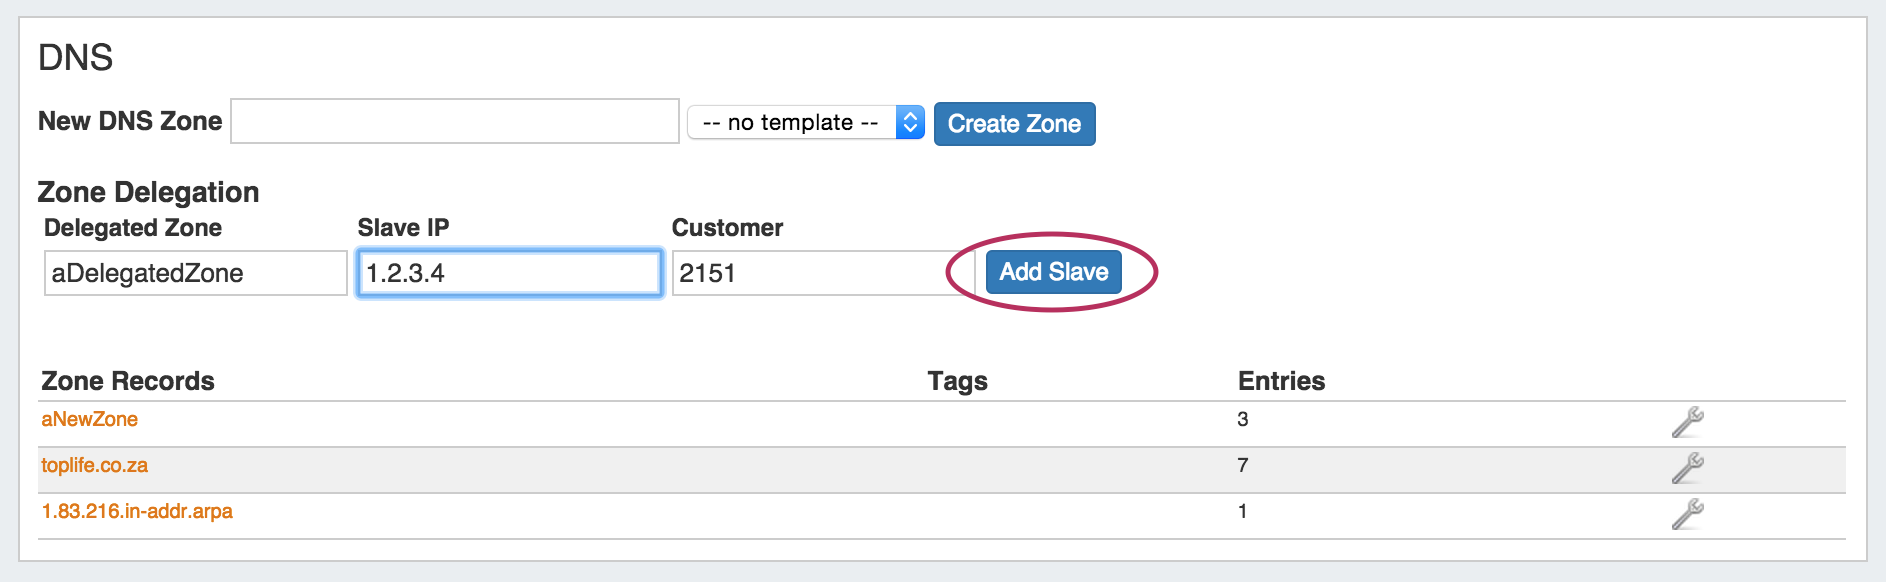
Zone Delegation - DNS Gadget
To delegate a zone, enter in the delegated zone name and the slave IP, and hit "Add Slave". The Customer number is the numerical ID for the Resource you are under, and it is automatically filled in.
After adding the slave, it will show under the Zone Delegation list. You can make edits to the fields at any time simply by clicking in the field and typing your edits, then clicking the "Update" button. To Delete an entry, click the red "Delete" icon.
Edit Zones - DNS Gadget
Clicking on the Action Menu (wrench icon) next to a zone record and selecting "DNS View", "DNS Edit", or clicking on a zone name, will take you to the zone view / edit page.
From this page you can edit DNSSEC, SOA, check zone status, link zones to servers, edit records, view the zone file, and view the zone history.
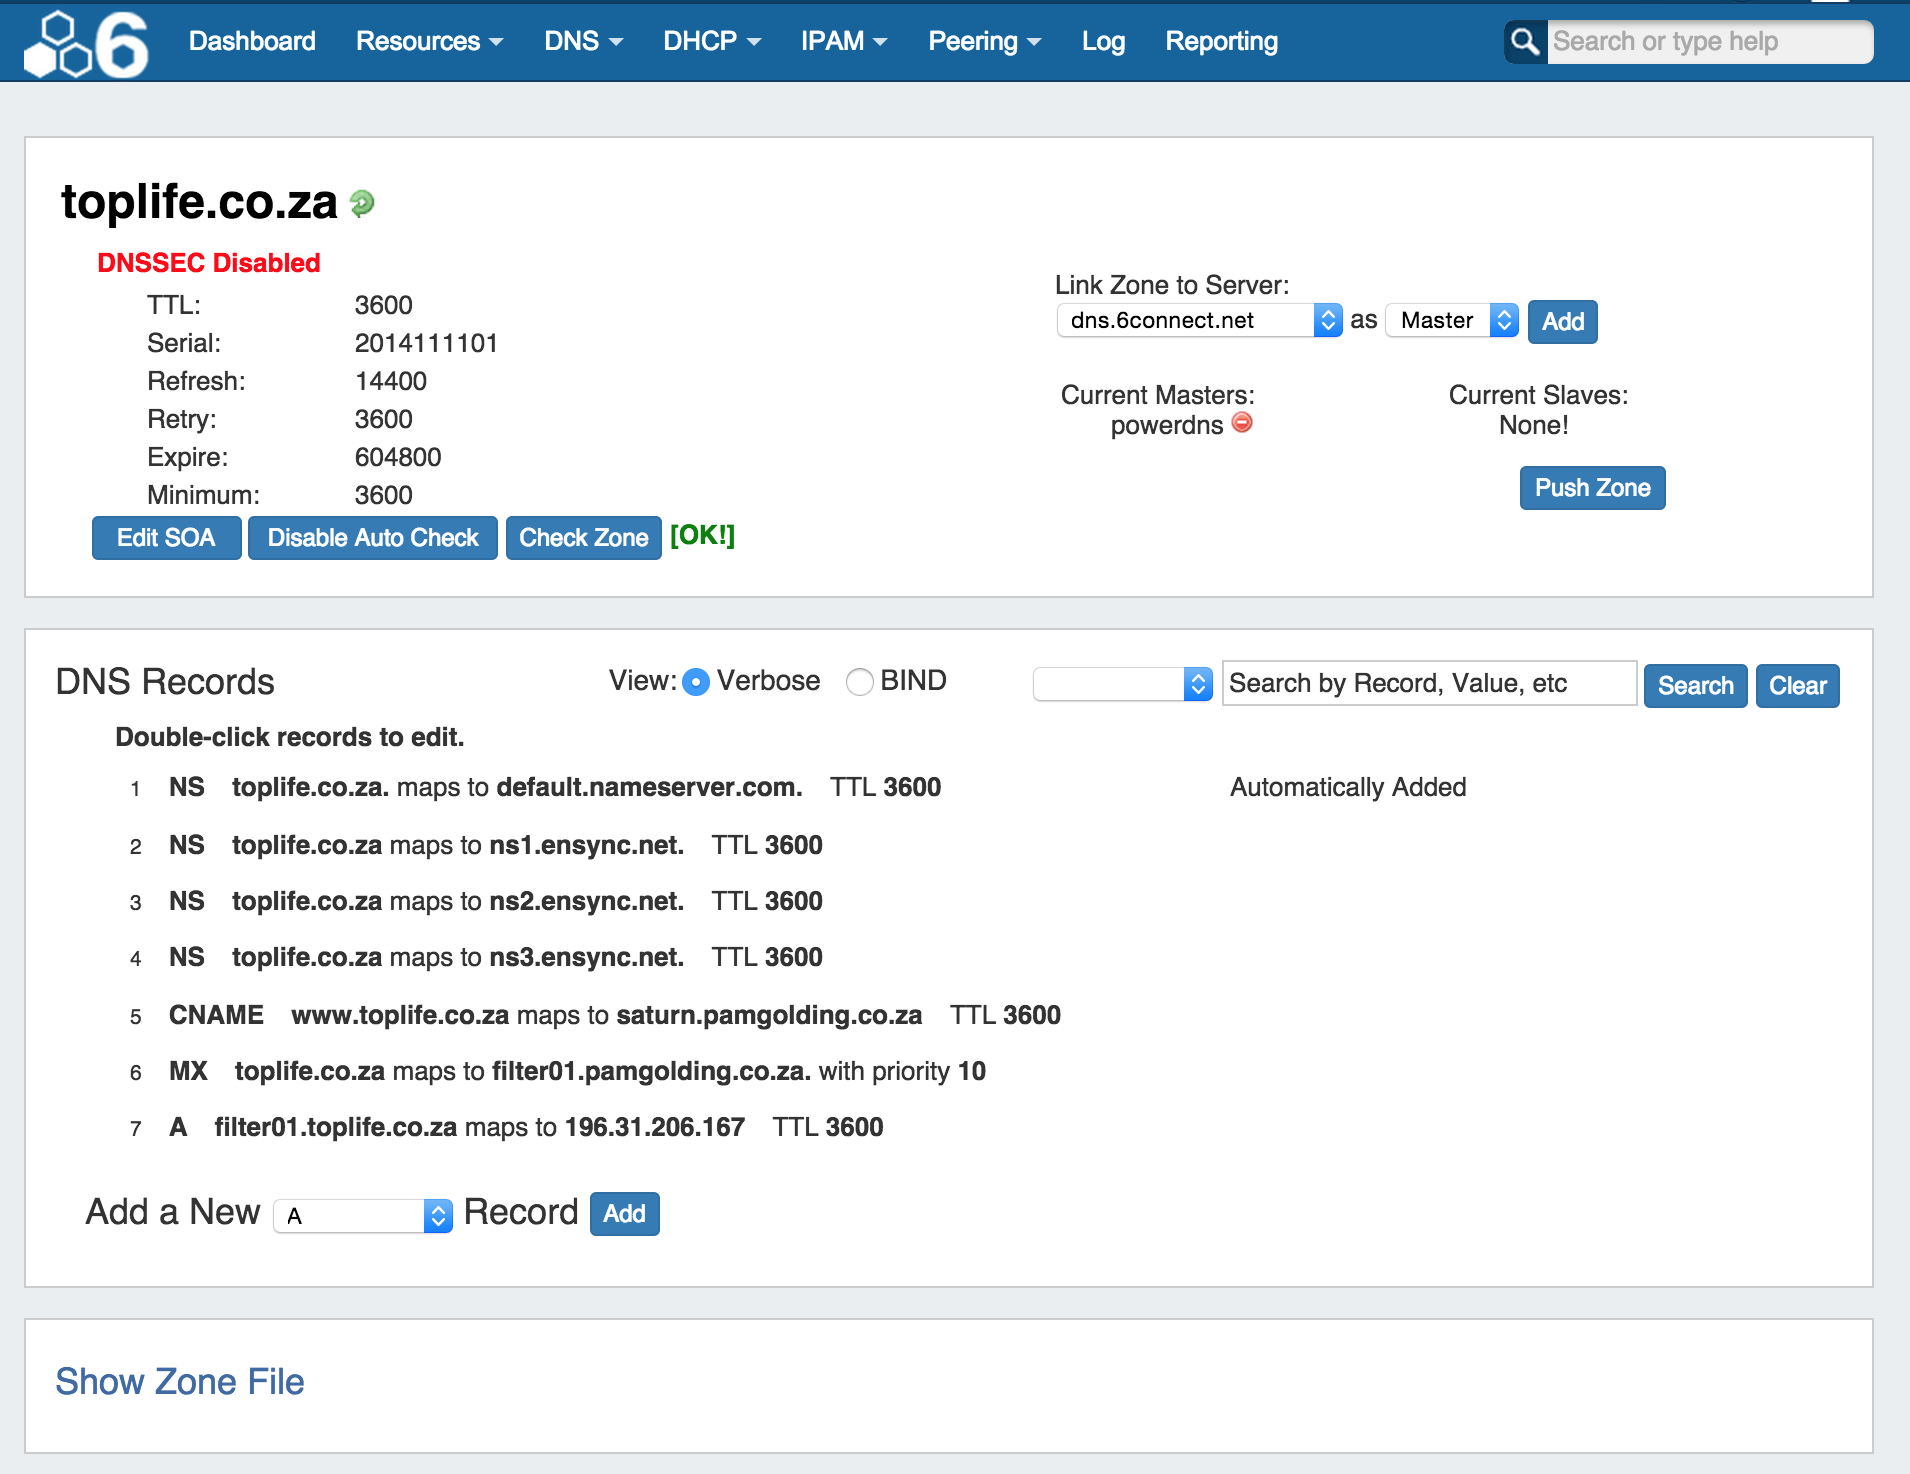
For a more detailed description on the view zone page, continue on to Editing DNS Zones.
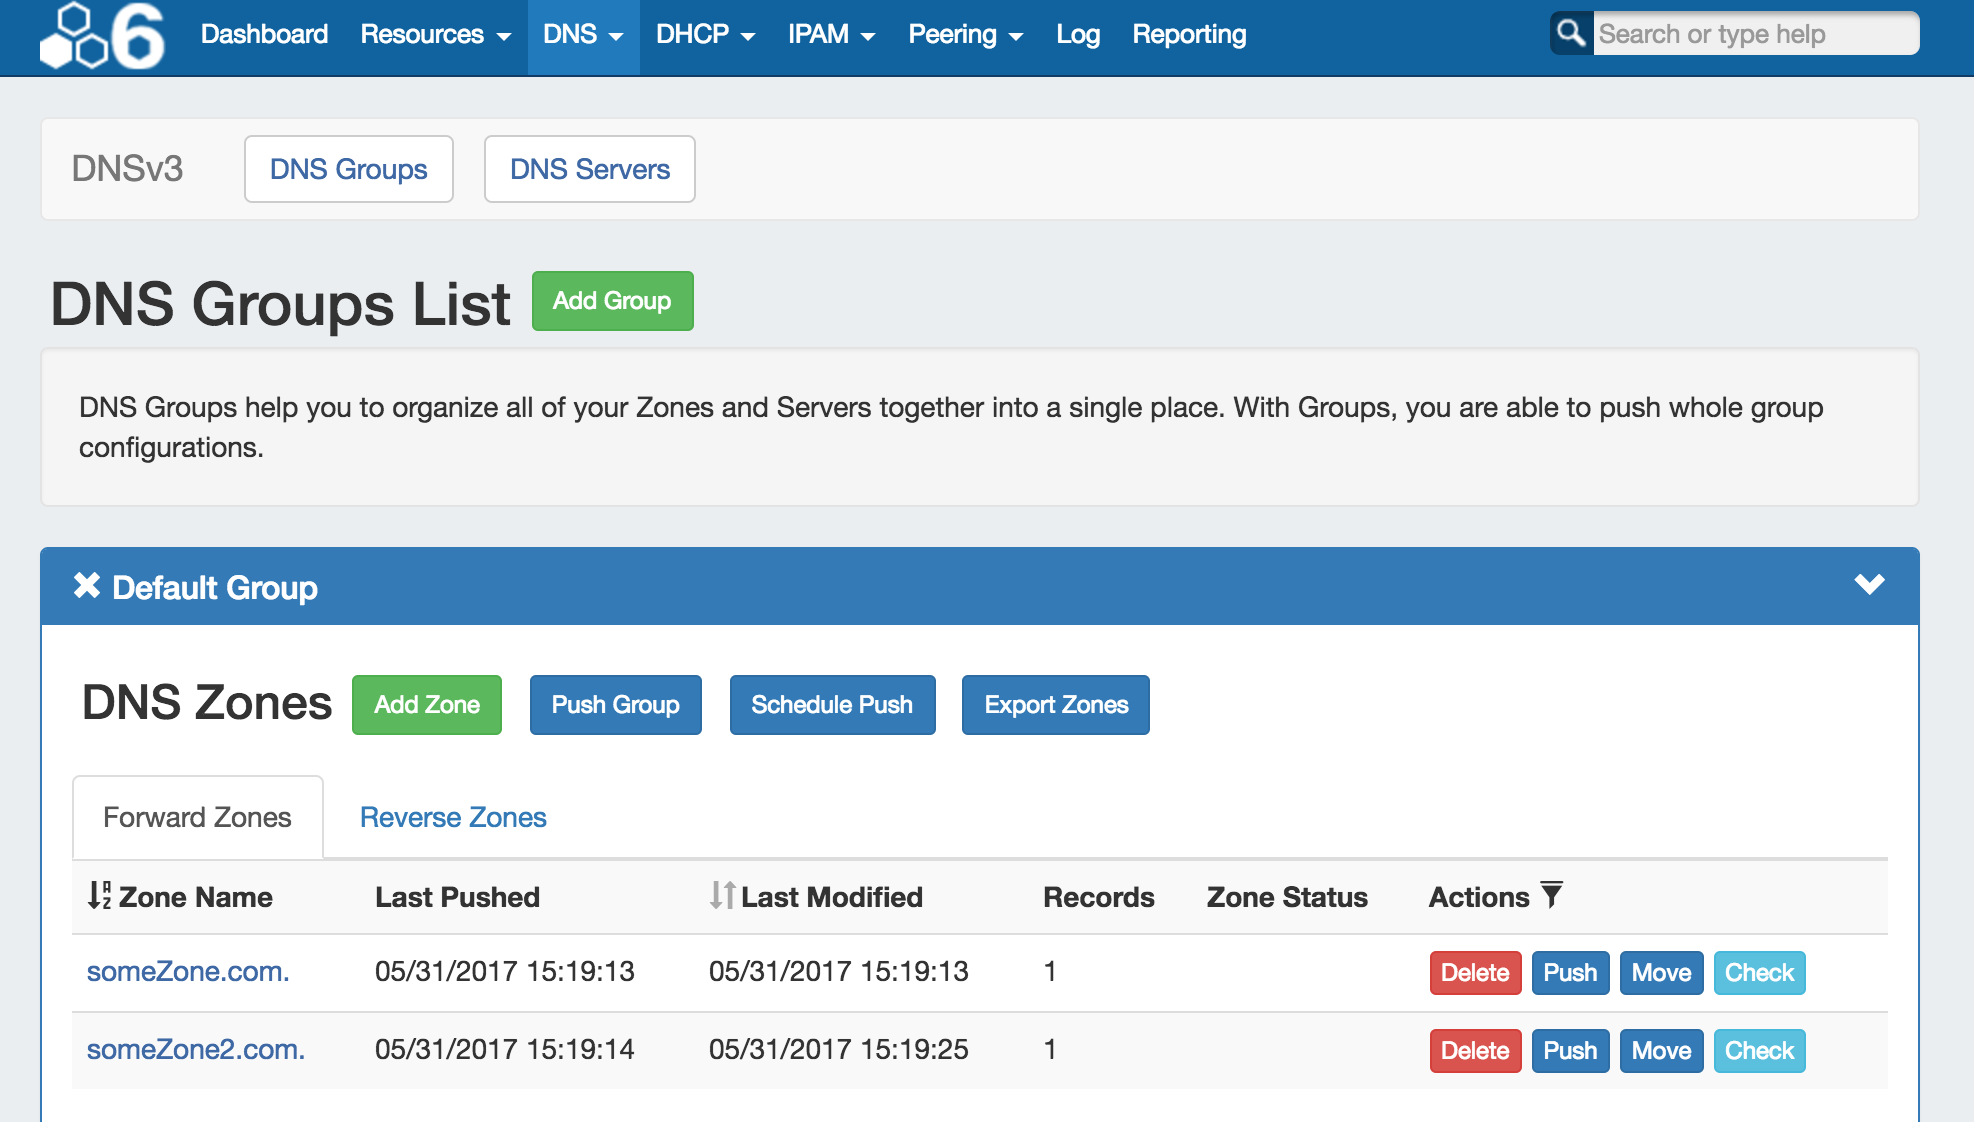
DNS Zones are accessed under the DNS tab, DNS Groups sub-tab. Separate zone lists exist under each DNS Group.
| Table of Contents |
|---|
Working with DNS Zones
Add a Zone
Add a new zone while in the DNS Groups tab by selecting "Add Zone" under the desired Group. The "Create New Zone" dialog will pop up.

Enter the name of your new zone and select a parent resource, if desired. The DNS group will already be selected.
DNSv3 allows you to populate the zone with three options:
- Empty Zone - create the zone as an empty zone, and manually create records
- Populate by AXFR Transfer - transfer zones from an outside server
- Clone an existing zone - use an existing zone as a template, and manually edit as needed
From there, you may either save your changes and complete zone creation, or add in optional field details.
Optional Fields
Expand the "Optional Fields" section by clicking on the chevron (>) or the "Optional Fields" header.
Under this section, add in optional values for Zone Host, Email, Serial , Refresh, Retry, Expiry, or TTL.
When finished, click the "Save Changes" button.
To exit without saving, simply click "Close".
Edit / Manage a Zone (View Zone page)
Zones may be editing by clicking on the Zone name in any zone list in which it appears - the Zone List, zones listed under DNS Groups, or zones listed as attached to a server under DNS Servers.
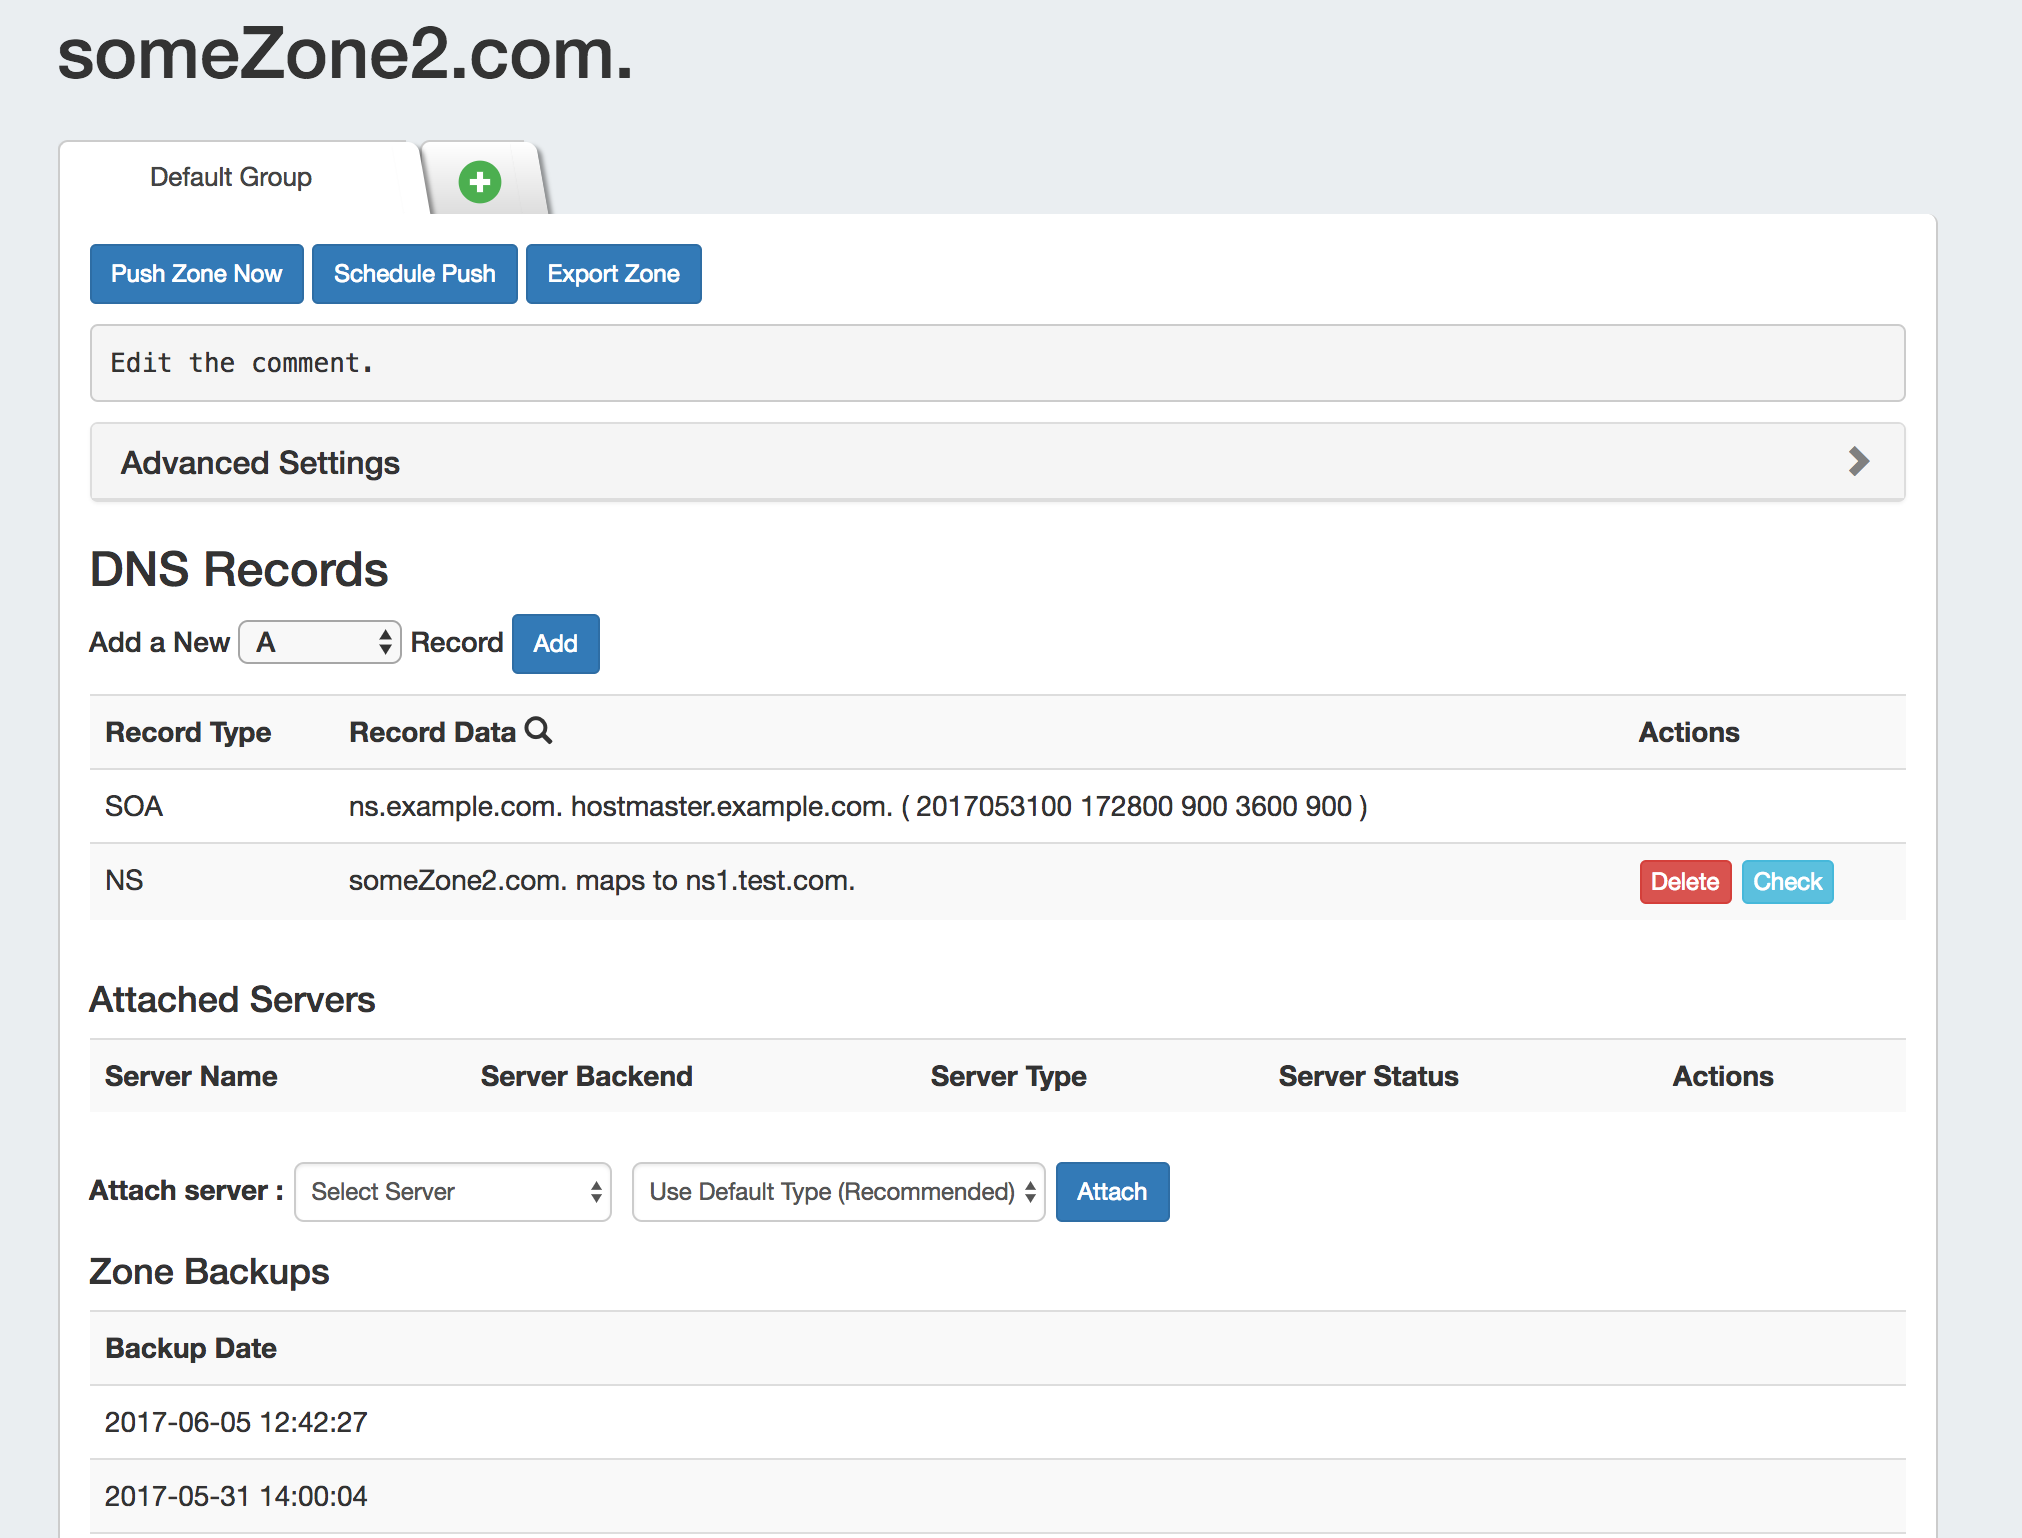
Clicking on the zone name opens up the View Zone page, from where comments may be added, records added or updated, servers attached to the zone, advanced settings edited, backups restored or the zone pushed / exported. For details on the View Zone page, see Editing DNS Zones.
Add a comment:
To add a comment to a zone, click anywhere inside the comment area and begin typing. The comment will be saved when an area outside of the comment box is clicked, deselecting the comment area.
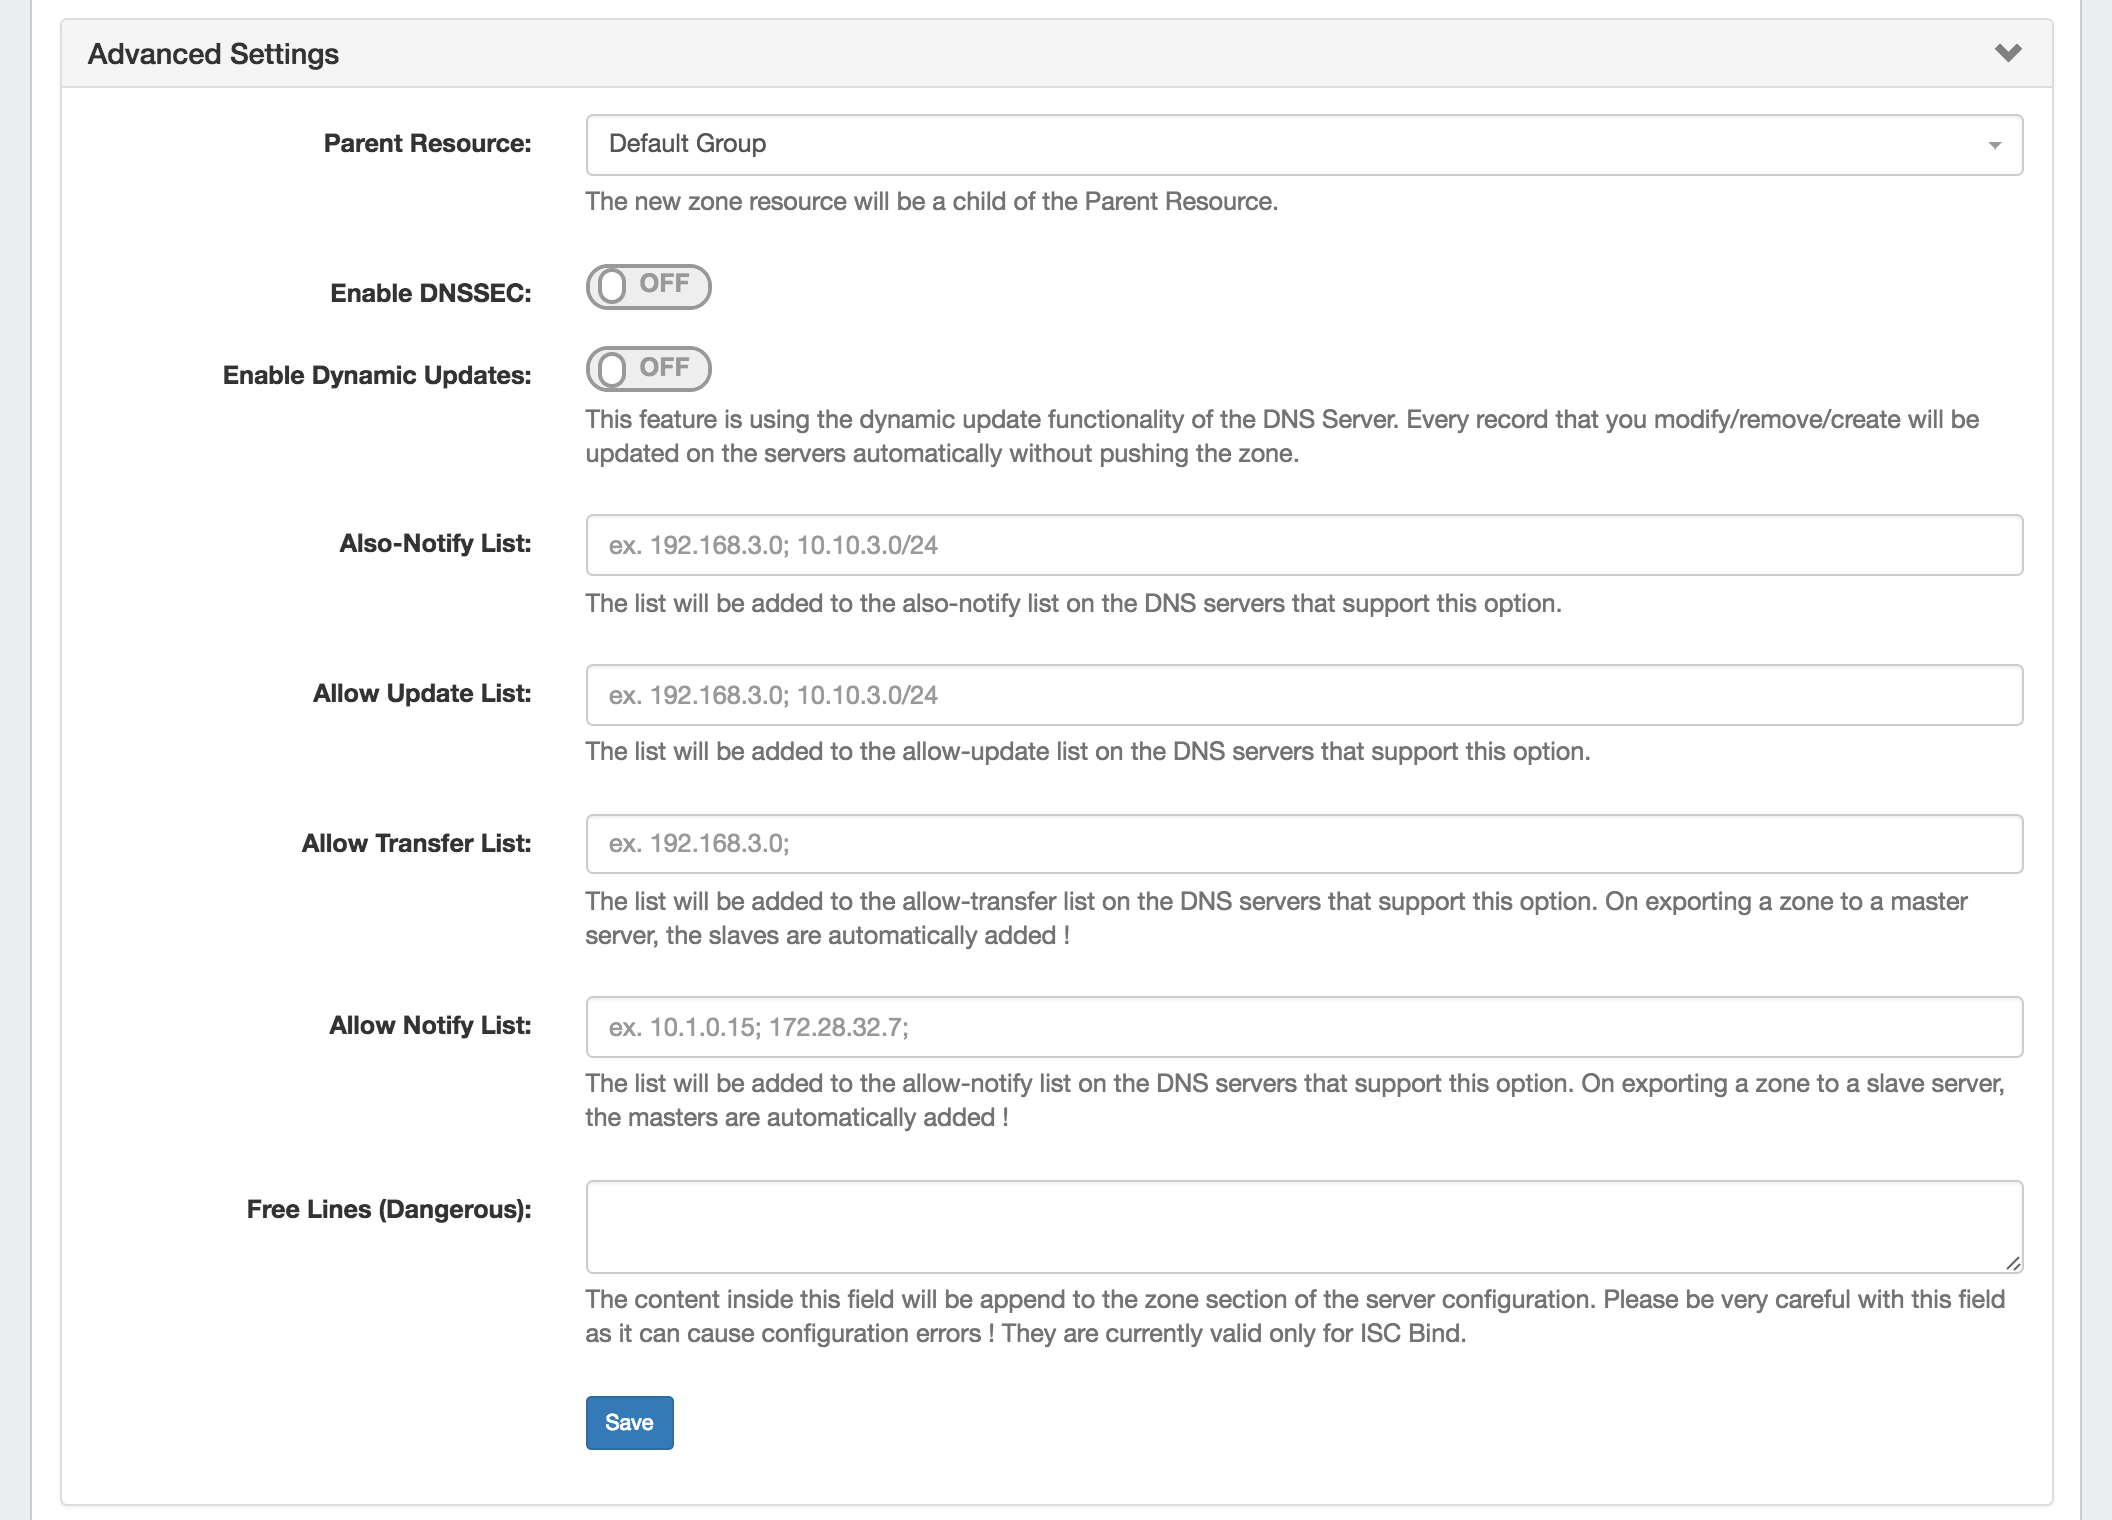
Edit Advanced Settings:
Open the zone "Advanced Settings" section by clicking on the header or the expansion arrow (>). Edit fields as needed, and click "Save" when complete.
Add or Edit Zone Records
From the View Zone page, under DNS Records, look for the line "Add a new ___ Record". Select the desired record type, then click "Add".
To edit an existing zone record, click on the record line in the DNS Records list.
The Edit Record dialog will open, allowing you to fill in record details.
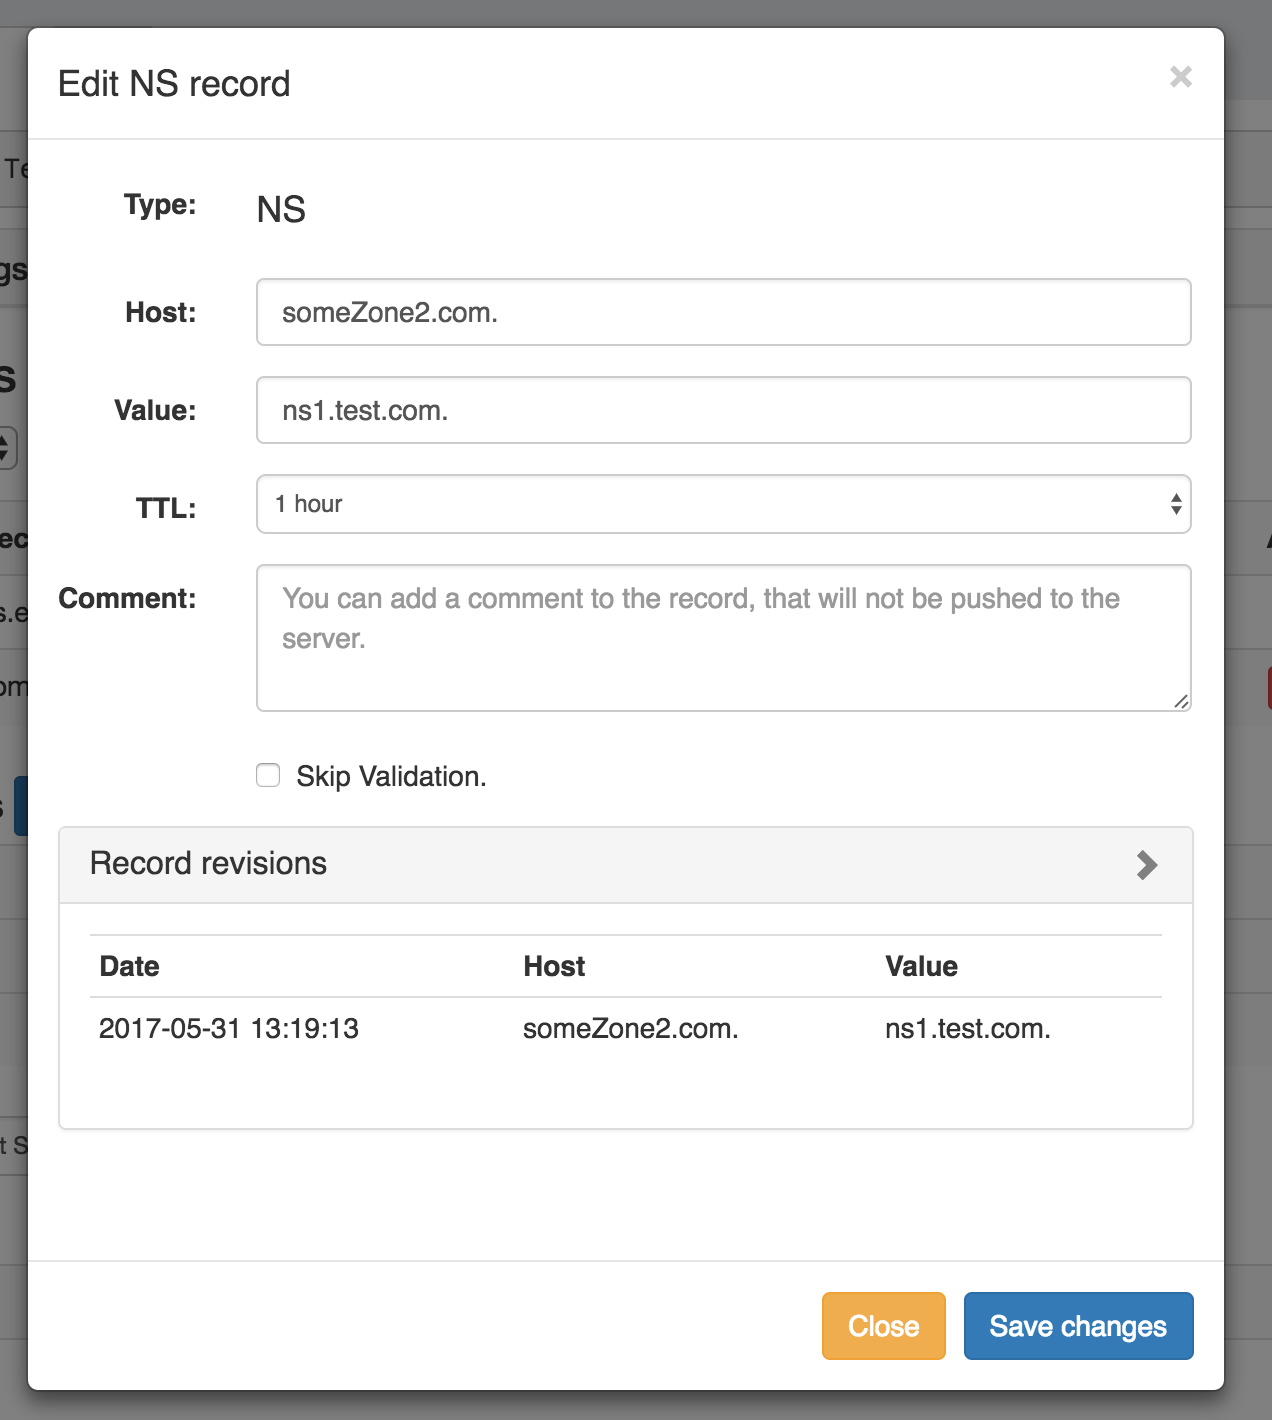
Fill in the Host, Value, TTL, and comment if desired.
An option exists to "Skip Validation" - check to select if you wish to bypass validation for the record.
If previous versions of the record exist, the revision log will be visible under "Record revisions".
When edits or reviewing is complete, click "Save changes", or "Close" to exit without saving.
Delete Zone Records
Delete a zone record by clicking the "Delete" button under "Actions" for the desired record entry.
Attach / Detach Servers to a Zone
Under the "Attached Servers" section of the View Zone page, next to "Attach Server:", select the desired server to attach and choose the server type (Default, Master, Slave), then click the "Attach" button.

To detach a server from a zone, look for the server under the "Attached Servers" list, then click "Detach" under actions for that server.
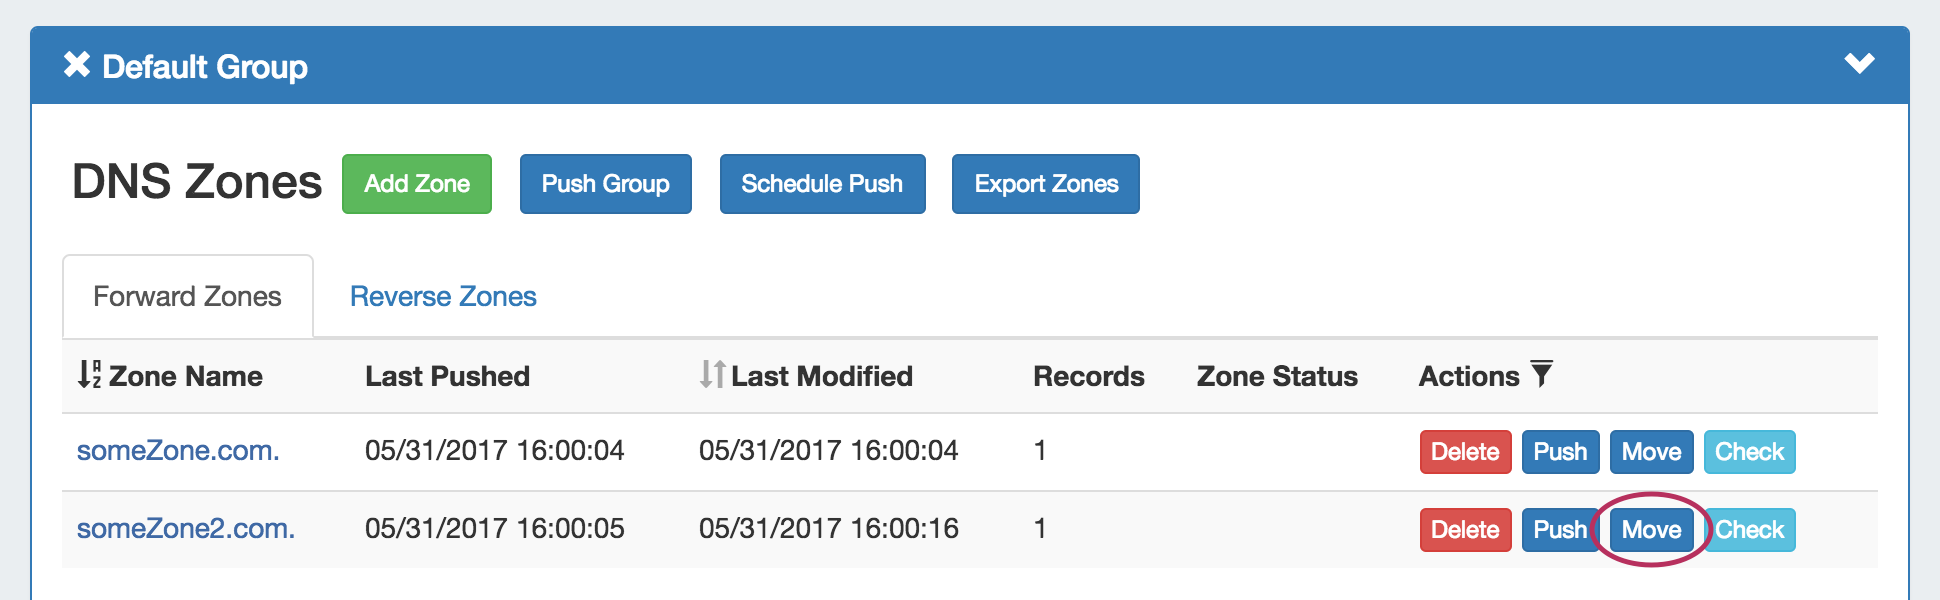
Move Zones to a Different Group
Zones may be moved to a different Group than the one created under, by clicking the "Move" button in the zone's Actions menu.
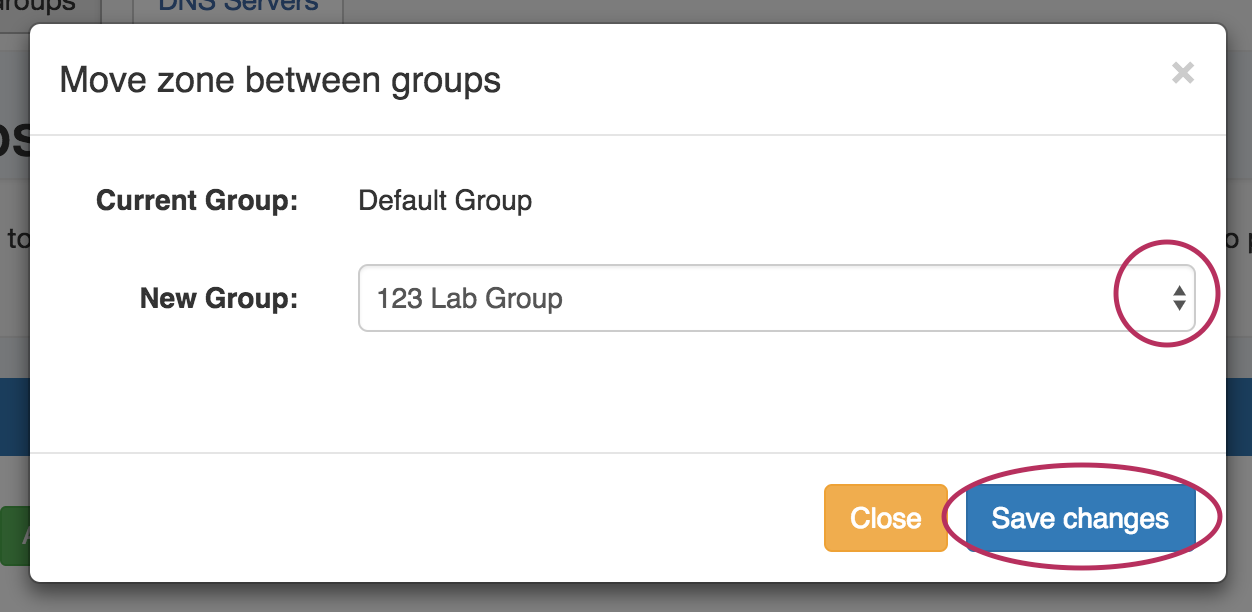
The "Move Zone" modal will appear - select the new Group to move to the zone under, and click "Save Changes" to complete.
Pushing Zones
Zones may be pushed individually ("Push Zone Now"), as a scheduled future push ("Schedule Push"), or pushed as part of a Group or Server Push.
Push Now (from Group List):
To immediately push a single zone, navigate to the DNS Group the zone is under, then click the "Push" button in the Actions column for the zone.
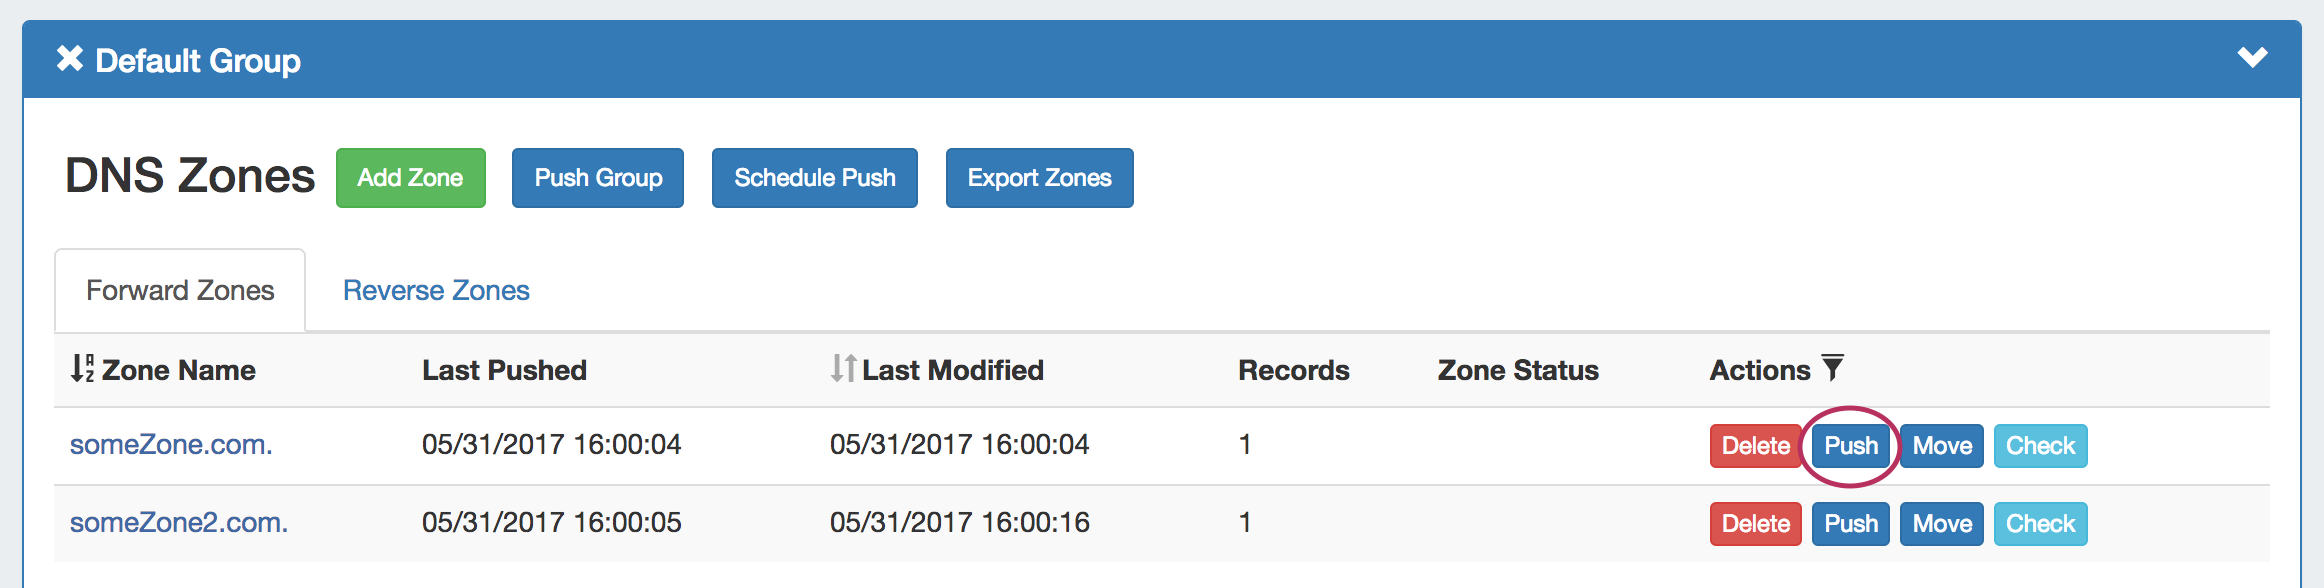
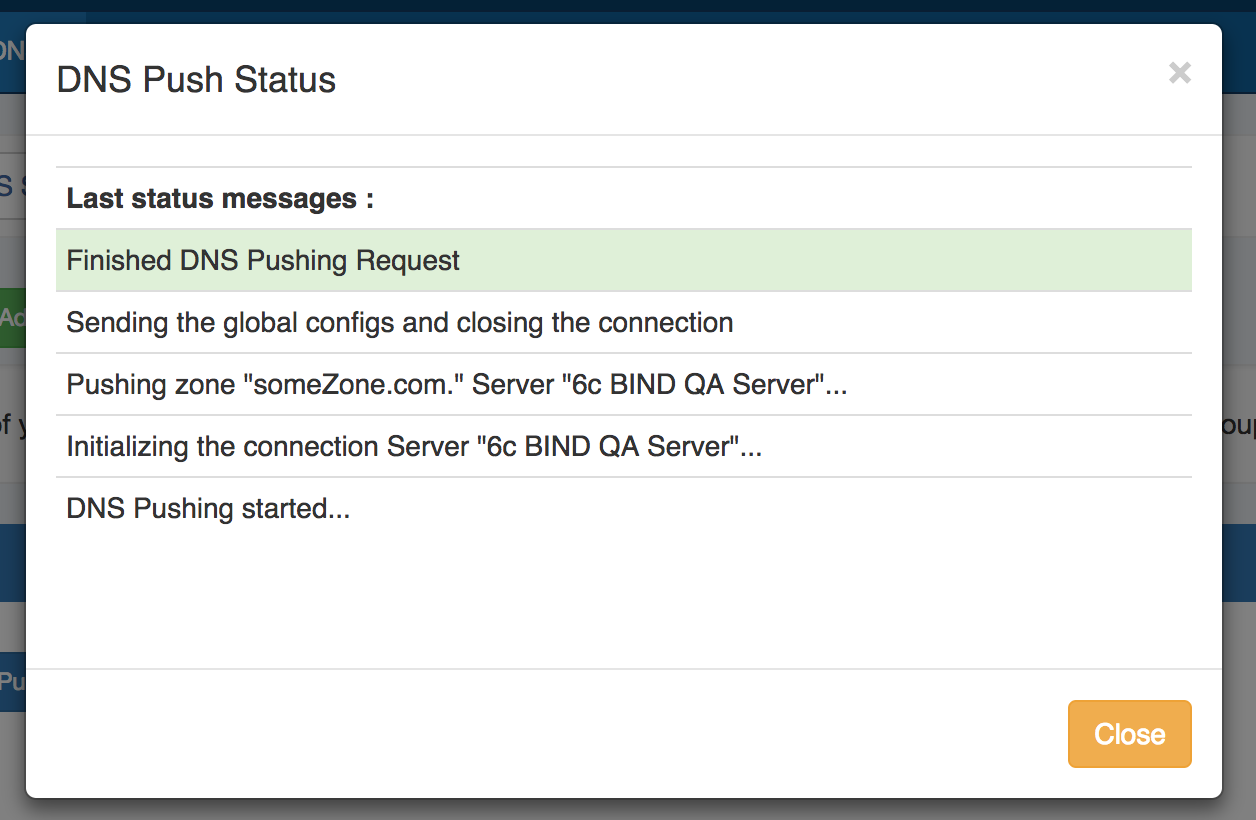
The "Push Status" modal will appear, showing status and any errors that occur. When a successful zone push is complete, a green "Finished DNS Pushing Request" message will appear, and the window may be closed.
Push Now (from View Zone page):
The View Zone page, accessed from clicking on the zone name in the Group zone list, includes a "Push Zone Now" button that immediately attempts to push the zone to the attached server(s).
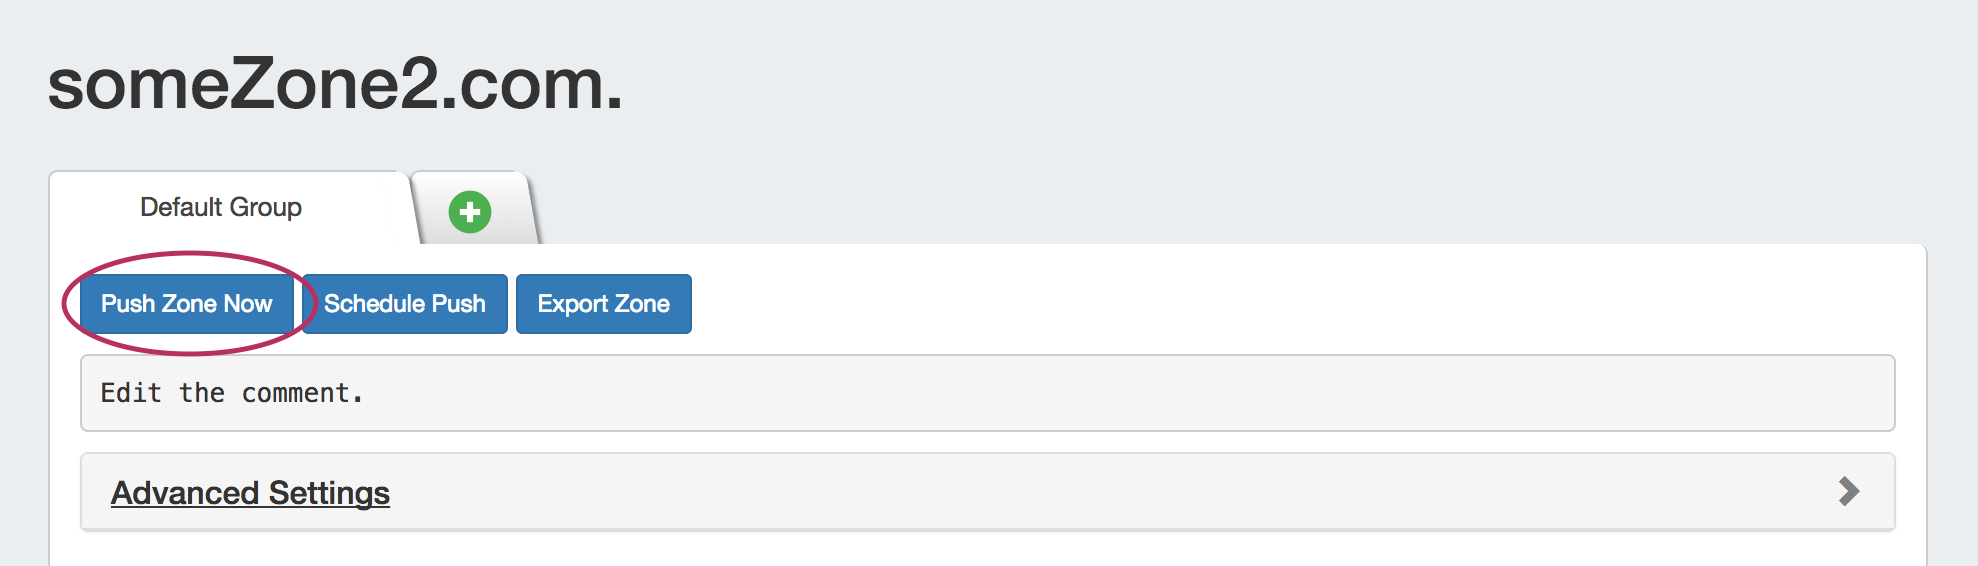
Click on "Push Zone Now", and the "Push Status" modal will appear, showing status and any errors that occur.
When a successful zone push is complete, a green "Finished DNS Pushing Request" message will appear, and the window may be closed.
Schedule Push (from View Zone page):
The View Zone page includes an option to schedule a zone push, similar to scheduling a Group push.
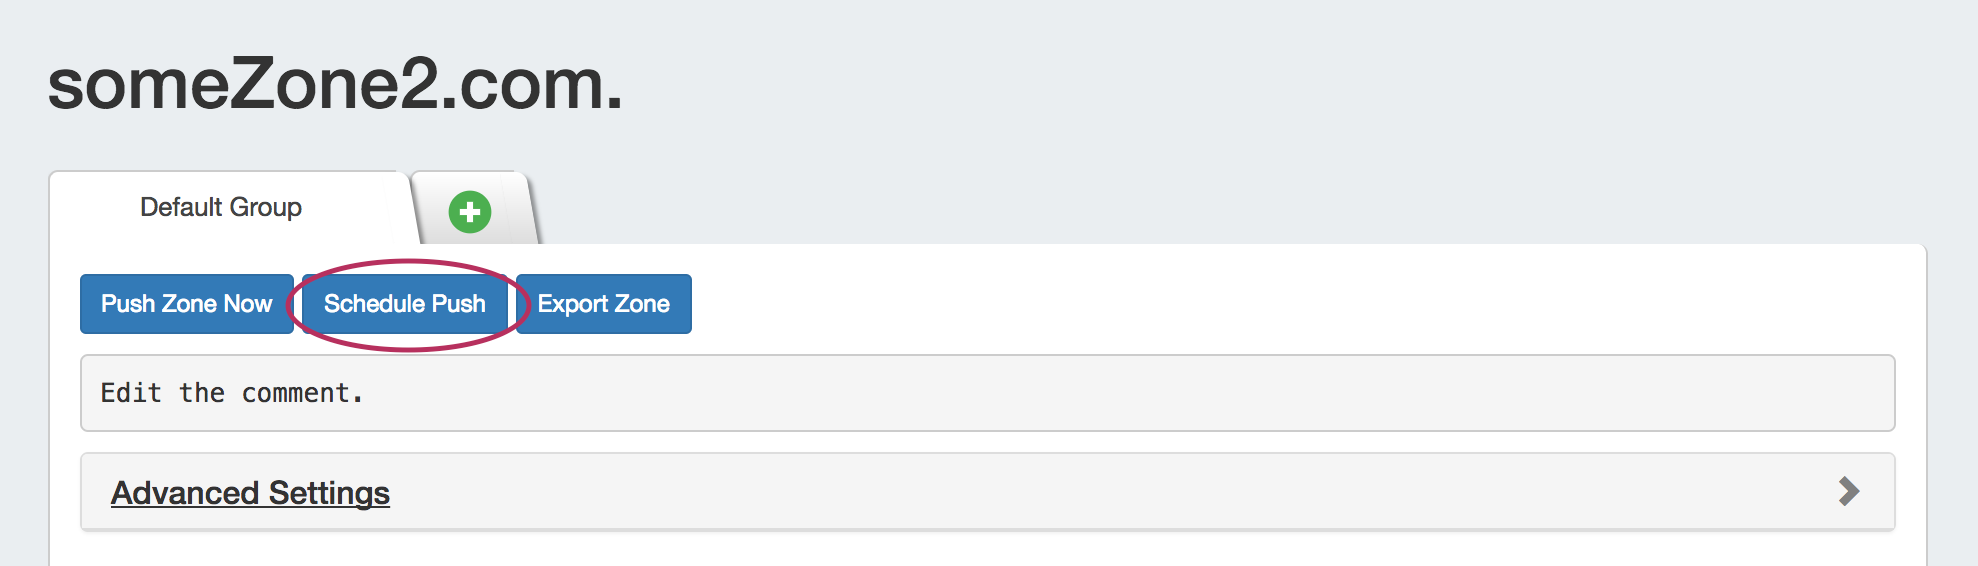
Click "Schedule Push" for the zone, then select a date, time (12 hour, with AM / PM toggle), add a notification email address, and click "Save changes".
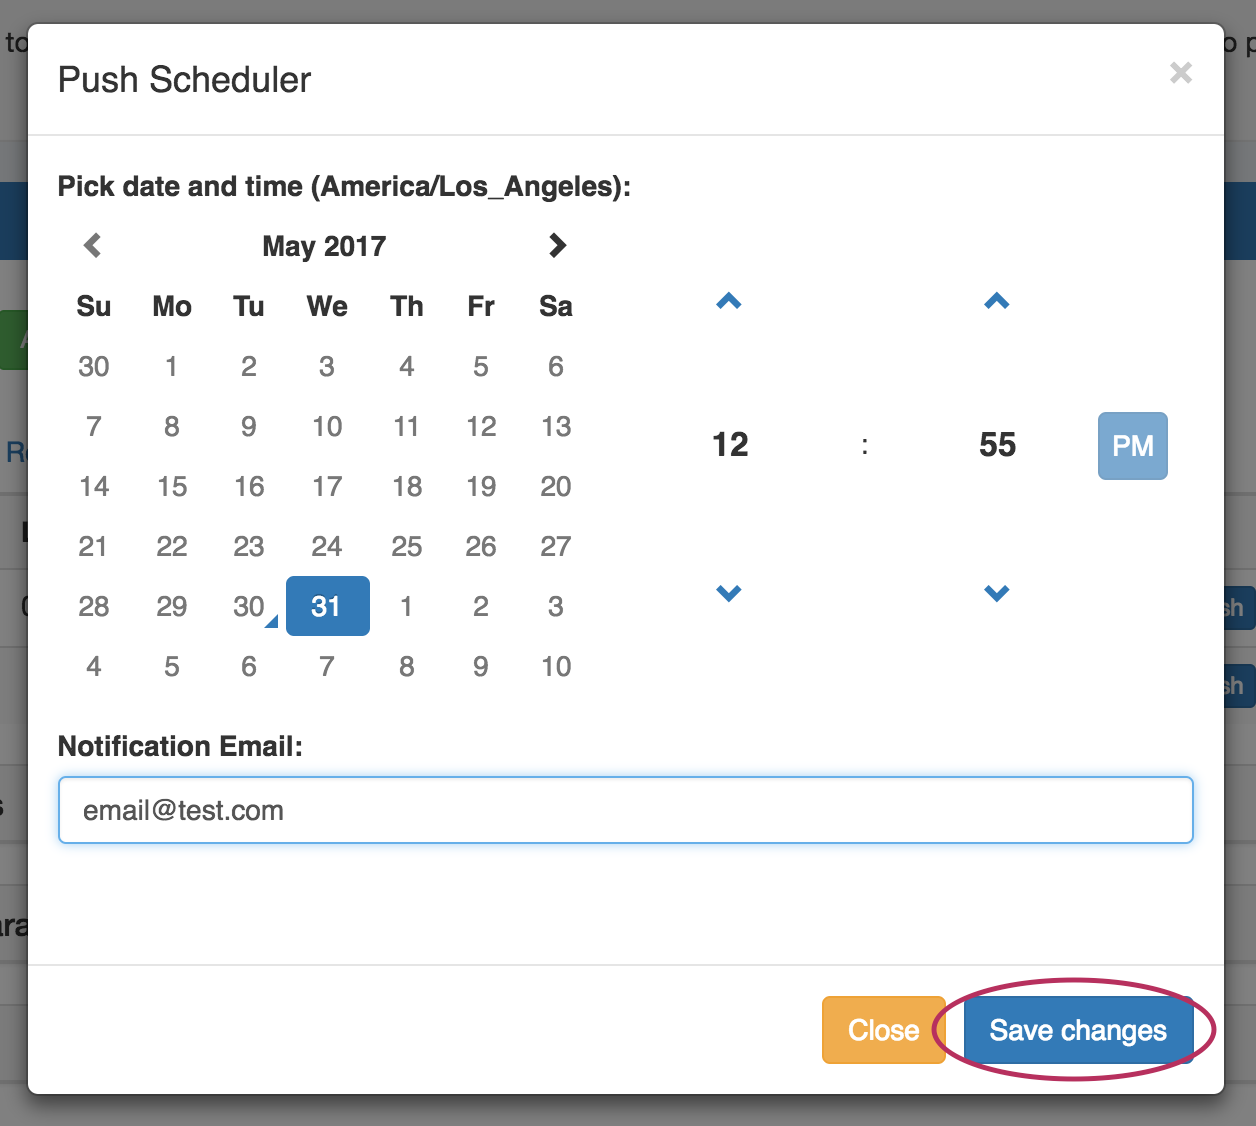
The Scheduled task will be shown in both the Zone View page (under "Scheduled Tasks") and the Admin Scheduler task list.

The task may be deleted prior to running by clicking the "delete" button, but will automatically be removed once completed.
Schedule Push (Admin Scheduler):
Scheduled zone and server pushes may also be set up by Admin users from the Scheduler tab. For more information, see the Scheduler documentation.
Group Push:
All zones contained in a DNS Group may be pushed at the same time, by pushing the DNS Group.
For information on working with DNS Groups, including performing a manual or scheduled Group push, see Working with DNS Groups - Pushing a Group.
Server Push:
Admin users may push all zones on a server from the DNS Tab -> DNS Servers page.
For information on working with DNS Servers, including performing a manual or scheduled server push, see Working with DNS Servers - Pushing a Server.
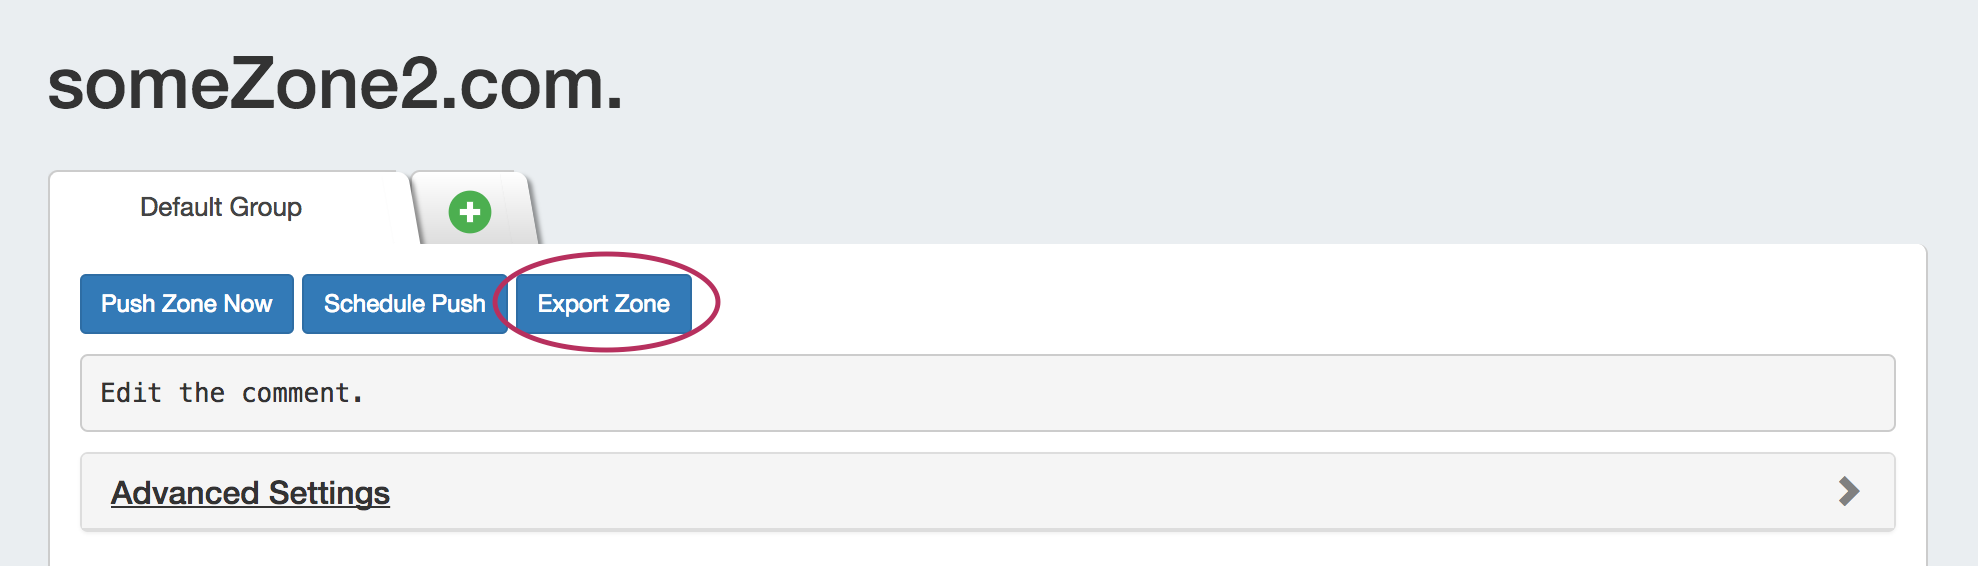
Export a Zone
Individual zones may be exported to a .zone file by clicking the "Export Zone" button on the View Zone page.
Individual .zone files may later be compressed into a .zip, and used with ProVision's BIND DNS Zone Upload / Import tool.
Delete a Zone
Users with resource delete permissions over the zone may delete a zone record by clicking the "Delete" button under "Actions" for the desired zone entry in any Zone List.
Addiitonal Information:
For more information on working with DNS Zones, Groups, and Servers, see the following sections:
Editing DNS Zones (The View Zone Page)