Working with DNS Zones - Common Tasks
This page details some common DNS tasks performed from the DNS tab and DNS Gadget. For tasks that require Admin access in ProVision, see Working with DNS Zones - List Management.
Creating/Adding Zones
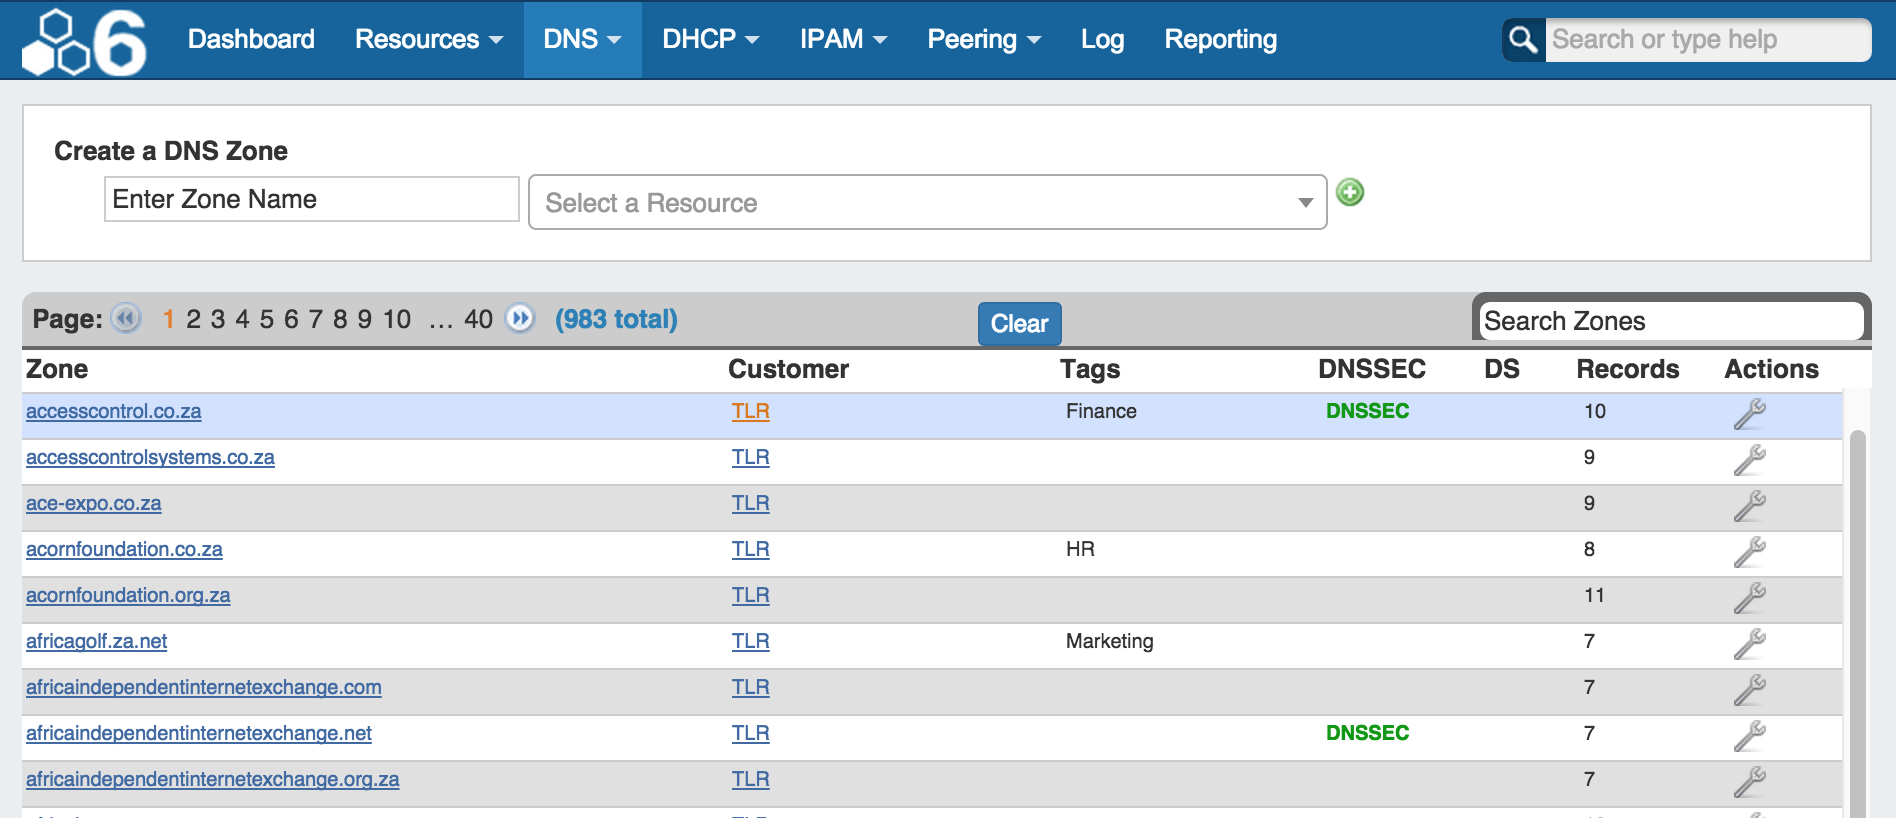
After clicking on the main DNS Tab, at the top of the page will be the "Create a DNS Zone" UI. To create a zone, enter the name of the zone and select the Resource you want to assign the zone to. Click on the green plus sign to be taken to the newly created zone file. There you can edit the zone, assign views, etc.

Editing DNS Tags
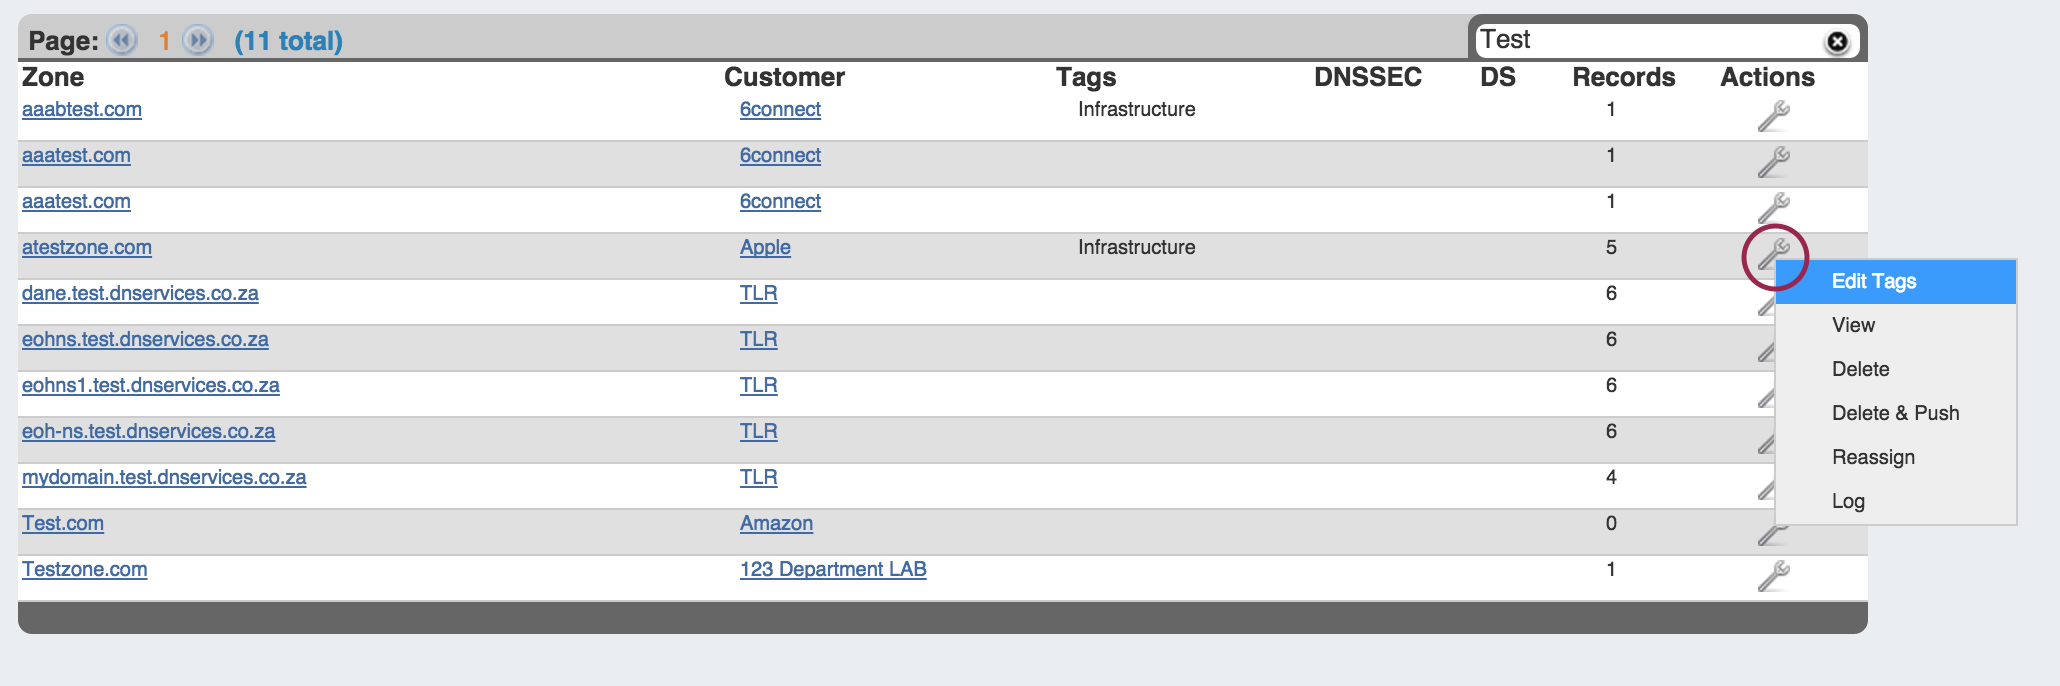
To add tags to a zone, first find the zone in the DNS Tab zone list. Click on the Action Menu (wrench icon), and select "Edit Tags".
The "Edit Tags" interface will pop up.
Click inside the tag listing box, and select the desired tag(s) from the dropdown list. To remove a tag from the zone, click on the "x" in front of the tag. When you are done with your edits, hit the "Update" button.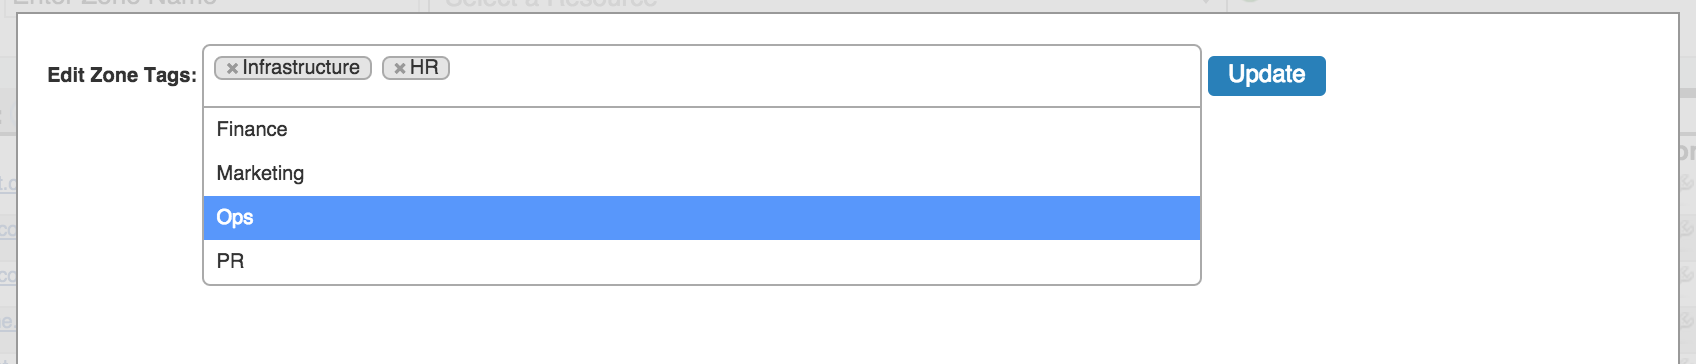
Using the DNS Gadget
When you have defined a Resource, you can assign the DNS Gadget to a given Section. This allows you a shortcut to DNS functionality without having to view it in the standard DNS Tab. Then, from the Resource's Entry page, you will see the DNS gadget and associated zones. From this interface, you can create new zones (with or without a Zone template) or assign Zone delegation specific information.
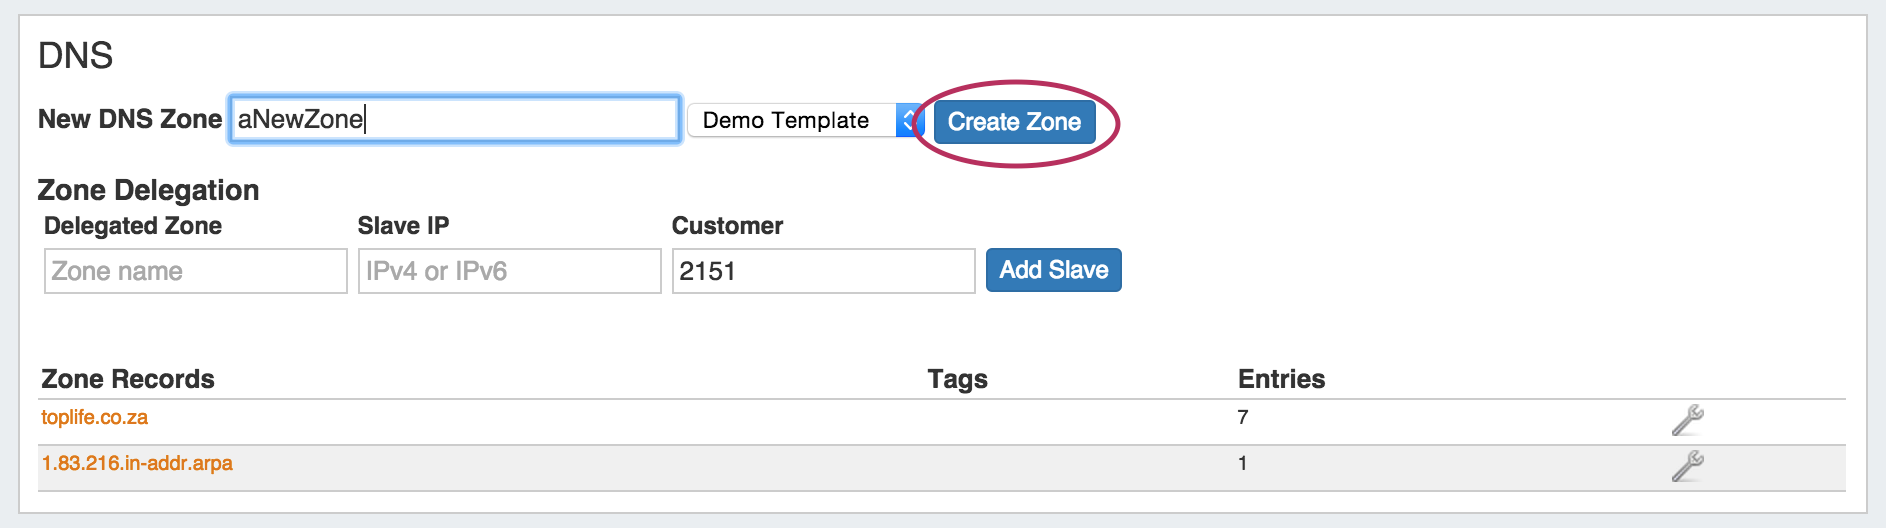
Creating/Adding Zones - DNS Gadget
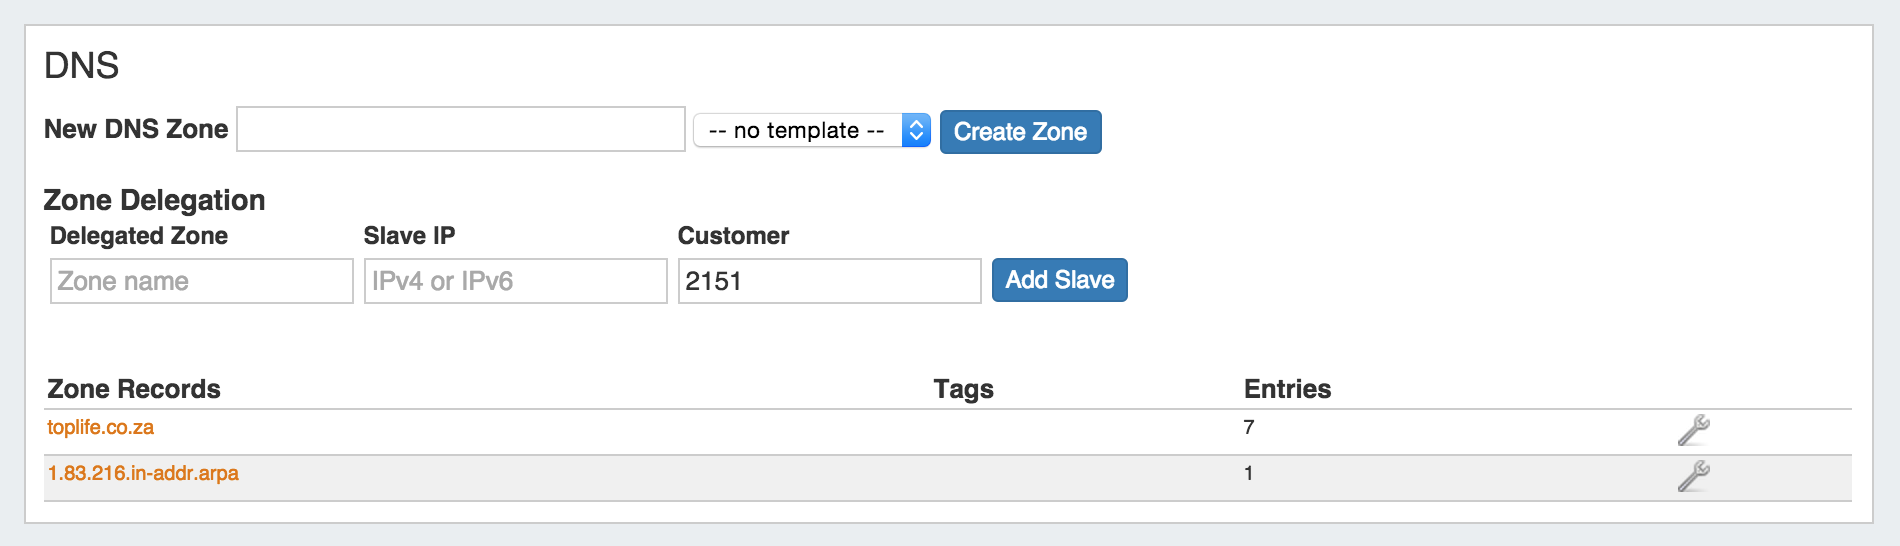
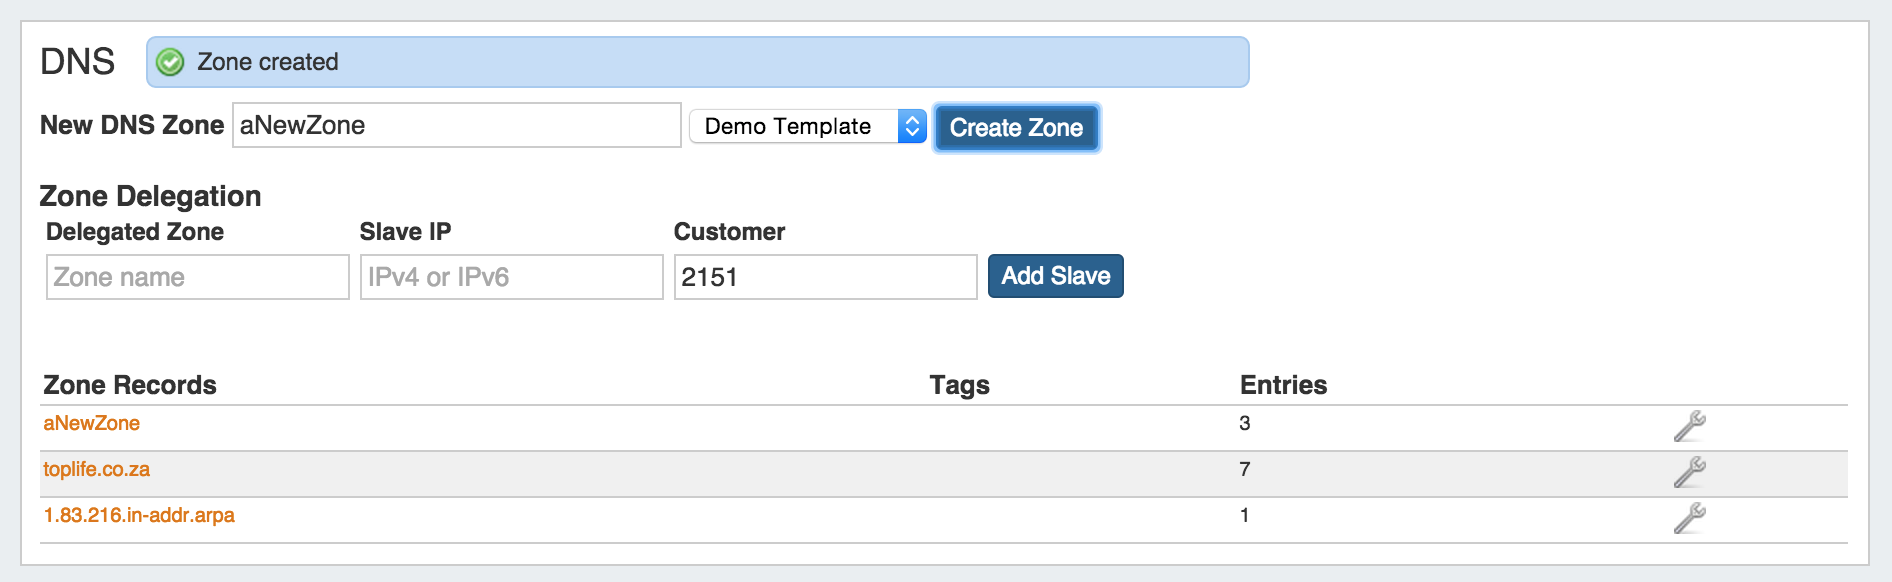
To add a new DNS Zone from the DNS Gadget, enter the zone name in the field next to "New DNS Zone", select a template if applicable, and hit "Create Zone".
Your zone will be added to the list below, and a success message will appear at the top of the gadget.
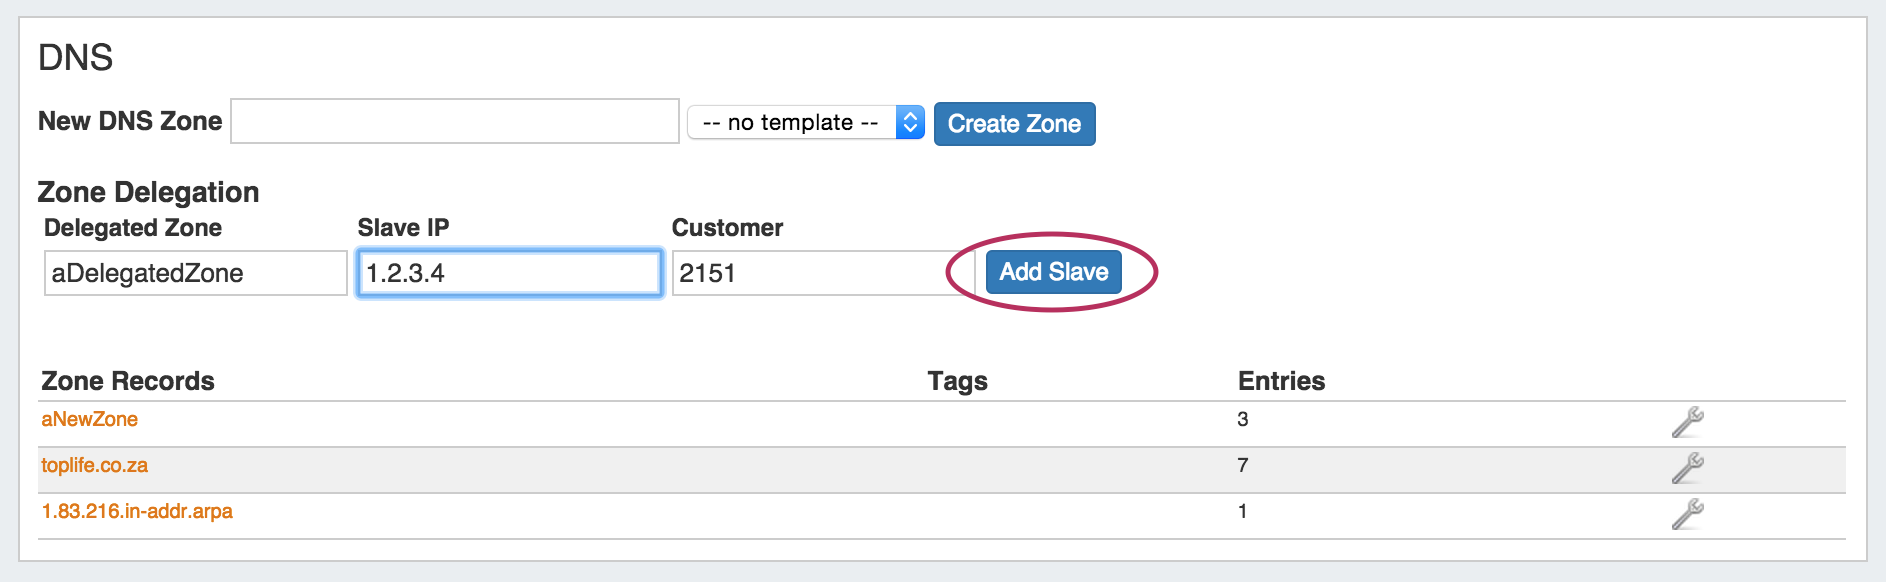
Zone Delegation - DNS Gadget
To delegate a zone, enter in the delegated zone name and the slave IP, and hit "Add Slave". The Customer number is the numerical ID for the Resource you are under, and it is automatically filled in.
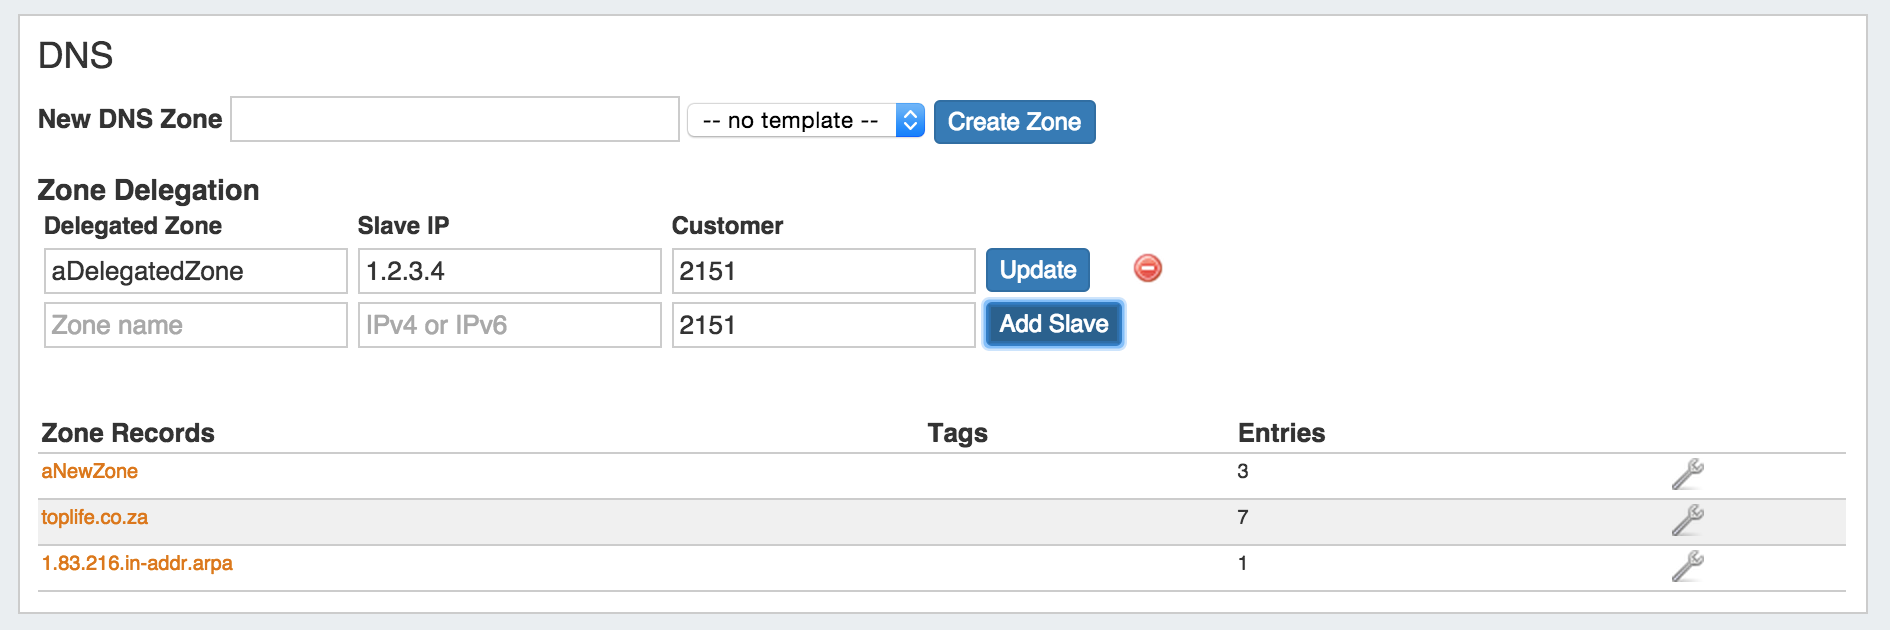
After adding the slave, it will show under the Zone Delegation list. You can make edits to the fields at any time simply by clicking in the field and typing your edits, then clicking the "Update" button. To Delete an entry, click the red "Delete" icon.
Edit Zones - DNS Gadget
Clicking on the Action Menu (wrench icon) next to a zone record and selecting "DNS View", "DNS Edit", or clicking on a zone name, will take you to the zone view / edit page.
From this page you can edit DNSSEC, SOA, check zone status, link zones to servers, edit records, view the zone file, and view the zone history.
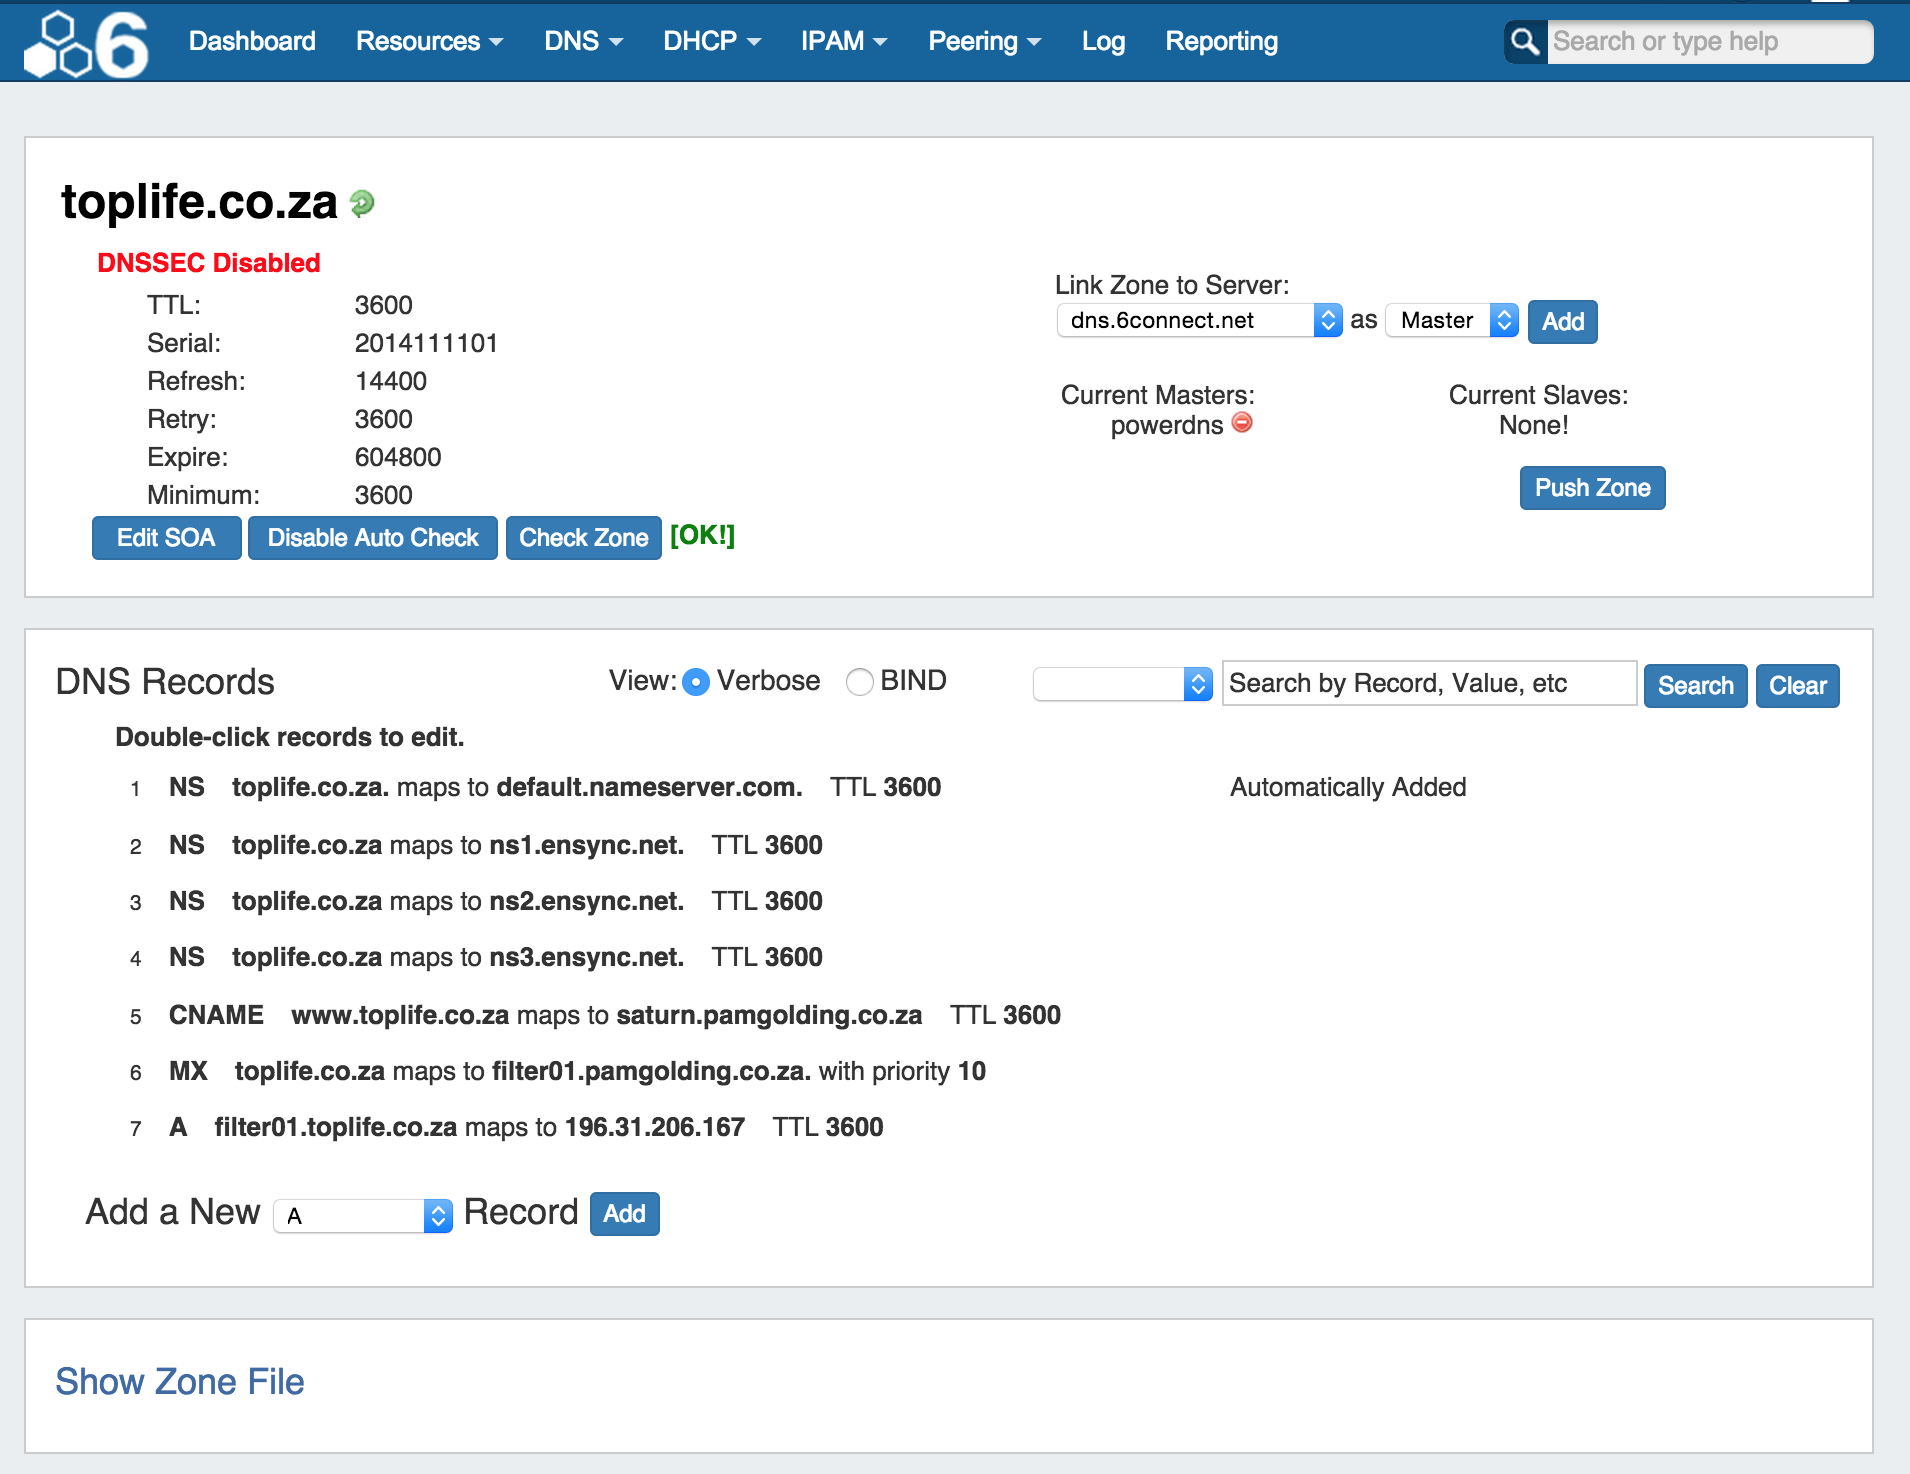
For a more detailed description on the view zone page, continue on to DNS Zones Overview.