Working with the VLAN Manager (Standard Flow)
Step 1) Add Domain
Users will already have a non-editable Default Domain created, which may house VLANs entered under the previous VLAN text field, however, you may choose to create new domains.
To create a new VLAN domain, navigate to the VLAN Admin Tab, in the Admin area of ProVision, and click on "Add Domain".

Enter the domain name, and select whether it is standard or extended - Standard has a range of VLAN IDs from 1-1005; Extended includes up to 4094.

Click "Add", and your new domain will be added to the Domain list below.
Viewing the Domain List

If a domain already has VLANs enabled for it, clicking on the "+" sign in front of the domain name will expand the domain list to show enabled VLANs.
The numbers in parentheses under the domain name (shown as 21/1000 in the above image for a standard domain; an extended domain would show as 21/4089) indicate the quantity of enabled VLANs over the available pool of VLANs to select from. There are 5 VLANs (1, 1002-1005) which are reserved, and not included in the count.
Edit a Domain
The Default Domain is not editable, however users may edit the name of user-created domains.
Once a domain has been created, users may not edit the range (standard / extended) of a domain - if a domain is created with a mistaken range, it must be deleted and re-created.
To edit a domain name, click on the "Manage" button next to the domain name.

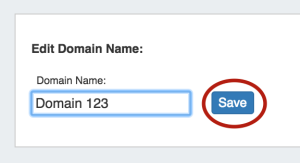
Under the "Edit Domain Name" section of the page, edit the name as desired, then hit "Save".
Remove a Domain
To edit a domain, click on the "Manage" button next to the domain name.

Then, edit the name as desired and hit "Save".
Step 2) Add VLANs to a Domain (Enable)
After creating domains, VLANs need to be added (enabled) for that domain out of the pool of available VLANs.
The IPAM VLAN Page
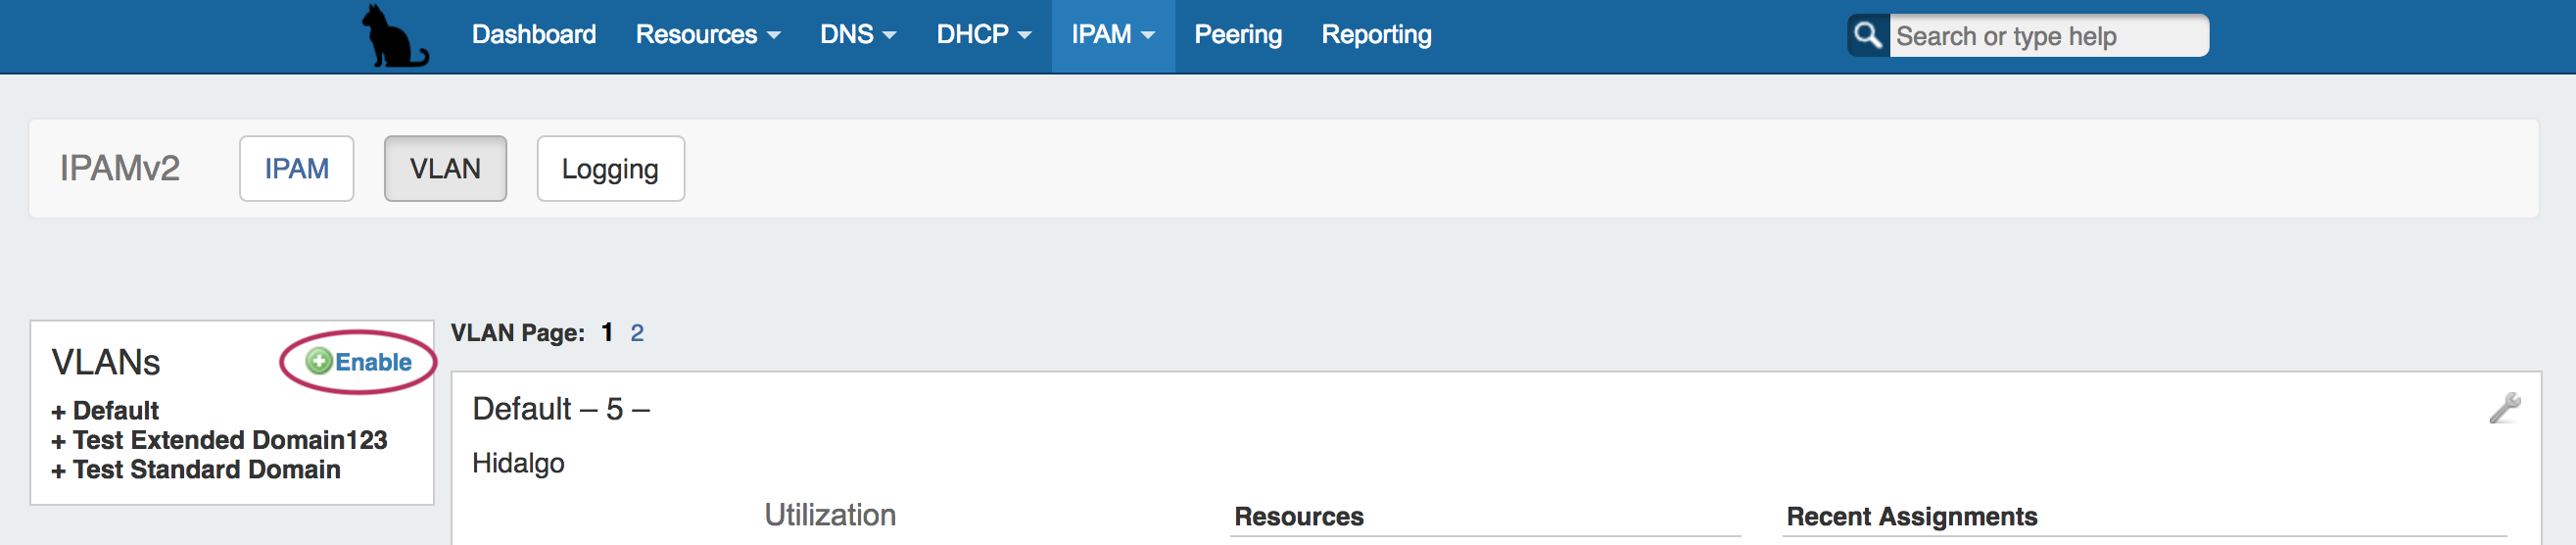
Go to the IPAM Tab, and then either select VLAN from the IPAM dropdown menu, or click "VLAN" from the subtab buttons that appear on the IPAM page.

This takes you to the IPAM - VLAN page, which shows an overview of Domains and VLANs on the left sidebar (click the + next to the domain names to see the enabled VLANs under each domain), and similar to the IPAM page, shows IPAM Utilization data for each Domain / VLAN pair. Clicking on the wrench will open "VLAN Manage", which has the same type of functionality for IP blocks as IPAM Manage, but organized under the scope of that VLAN.
Add VLANs to a Domain (Enable)
In the IPAM - VLAN page VLAN sidebar, click "Enable".
This changes the sidebar into a VLAN search module. Select the desired domain, range of VLANs to view, and click "Search".
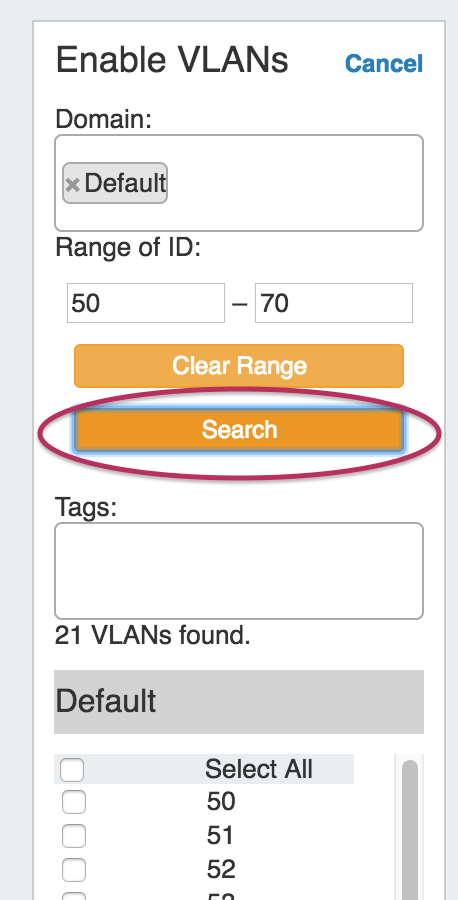
Below the search criteria, the results list will show VLANs meeting your criteria.
Select the desired VLANs to enable for the domain - you may either select all VLANs in your results list, or check VLANs individually.
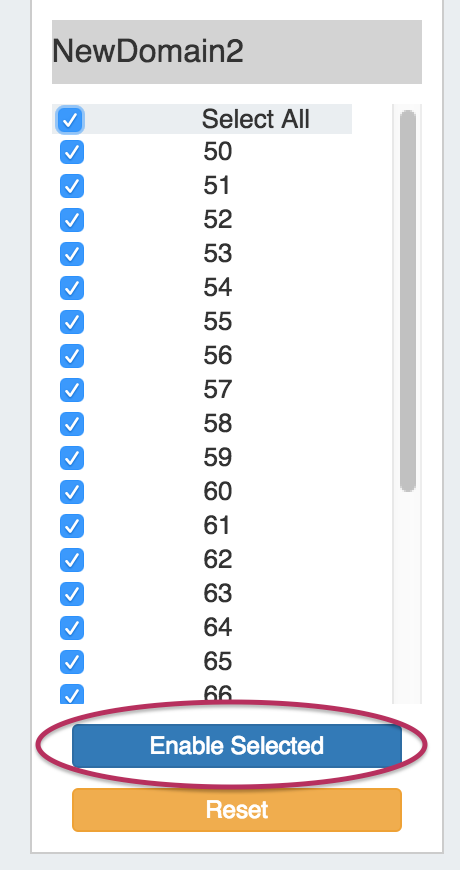
When done selecting the VLANs, click "Enable Selected". The selected VLANs will now be enabled for the domain, show in Domain / VLAN lists, and be available to edit or add blocks to. To add more VLANs to another domain, click "Reset" and repeat the process. If done, hit the "Cancel" button at the top of the Add VLAN module, and you will return to the main IPAM - VLAN page view.
Remove VLANs from a Domain (Disable) - API
Disabling a VLAN (removing the VLAN from a domain) may be done through the VLAN API "update" endpoint.
A VLAN may be enabled or disabled by setting its "enabled" parameter to true (enable) or false (disable), after providing the required id.
An example API call to disable a VLAN with id=41438 would look like:
(instance url)/api/v1/api.php?target=vlan&action=update&id=41438&enabled=false
For details on the VLAN update endpoint, see API Module - VLAN - (update).
Edit a VLAN
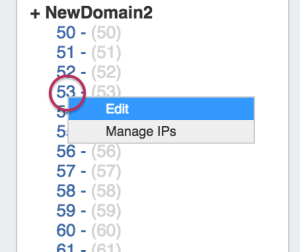
You can edit a VLAN by clicking on the VLAN in the VLAN List sidebar, then selecting "Edit".
You cannot change the Domain of the VLAN, but you can add a descriptive text name, apply a VLAN tag (if using the tag system), or edit VLAN Metadata (if enabled).
After making your changes, click the "Save" button. The named VLAN will now show both VLAN number and name when viewing Domain / VLAN lists or when working with blocks.
Step 3) Add Blocks to VLANs
After VLANs have been enabled for domains, you can associate those VLANs with IP blocks.
Add / Update Blocks to VLAN from VLAN - Manage IPs:
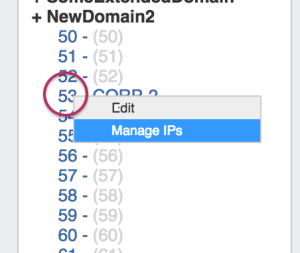
While in the IPAM Tab -> VLAN Page, expand the desired domain and click on a VLAN. Then select "Manage IPs".
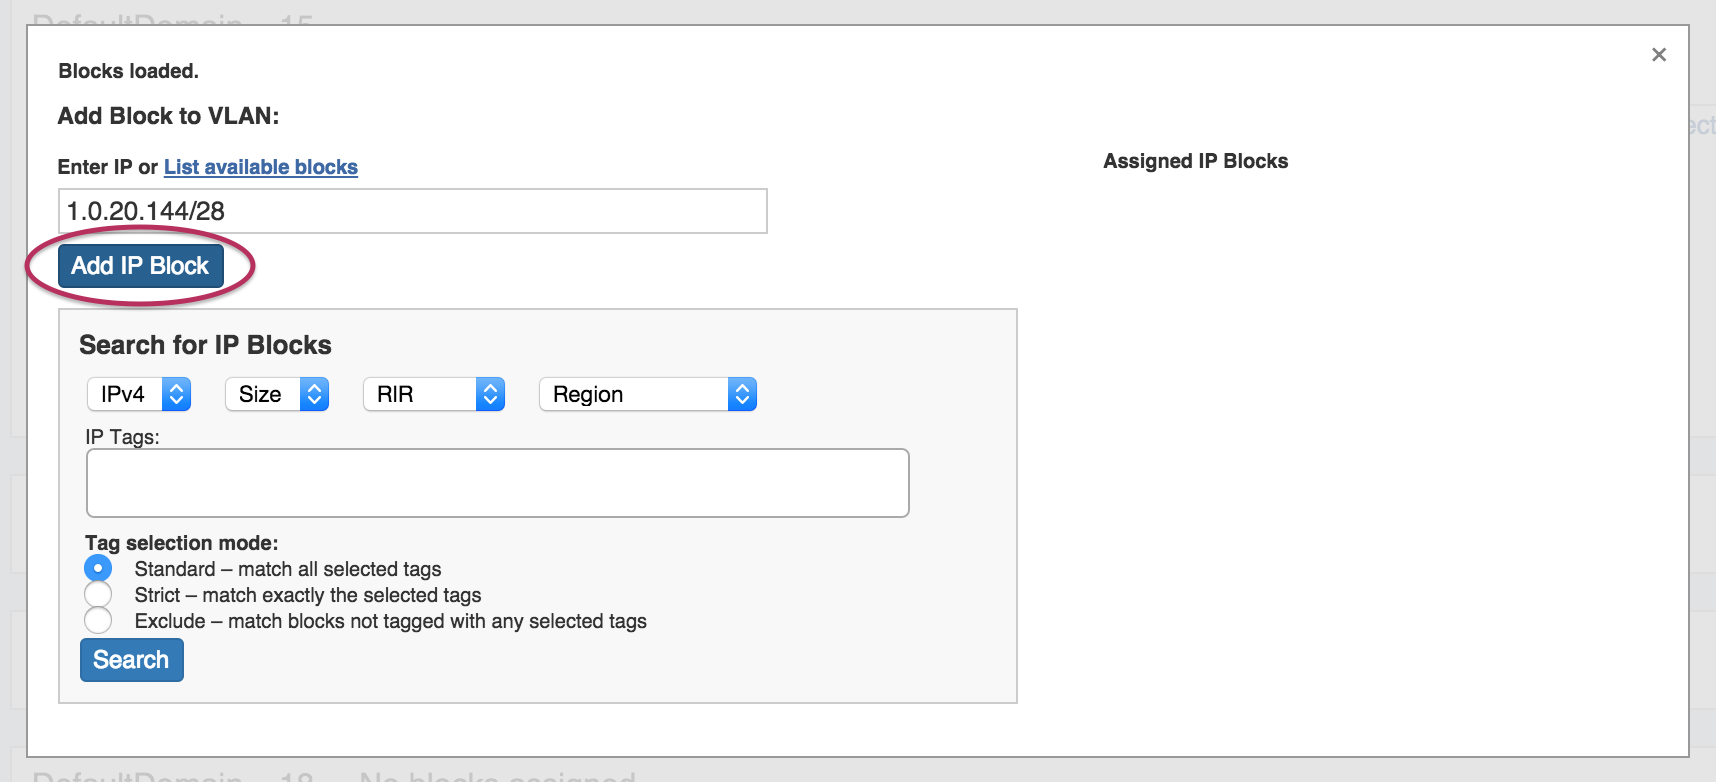
This opens up a window where IP Blocks may be associated to the VLAN. From here, you can "Direct Assign" a block to the VLAN, "Browse Assign" blocks, or Search for a block to add to the VLAN.
Direct Add Block to VLAN:
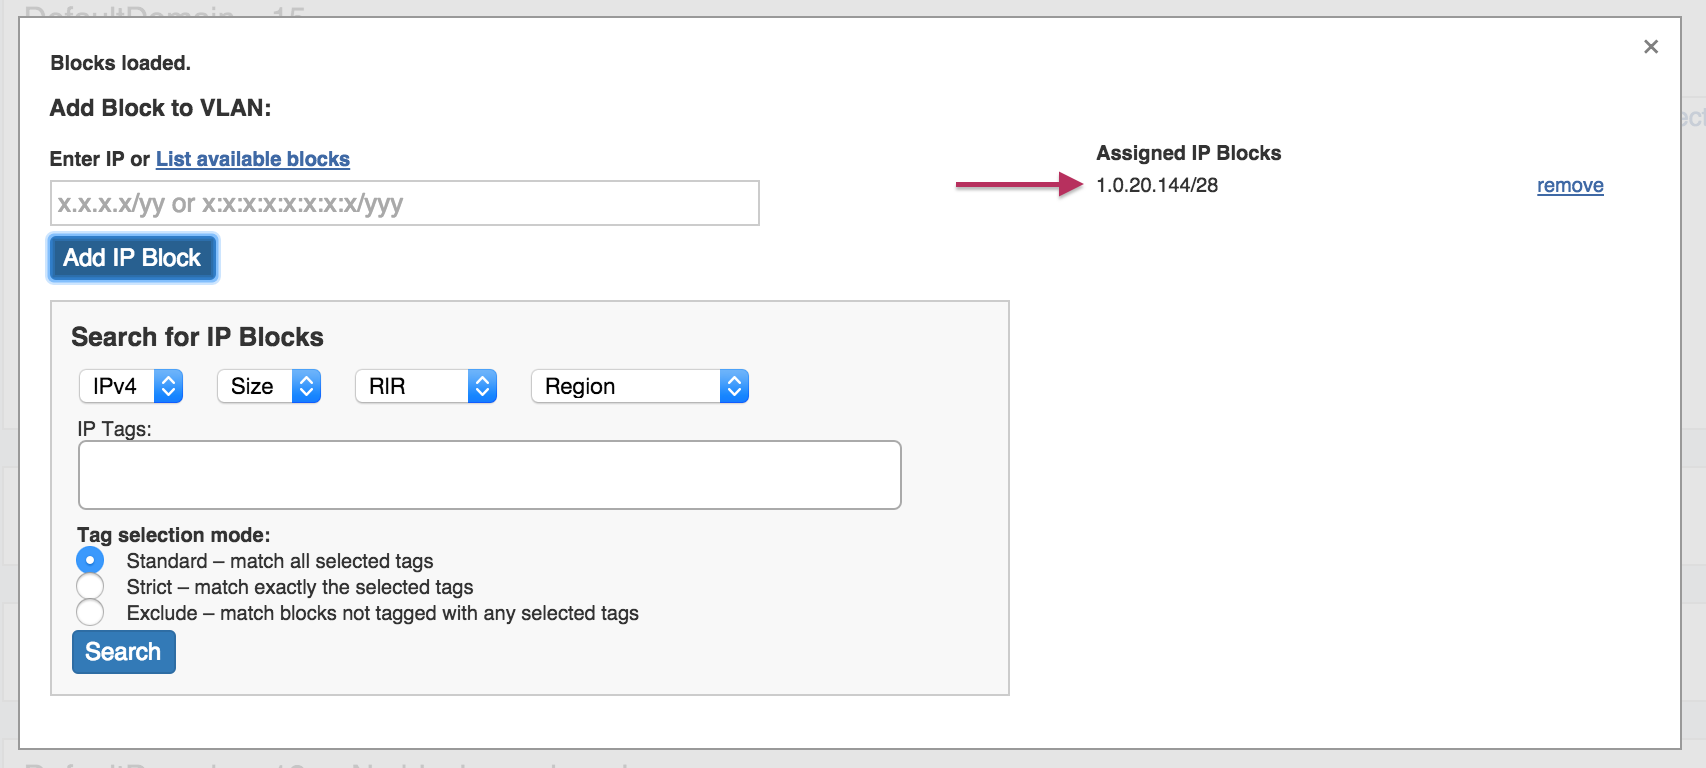
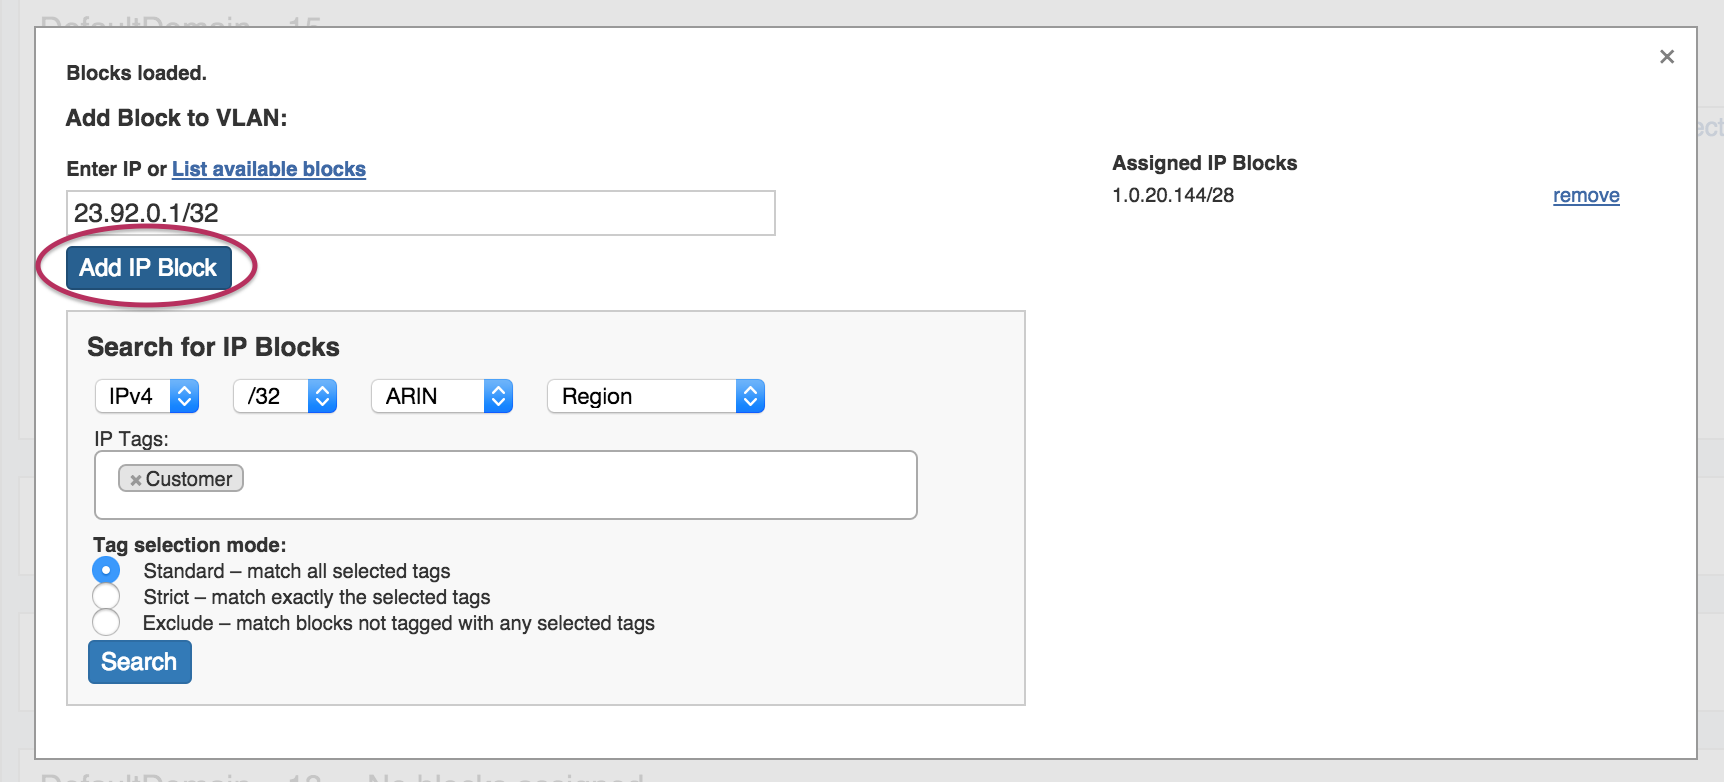
Directly add a known, available IP Block by typing in the CIDR, then hitting "Add IP Block".
When complete, the block will be added to the "Assigned IP Blocks" list on the right of the window, with the option to remove if desired.
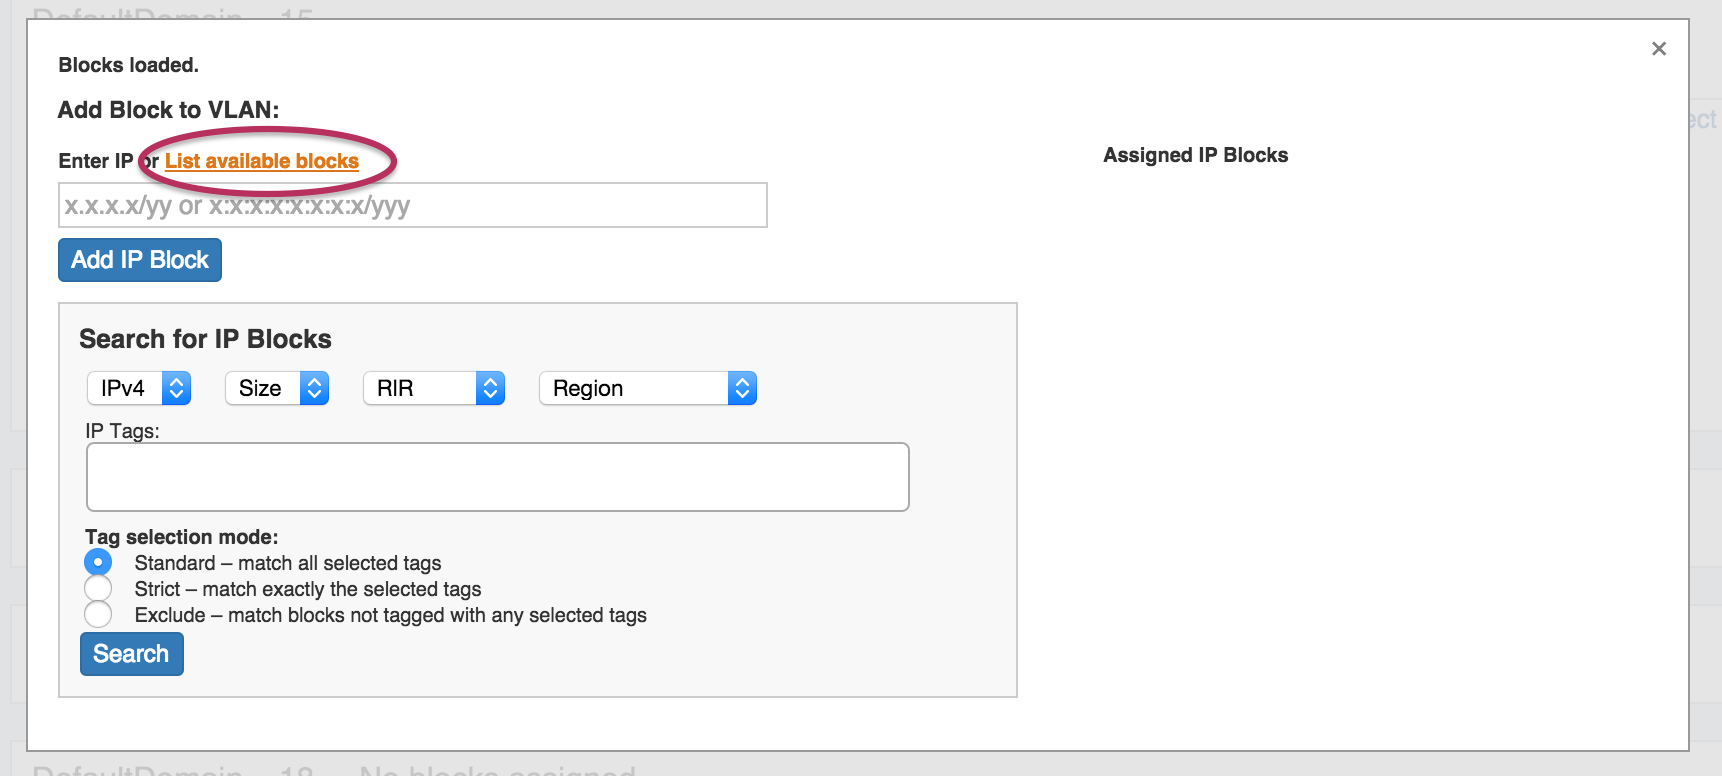
Browse IP Blocks to add to VLAN:
Browse blocks available to add to the VLAN by clicking on the "List available blocks" link above the IP block input box.
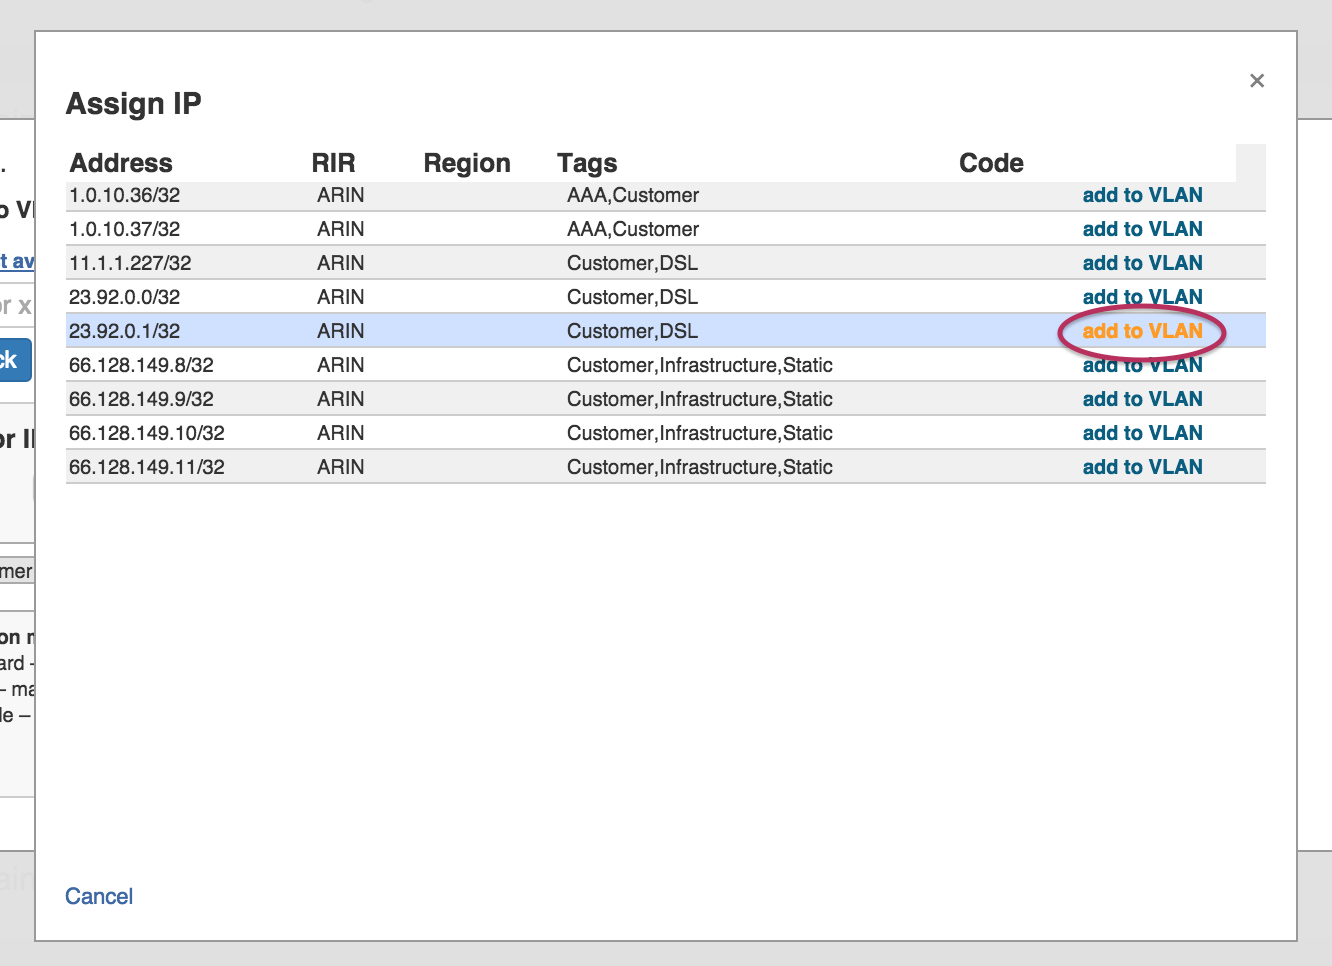
This opens a window similar to the "Smart Browse" used in assigning IPs to a resource - just select IPv4, IPv6 blocks, or Resources to browse from the radio buttons at the top of the list.
When you have selected the block to add, click "add to VLAN".
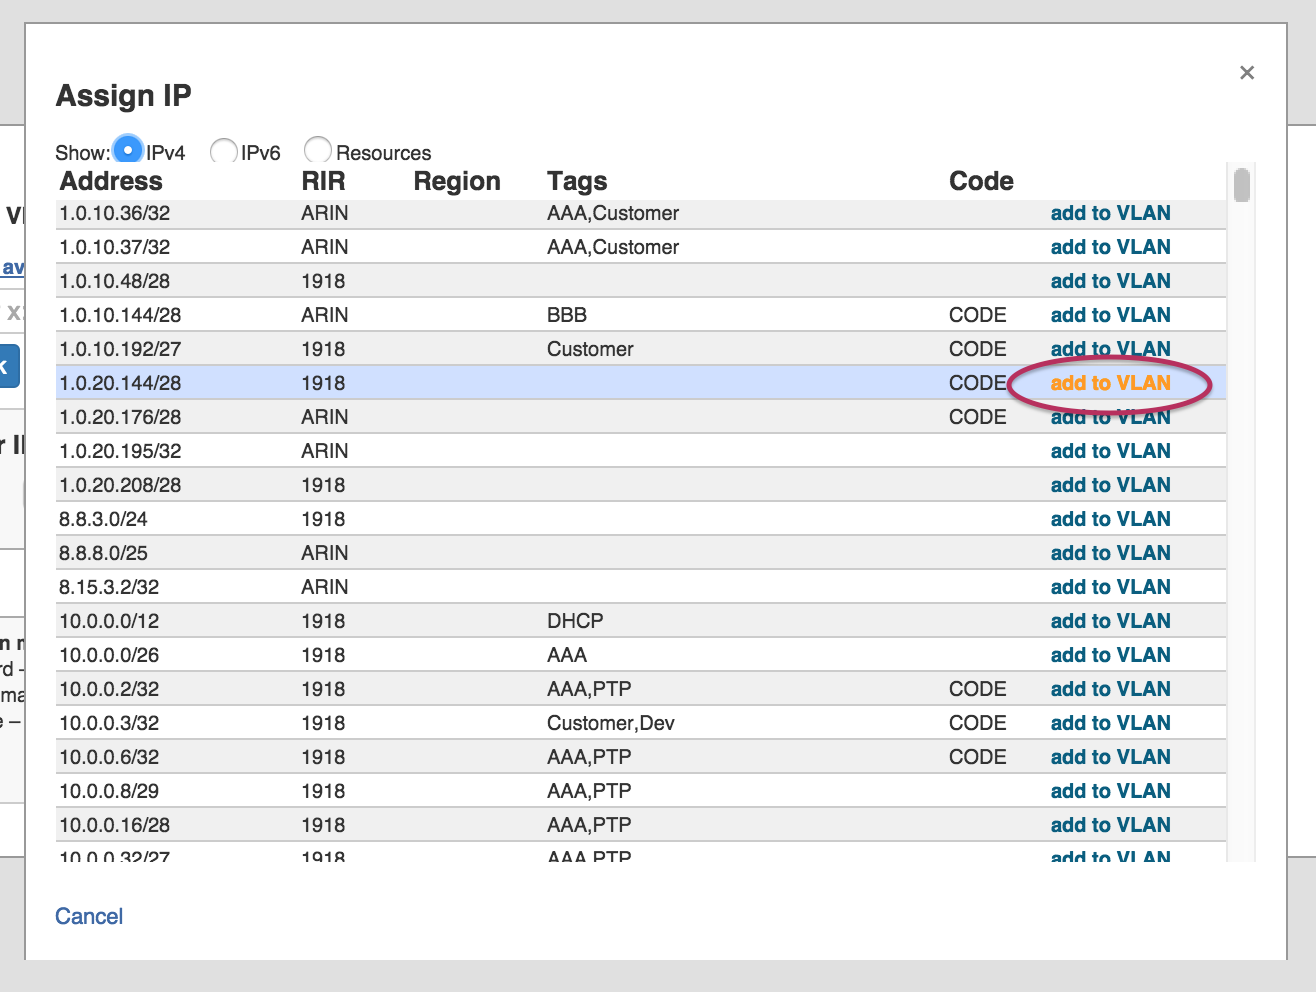
The selected block will automatically fill in the block input box - just hit "Add to IP Block" below the input to finalize the addition.
When complete, the block will be added to the "Assigned IP Blocks" list on the right of the window, with the option to remove if desired.
Search IP Blocks to add to VLAN:
Select search criteria of IPv4 / IPv6, size, RIR, Region, or Associated Tags / Tag selection mode to create a filtered list of IP blocks meeting that criteria. Then, click "Search".
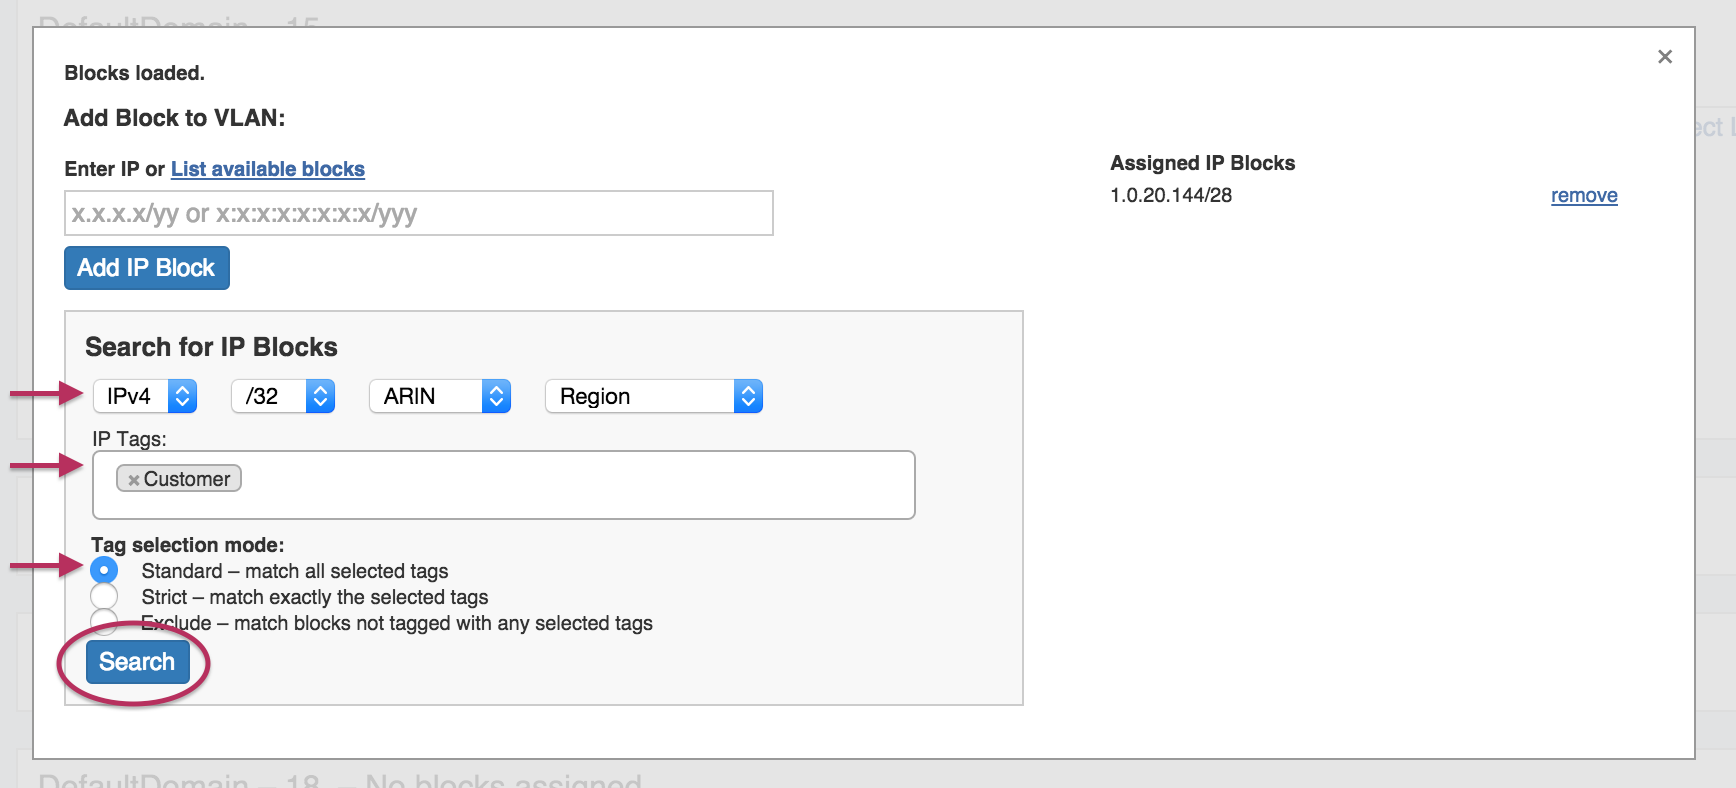
This opens a window with filtered results matching your criteria.
When you have selected the block to add, click "add to VLAN".
The selected block will automatically fill in the block input box - just hit "Add to IP Block" below the input to finalize the addition.
When complete, the block will be added to the "Assigned IP Blocks" list on the right of the window, with the option to remove if desired.
Add / Update VLAN to Blocks from IPAM Manage or VLAN Manage:
When editing a block in either IP Manage (IPAM Tab -> Action Menu (wrench) -> Manage), or VLAN Manage (IPAM Tab - VLAN -> Action Menu (wrench)) , you can select an existing domain and VLAN to associate to the block.
VLAN Manage:
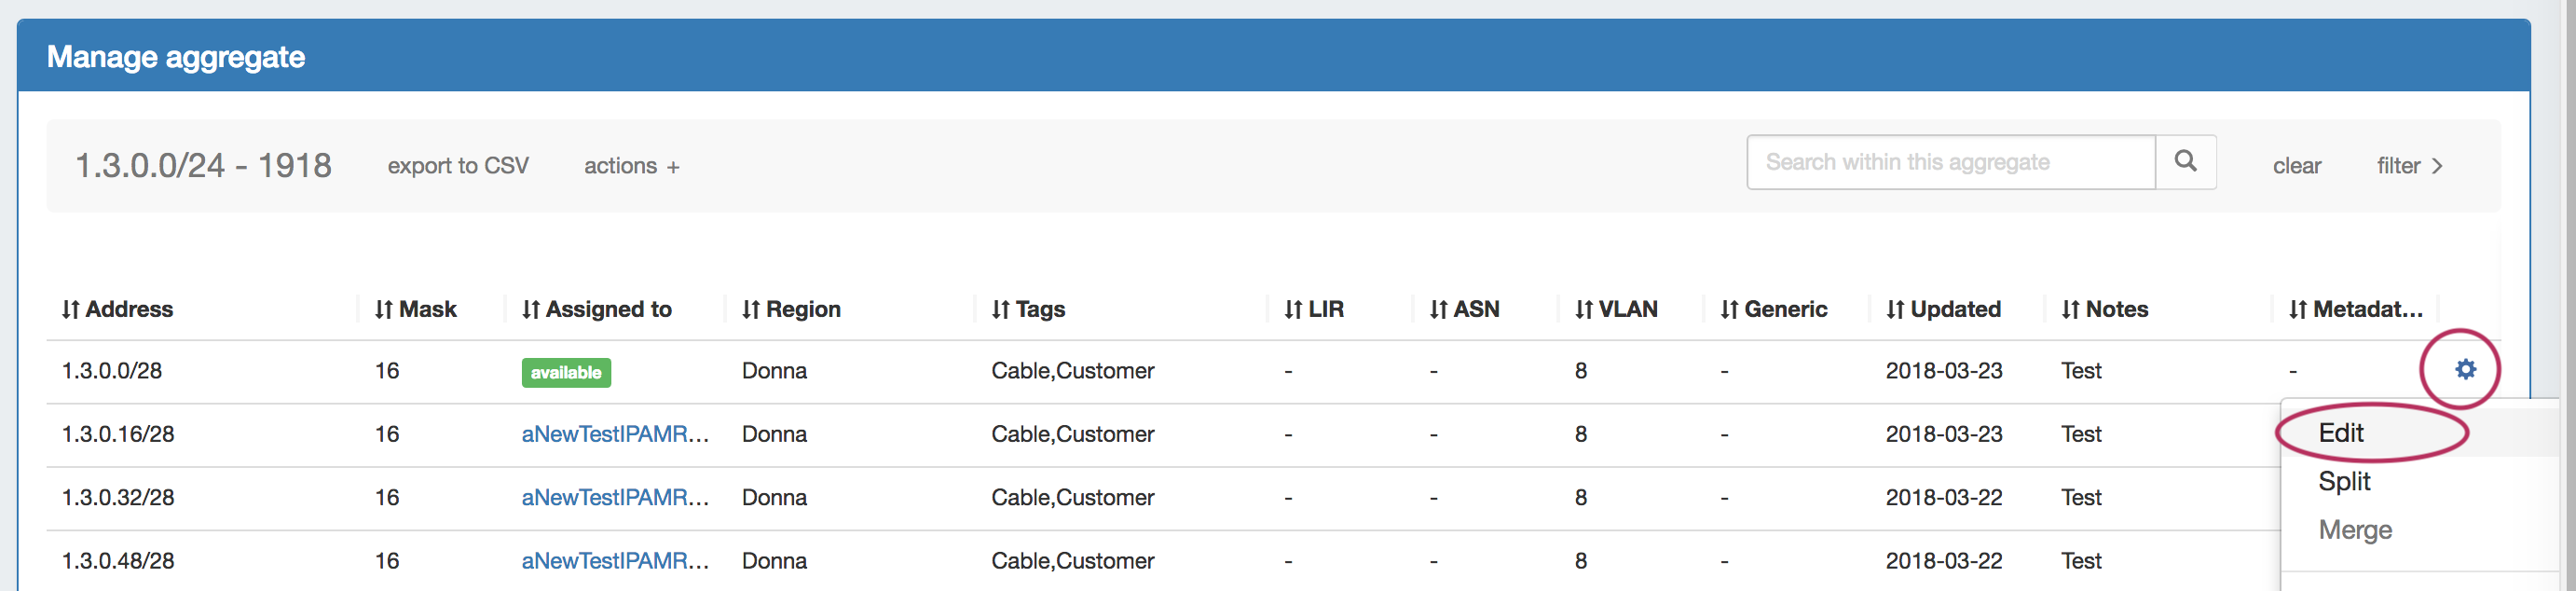
From the VLAN Manage screen, click on the Action Menu (wrench icon) for the desired block, the select "Edit".
In the Edit Attributes page for the block, change the Domain to the desired item, then select the VLAN. Hit save when done. 
IPAM Manage:
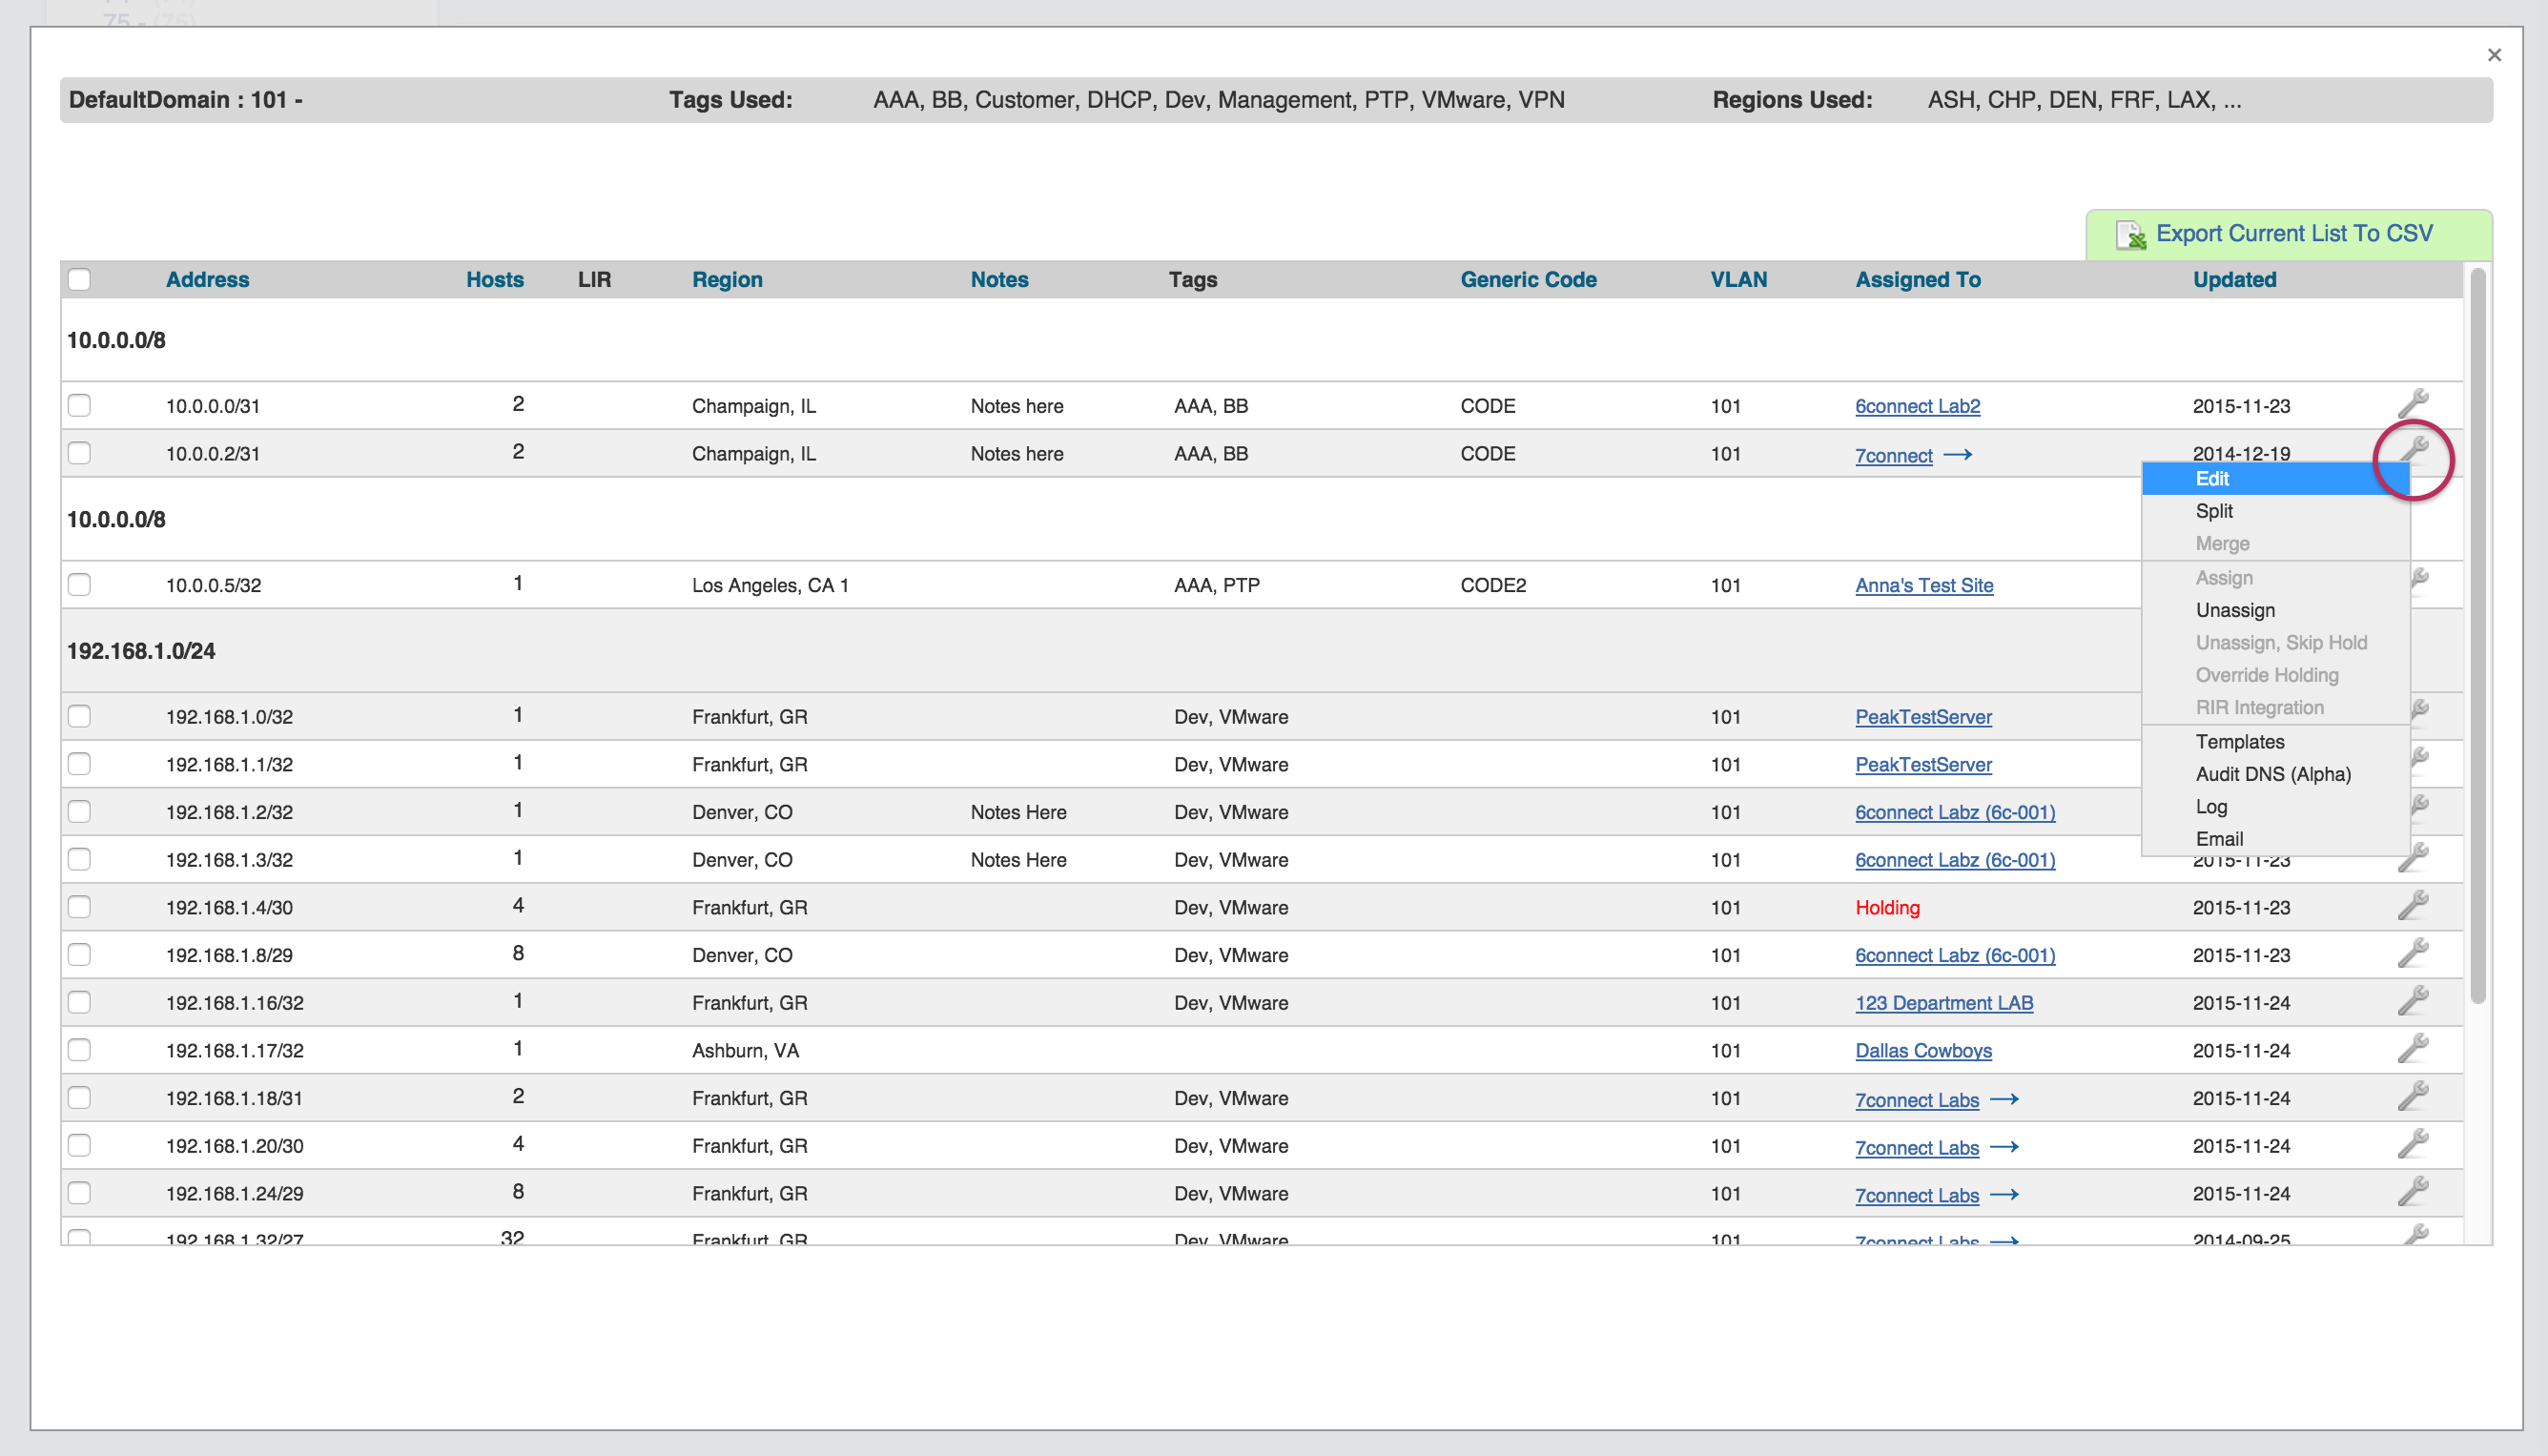
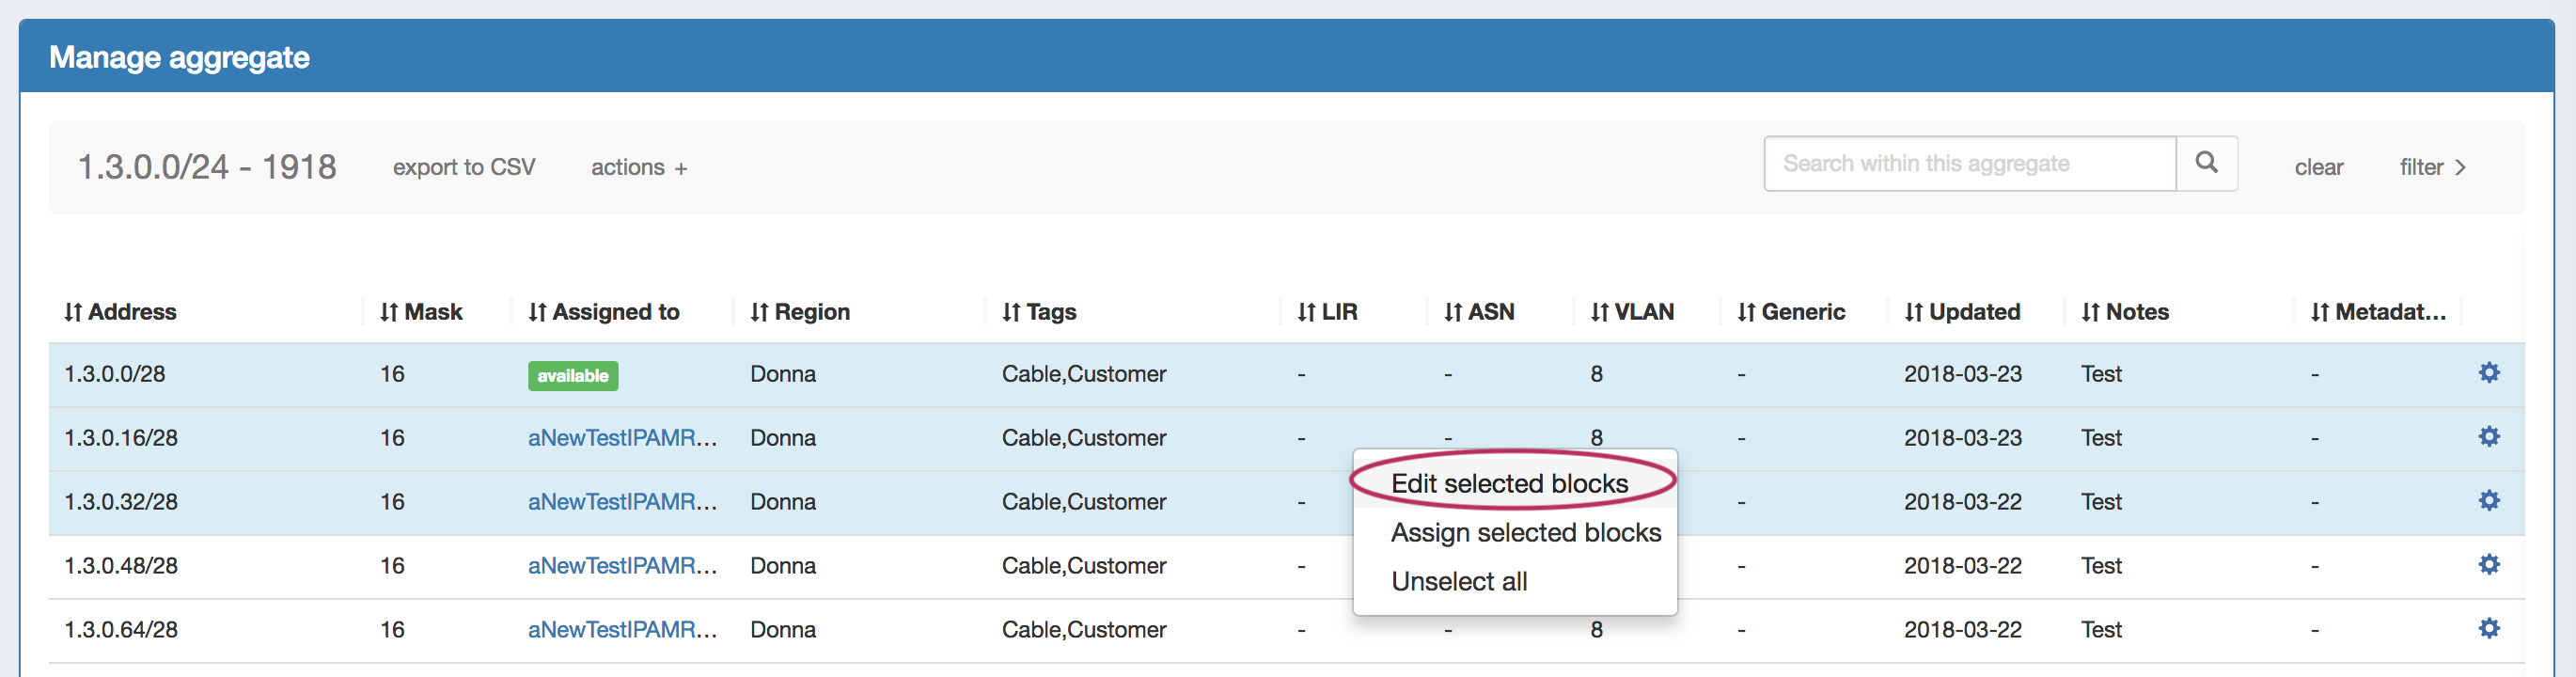
From the IPAM Manage screen, right click on the Action Menu (gear icon) for the desired block, the select "Edit".
To select multple blocks to edit, hold down the shift key and click on the blocks you wish to edit - the selected blocks will be highlighted. Right click anywhere in the blue highlighted area, and select "Edit selected blocks".
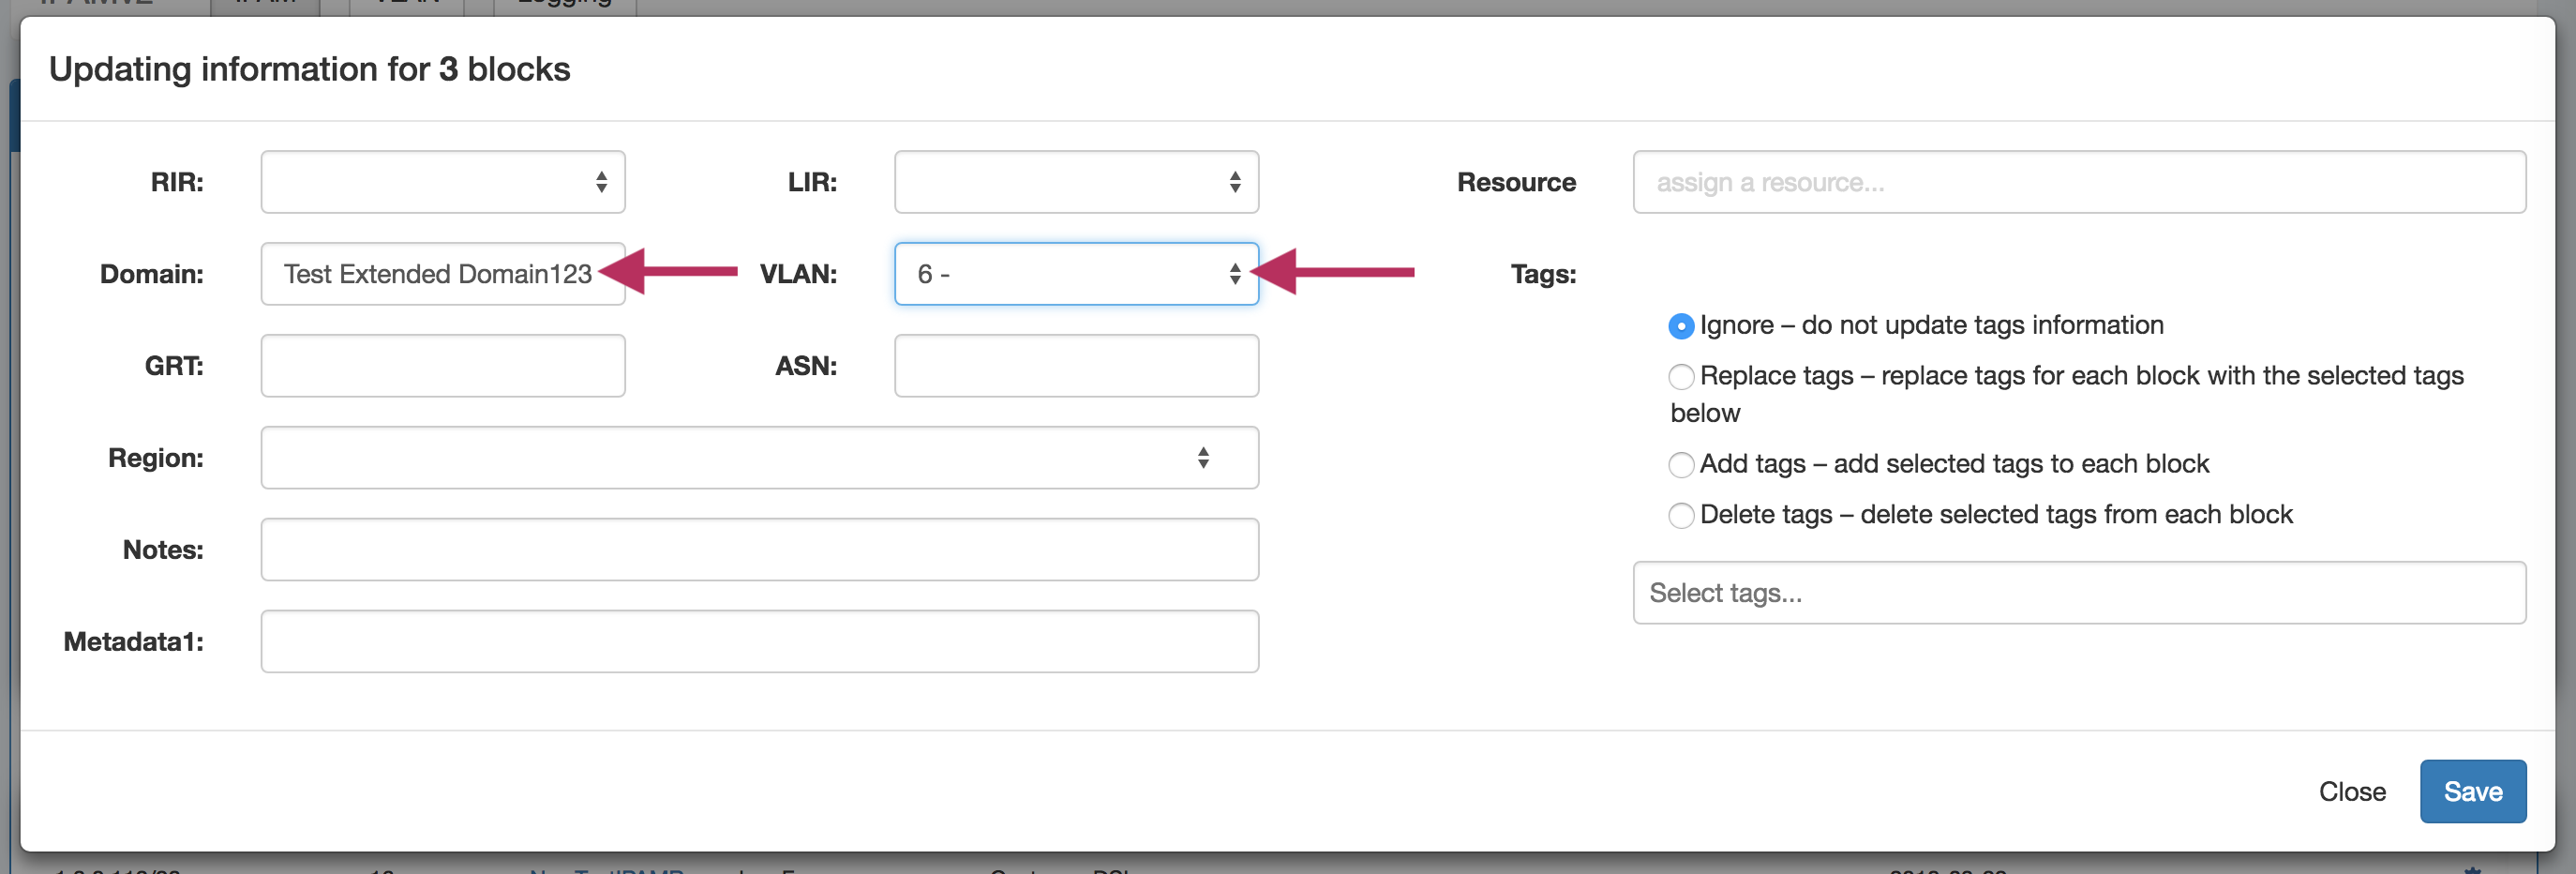
The "Edit Block" modal window will pop up for the selected block(s). Edit the domain by clicking in or typing in the domain search box, and select the desired Domain.
Then, select the VLAN for the blocks from the enabled VLAN list. When done, click "Save".
VLANs and Child Blocks
NOTE: Child blocks whose Parent blocks already have an assigned Domain / VLAN, may not have domains and VLANs changed to be different than the Parent Block's values. If you attempt to save domain / VLAN changes to a child block under this situation, an error will occur.
i.e., Parent and Child IP Blocks must have matching Domain / VLAN values.
Add / Update VLAN to Blocks from IPAM Gadget:
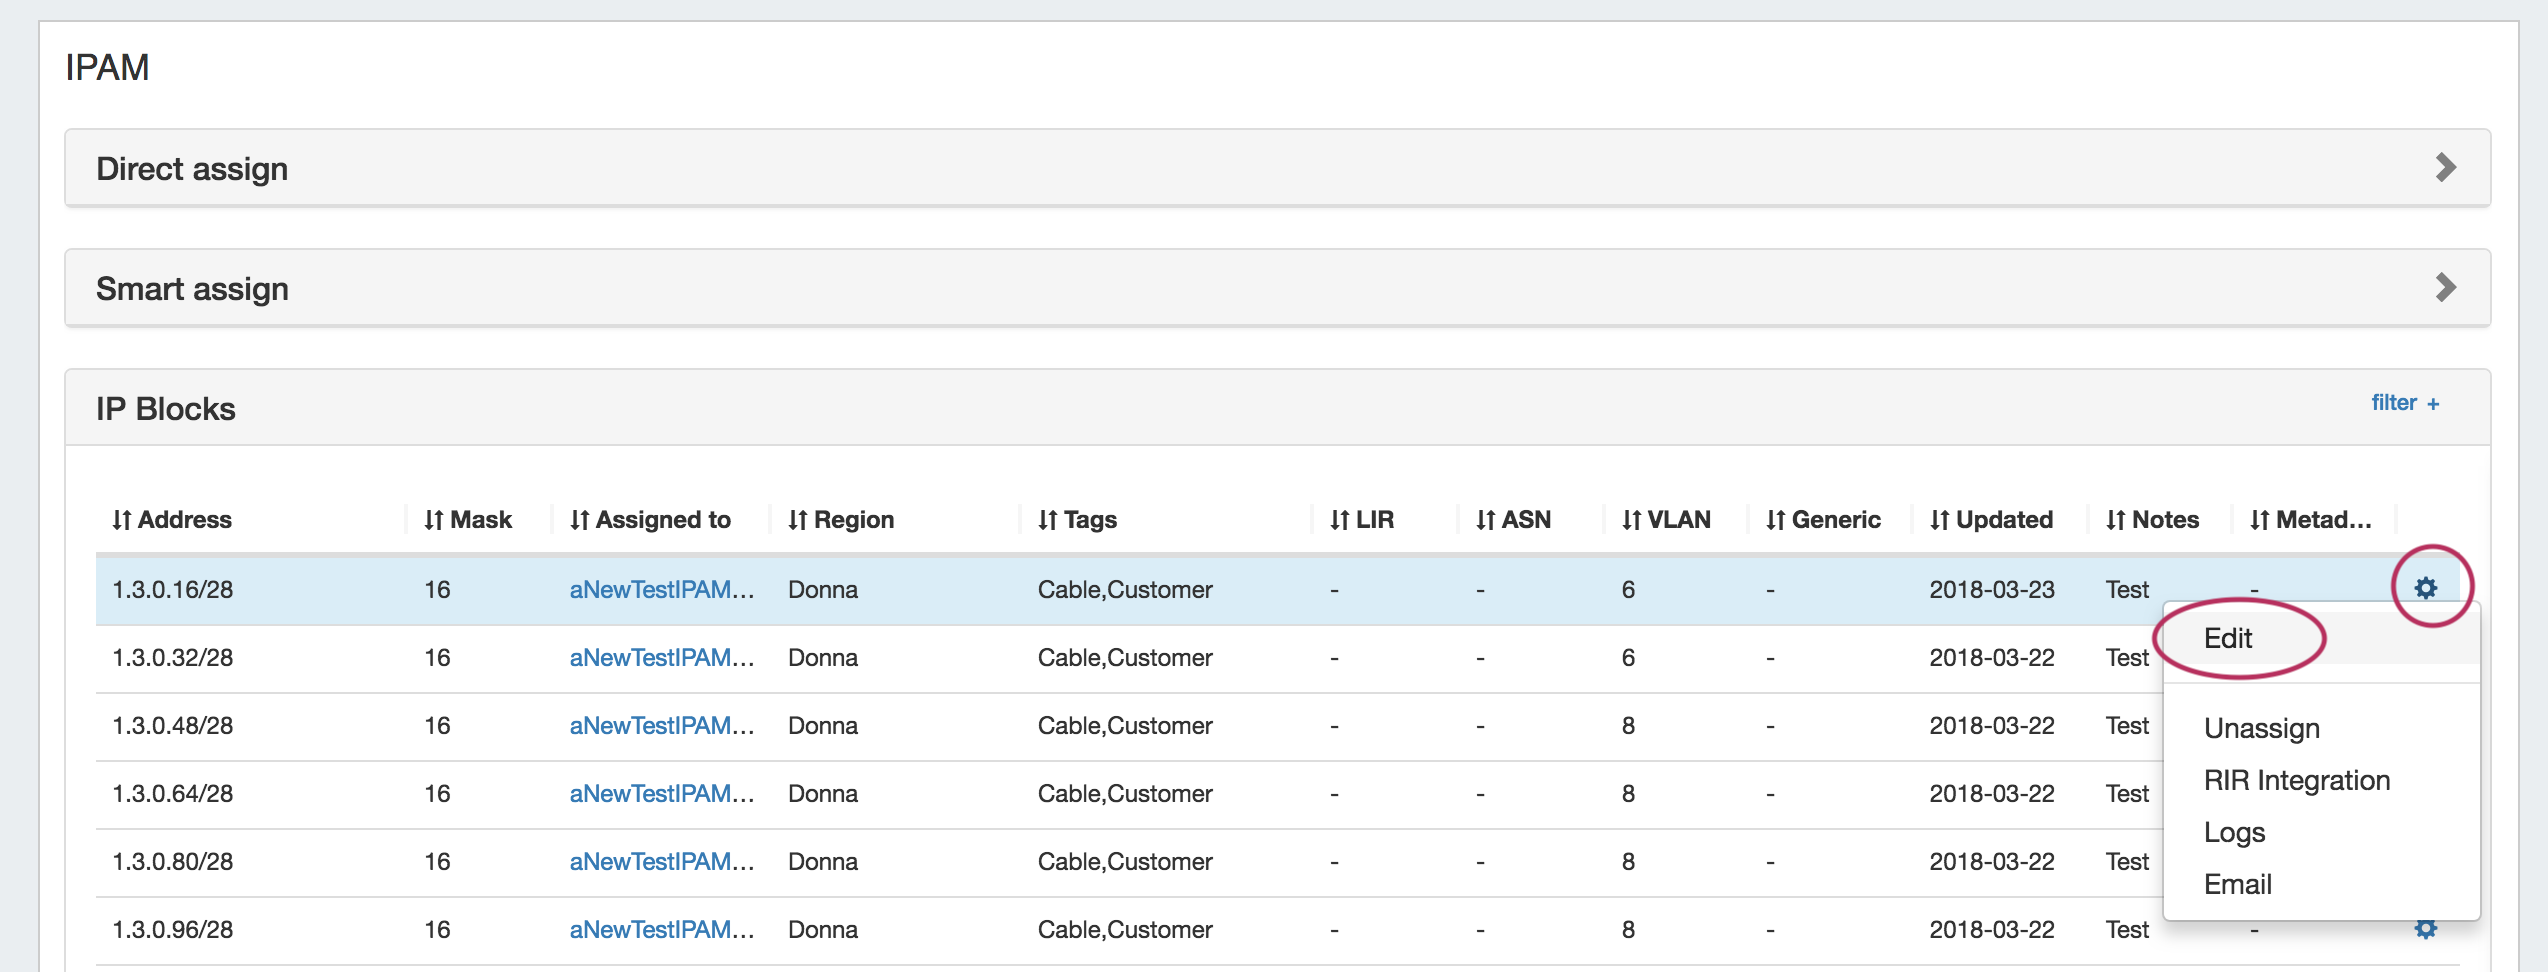
You may also add / edit Domain /VLAN information when editing a block in the IPAM Gadget. From the IP block's Action Menu (gear icon), select "Edit".
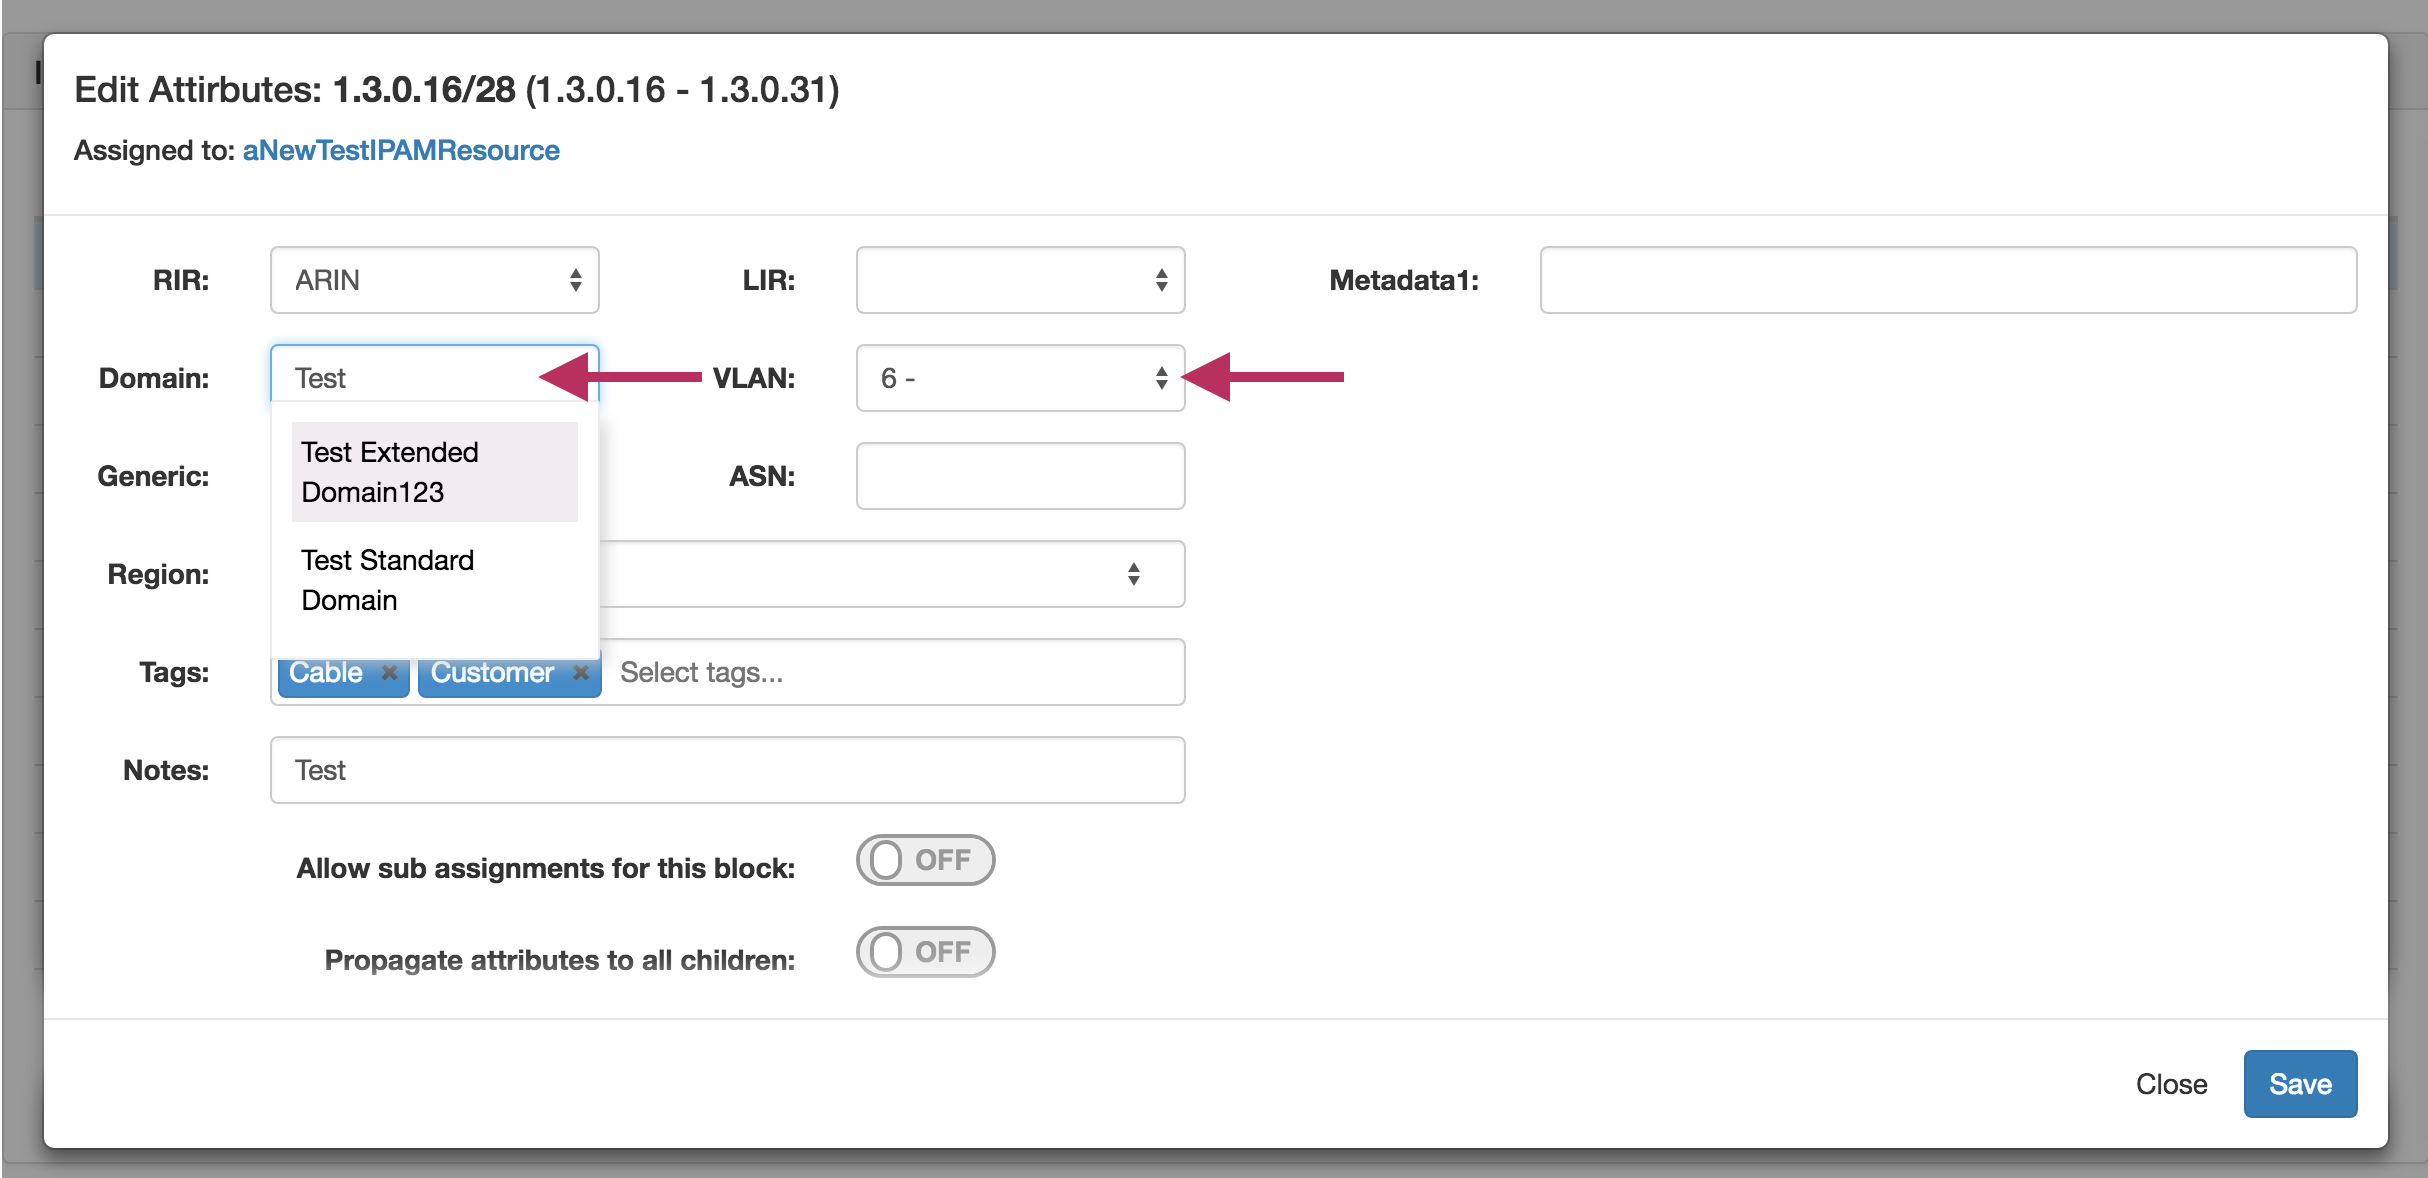
Then, in the Edit Attributes box that pops up, search for or type the desired Domain, select VLAN information, and click "save".
Working with VLAN Tags - (Optional)
VLAN tags provide further organizational / search criteria when searching for VLANs to enable.
Creating VLAN Tags
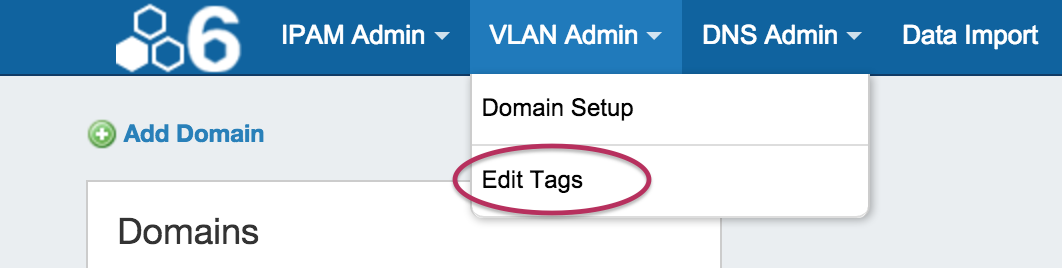
Create VLAN Tags from the VLAN Admin Tab, in the Admin area of ProVision, and select "Edit Tags" from the dropdown.
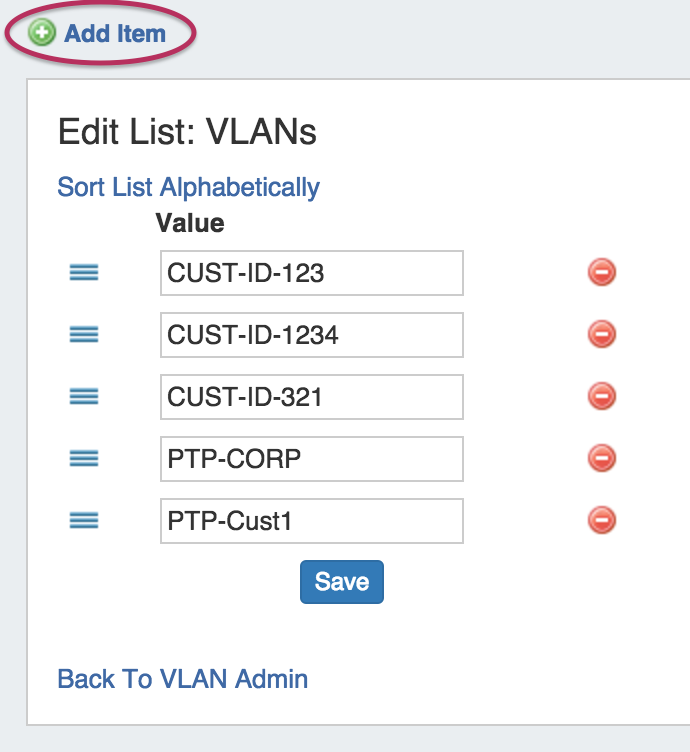
To add a new VLAN tag, click on "Add Item" at the top of the Edit List: VLAN Tags page.
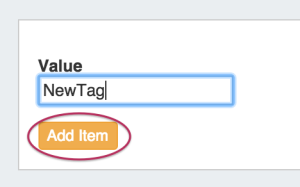
Then, type in the desired name value for the new tag, and hit "Add Item". The new tag will be added to the list below.
To edit a tag, simply type your changes in to the text box with the tag name. Tags with unsaved changes will be highlighted until saved.
To delete a tag, click on the red "delete" symbol to the right of the tag name.
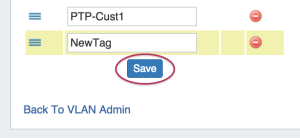
When complete, be sure to click on the "Save" button to save your changes.
Once VLAN tags have been created, they will be available to add to VLAN ranges and use in the "Add VLAN" search function.
Add VLAN Tags to VLANs
VLAN tags may be added to VLANs in two ways: Editing an already-enabled VLAN (VLAN Edit), or by assigning the tag to a range of VLANs from the Domain VLAN pool (un-enabled VLANs, which are then available to search by VLAN tag to enable).
Add Tag to an Enabled VLAN
Edit an existing, already enabled VLAN by clicking on the VLAN in the VLAN List sidebar, then selecting "Edit".
Apply a VLAN tag from clicking in the "VLAN Tags" box, and selecting one or more VLAN Tags.
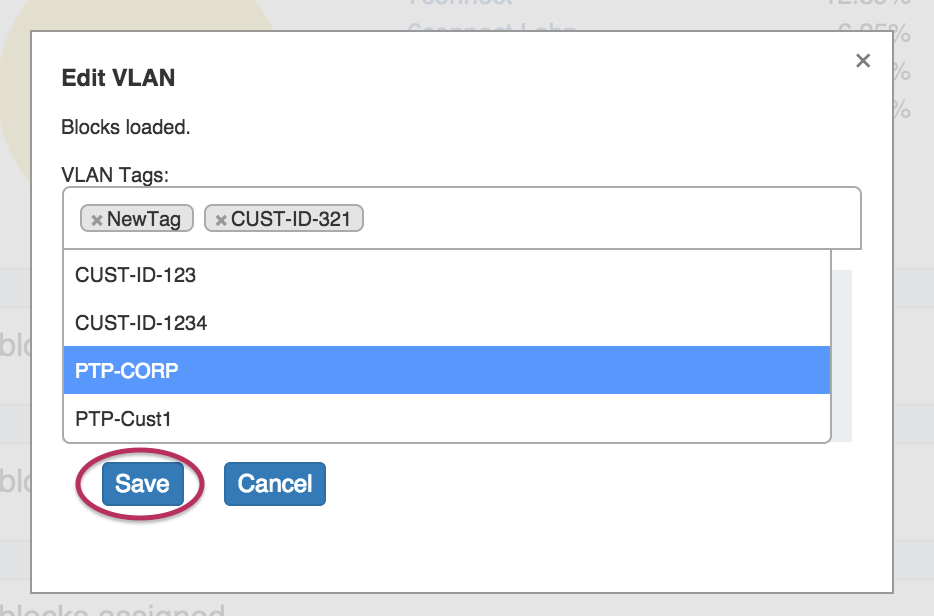
After making your changes, click the "Save" button. Tagged VLANs will be viewable in the VLAN Chart a single tag points under VLAN Admin - Domain Manage.
Add Tag to a Range of the VLAN Pool
You can also tag a range of the (un-enabled) VLANs in a domain's VLAN pool. Then, when moving on to enable a set of VLANs for a Domain, you can select those VLANs by tag.
Go to the VLAN Admin Tab in the Admin area of ProVision. Then, next to the desired domain, click "Manage".

This brings up the page to edit the domain or view a chart of VLAN tags (y axis) to VLANs in the available pool (x axis).
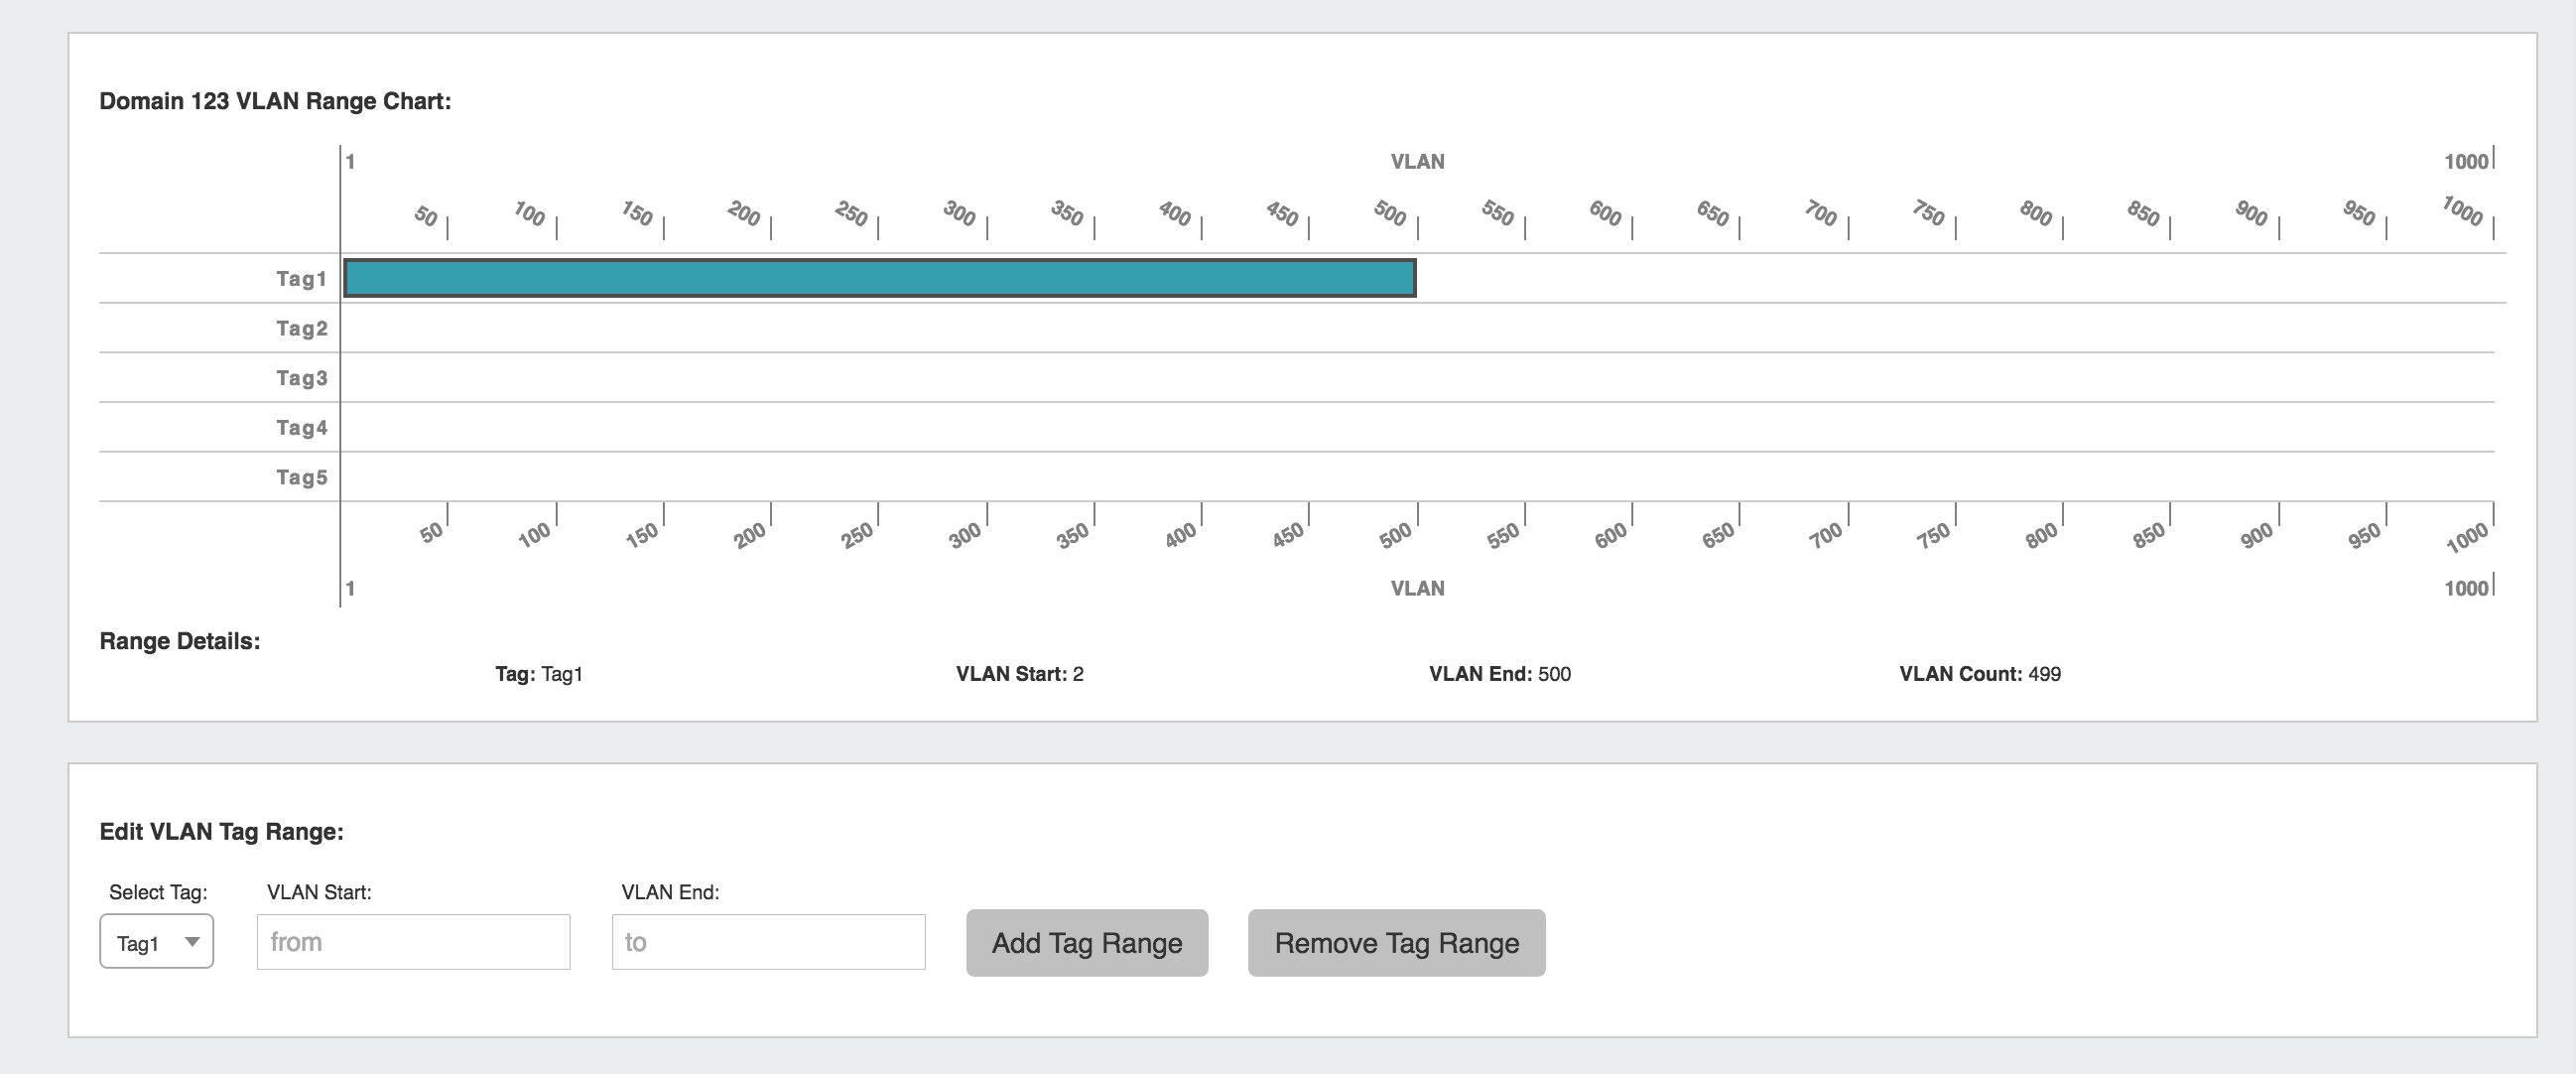
Hovering the mouse over a tag range will show details such as the range start, end, and count of vlans in the range.
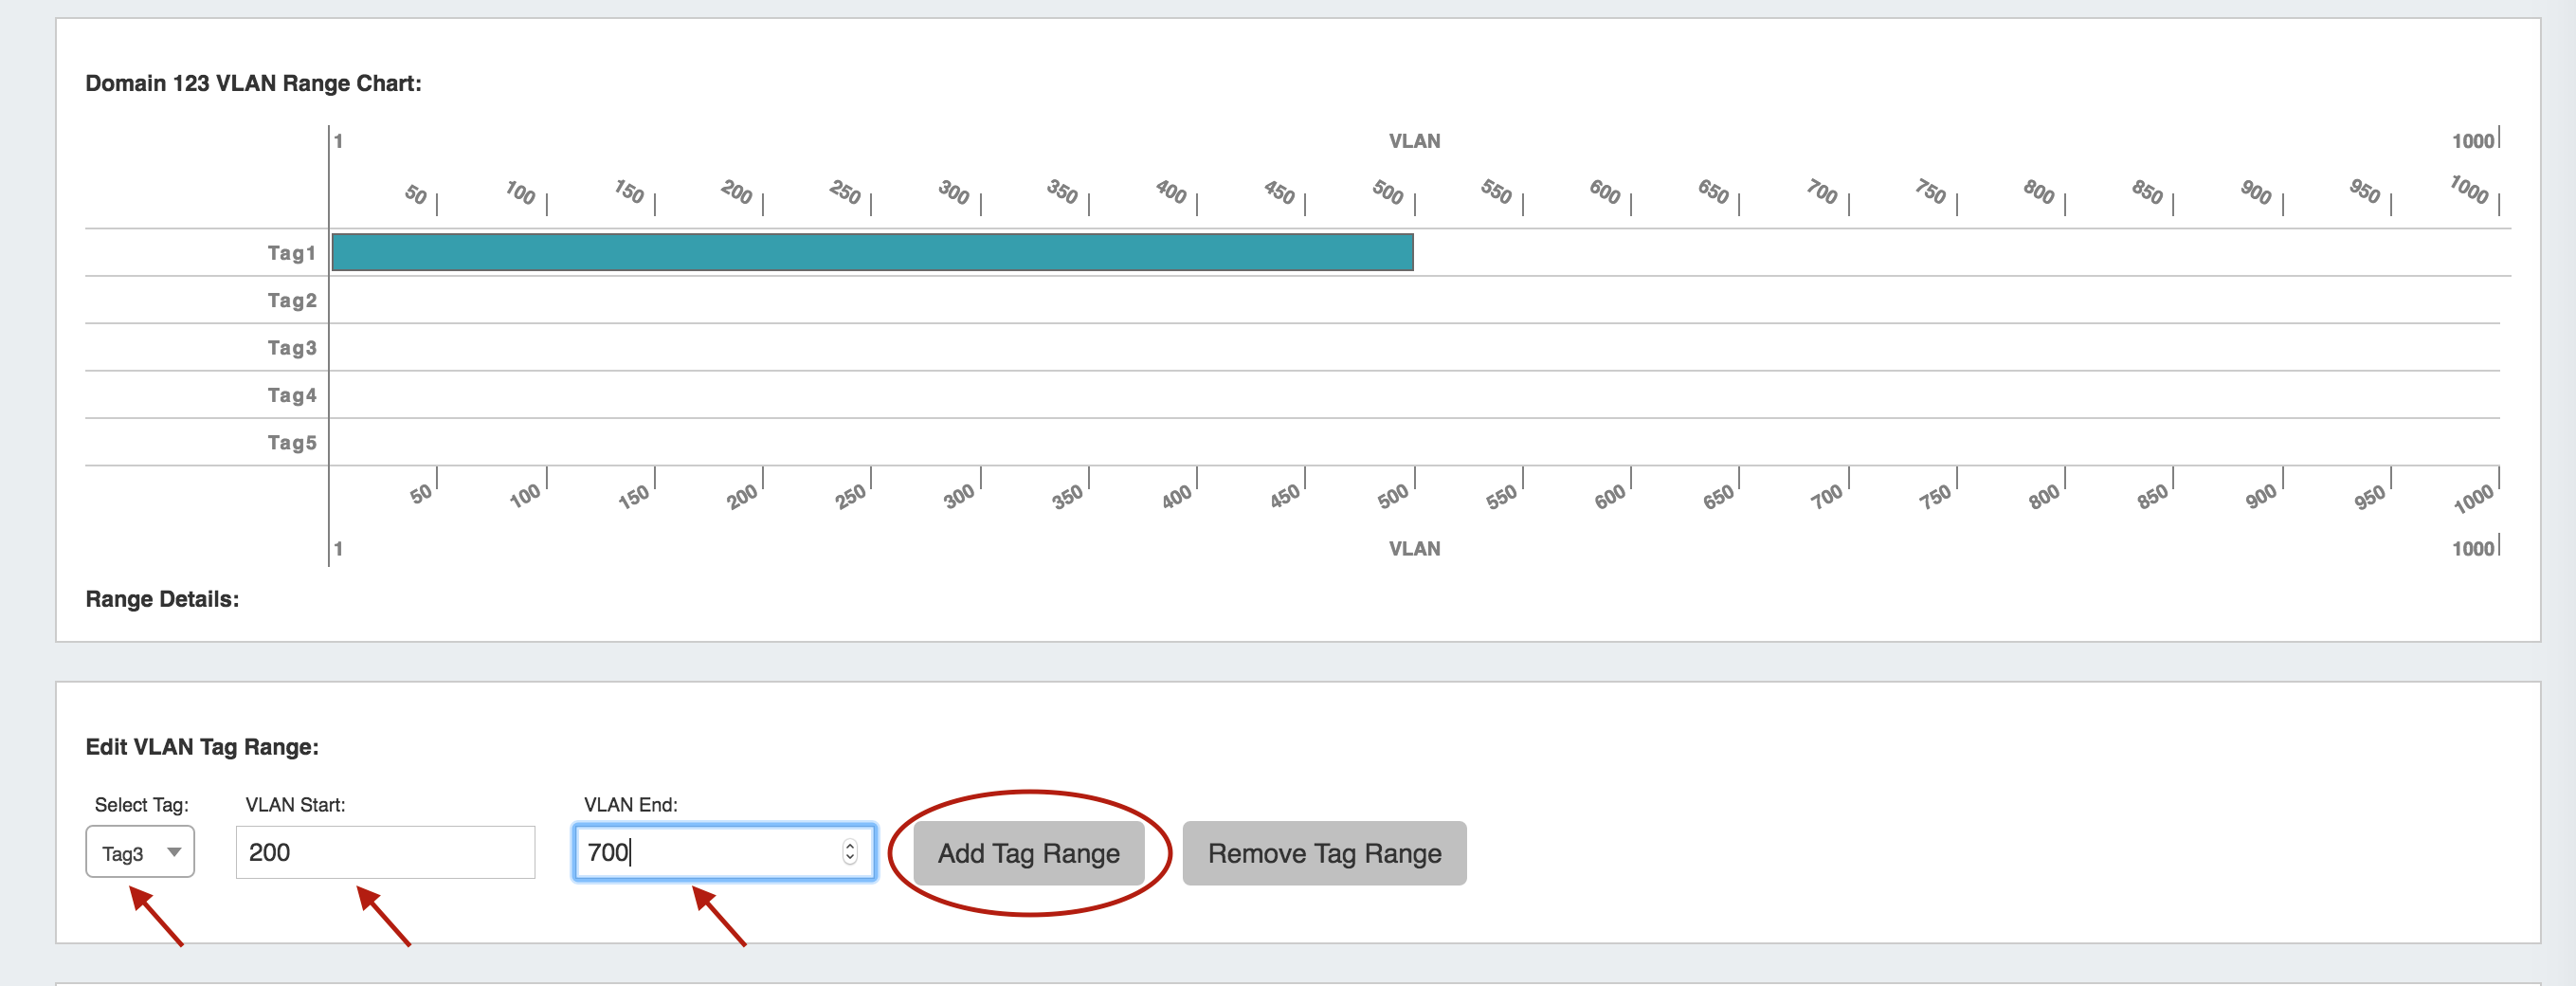
Under the "Edit VLAN Tag Range" section, you can bulk assign tags to ranges by:
- Select the tag to edit in dropdown below chart
- Type desired VLAN start and end value for the range
- Click "Add Tag Range" to set and save.
To remove a range of tags, under "Edit VLAN Tag Range":
- Select tag to edit in dropdown below chart
- Type desired VLAN start and end value for the range to remove
- Click "Remove Tag Range" to set and save.
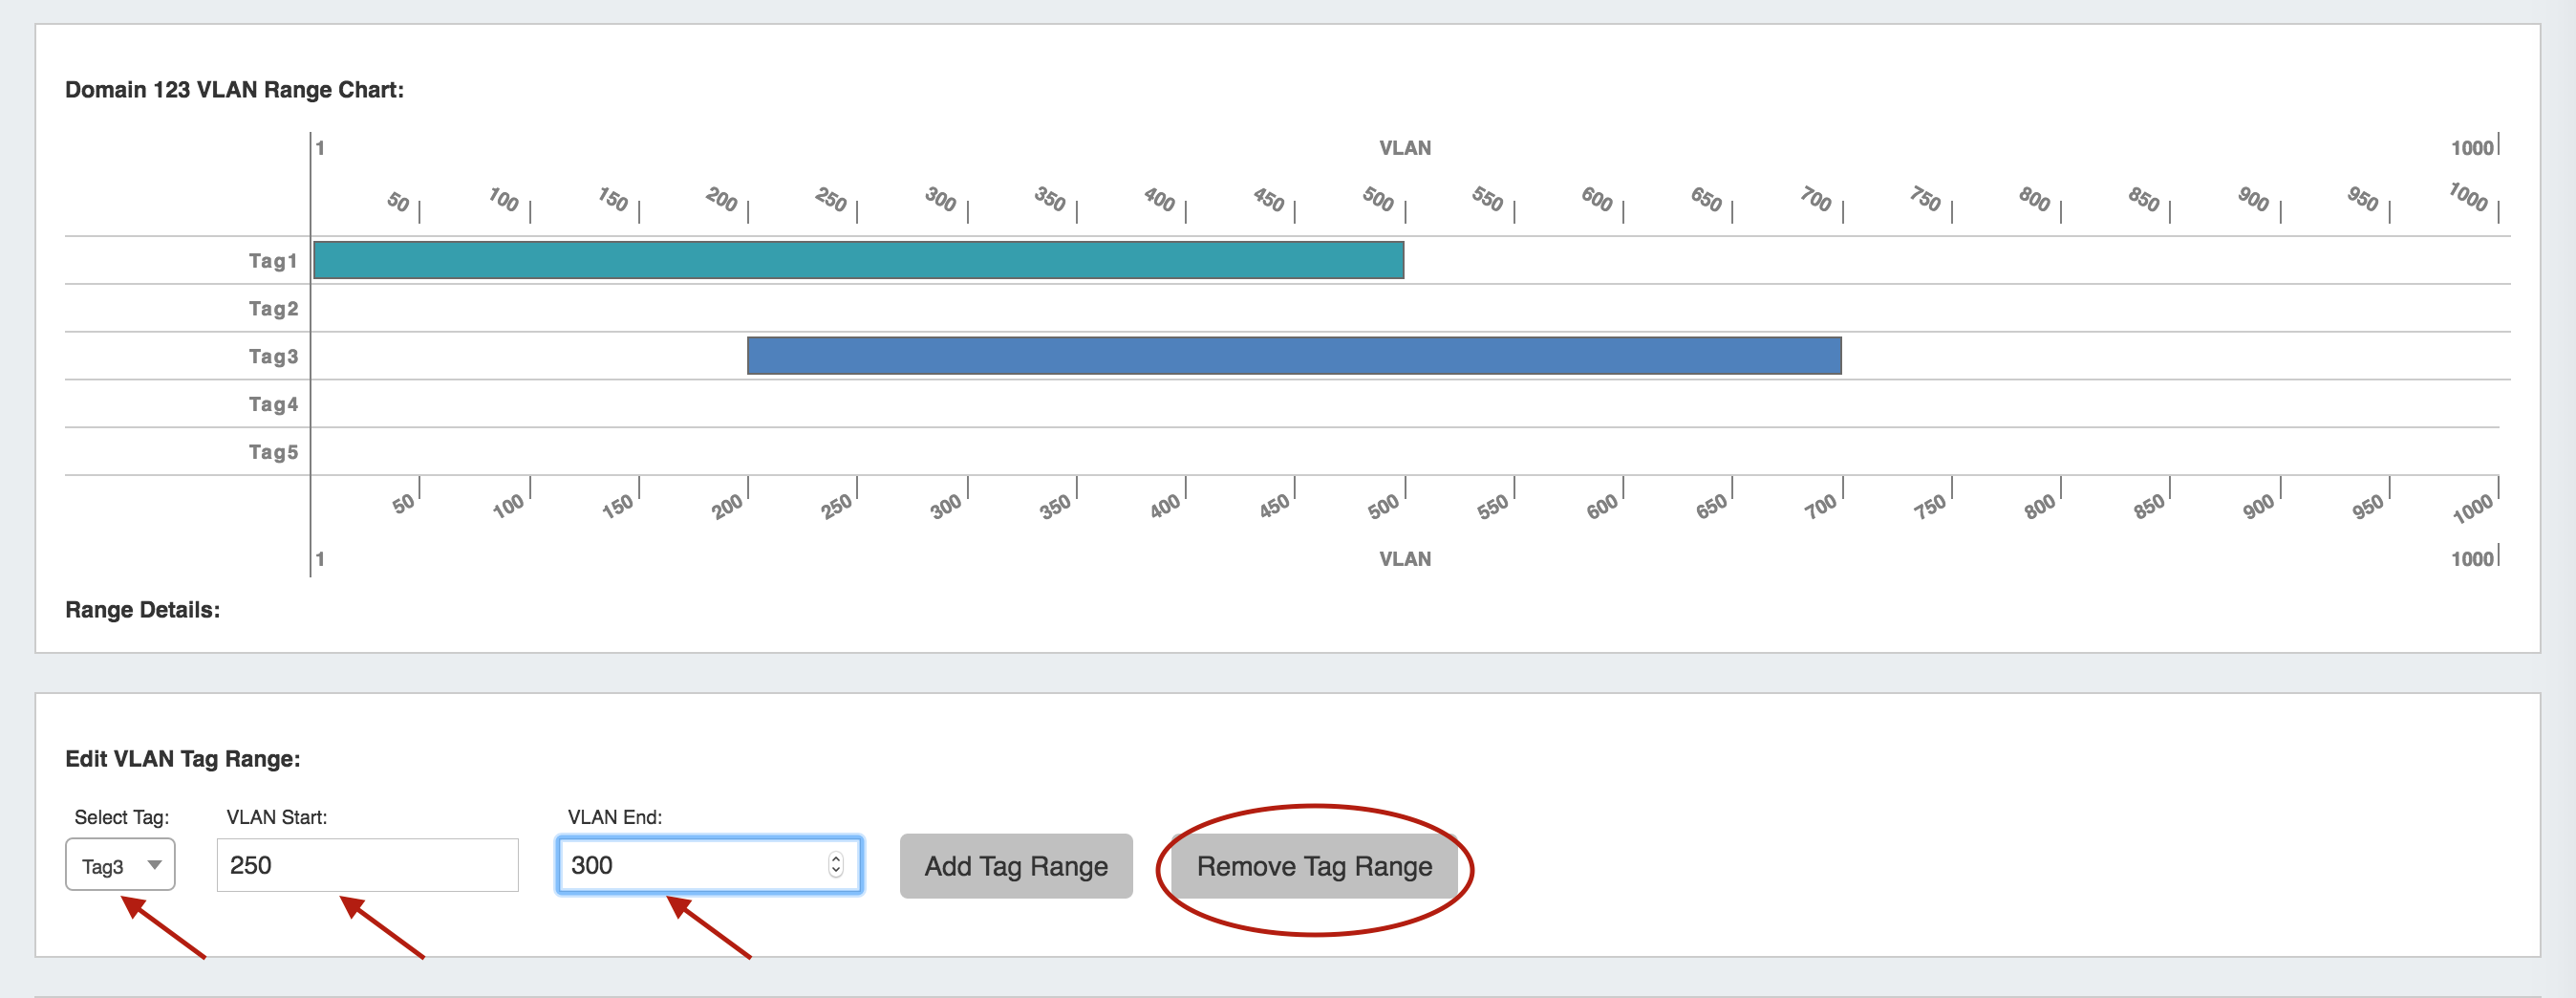
- To untag a single VLAN, simply enter the same VLAN value in the VLAN Start and VLAN End boxes, then hit "Remove Tag Range".

- Changes to tag ranges are automatically saved when clicking "Add Tag Range" or "Remove Tag Range", so after all desired changes are made, you may immediately exit the page.
Once assigned, the tags show as a property of the VLAN block in the VLAN edit menu and may be used for VLAN Searches / Assignments.
Working with VLAN Metadata - (Optional)
Customizable metadata fields are available to hold VLAN-specific information such as Location, Client, Firewall, Gateway, and more.
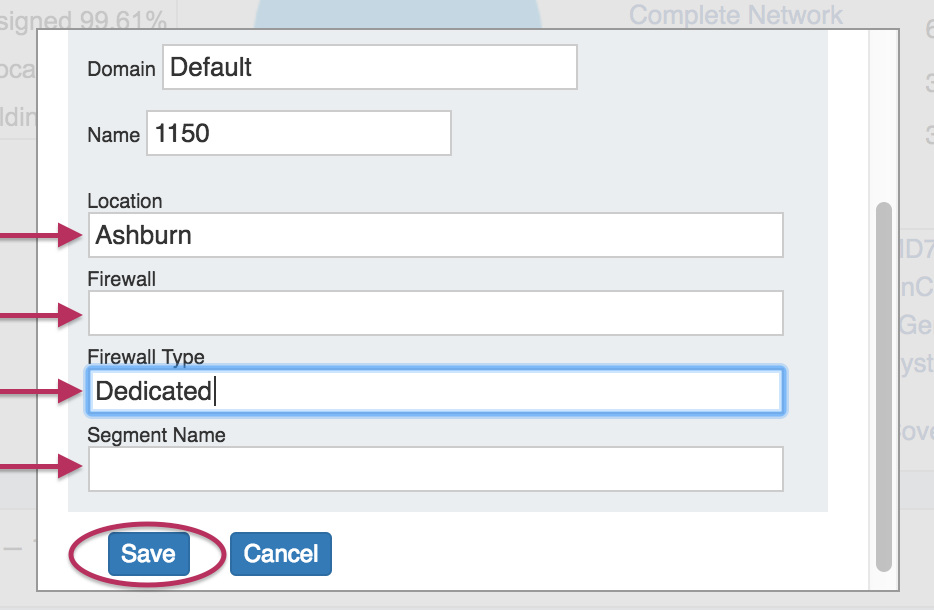
These fields can be enabled and disabled in the VLAN Admin section of ProVision, and viewed / edited under "Edit VLAN" in the VLAN Tab.
Enable / Disable VLAn Metadata Fields
VLAN Metadata fields can be enabled and disabled under the VLAN Admin area of ProVision.
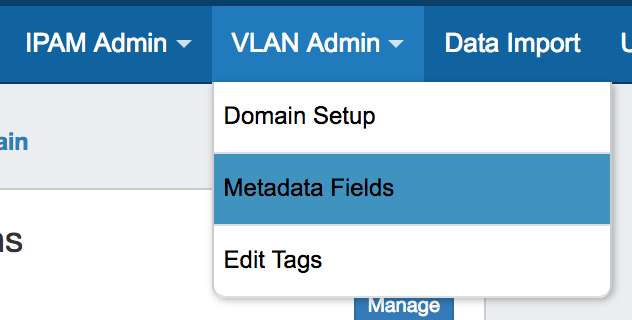
To enable a new Metadata Field, navigate to the Admin section of ProVision, and select "Metadata Fields" from the dropdown.
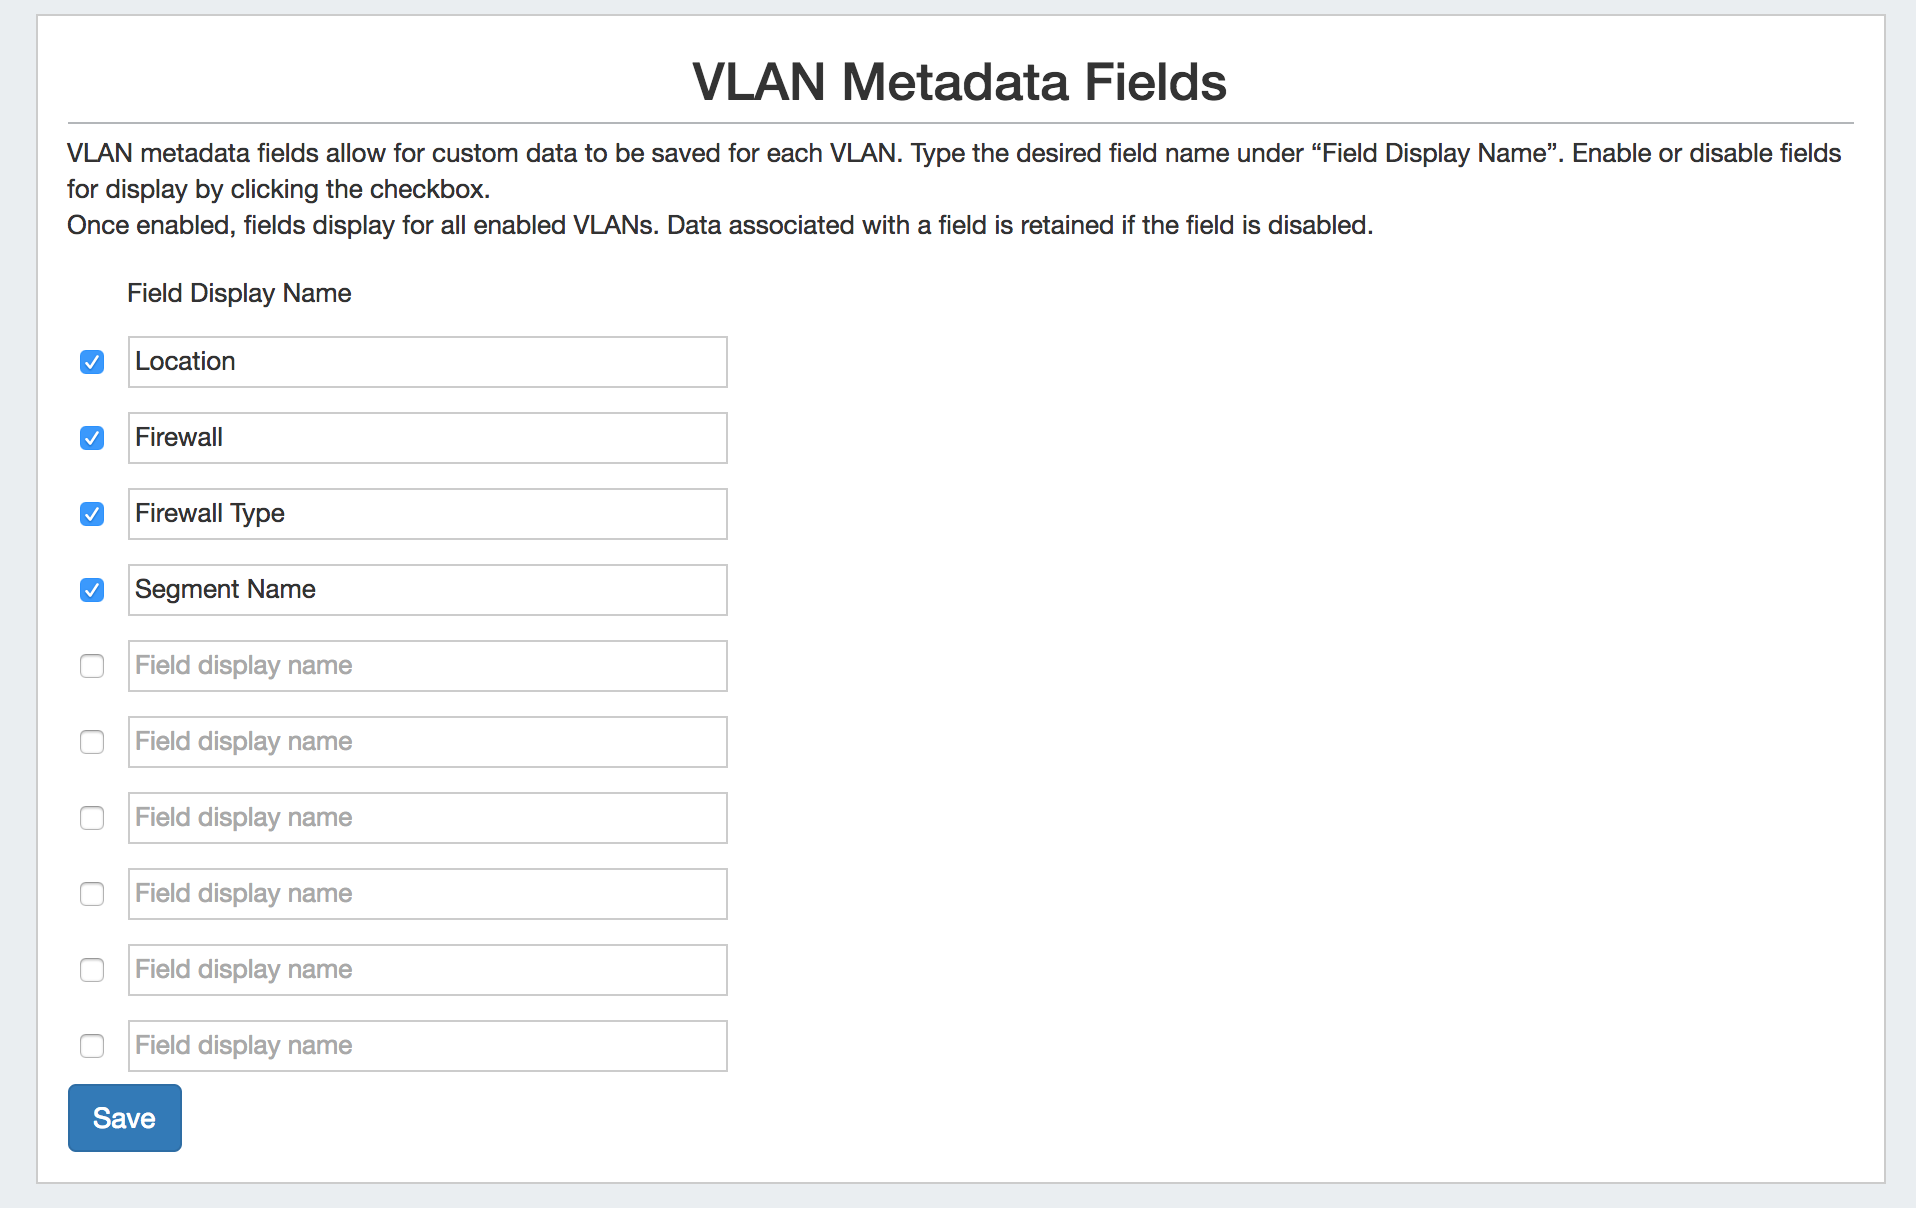
To enable a new field, type the desired field name in an empty text input box under "Field Display Name", and select the check box next to the new name. Then, click "Save" to save your changes. Field display names may be edited at any time by simply typing the desired change into the "Field Display Name" box and saving your changes.
Once enabled, a metadata field displays for all enabled VLANs.
To disable a metadata field, deselect the check box next to the Field Display Name and click "Save". Any data that exists under a disabled field is retained, and will reappear once the field is re-enabled.
View / Edit Metadata Field Information
VLAN Metadata may be viewed and edited in from the IPAM - VLAN Tab.
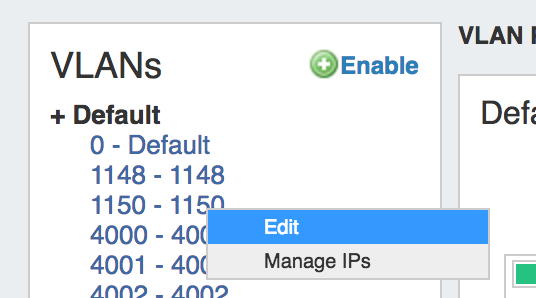
While in the IPAM Tab -> VLAN Page, expand the desired domain from the left sidebar and click on a VLAN. Then select "Edit".
In the Edit VLAN screen, you may view the Metadata or enter your desired changes and click "Save" when done.