Application Settings
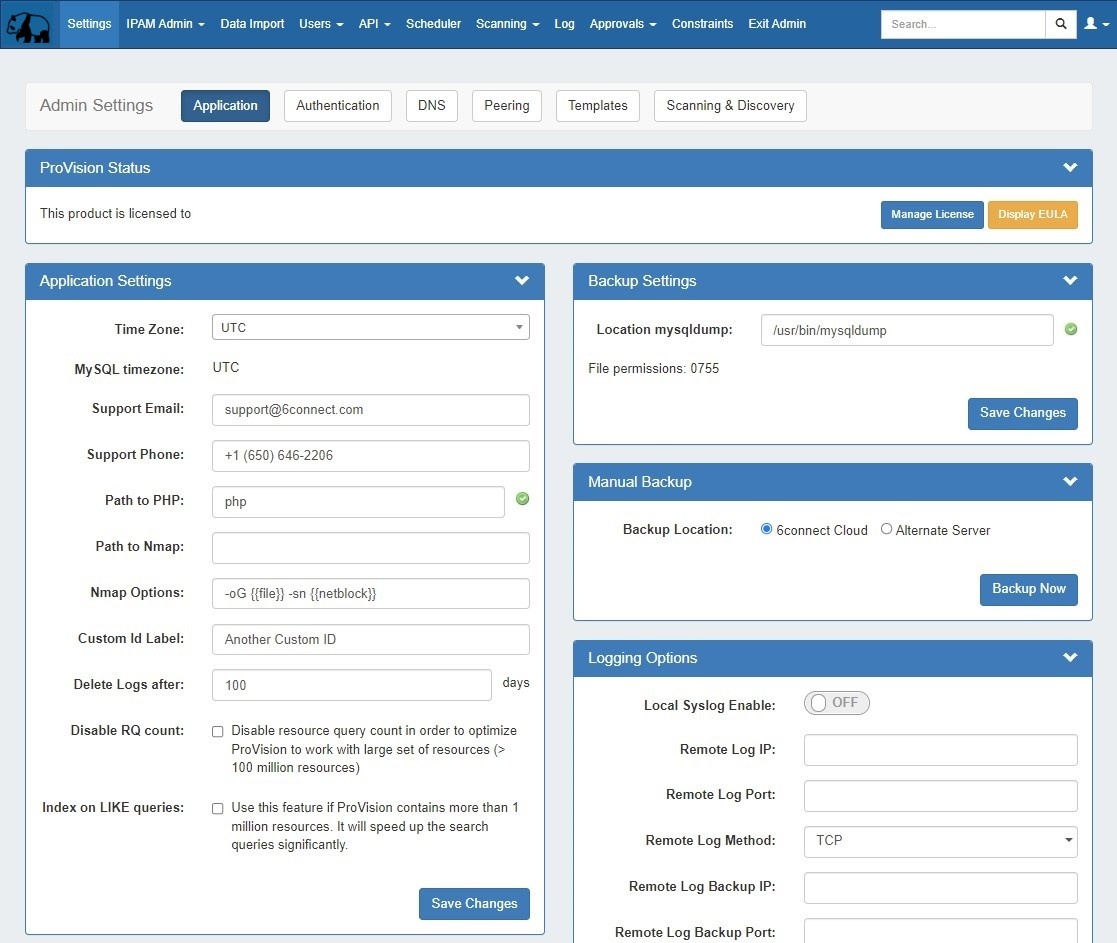
The Application Settings page is the home page of the Admin section of ProVision where general platform preferences may be set.
ProVision Status / License Info
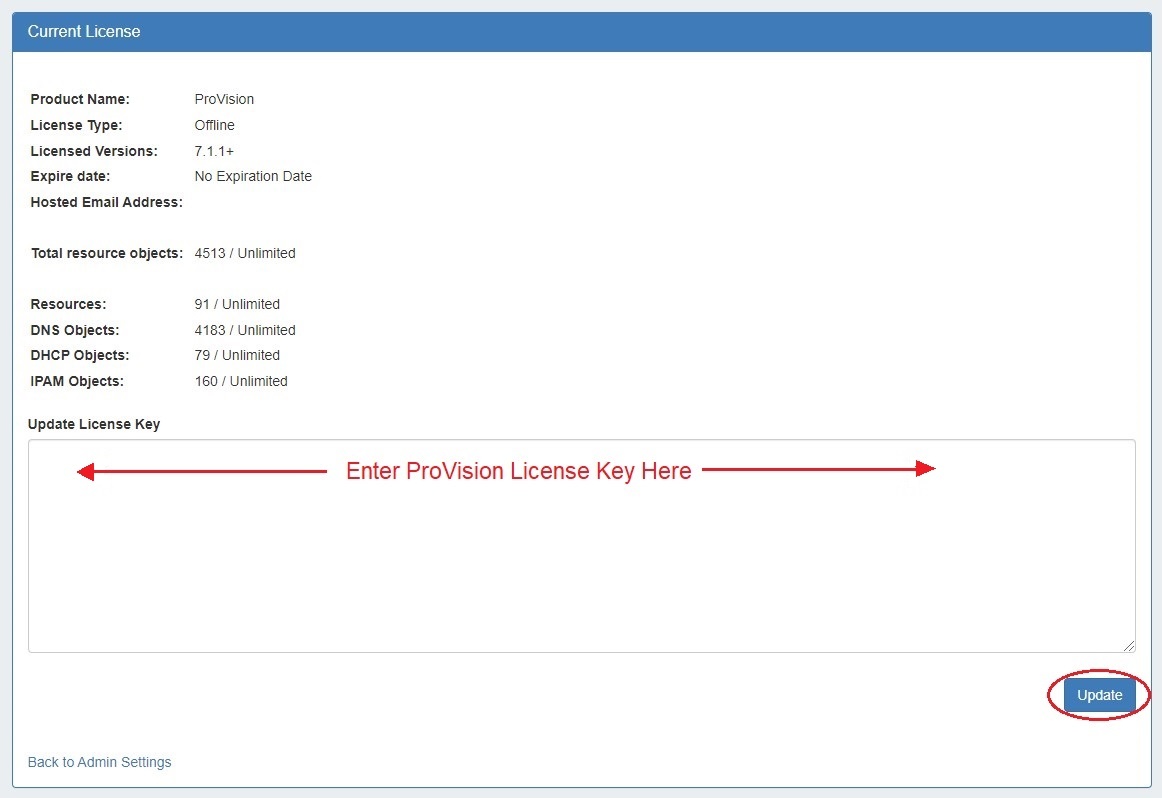
The License page displays current product license details such as Product, Type, Versions, Expiration, Email, and the option to add/update the 6connect License Key(s).
From the Admin Settings page, ensure the "Application" sub-tab is selected, then click "Manage License".

Current license details for ProVision, and other affiliated 6connect products will display.
To add/update a License Key, paste the key provided into the "Update License Key" box, and click "Update License".
Application Settings
Application Settings is where you provide company specific info that appears in the Dashboard, as well as general instance settings.
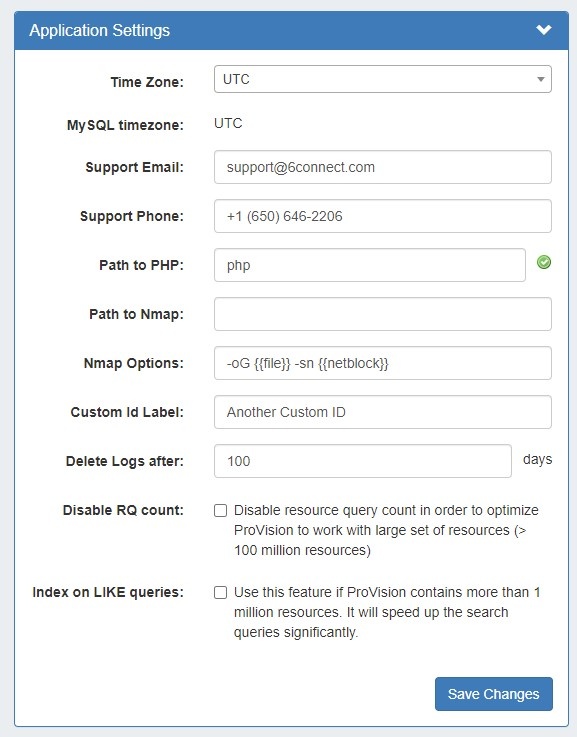
Time Zone: Supported Time zones are listed here: {EXT} http://www.php.net/manual/en/timezones.php. Default value is ('America/Los_Angeles') and can be modified at any time via the drop down menu
MySQL Timezone: The timezone set from the server's MySQL settings.
Support Email: Support Email address that displays on the Dashboard
Support Phone: Support phone number that displays on the Dashboard
Path to PHP (Local Installation): The directory path to php location
Path to Nmap (Local Installation): The directory path to nmap location
Nmap Options (Local Installation): Custom nmap options
Custom id Label: The display name for the customizable label field available when creating or editing a resource.
Delete Logs after: The number of days to retain logs.
Disable RQ Count: Disables resource query count, in order to optimize ProVision with large data sets.
Index on LIKE queries: Speeds up search queries for cases of extremely large data sets.
Backup Settings
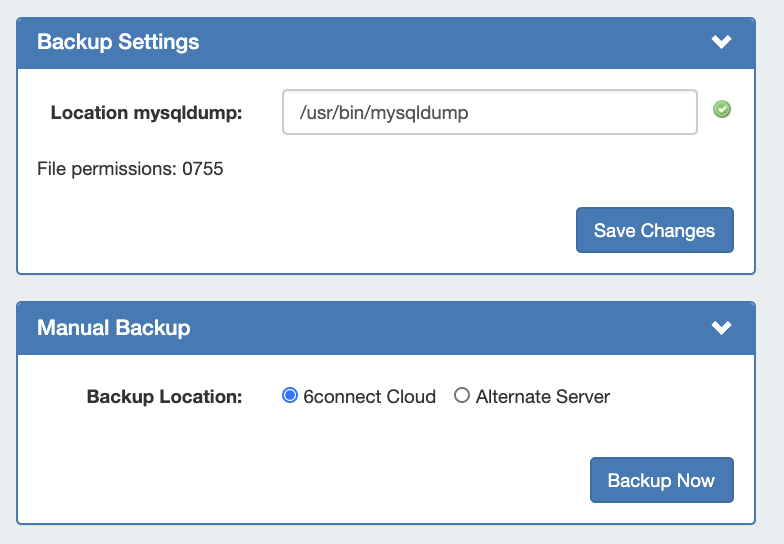
For cloud users, regular backups can be set up through the Scheduler. However, prior to imports or other large changes, you may wish to manually perform a backup.
Backup Location: The backups may be sent to the 6connect cloud, or to a specific server in the Resource system. Select the radio button for the desired location.
Manual Backup - 6connect Cloud:
Select "6connect Cloud" as your backup location, then click on the "Backup Now" button. You will see a success message below the button if successful.
Manual Backup - Alternate Server:
Manual Backup: Alternate Server saves a backup msql dump to a Server Resource already set up in ProVision.
This Resource needs to have the following information provided in the server section fields in order to establish a connection: Port, Hostname, Username, and Password.
Before selecting Alternate Server Backup:
1) Ensure that the Server Resource exists in ProVision for the backup (Section = "Server"). If needed, create a new entry for the server.
2) Check that the following fields are added to the Server Section:
- Network Port (22 is typical)
- Hostname (this can also be an IP address)
- Username
- Password
See Customizing Sections and Customizing Fields for information on adding fields to sections. Hostname, Username, Password, and Network Port will all be contained under the "Existing Fields" selector when adding fields to the Section.
3) On the Backup Server's Entry page, verify that the server fields are filled in and correct for the ProVision server entry:
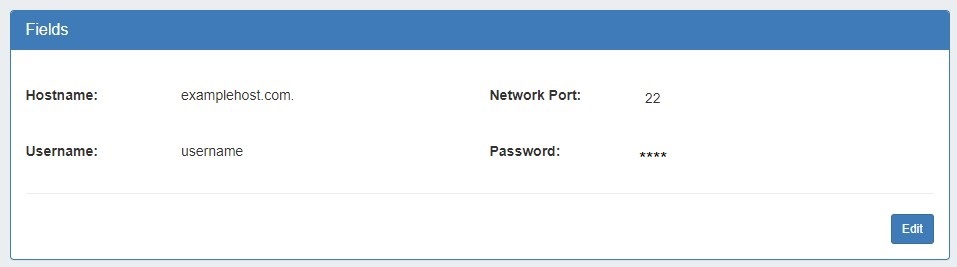
If needed, click "Edit" and add or update the information. See Working with Entries for additional information.
Once a Backup server has been set up in ProVision, it will be available to select under Backup Settings: Alternate Server.
Select "Alternate Server" as your backup location, then select the desired ProVision server Resource. After selecting your server, click on the "Backup Now" Button.
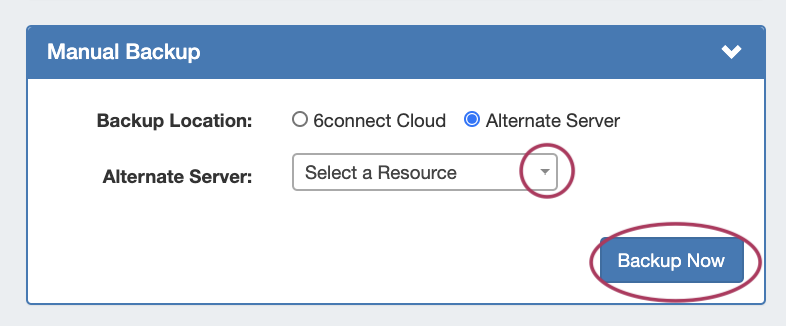
If successful, a mysql dump file will be sent to the selected server and a "Success!" message will appear.
Once the connection is confirmed successful, Backups to alternate servers may be scheduled on a recurring basis through the Scheduler Tab, or continued to be performed manually under Backup Settings.
Backup Settings - Local Installation
Additional settings are available for local installations:
Location of mysqldump (Local Installation): This is the location of the mysqldump directory.
ACP Settings
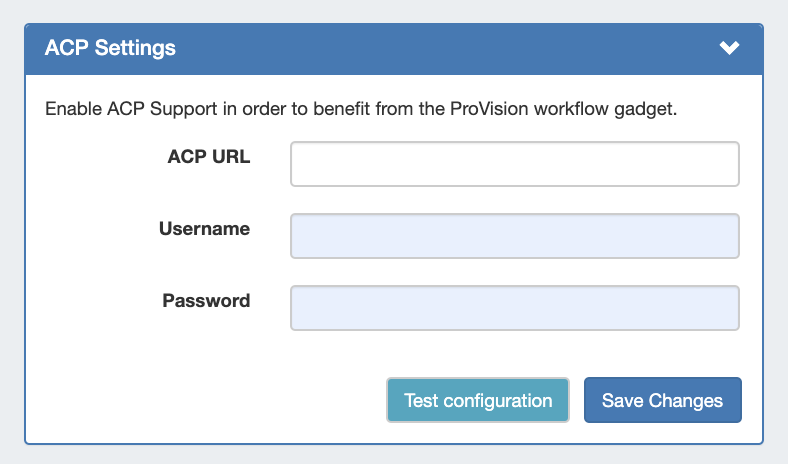
The ACP Settings area links an ACP instance and login credentials to the ProVision instance, and allows the ACP Workflow Gadget to execute Workflows as the provided user.
Enter the ACP URL for a licensed ACP instance, then provide the ACP Username and Password for the user that should be used to execute Workflows. To verify the account, click "Test Configuration" - you will be notified whether the account is valid.
When done, click "Test configuration" to verify the connection and then "Save Changes". Afterwards, you may proceed to configure the ACP Workflows Gadget to specify Workflows to execute in ProVision.
Logging Options
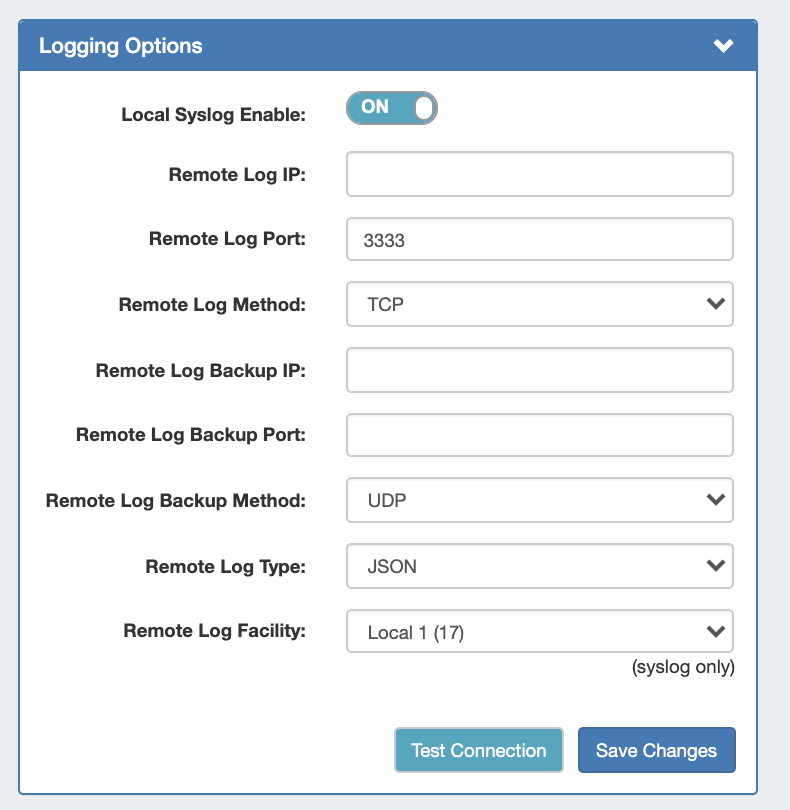
Remote Log IP: Target IP address that we will send log information to
Remote Log Port: Port number for the syslog server you will send log information to
Remote Log Method: Select TCP, UDP, SSL from the dropdown for the log delivery method
Remote Log Backup IP: Target IP address for the Backup syslog server you will send log information to
Remote Log Backup Port: Port number for the Backup syslog server you will send log information to
Remote Log Backup Method: Select TCP, UDP, SSL from the dropdown for the log delivery method
Remote Log Type: Select SysLog format or JSON output
Remote Log Facility: Select the Facility - applies to syslog only
If desired, you may select "Test Connection" to verify the connection before clicking "Save Changes".
MySQL Replication
MySQL Replication Monitor displays the enabled/disabled status of replication, and periodically checks the replication state and displays the result in Admin Settings.
To enable / disable MySQL Replication, turn the toggle to the ON/OFF position, respectively. Click "Save Changes" when done.
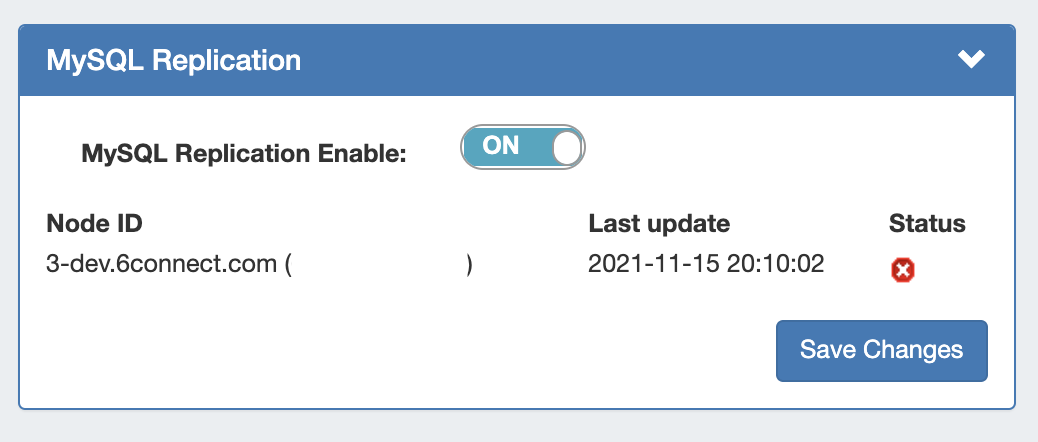
Note: The associated "MySQL Replication Monitor" Scheduler task must be created for the desired interval in order for the monitor to execute. See Scheduler Tab updates, below, or the the Scheduler Tab for details on setting up tasks.