Quick-Start Tutorial 1
Here are the steps needed This is a basic walkthrough to set up a complete, working ACP workflow.
This tutorial assumes you have access to a working 6connect ProVision instance. If you do not have a working 6connect ProVision instance, but if not any other supported service can be used with minor conceptual tweaksby substituting the applicable service and desired API endpoint information in Steps 4 through 7.
| Table of Contents | ||
|---|---|---|
|
...
Click ‘Add Parameter’ to add a new field to the output of this Workflow. Output parameter options will appear.
Change the name from ‘output-param-1’ to ‘id’, and then select ‘Workflow Link’ from the adjacent drop-down. The form expands.
...
In ‘Workflow Link’ mode the third box contains all the steps of the workflow. You can select parameters from any call to return in the output, either in whole or in part.
Select ‘Get Resources → (object).’ Clicking on the fourth and last box will bring up a listing of all the parameters returned by the Get Resources call.
...
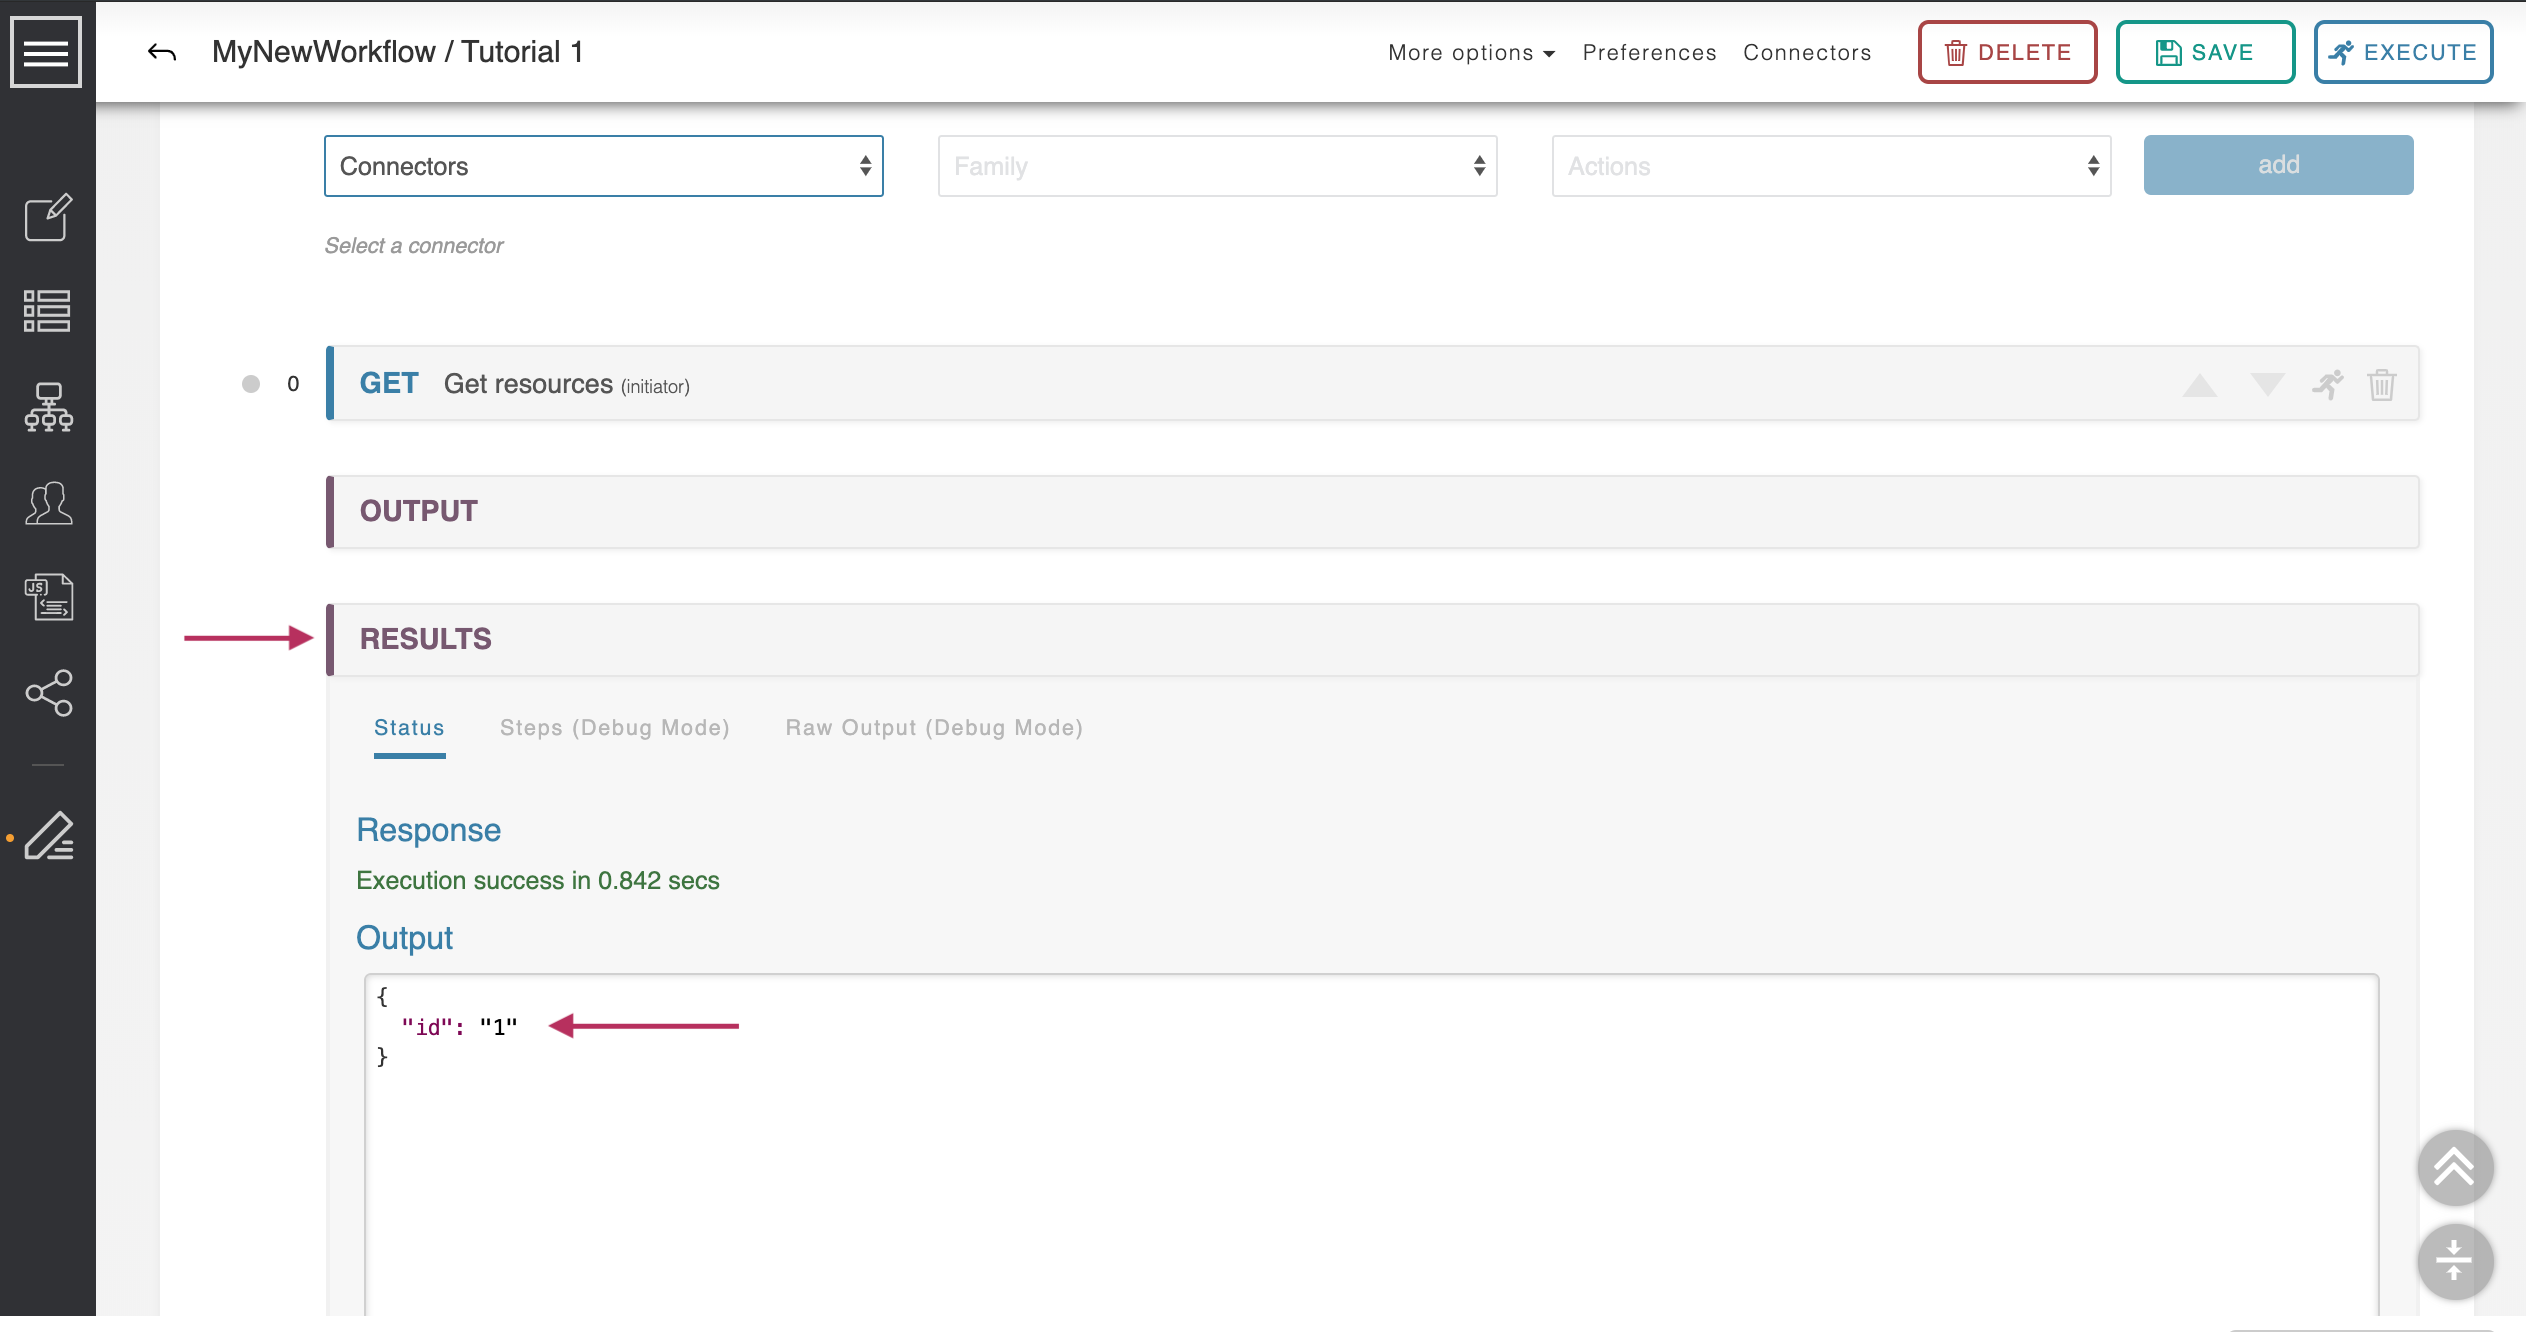
After the processing timer finishes, a Results section appears with the response object: { "id": "1" }. We have queried the API for a resource named ‘TLR’ and have found that its resource id# is 1.
Step 10 (Optional): Review / Debug Workflow
...
This time the Results section expands into detailed reporting of what parameters were sent at each step, what data came back, and what routing path was taken.
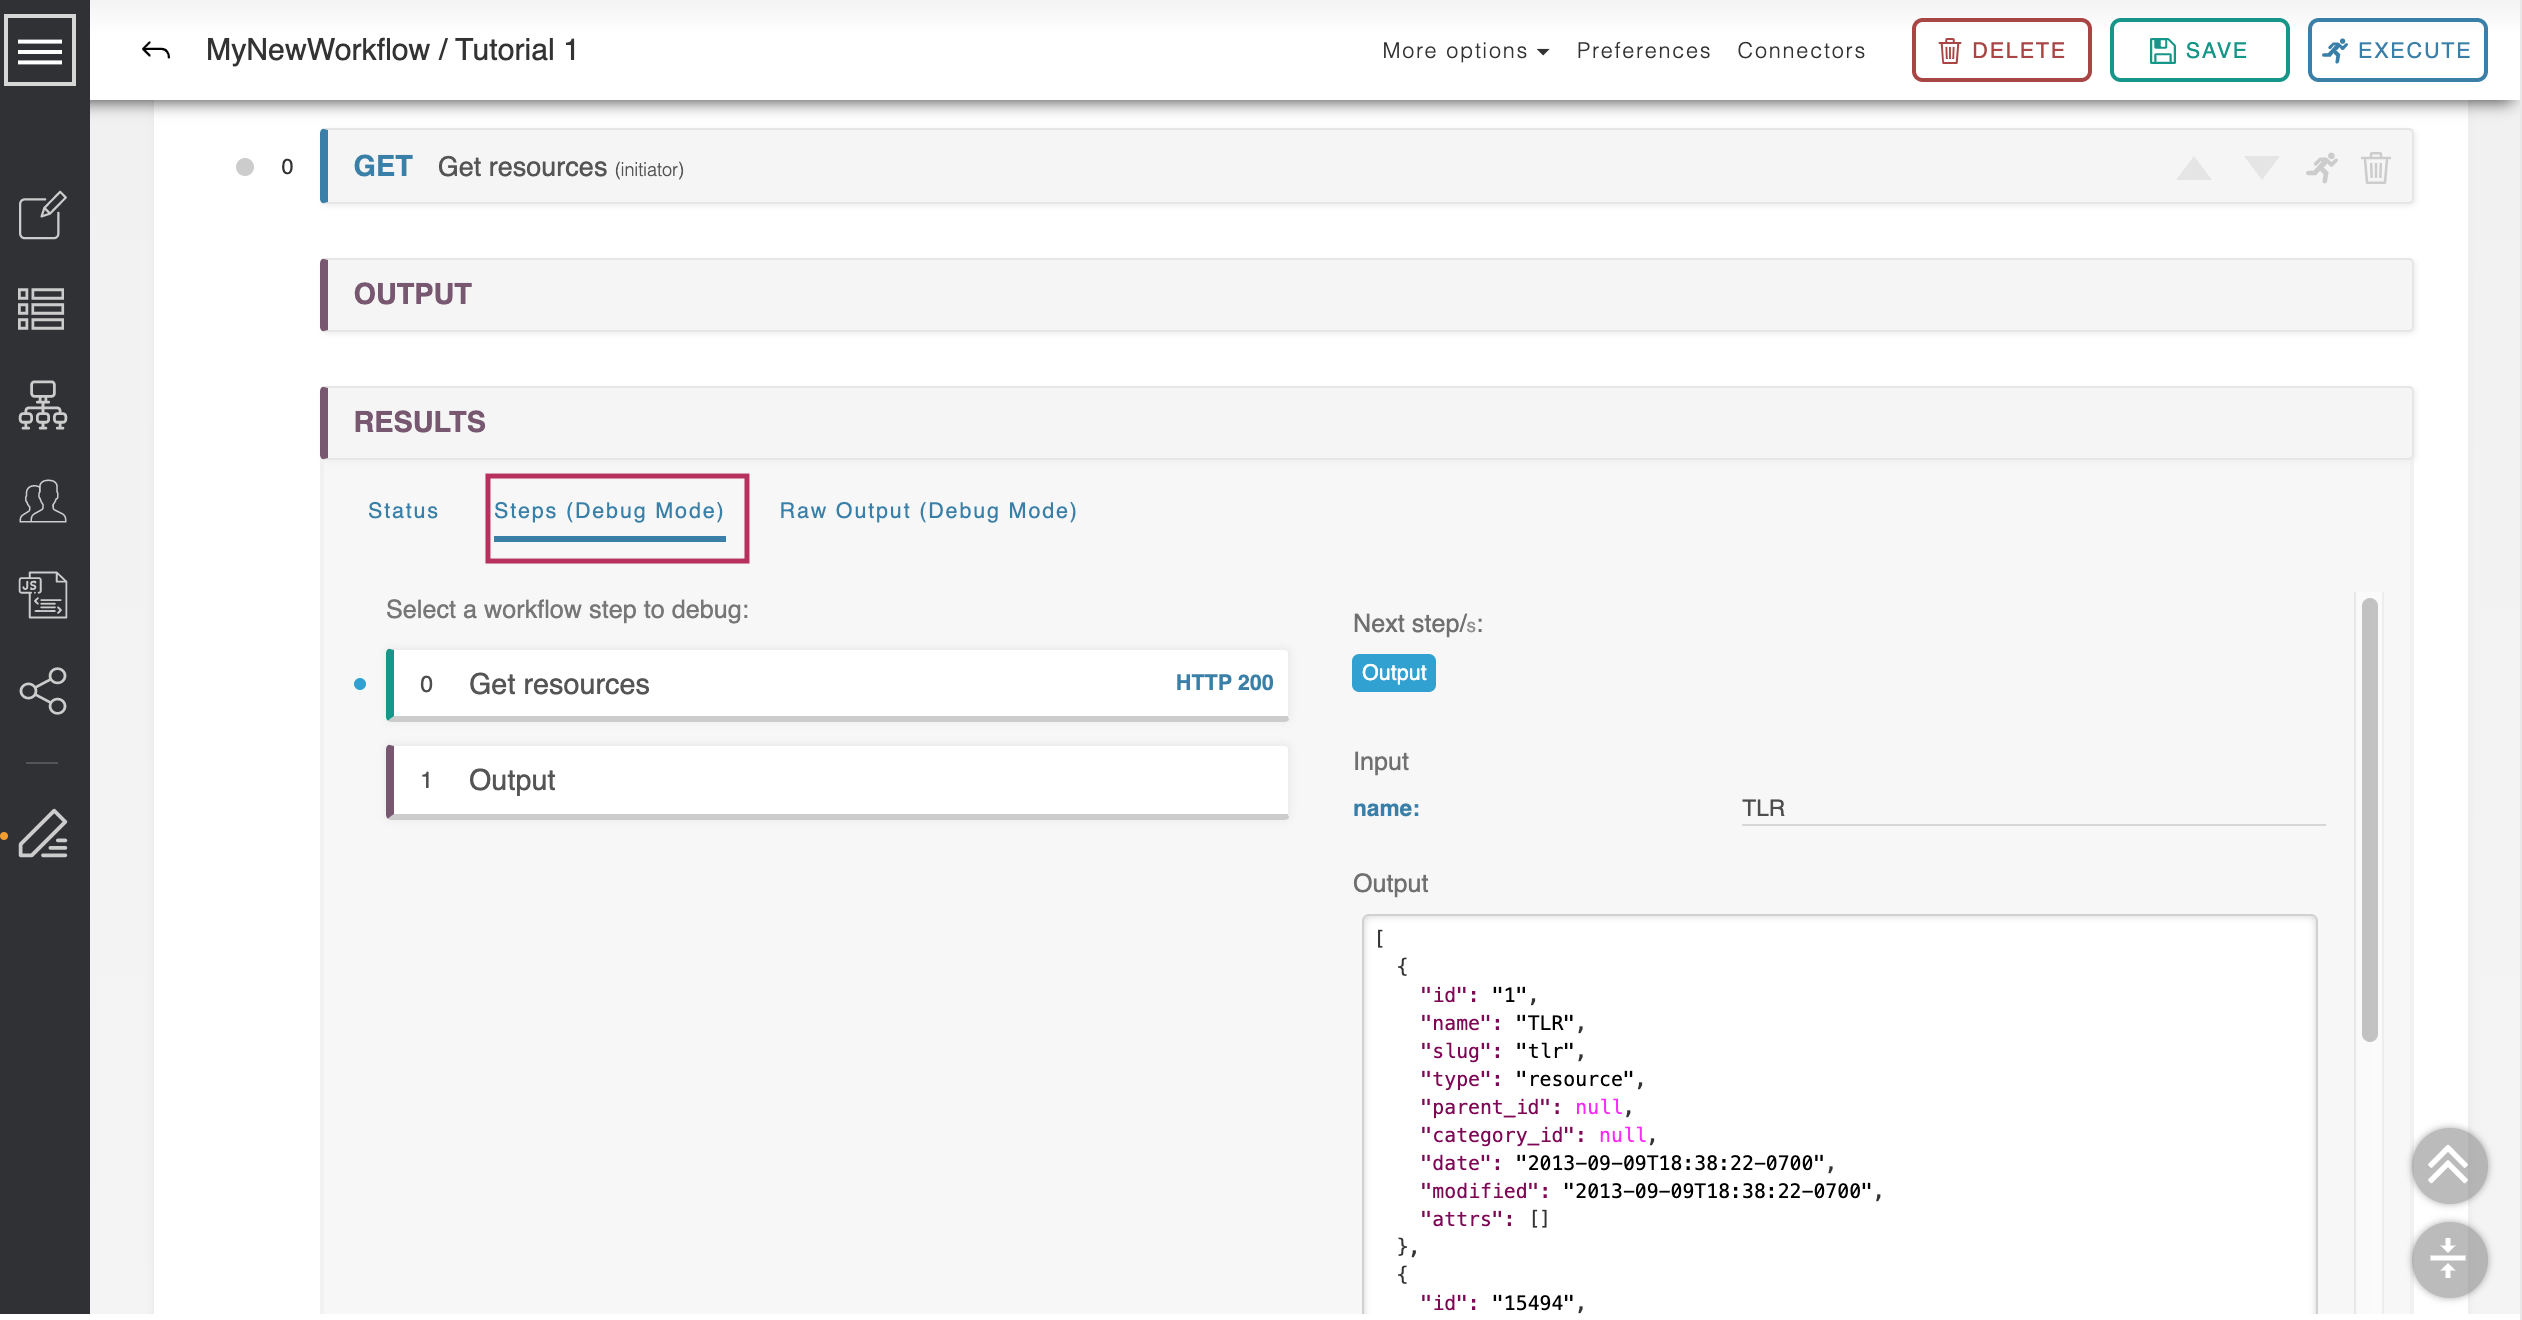
Steps Tab
While Debug Mode is enabled, the results tab "Steps (Debug Mode)" will be available after executing a Workflow.
Each step of the workflow is listed on the left side of the results panel; clicking on a step will detail the inputs and outputs of that step. This will also show you what steps which step(s) fail.
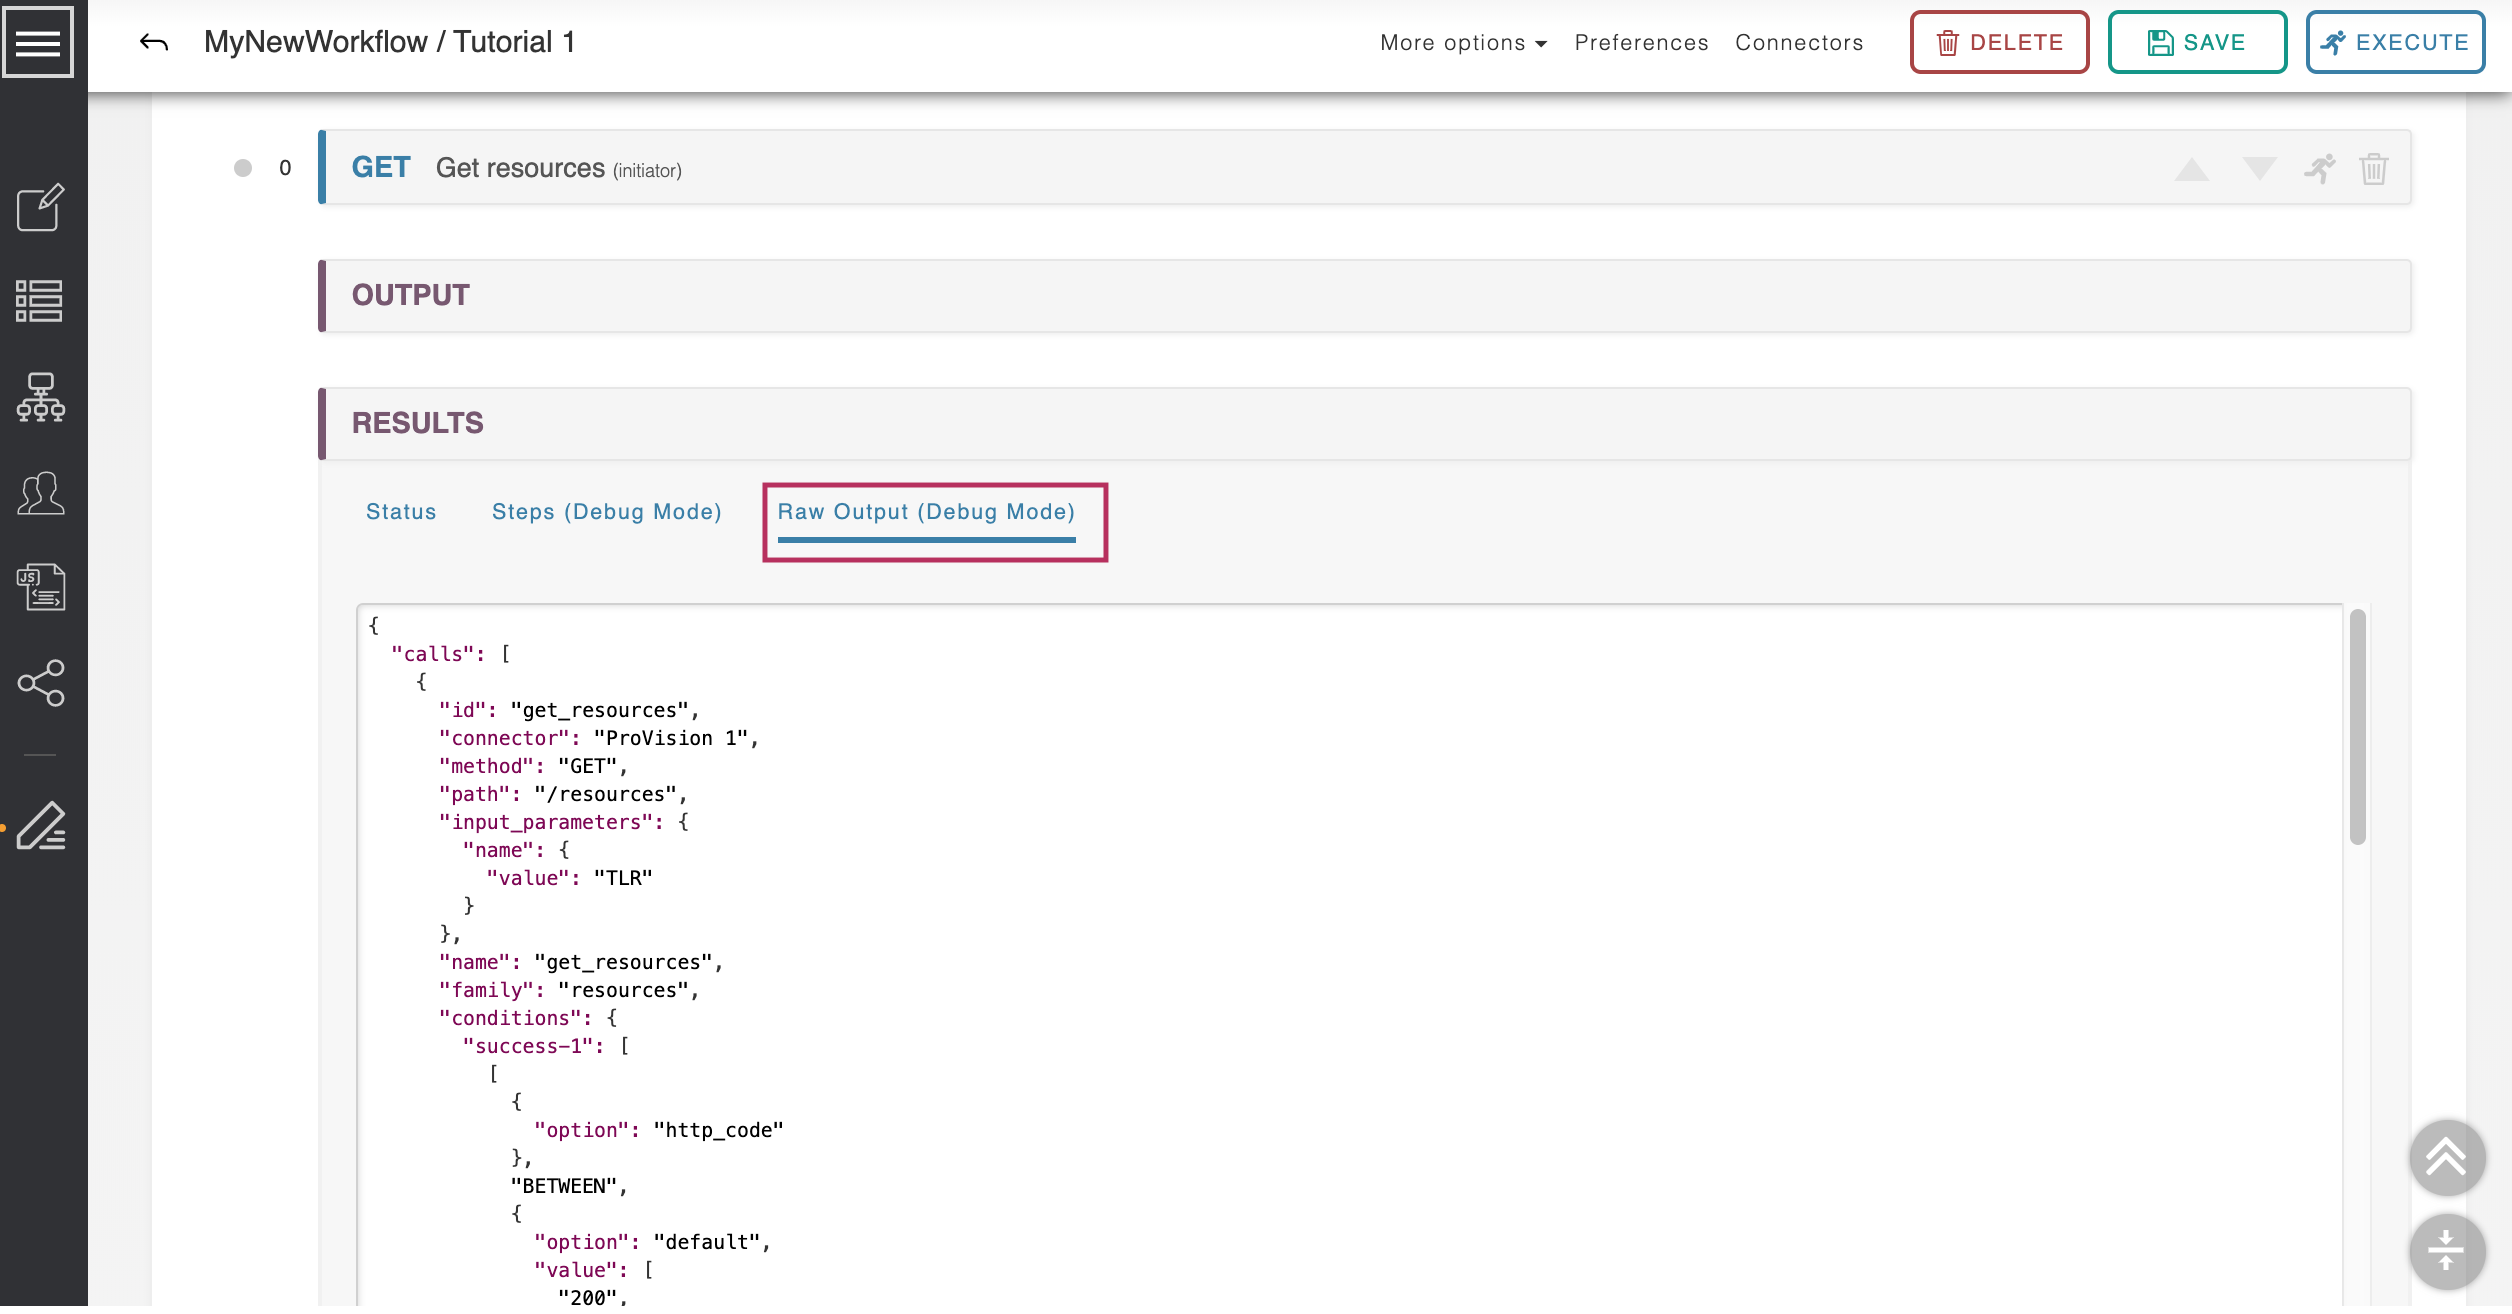
Raw Output Tab
Click on ‘Raw Output’ for the ‘Get resources’ step to see the full, raw response to our query. This is very helpful for finding errors.
Additional Tutorials
Congratulations! You have completed Quick-start Tutorial 1. If you would like to proceed to more advanced topics, continue on to the following tutorial: