Quick-Start Tutorial 2
This tutorial expands upon the concepts introduced in Quick-Start Tutorial 1. It is recommended to complete Quick-Start Tutorial 1 prior to starting this walkthrough, as you will be cloning the previous Workflow.
Saving
ACP Workflows may only be saved once they have at least a single working step, in order to ensure that data transmitted is valid for the connector and system.
Before starting this tutorial, or any other workflow creation, ensure that you:
- Have sufficient time to proceed to completing at least one step in the Workflow
- Have connector type, instance, and credential information at hand (or have identified an existing workflow from which to import the connector)
- Know the initial API condition with which you want to start your Workflow (If not using a ProVision connector as shown in this example)
Step 1: Open the Workflow List
Now let's expand a bit on the previous Tutorial and introduce some more advanced ACP concepts.
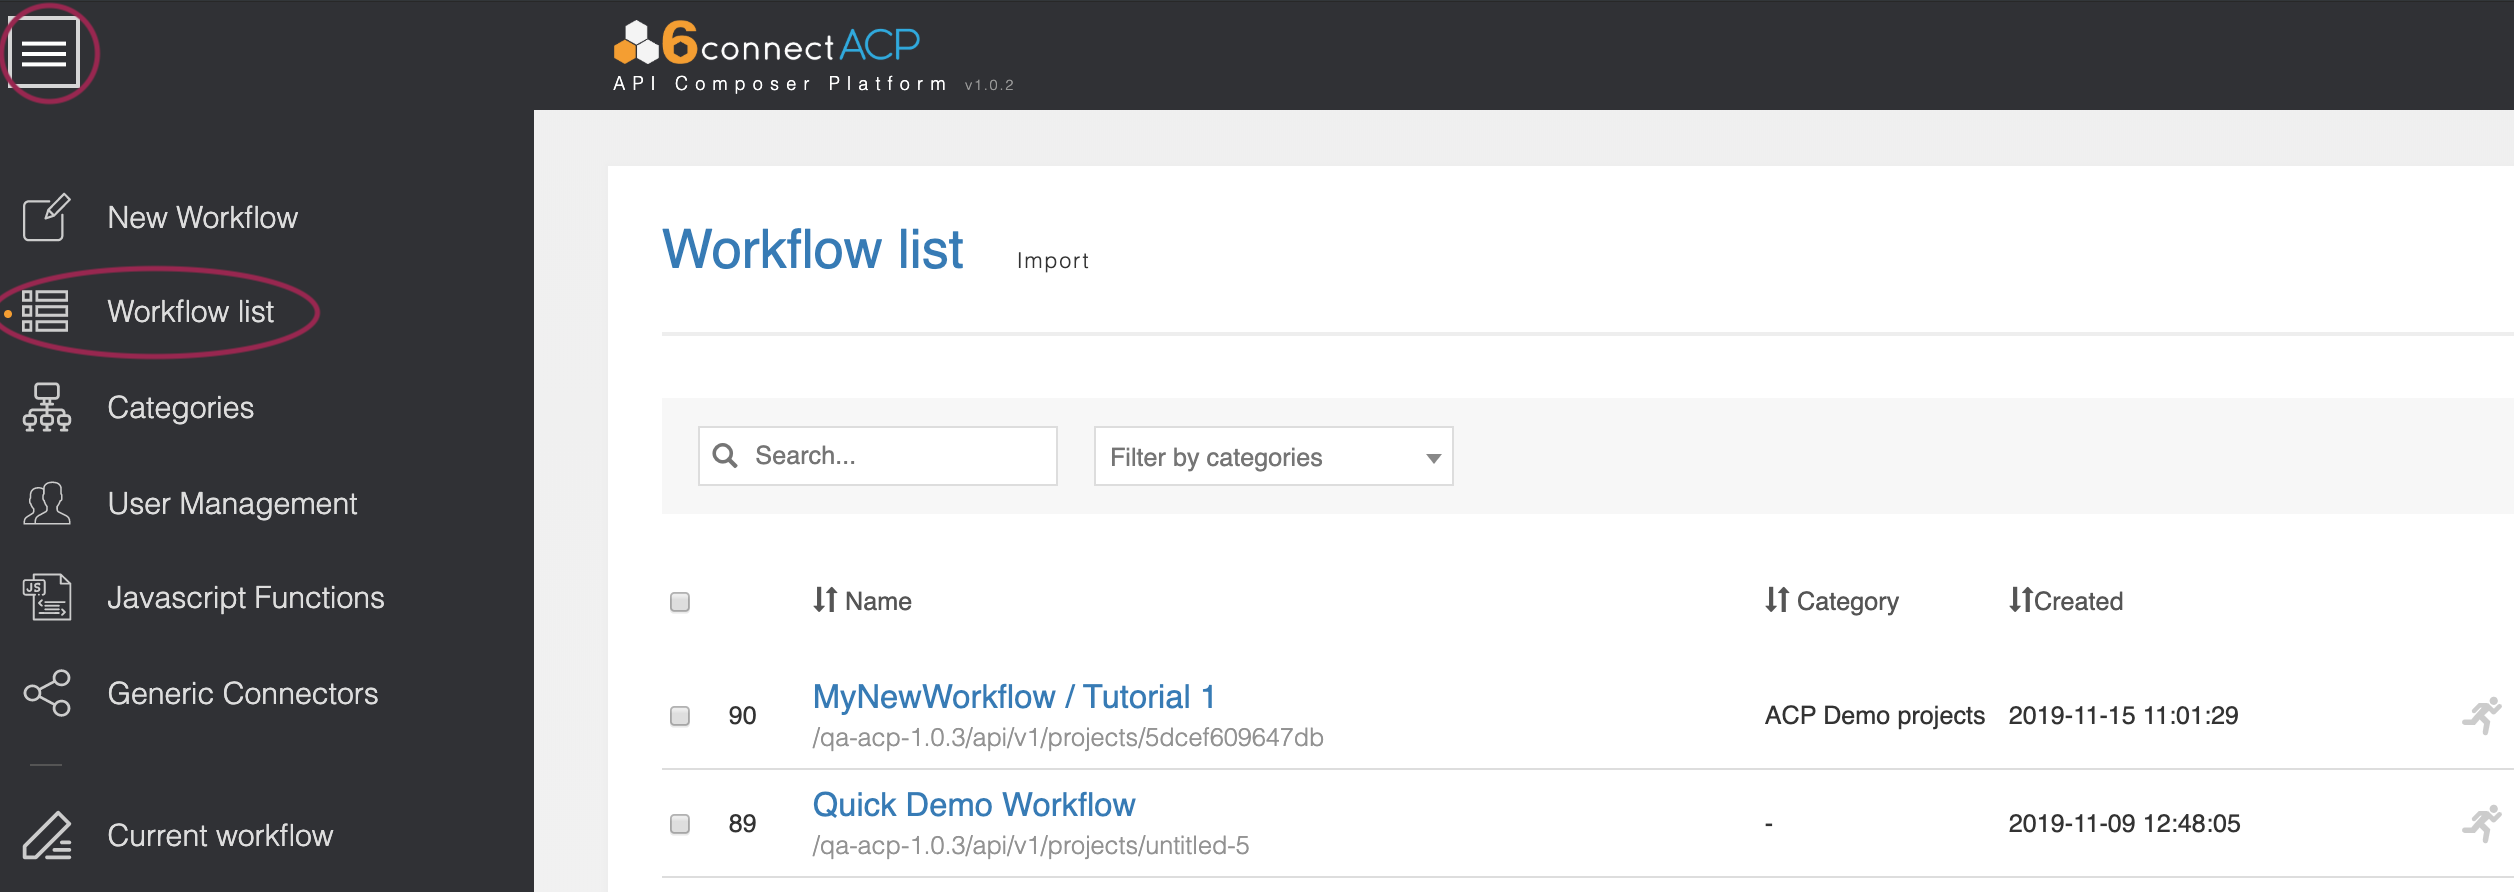
Navigate to your ACP instance and open the Actions Menu by clicking on the Menu icon in the upper-left.
Then click on the "Workflow list" option to view all Workflows.
Step 2: Clone Workflow from Tutorial 1
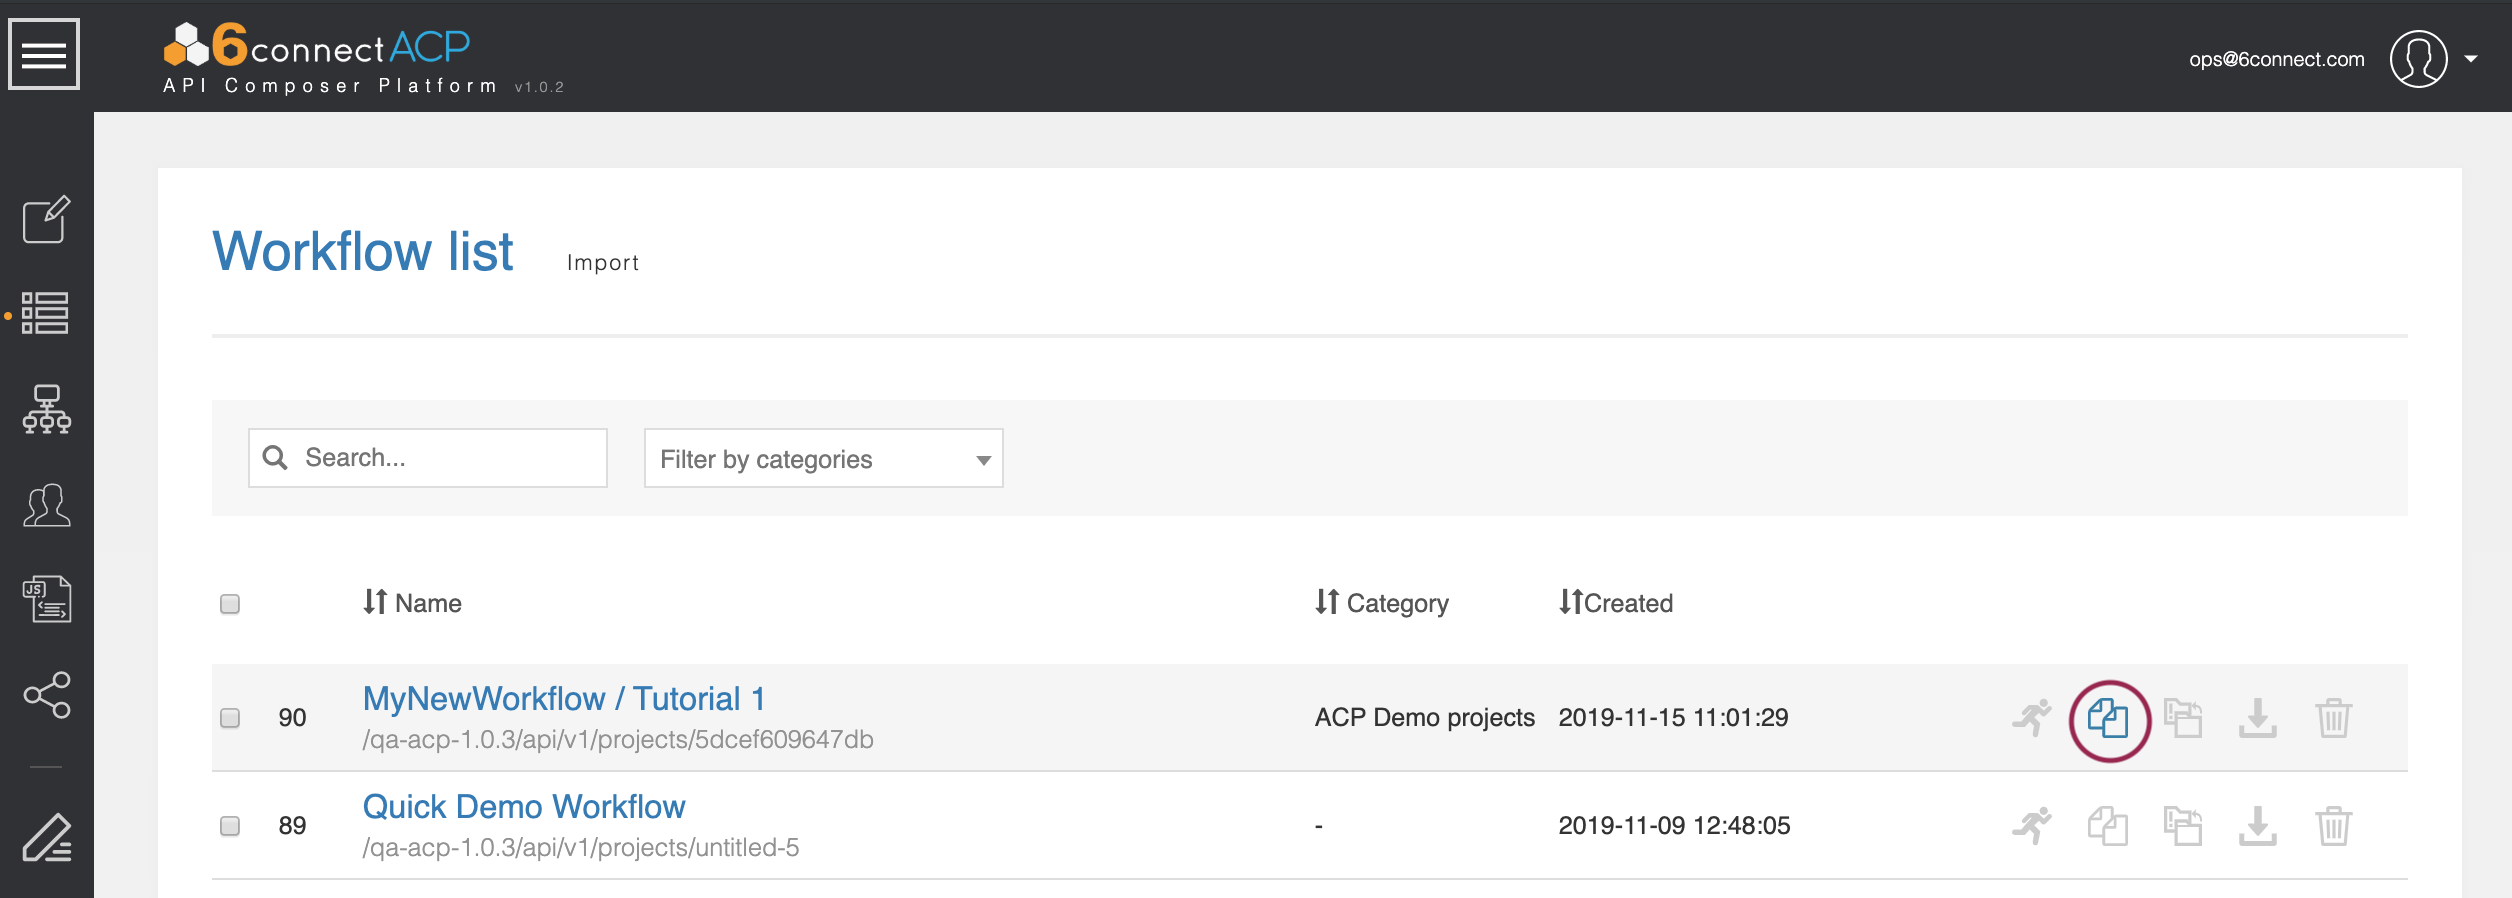
Find the tutorial Workflow that you created by following Quick-Start Tutorial 1. You can search by Name, filter by category, or sort the workflow list by Name, Category, or Created date.
Once you find your Tutorial 1 Workflow, click on the ‘Clone’ icon.
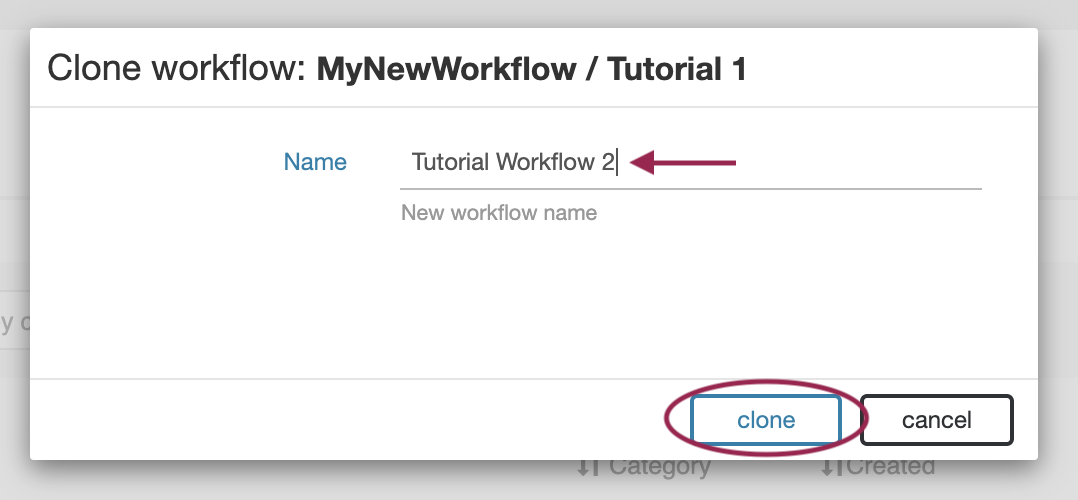
Enter “Tutorial Workflow 2” as the new name, then click ‘clone.’
The new Workflow will be created and added to the Workflow List.
Step 3: Open Tutorial 2 Workflow
From the Workflow list, find and click on the name “Tutorial Workflow 2” to open your new workflow.
This workflow is an exact copy of the previous tutorial, complete with all steps, settings, and connectors.
If another Workflow is still open (such as Tutorial 1 Workflow), a warning may appear confirming that you wish to close the previous workflow.
If any unsaved changes exist in the previous workflow, select 'Cancel', save the Workflow, close, and then re-open the Tutorial 2 Workflow. Otherwise, select "Close" and continue to the next step of Tutorial 2.
Step 4: Edit Step Inputs
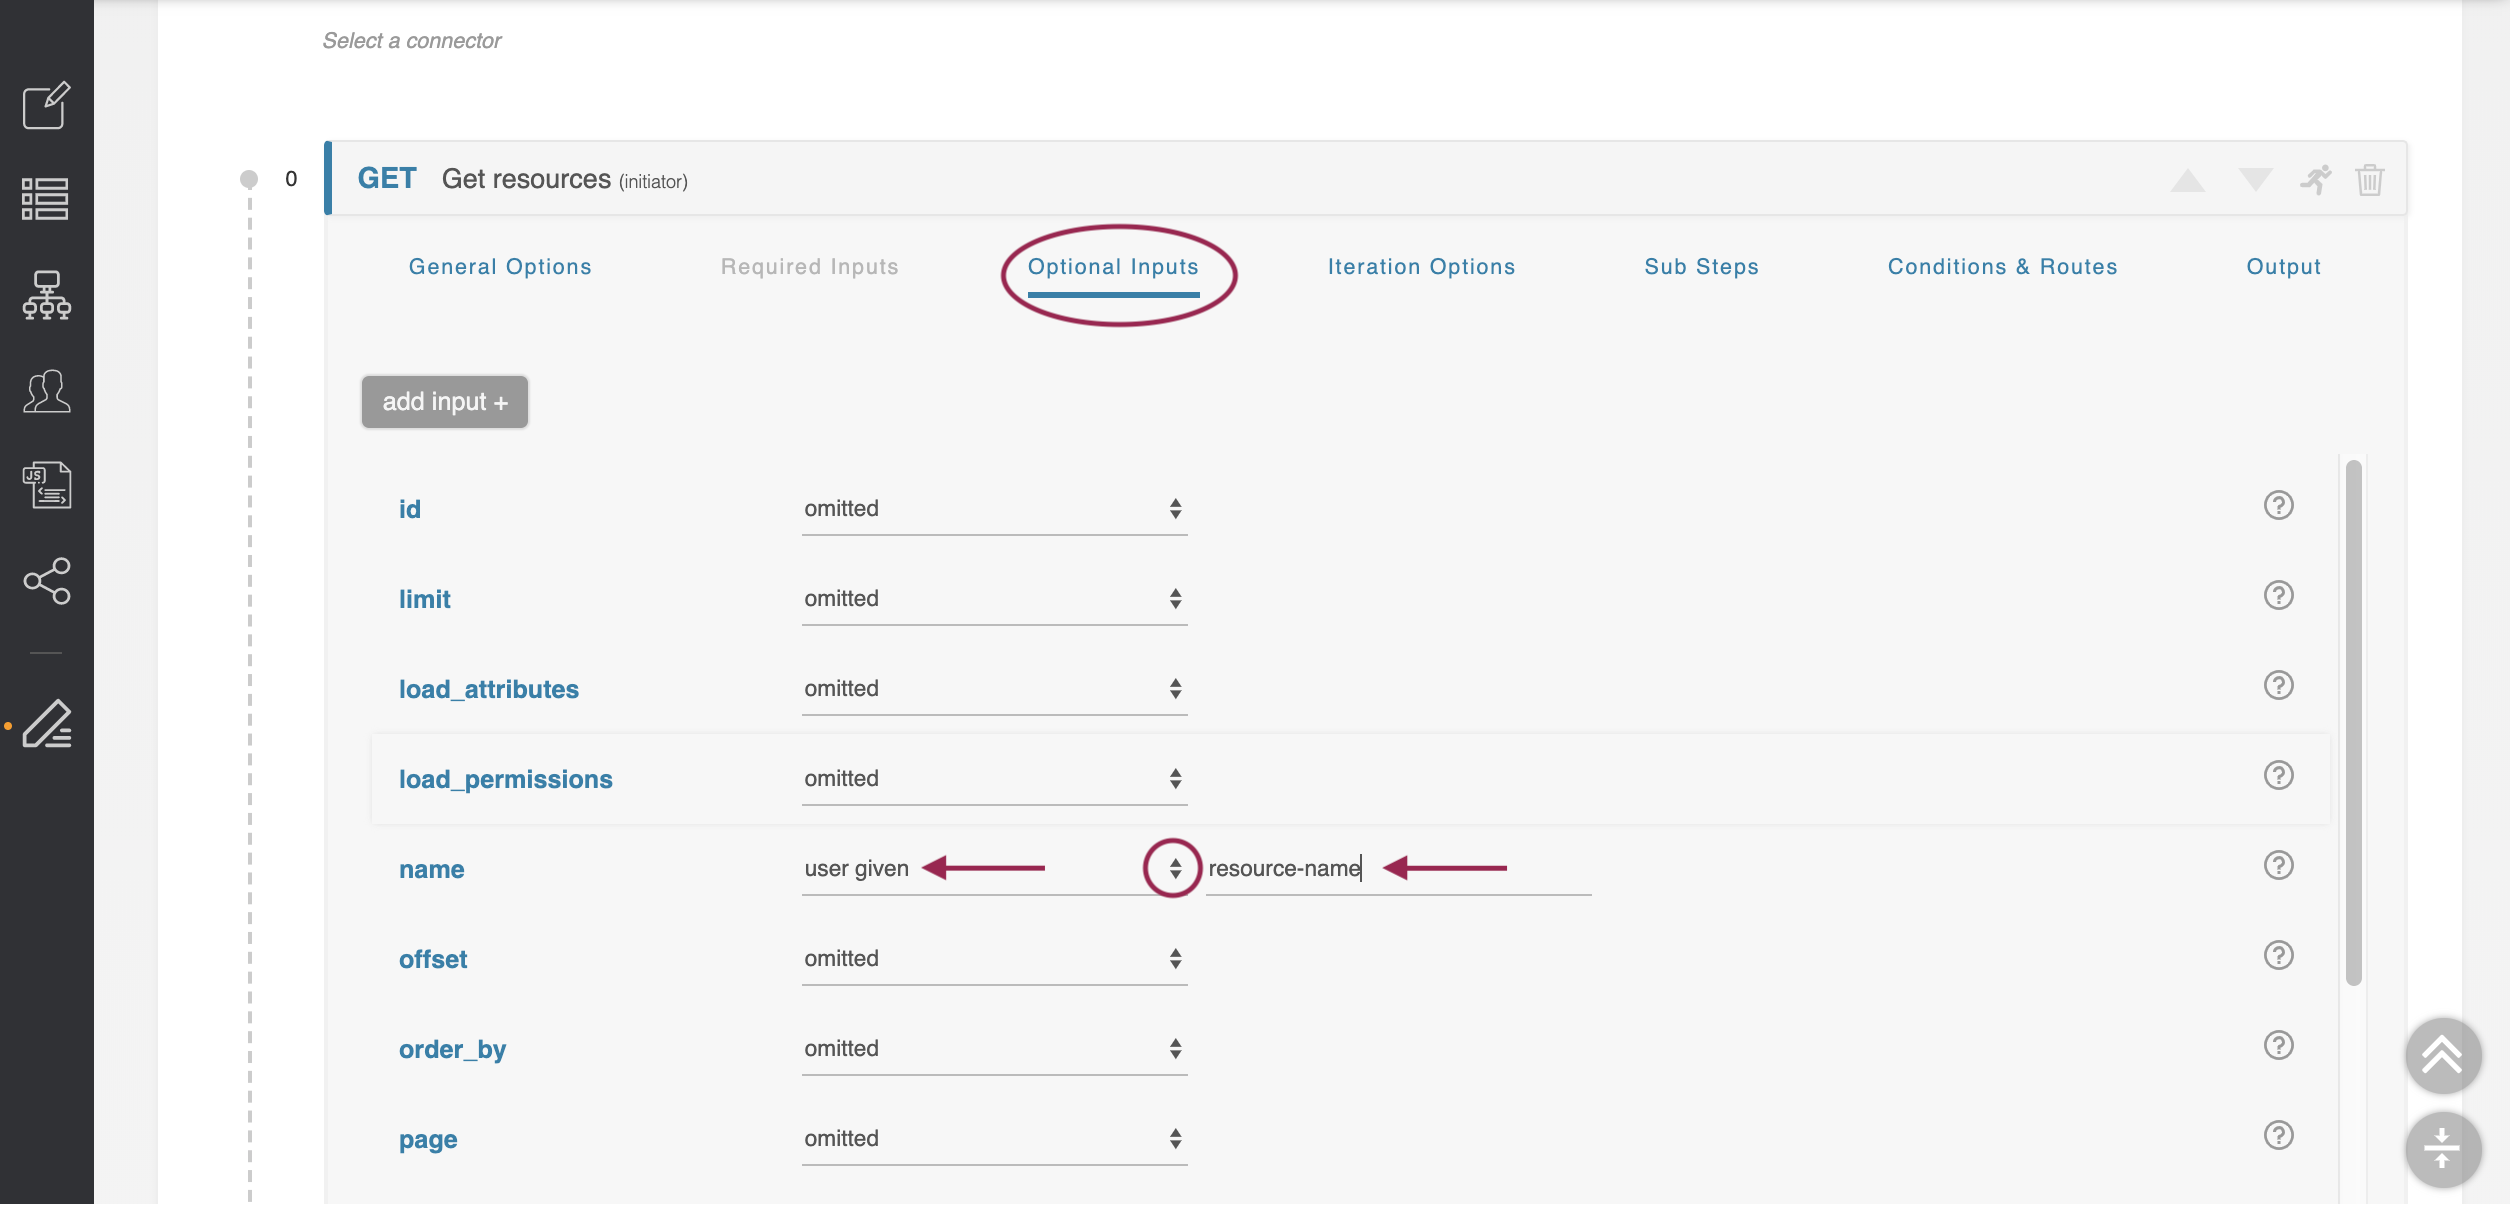
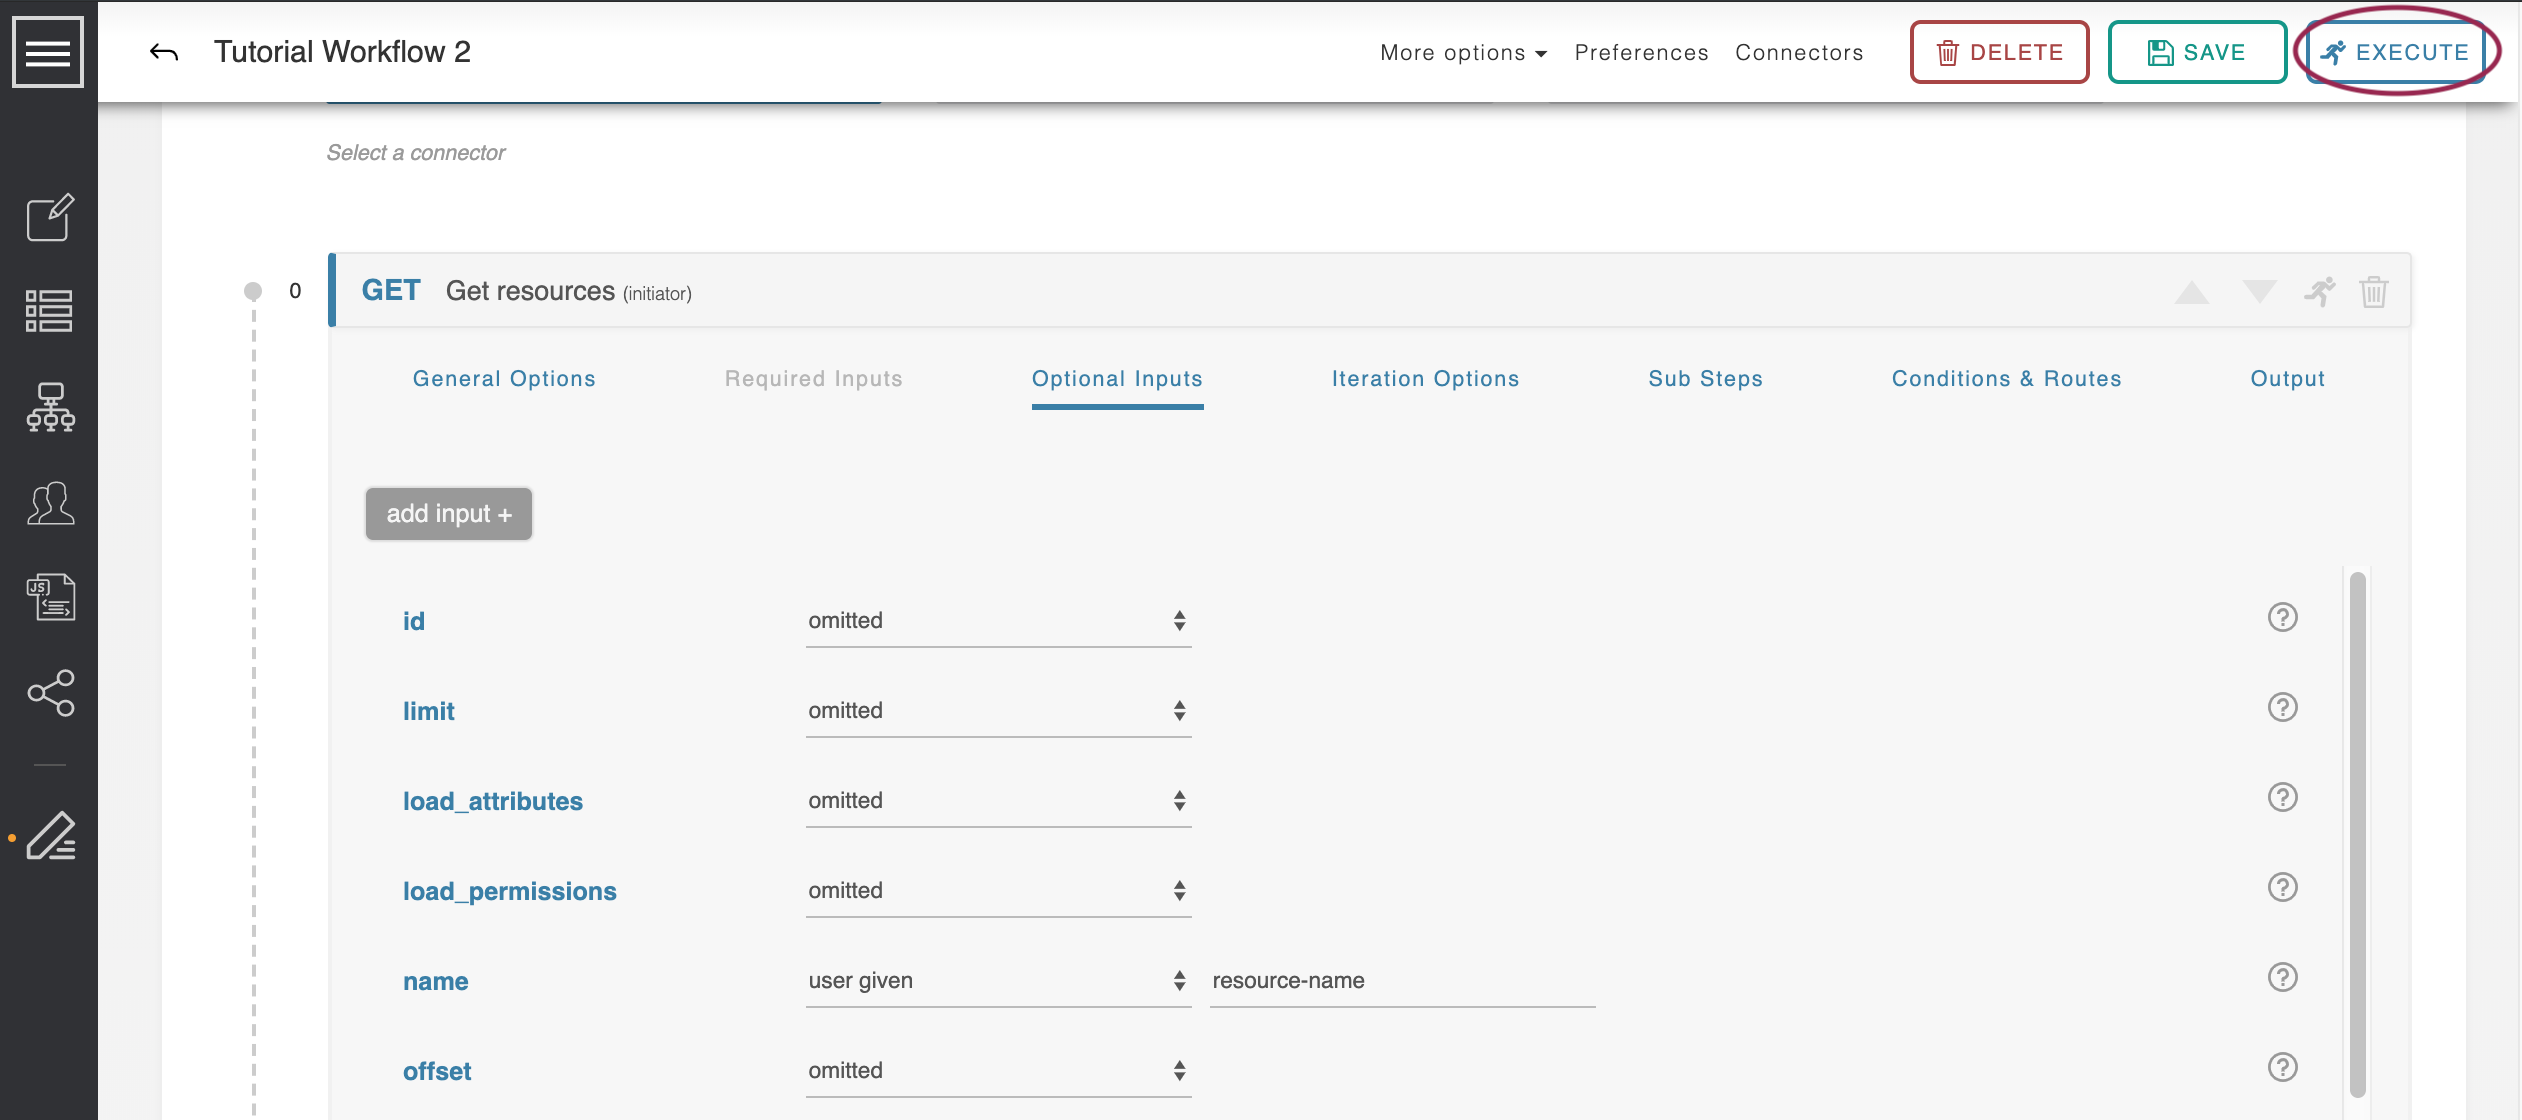
Click the ‘Get Resources’ step we created in Tutorial 1, and select the 'Optional Inputs' tab. Scroll down to the ‘name’ field we assigned previously to ‘Default Value: TLR’.
Change this field to ‘user given.’ The form changes to allow you to name this user-given variable we just declared. Name it ‘resource-name.’
When done, save the Workflow.
Step 5: Execute Workflow with User-Given Variables
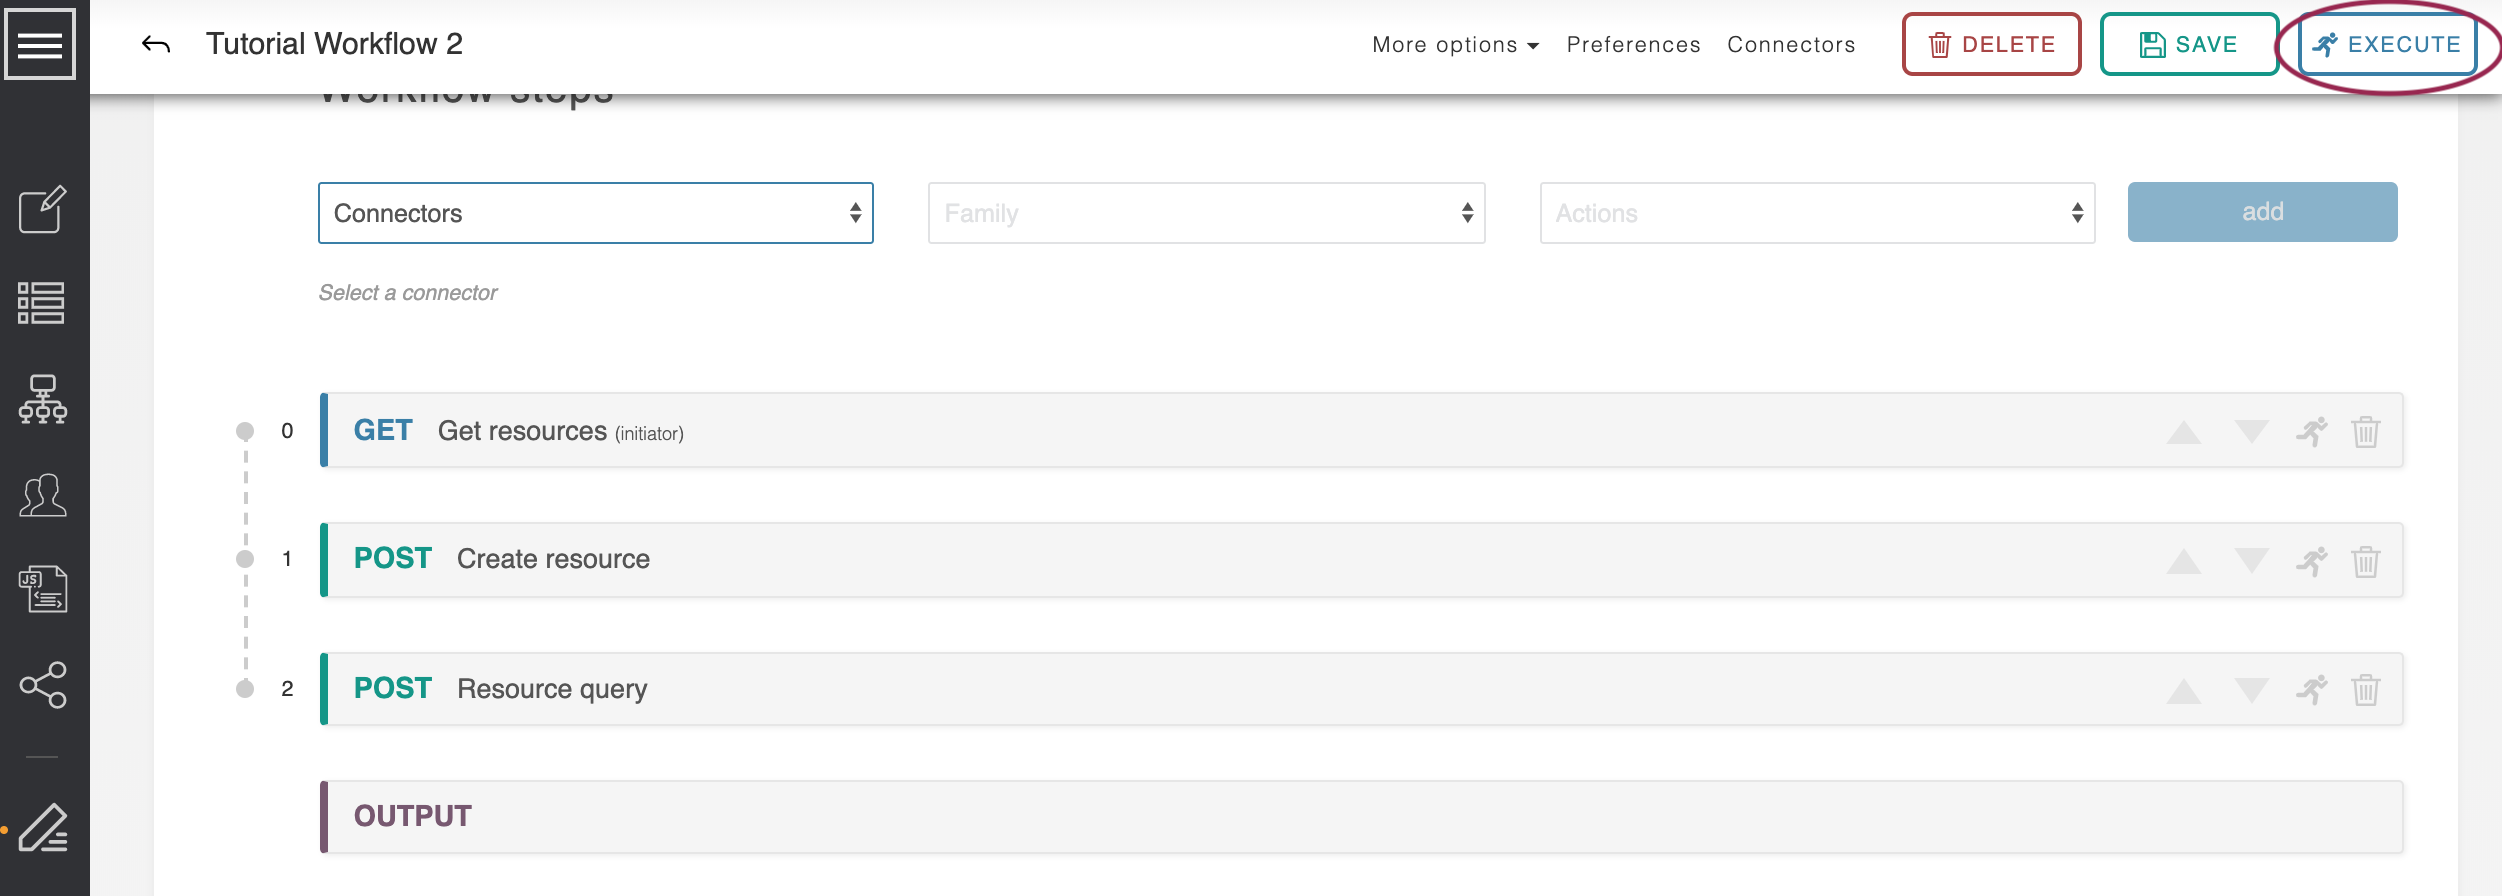
After saving the Workflow, click 'execute' to run it.
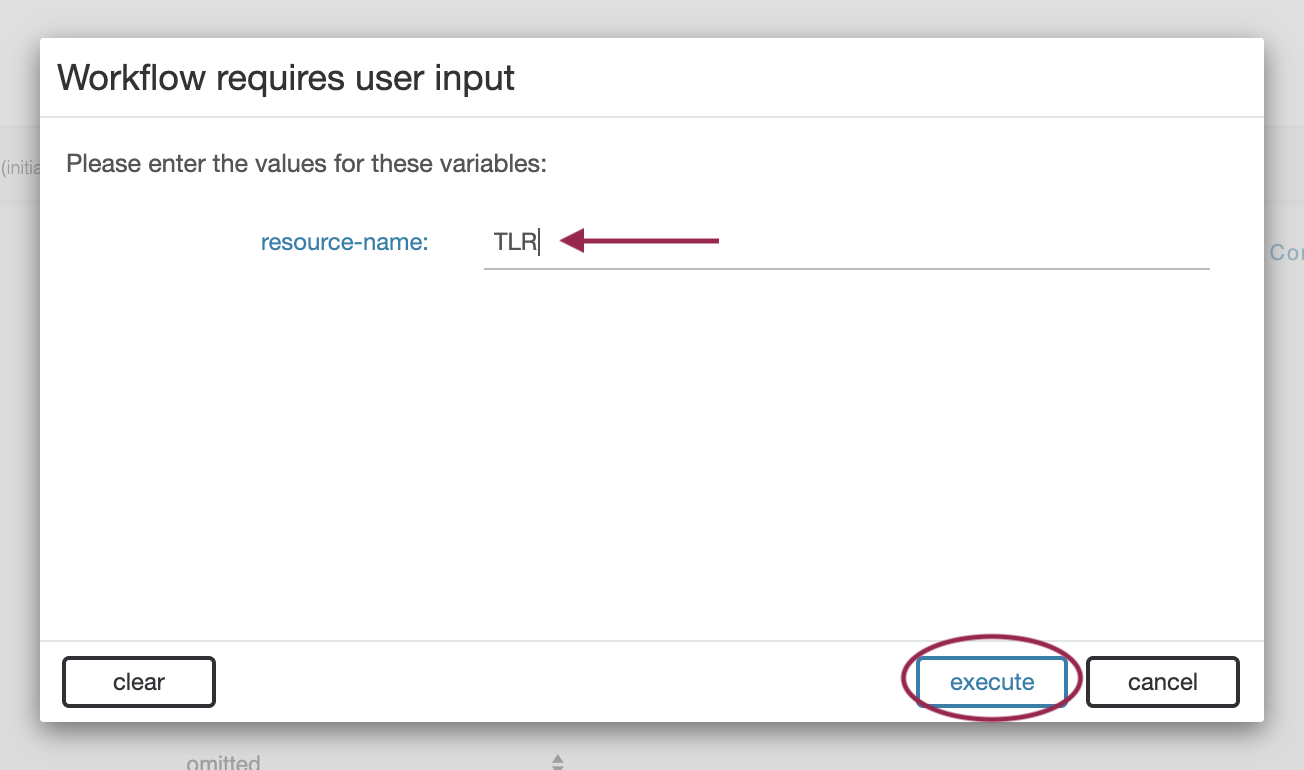
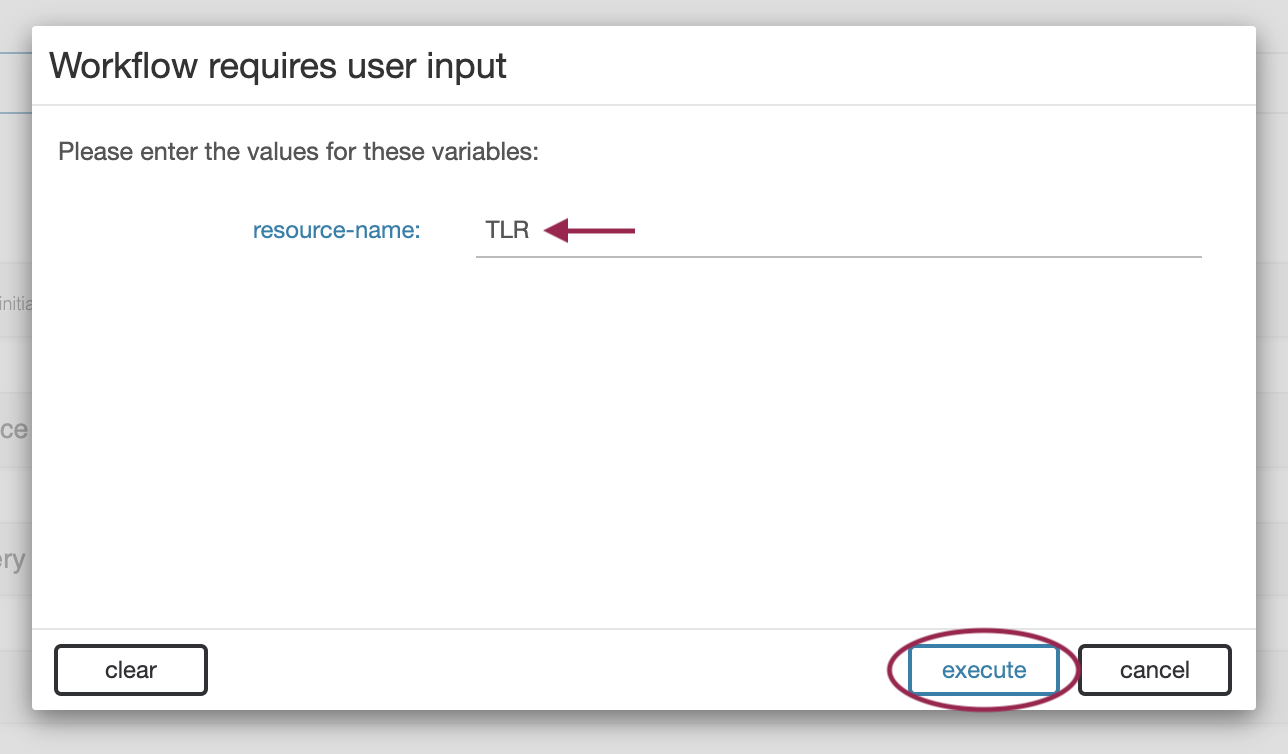
A form pops up listing off all the user-given variables required to run the workflow. In this case, there is only one, but there can be as many as are needed.
Enter ‘TLR’ as the resource-name and click ‘execute.’
The resultant id is the same.
Step 6: Execute Workflow with User-Given Variables - Fail Condition
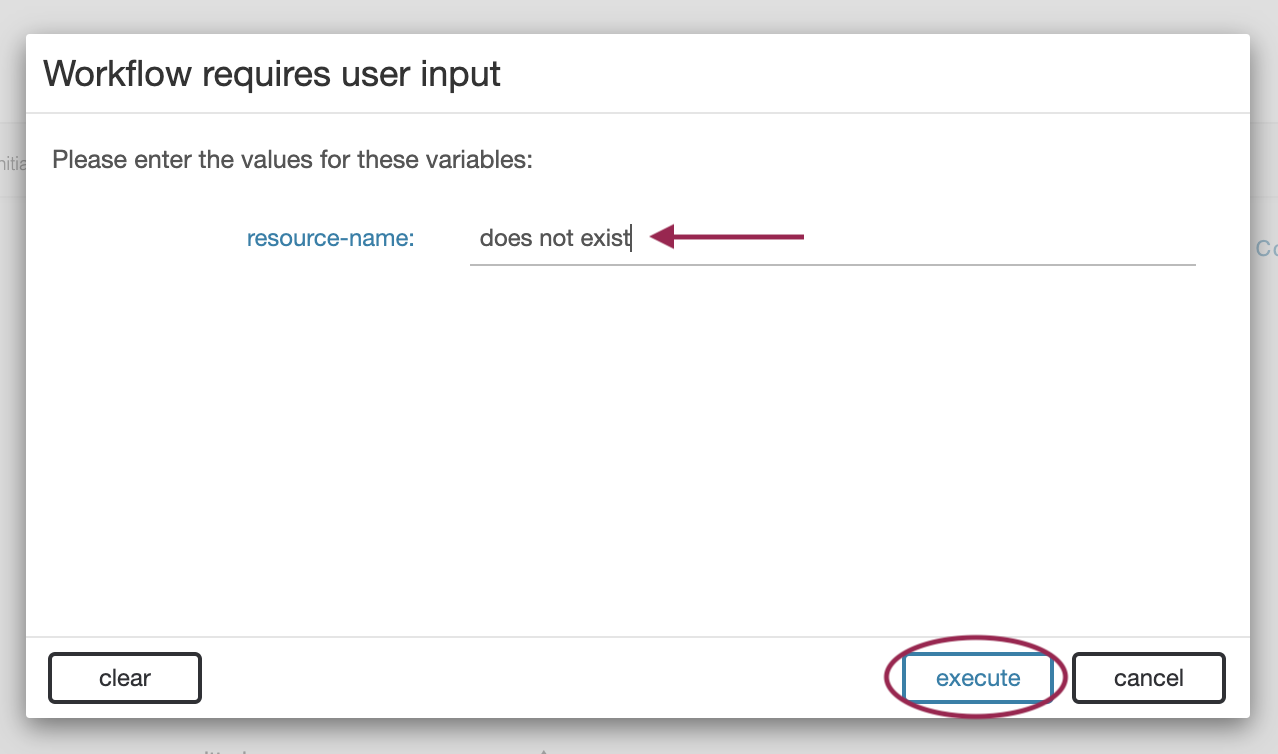
Execute the workflow again - but this time enter the name ‘does not exist.’
This resource obviously does not exist, and so the id returned is ‘null.’
Step 7: Add Workflow Step 2 - Create Resource
To adjust for a null return, we will instead alter the routing of the 'Get Resources' call, and create the resource if it is not found.
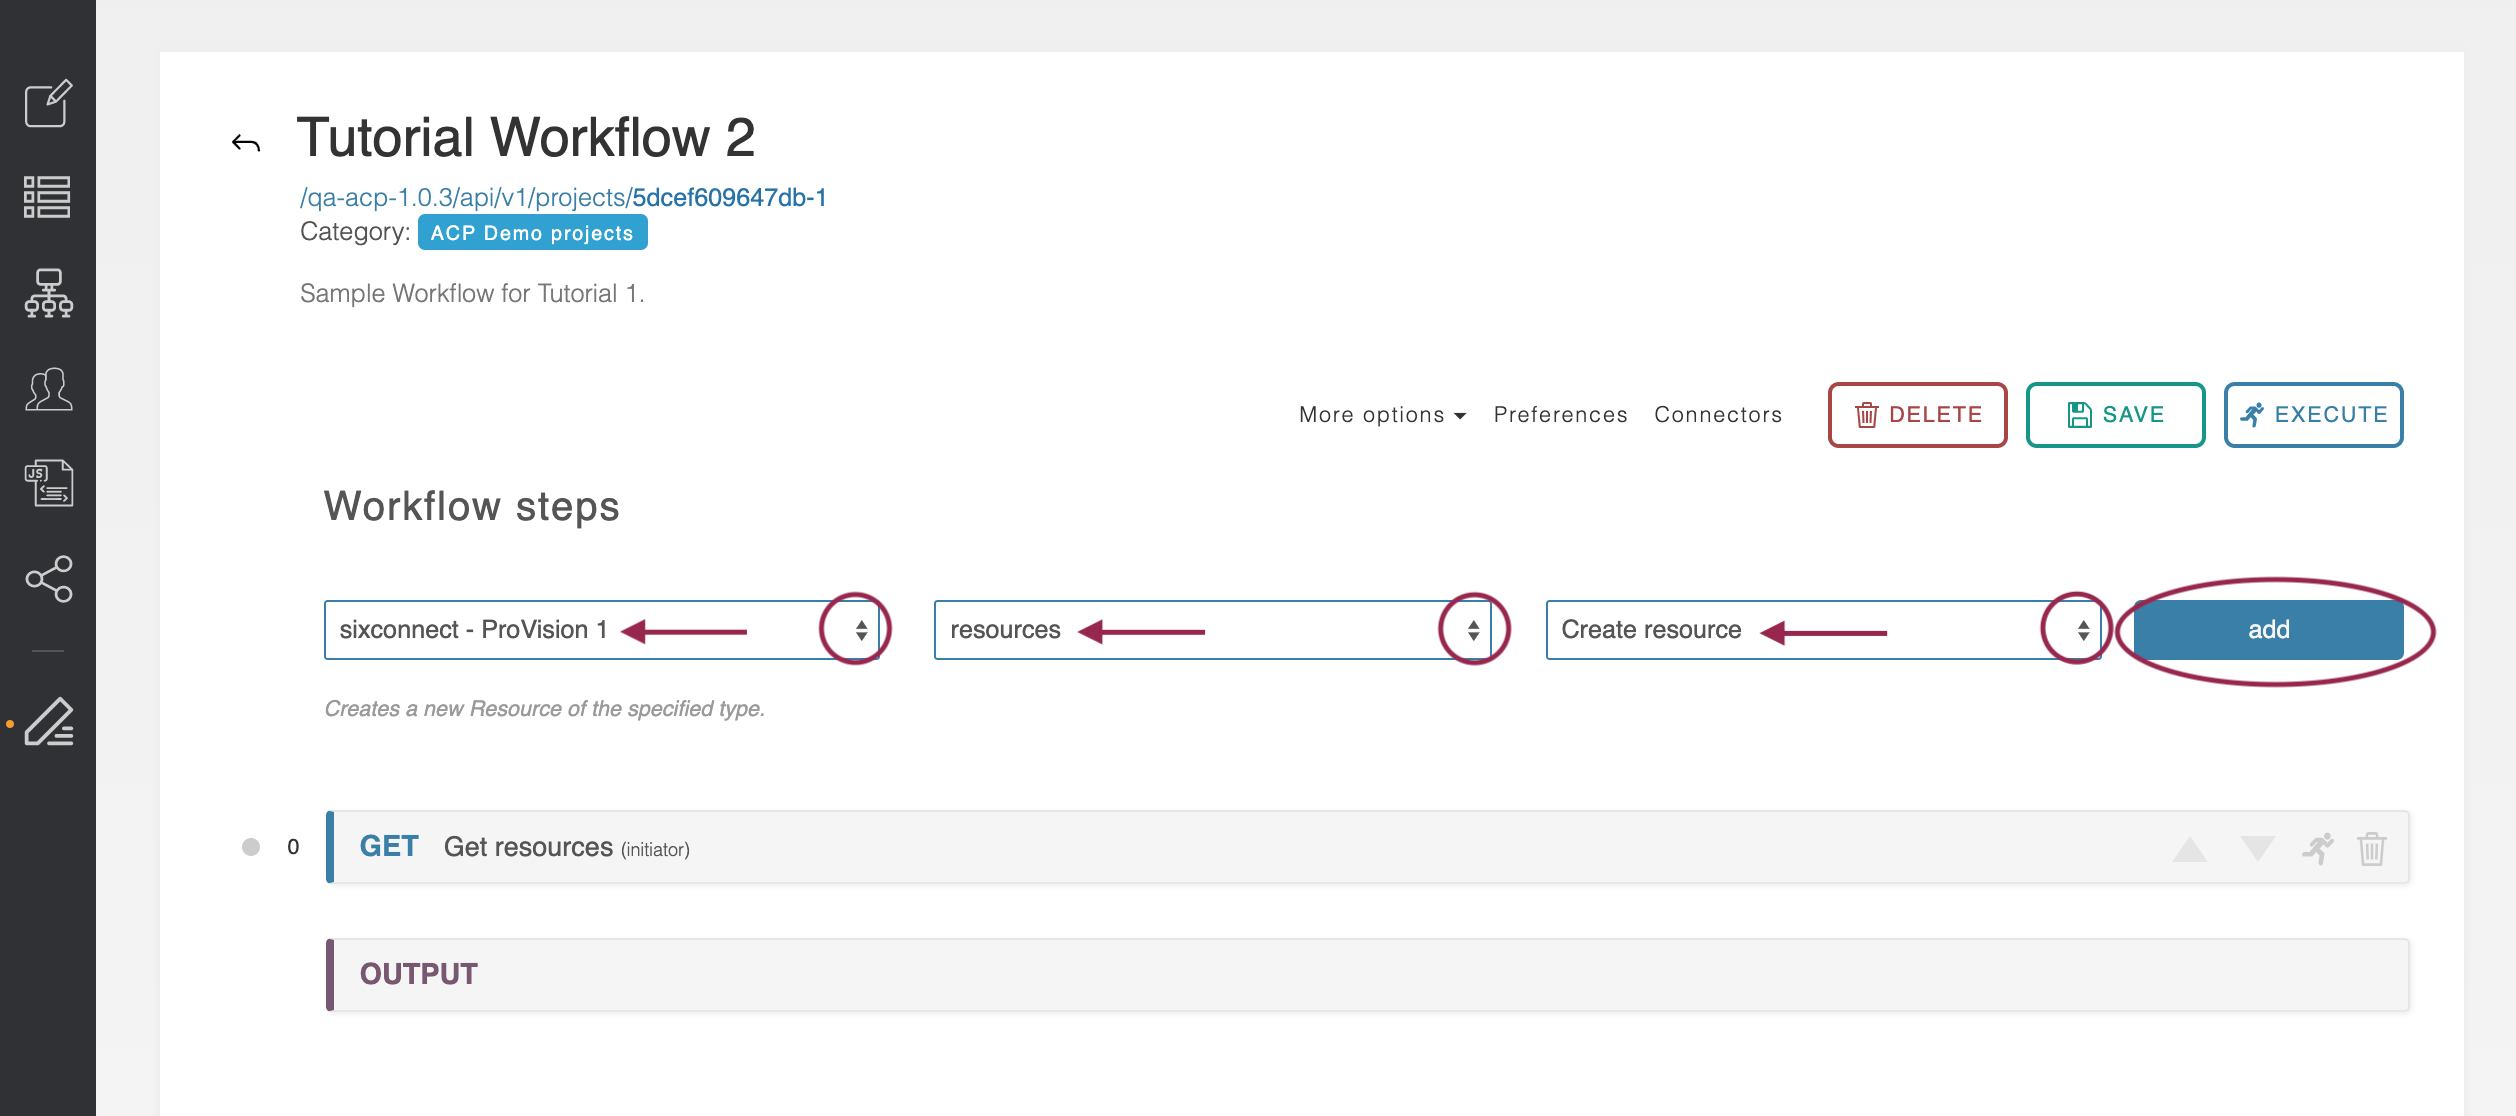
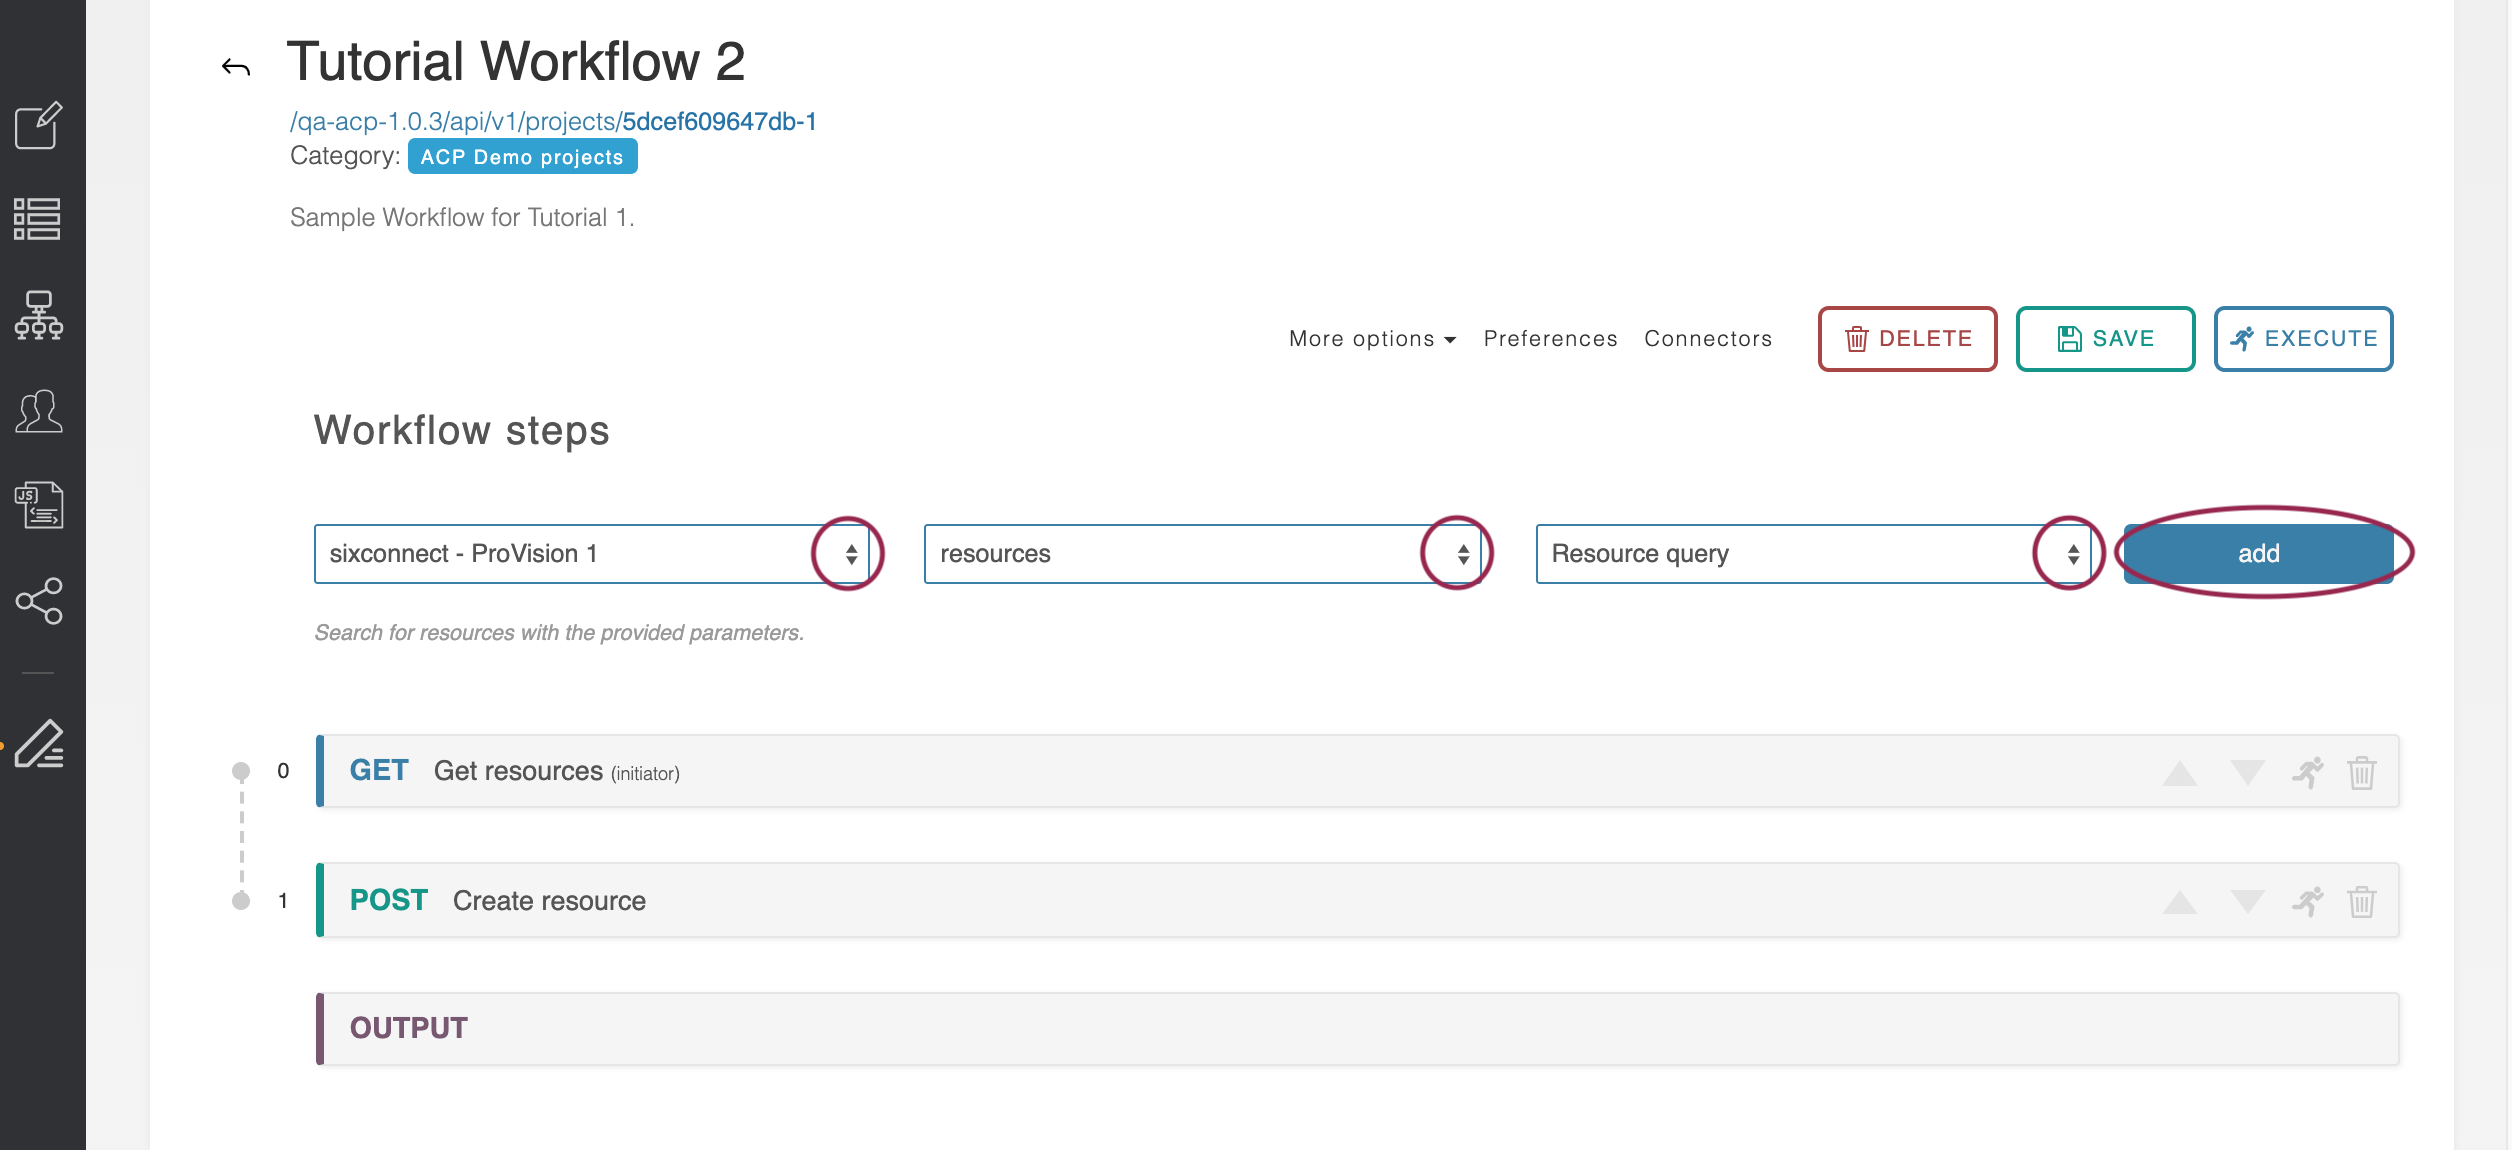
Add a new step to the workflow by selecting the ‘sixconnect’ connector, then the ‘resources’ family, and finally the ‘Create Resource’ action. Then, Click "Add".
A second step, POST Create resource, will be added to the Workflow.
Step 8: Add Workflow Step 3 - Query
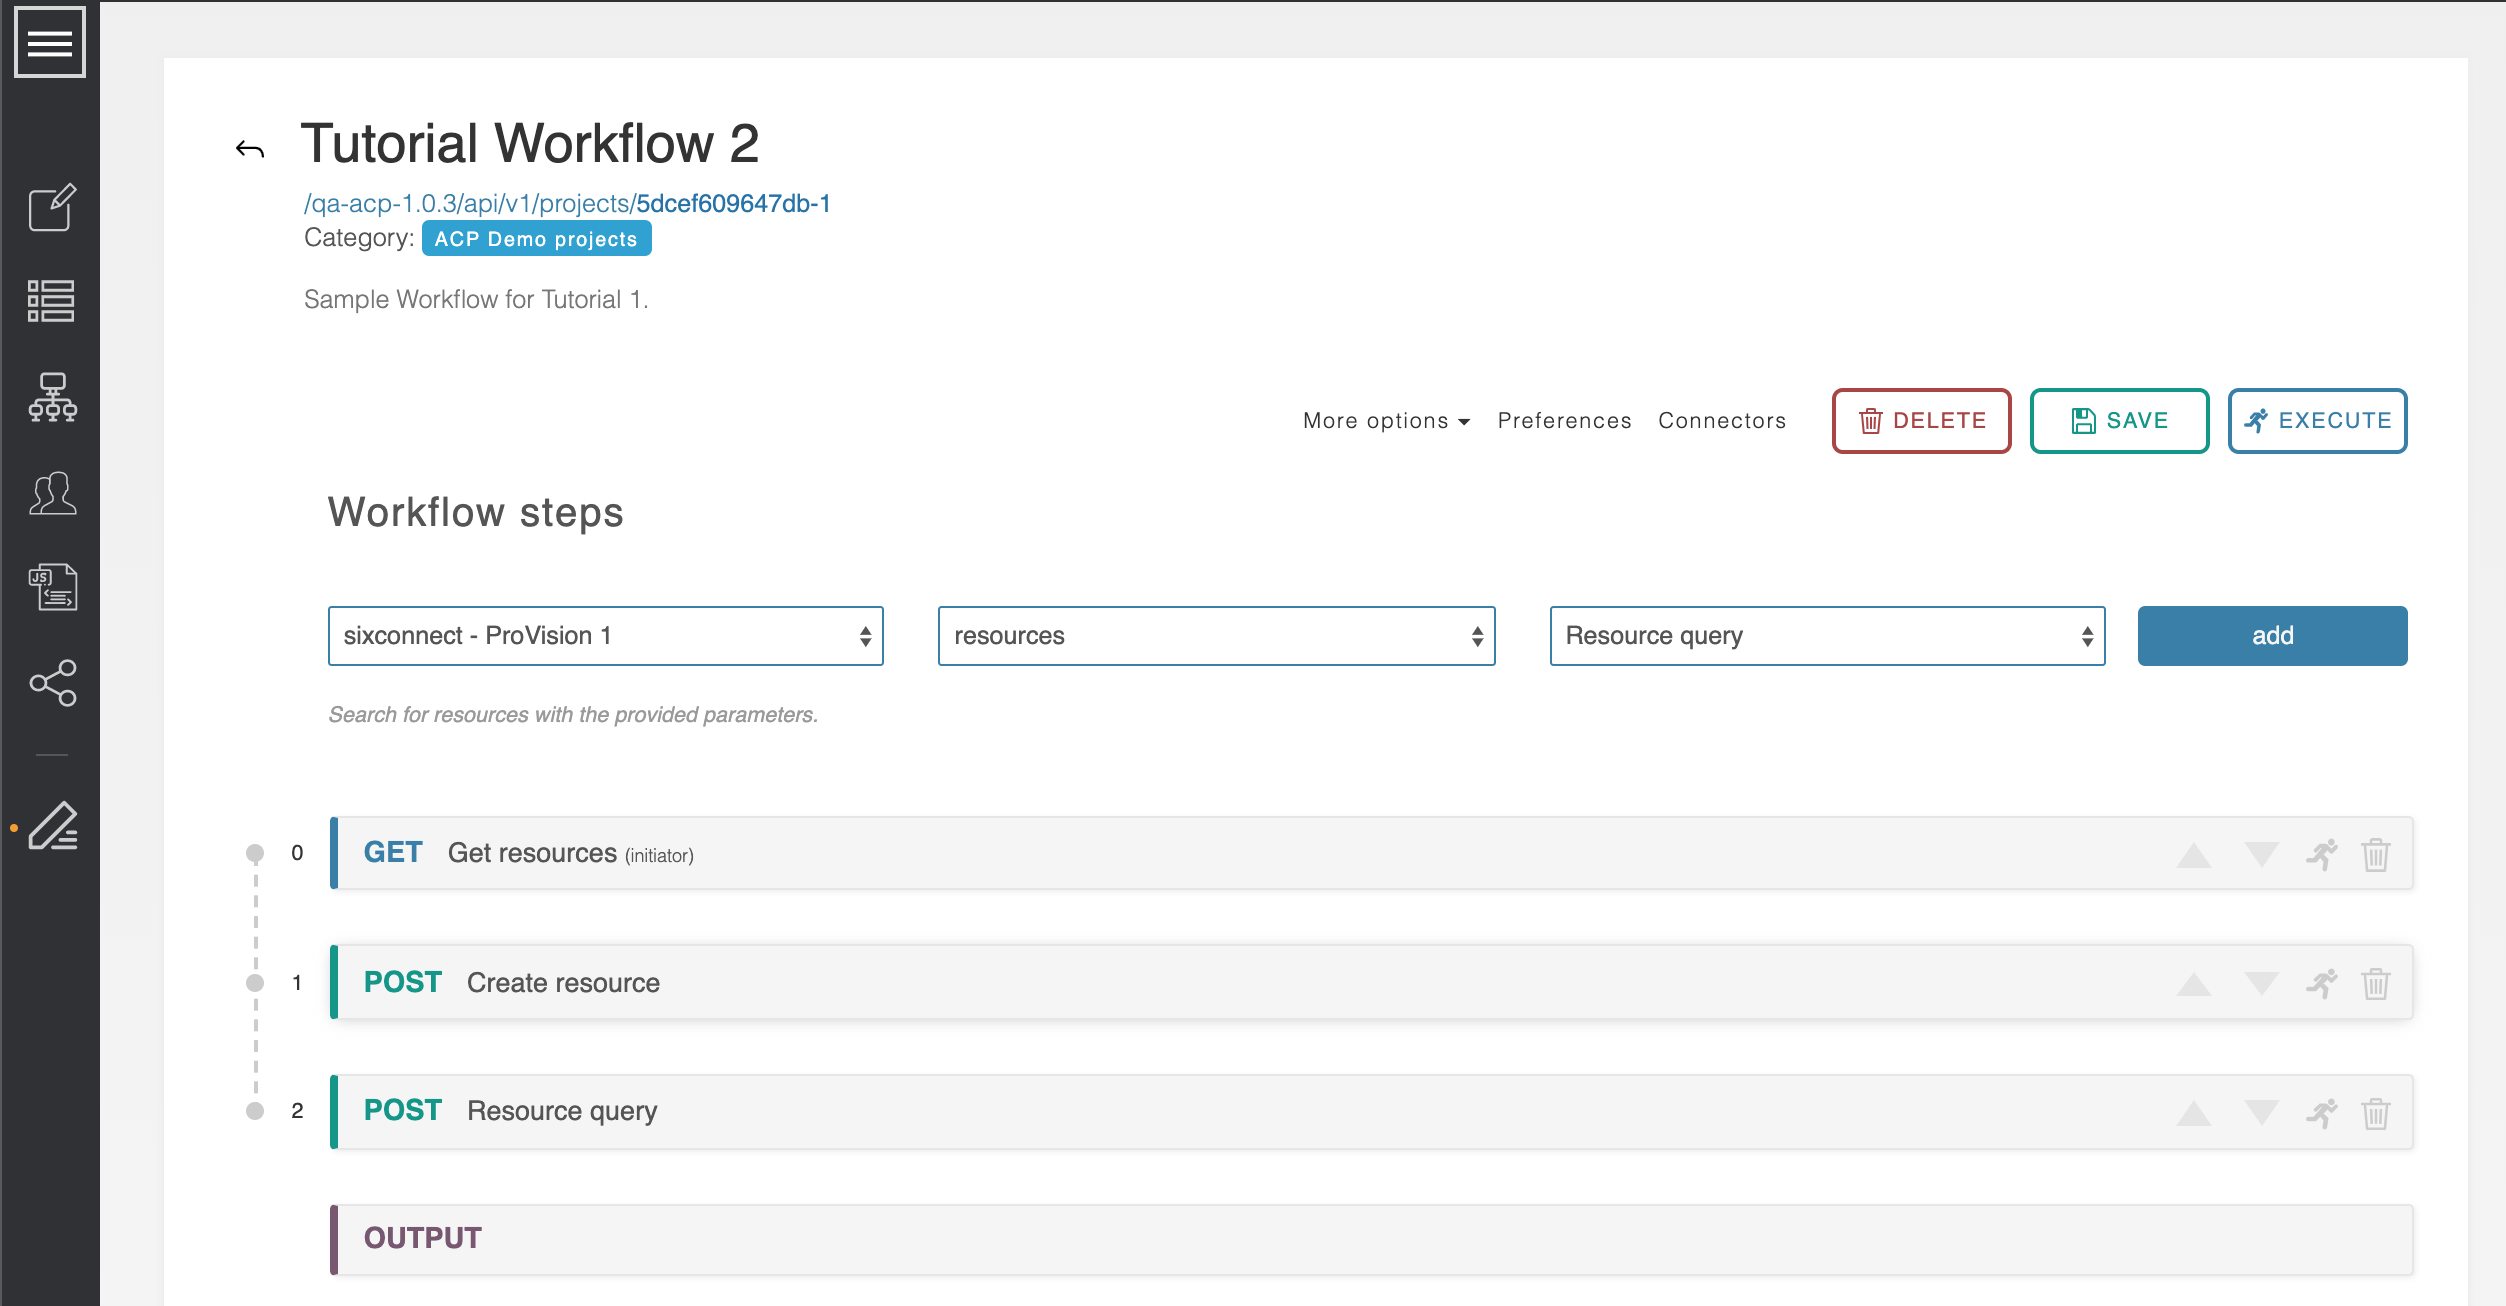
Add a third step to the workflow for Resource Query. Select the ‘sixconnect’ connector, then the ‘resources’ family, and finally the ‘Resource Query’ action.
Note this is different from the ‘Get Resource’ action we use as Workflow Step #1.
You should now have a 3-step workflow, with 'Get Resources', 'Create Resource', and 'Resource Query', like so:
If you tried to save or execute the Workflow at this point, a warning occurs indicating that an invalid input exists, and the save/execute fails. Although we have created the three calls we would like to occur, they still need condition logic added to handle the "does not exist" resource scenario.
Step 9: View Conditions & Routes
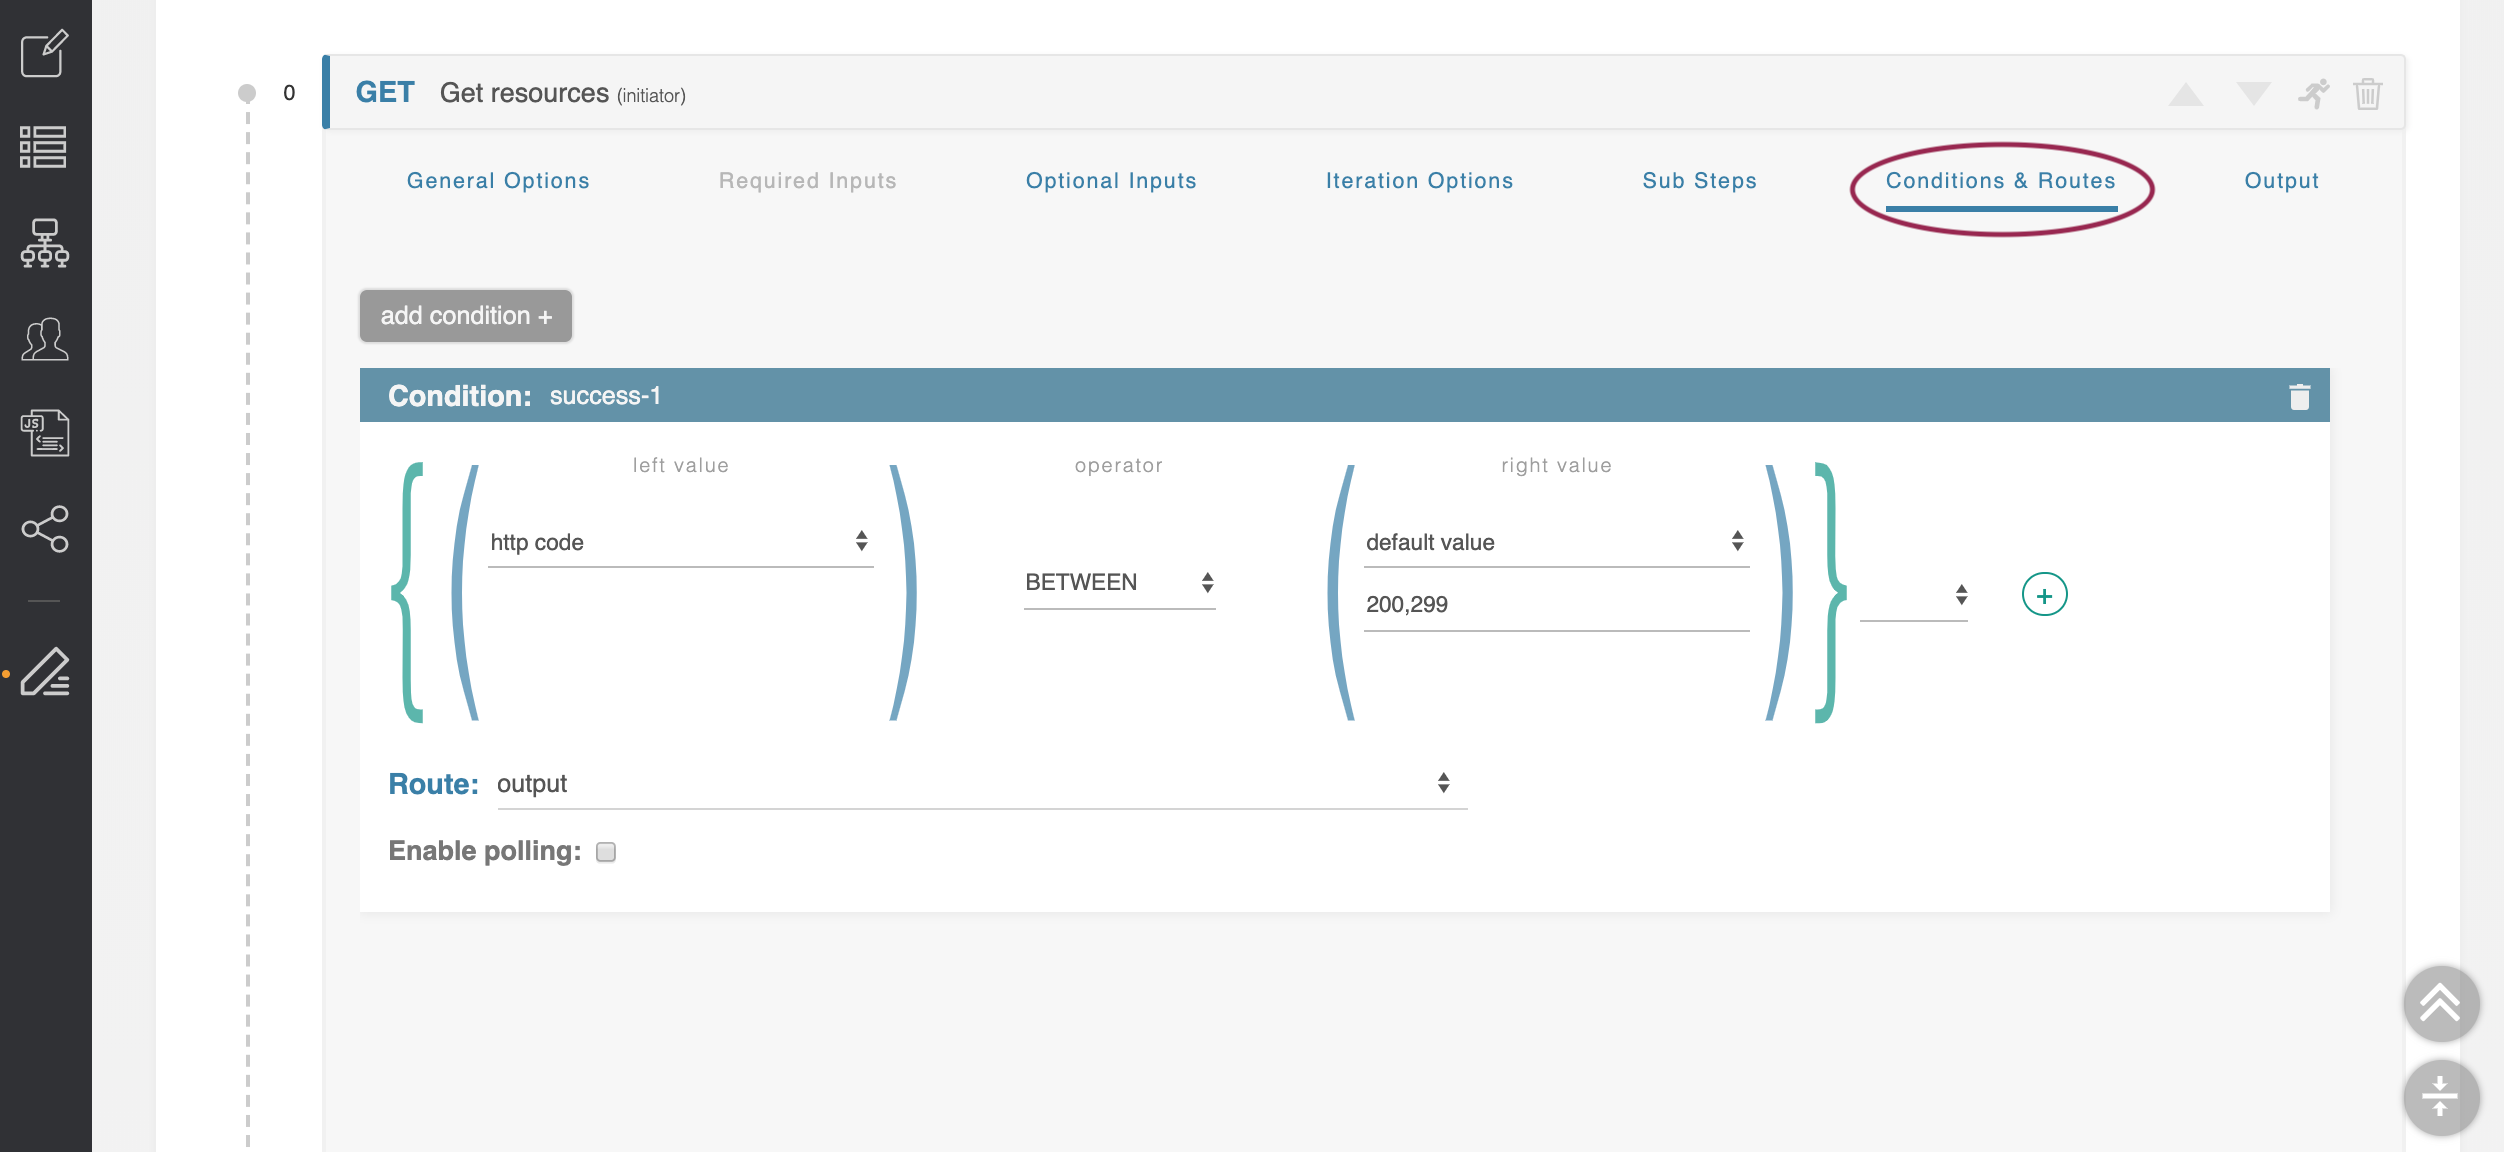
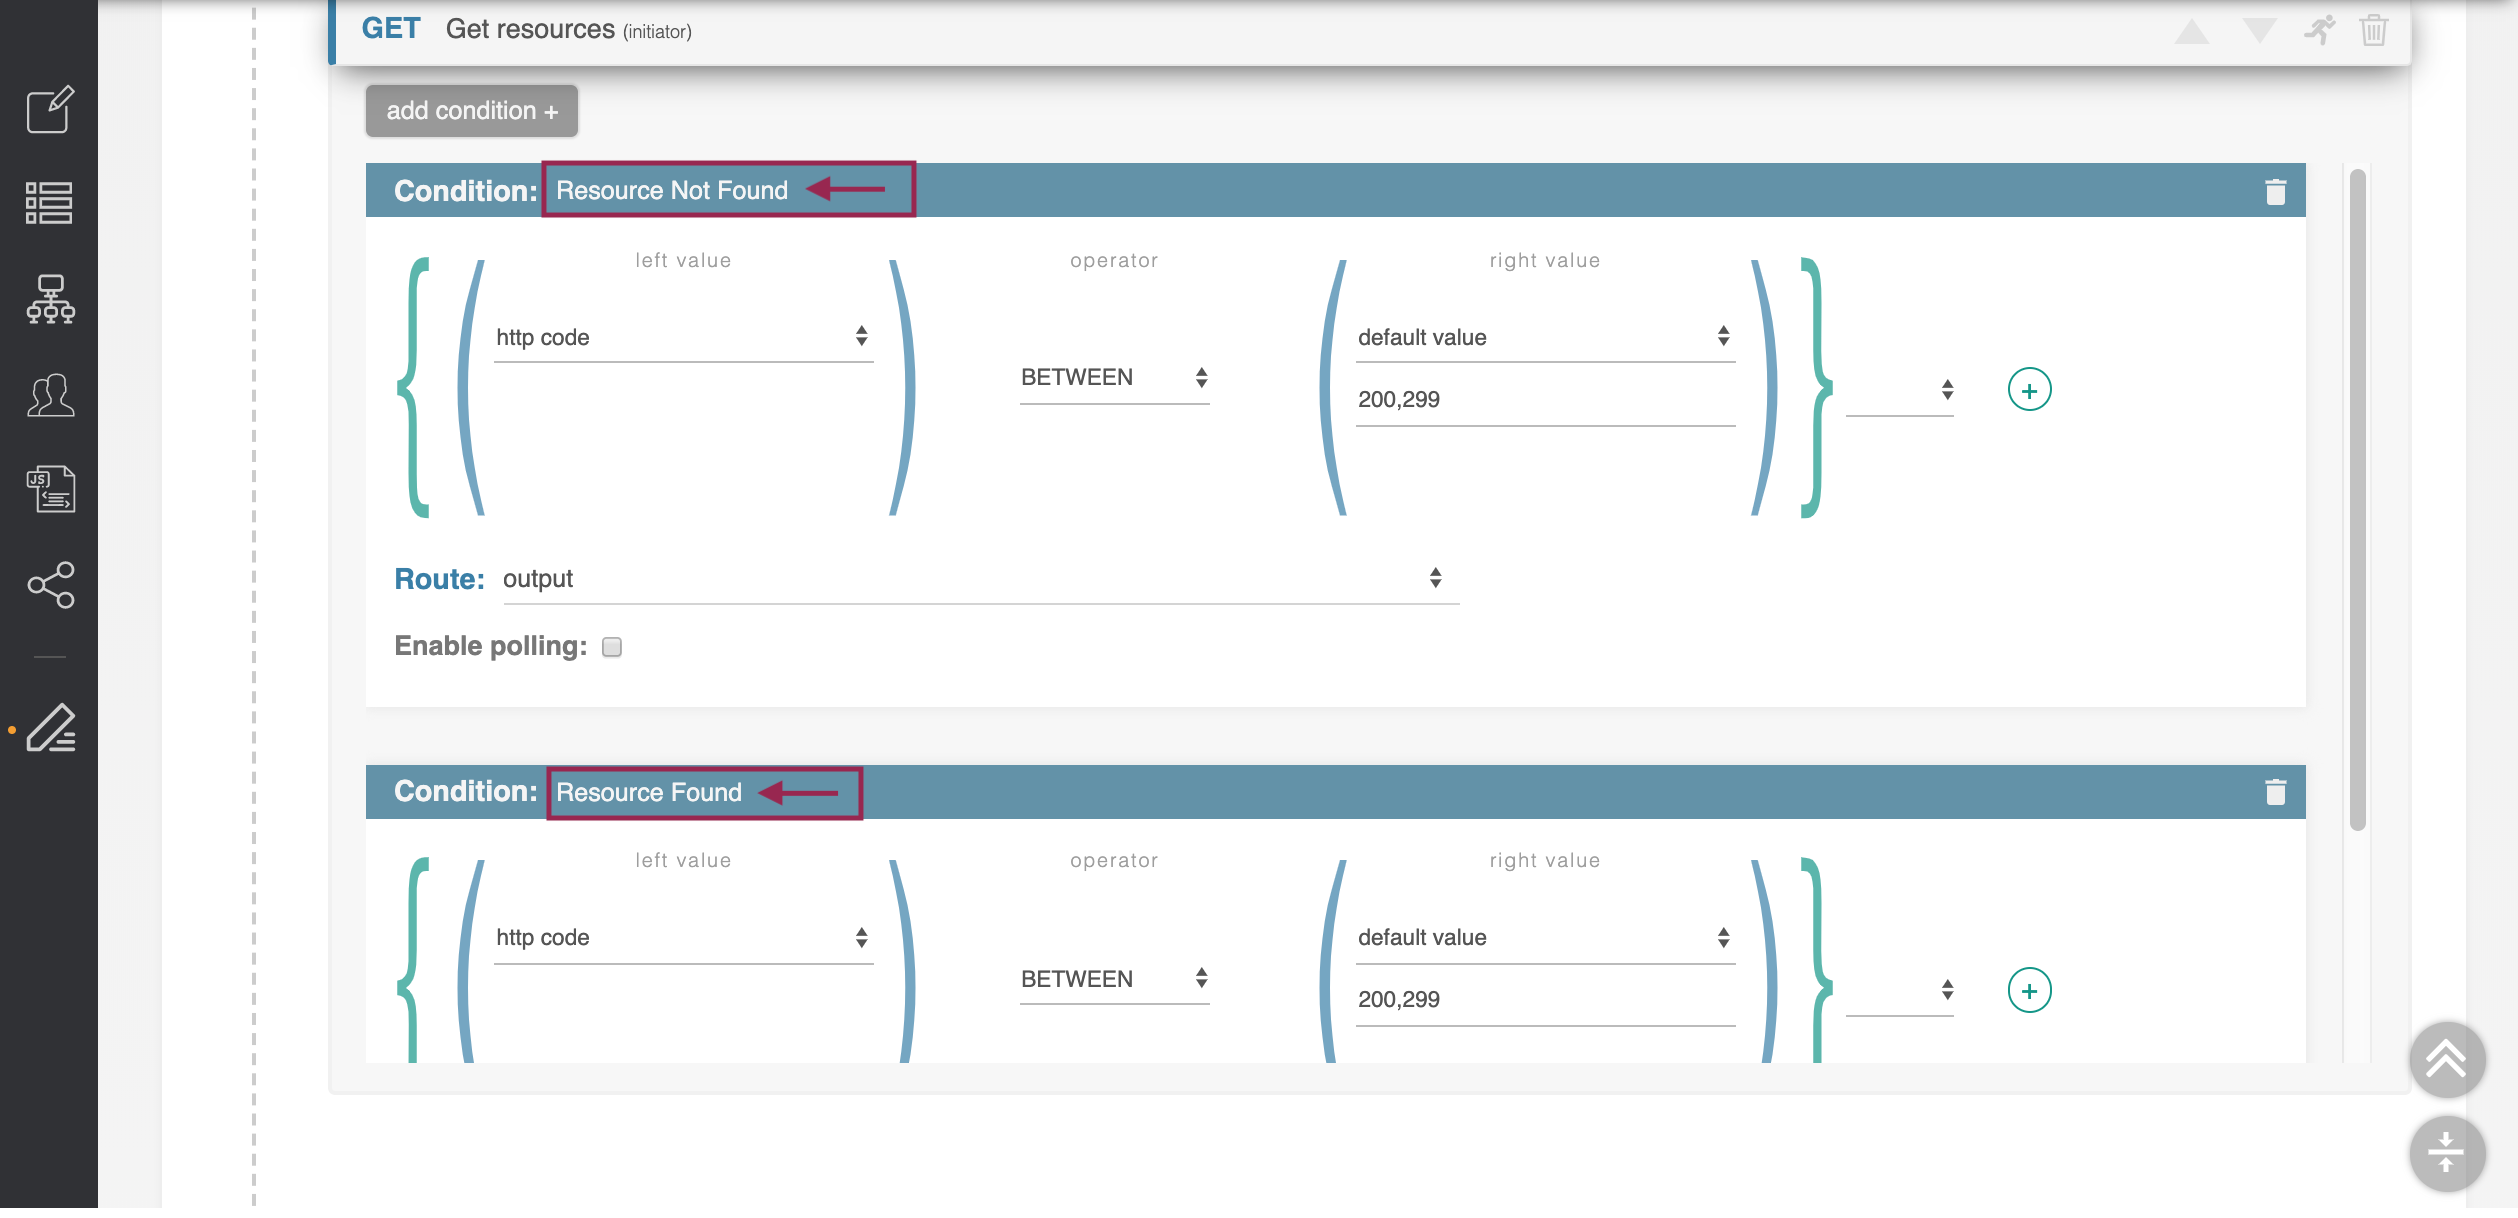
Open up the first step of the workflow, 'Get Resources', then select the ‘Conditions and Routes’ tab.
This is the area where the decision logic is stored. Currently, it is configured to proceed directly to the Output whenever the step successfully returns data.
We are going to add a second condition to handle the case where a resource is not found.
Step 10: Add a New Condition
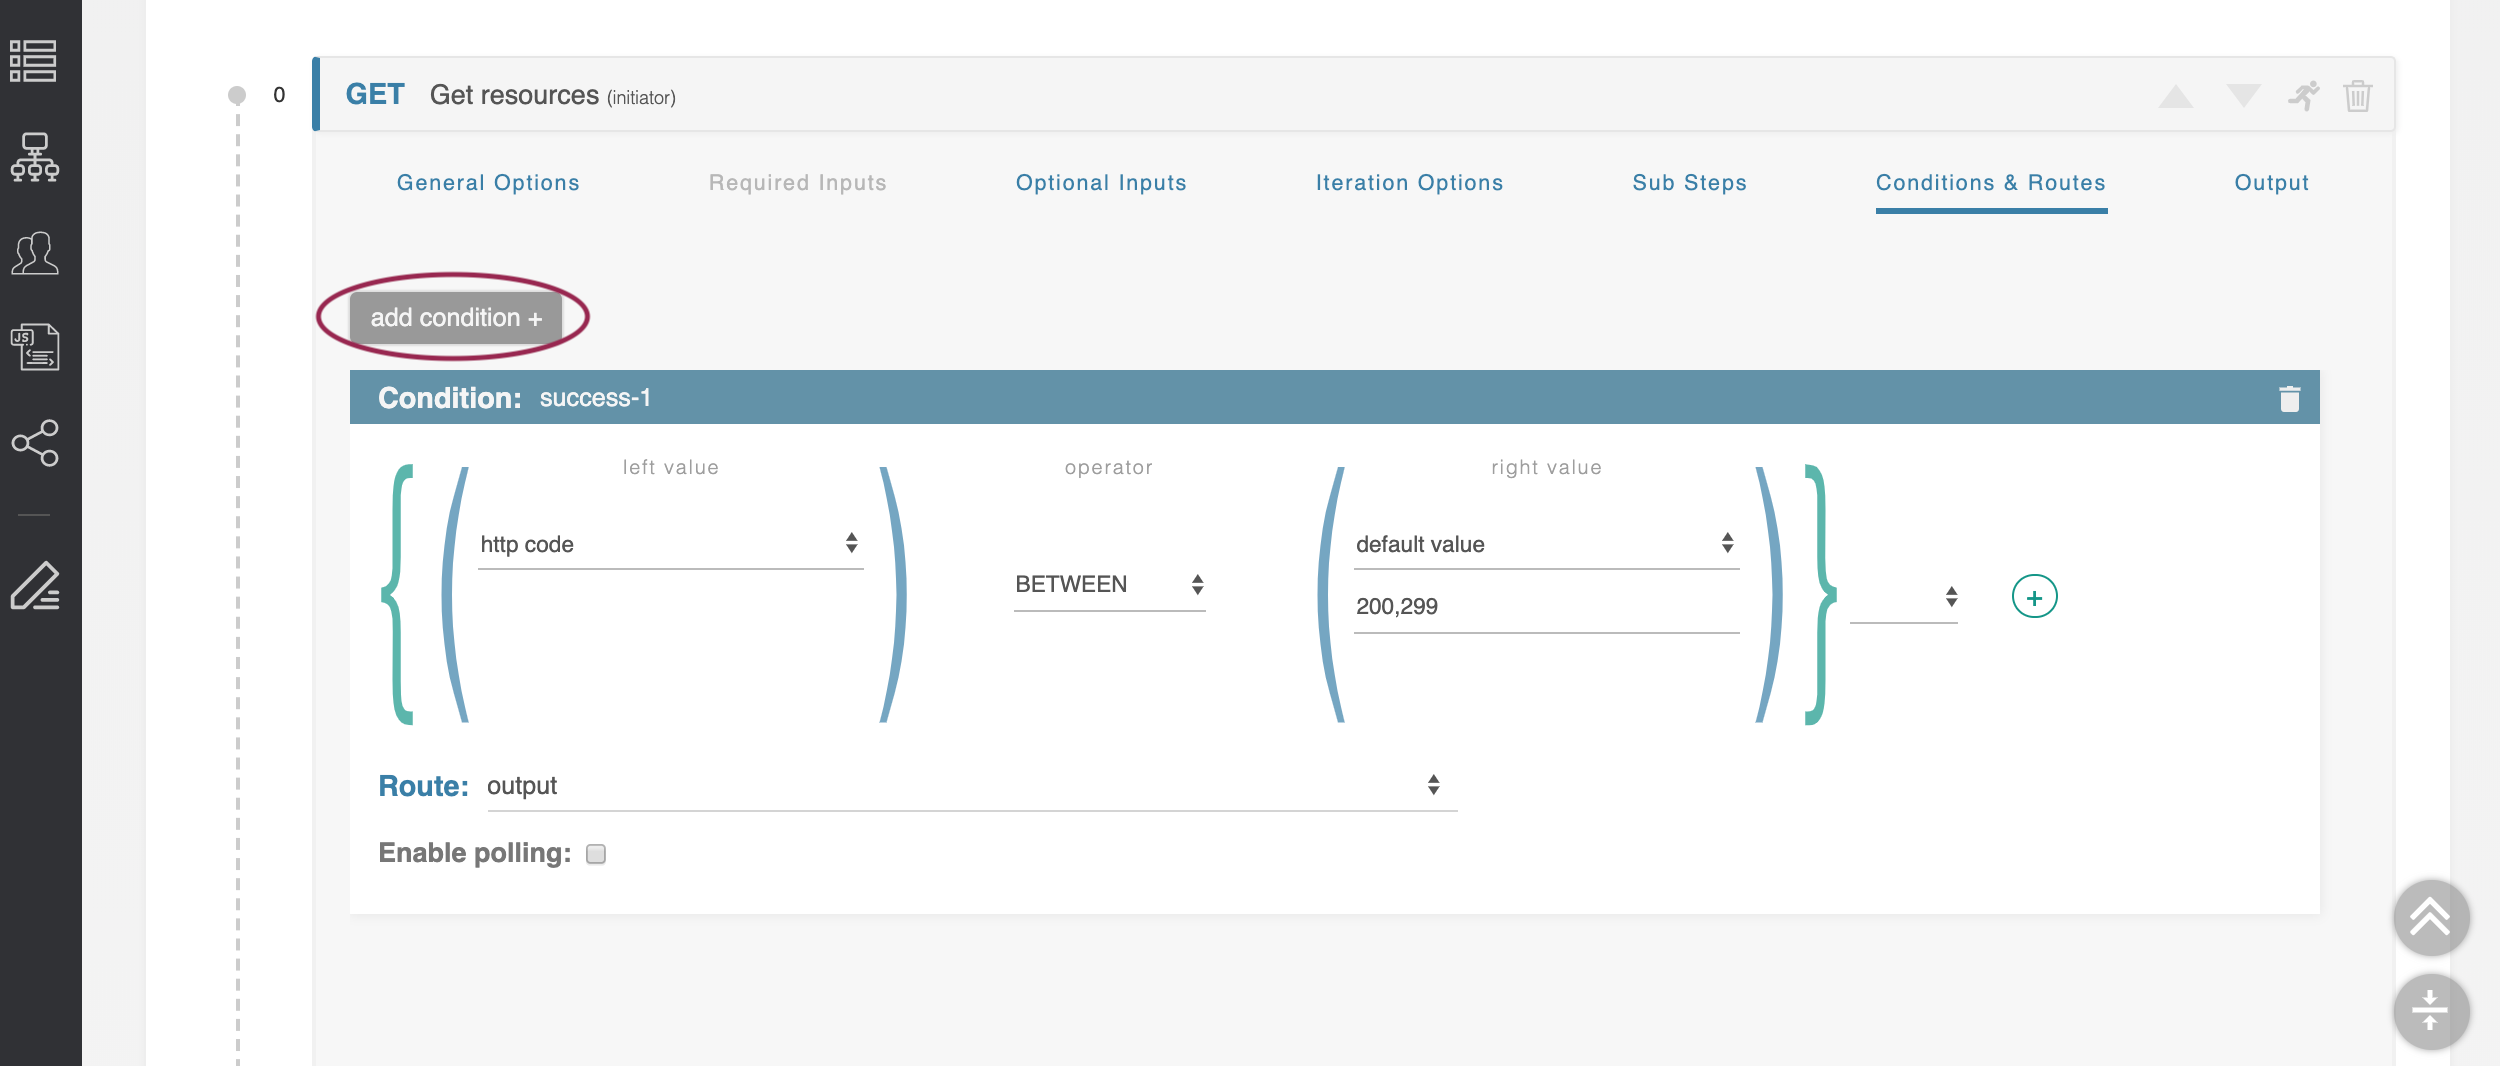
From the Conditions & Routes tab under the 'Get Resources' step, click the ‘add condition +’ button in the upper left of the Conditions area to add a new Condition.
It is added at the bottom of the list. You should now see two Condition blocks, one named "success-1", the other "success-2".
Change Condition Name(s)
Edit the Condition names by clicking on the condition name (you should see a typing cursor), and typing in the new name(s).
Change the name of the first condition to read ‘Resource Not Found’, then change the name of the second condition to read ‘Resource Found.’
Step 11: Set 'Resource Not Found' Condition Values
Edit the ‘Resource Not Found’ condition so that the left value is set to ‘body’ and its property selected as ‘id’.
Set the operator for the ‘Resource Not Found’ condition to ‘IS NULL.’
Set the ‘Route’ to ‘Create Resource’.
Step 12: Set 'Resource Found' Condition Values
Scroll down to the second Condition set, for 'Resource Found'. Change the route for the ‘Resource Found’ step to ‘Resource Query.’
When done, close the 'Get Resource' step by clicking on the step header.
Step 13: Set Create Resource Step Condition Values
Next, we set the parameters for Step 2, Create resource. Expand the ‘Create Resource’ step by clicking on its header.
Update Required Inputs
Select the "Required Inputs" tab, and find its required parameters - ‘name’ and ‘type’.
Change ‘name’ to be ‘user given’, and as its value put ‘resource-name’, which is the same variable we defined in the previous step. The same value will be used for both parameters.
Change the ‘type’ input to ‘default value,’ and give it a default value of ‘resource’.
Update Conditions
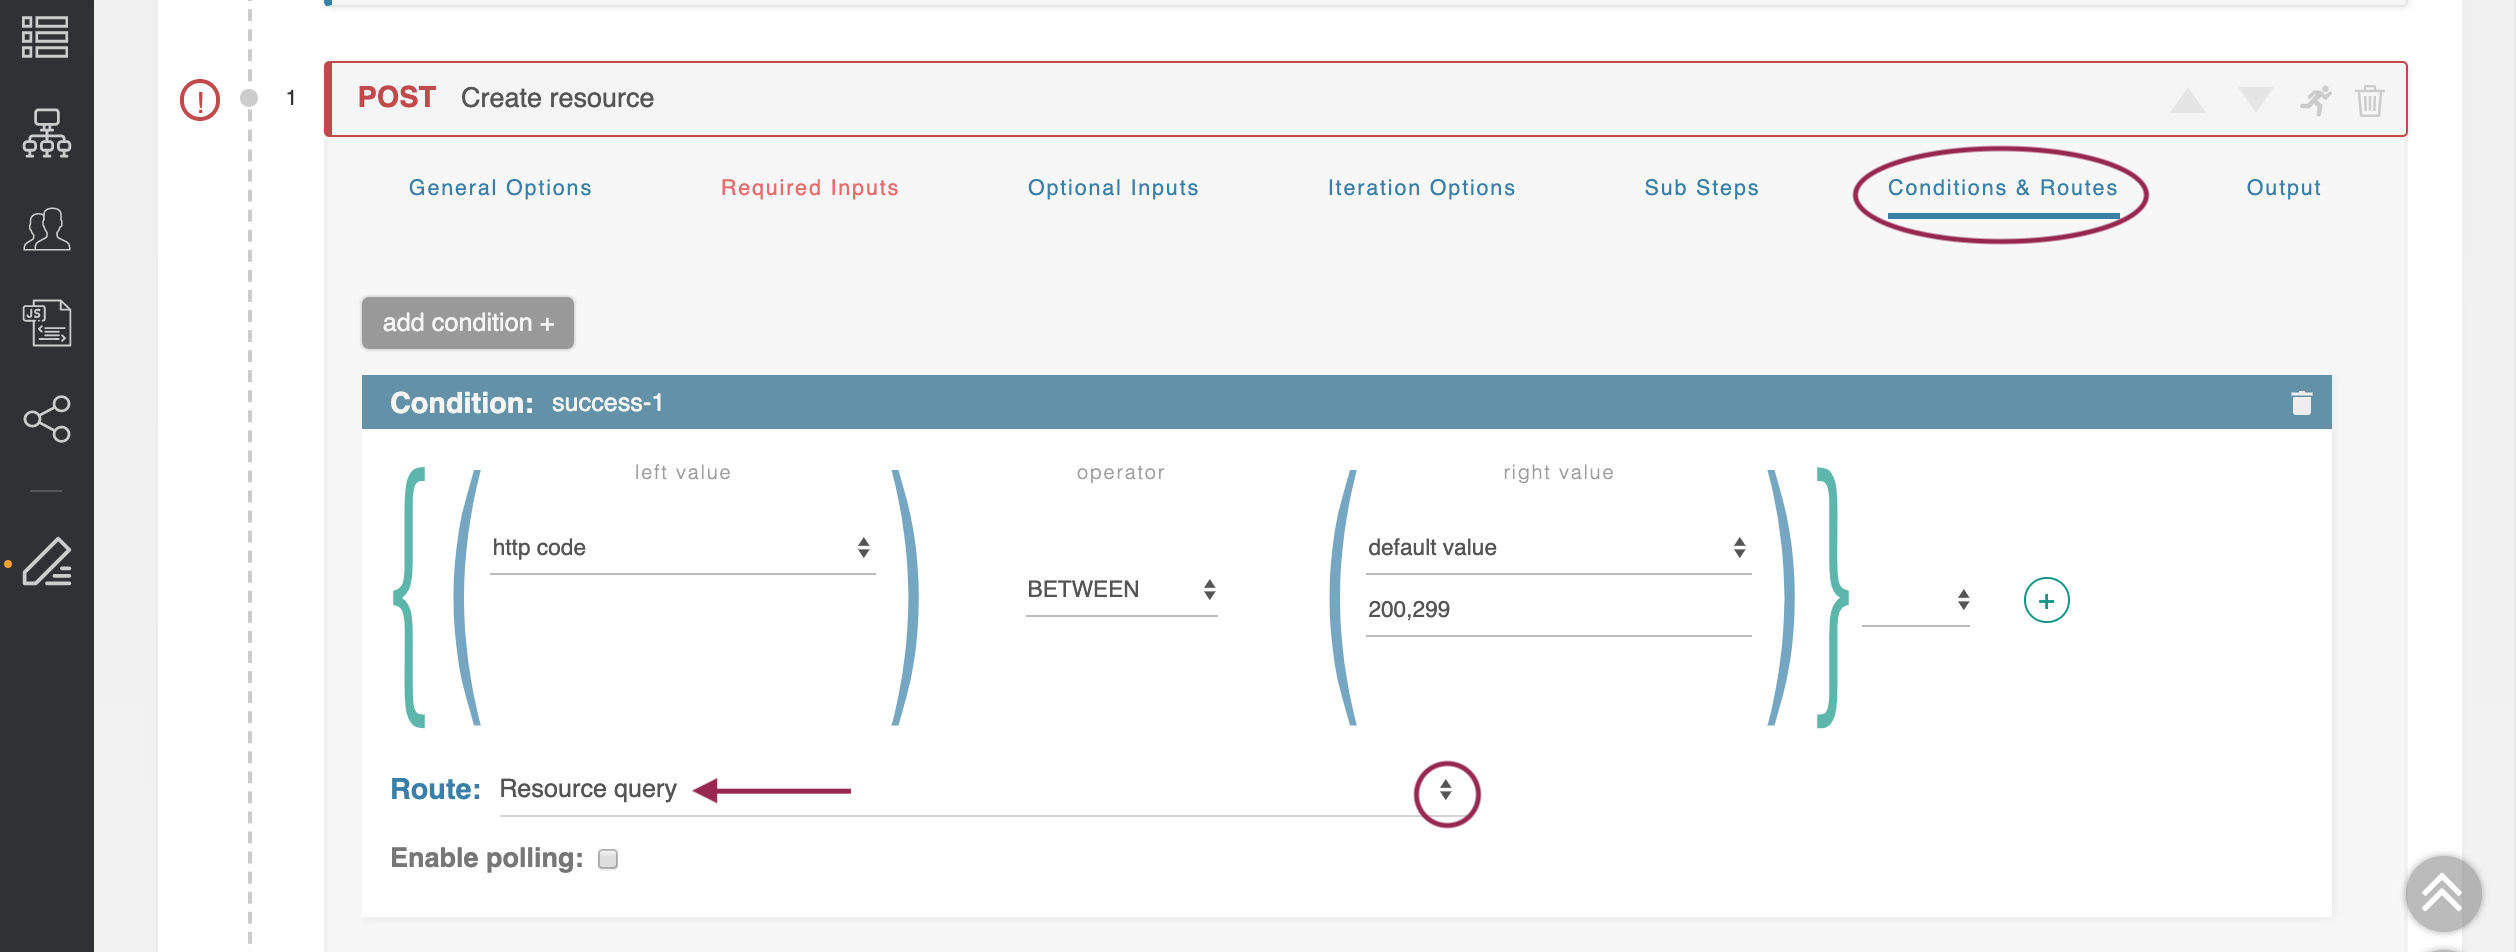
Click on the 'Conditions & Routes' tab. Under the only available Condition, change the Route to the setting ‘Resource Query.’
Close the ‘Create Resource’ step.
Now that we have set the appropriate conditions and inputs for steps 1 and 2, saving the workflow at this time should automatically resolve any previous "invalid input" errors.
Step 14: Standardize Query Data
Expand the ‘Resource Query’ step. We have two previous steps which can route into this step under different conditions. This is a unification step, to standardize the data coming back.
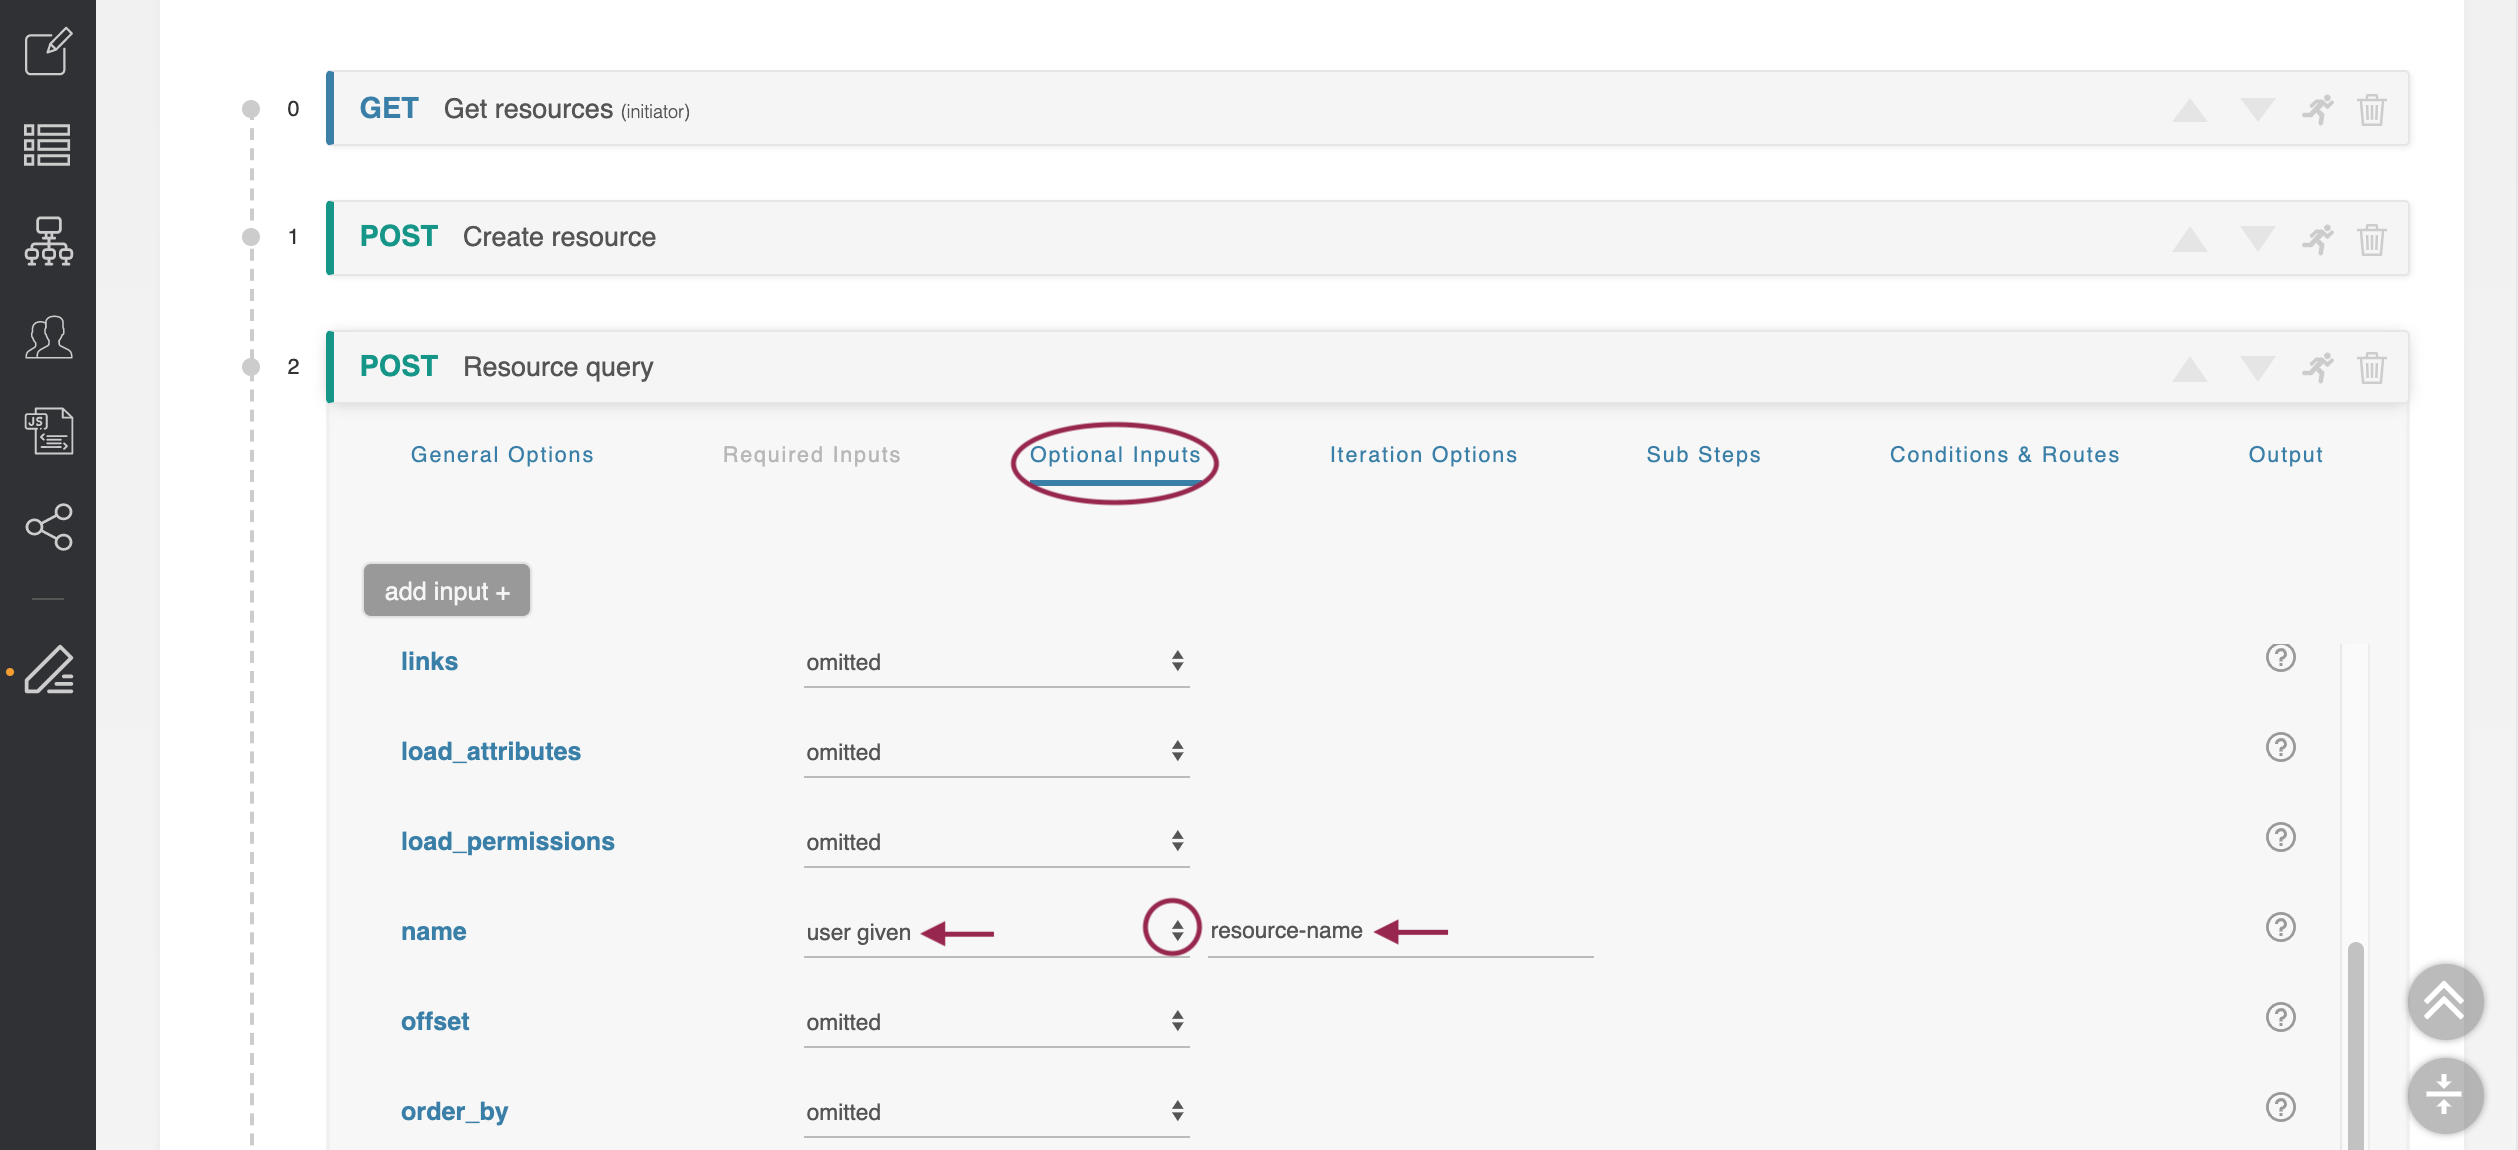
Open the 'Optional Inputs' tab, then find the parameter ‘name.’ As in the previous step, make this parameter ‘user given’ with a variable name of ‘resource-name’.
This will use the same variable we’ve used in previous steps.
Close the ‘Resource Query’ step, and (optionally) save your changes.
Step 15: Format Output
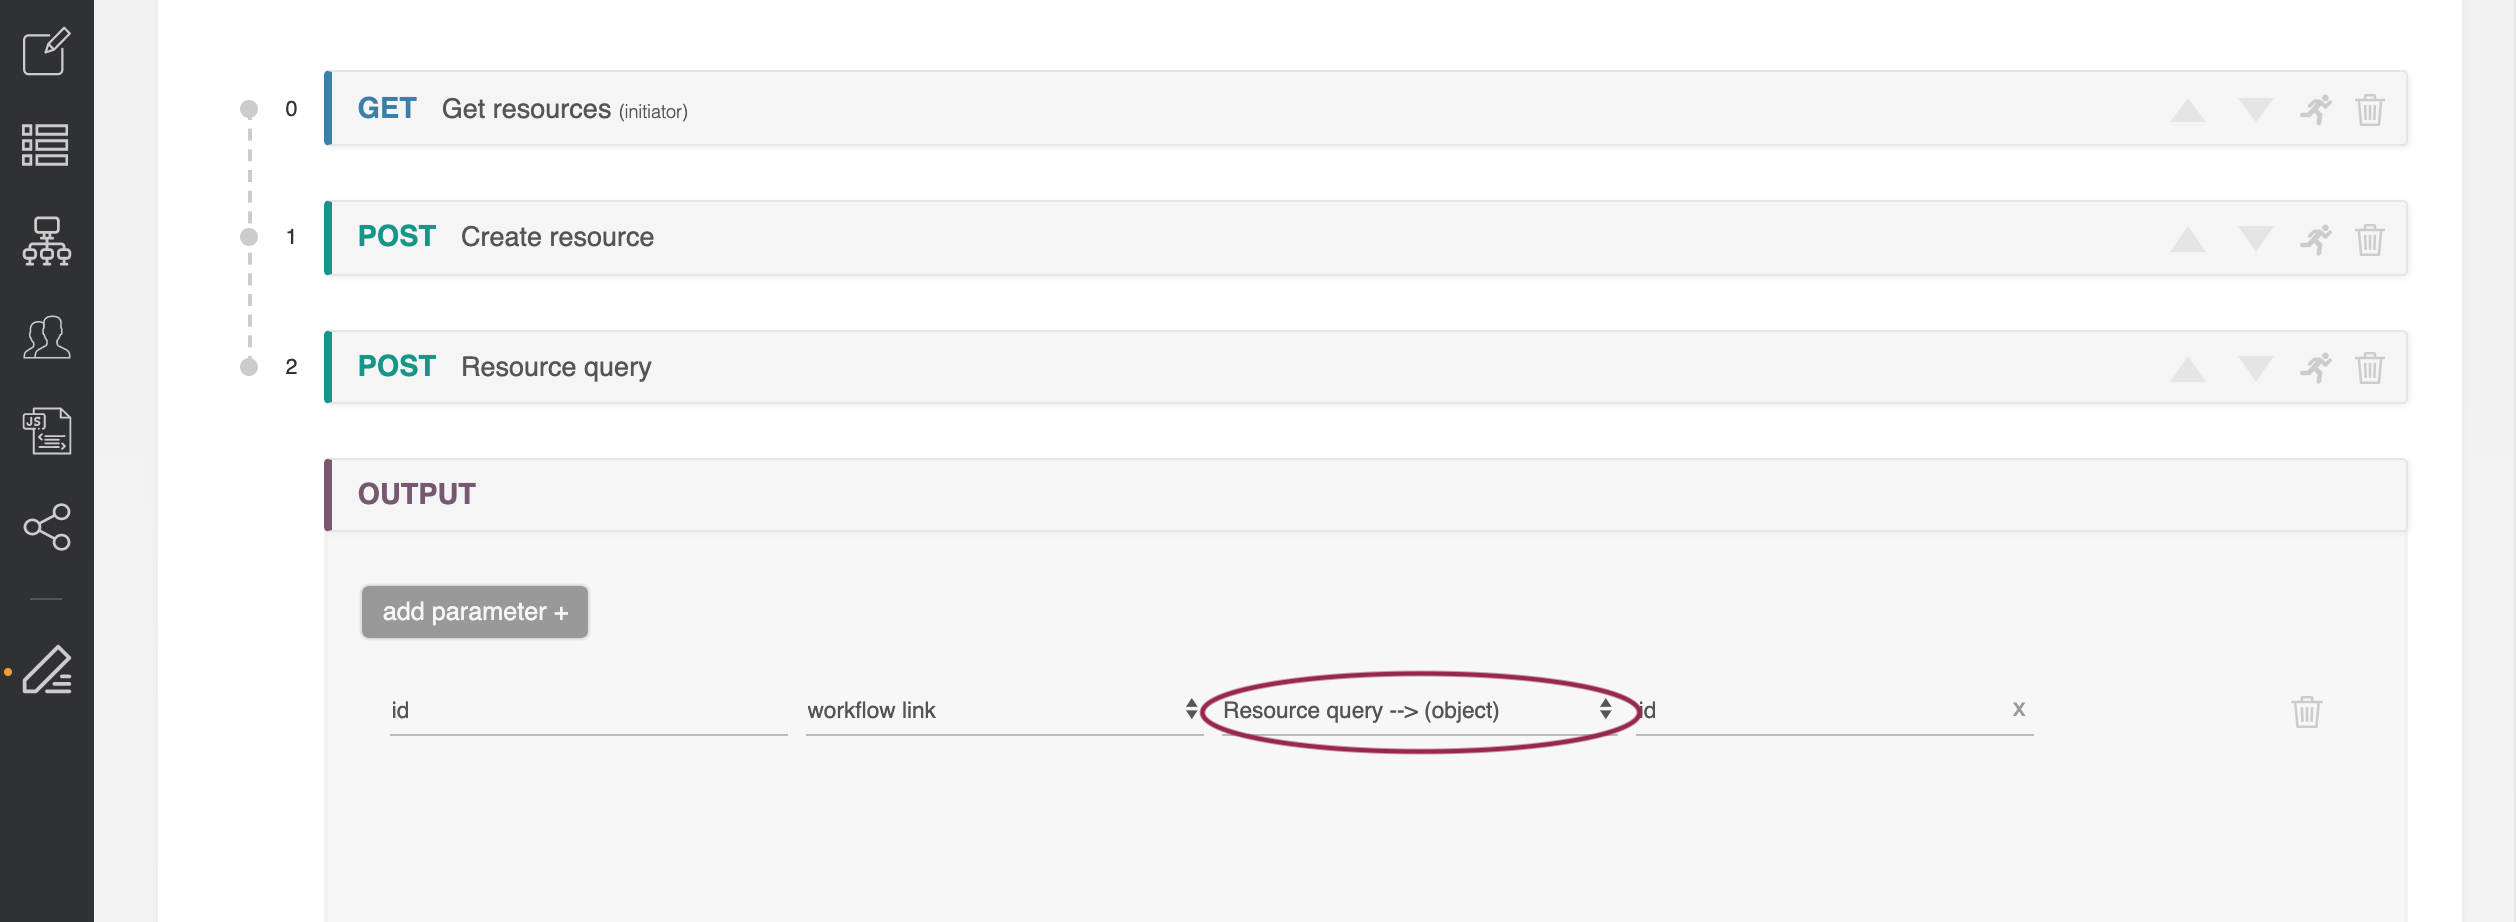
Open the ‘Output’ step and change the third field to use 'Resource Query → (object)', so that we are taking the ‘id’ parameter from the ‘Resource Query’ step, and not the ‘Resource Get’ step.
Then, save your changes to the workflow.
Step 16: Execute Workflow - Resource Found Condition
Now that our conditions and paths for both Resource Found and Resource Not Found scenarios have been set, we can execute the Workflow for both scenarios.
First, let's re-execute with a standard 'Resource Found' condition:
At the top of the Workflow page, click 'Execute'.
Execute the workflow with 'TLR' entered for the 'resource-name' input.
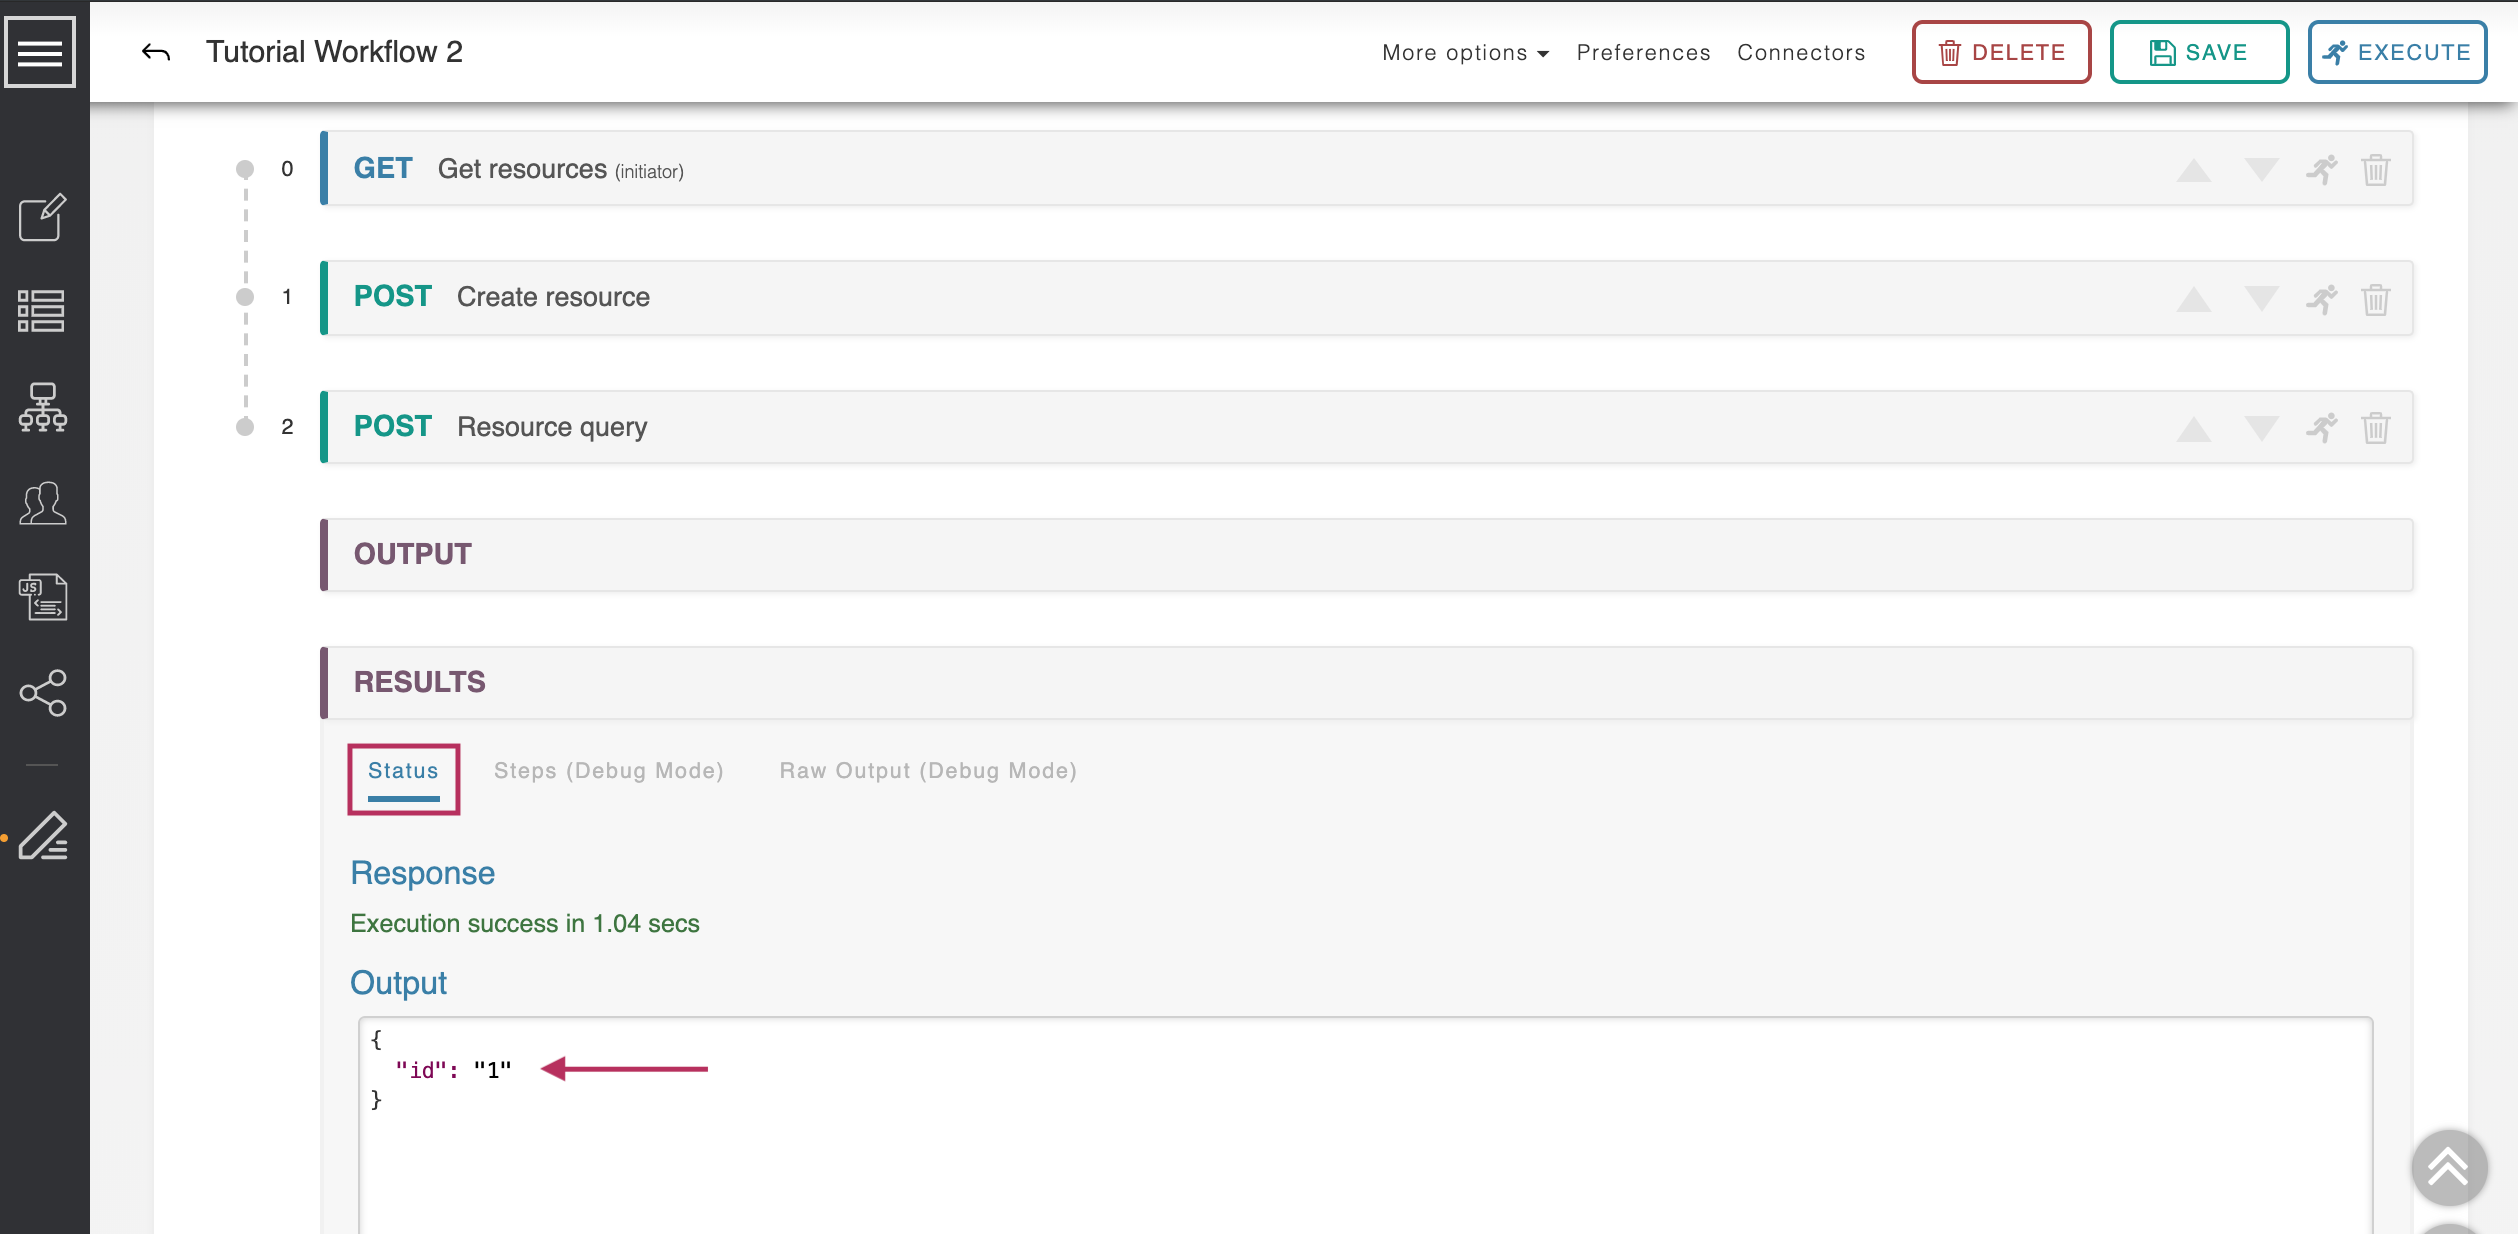
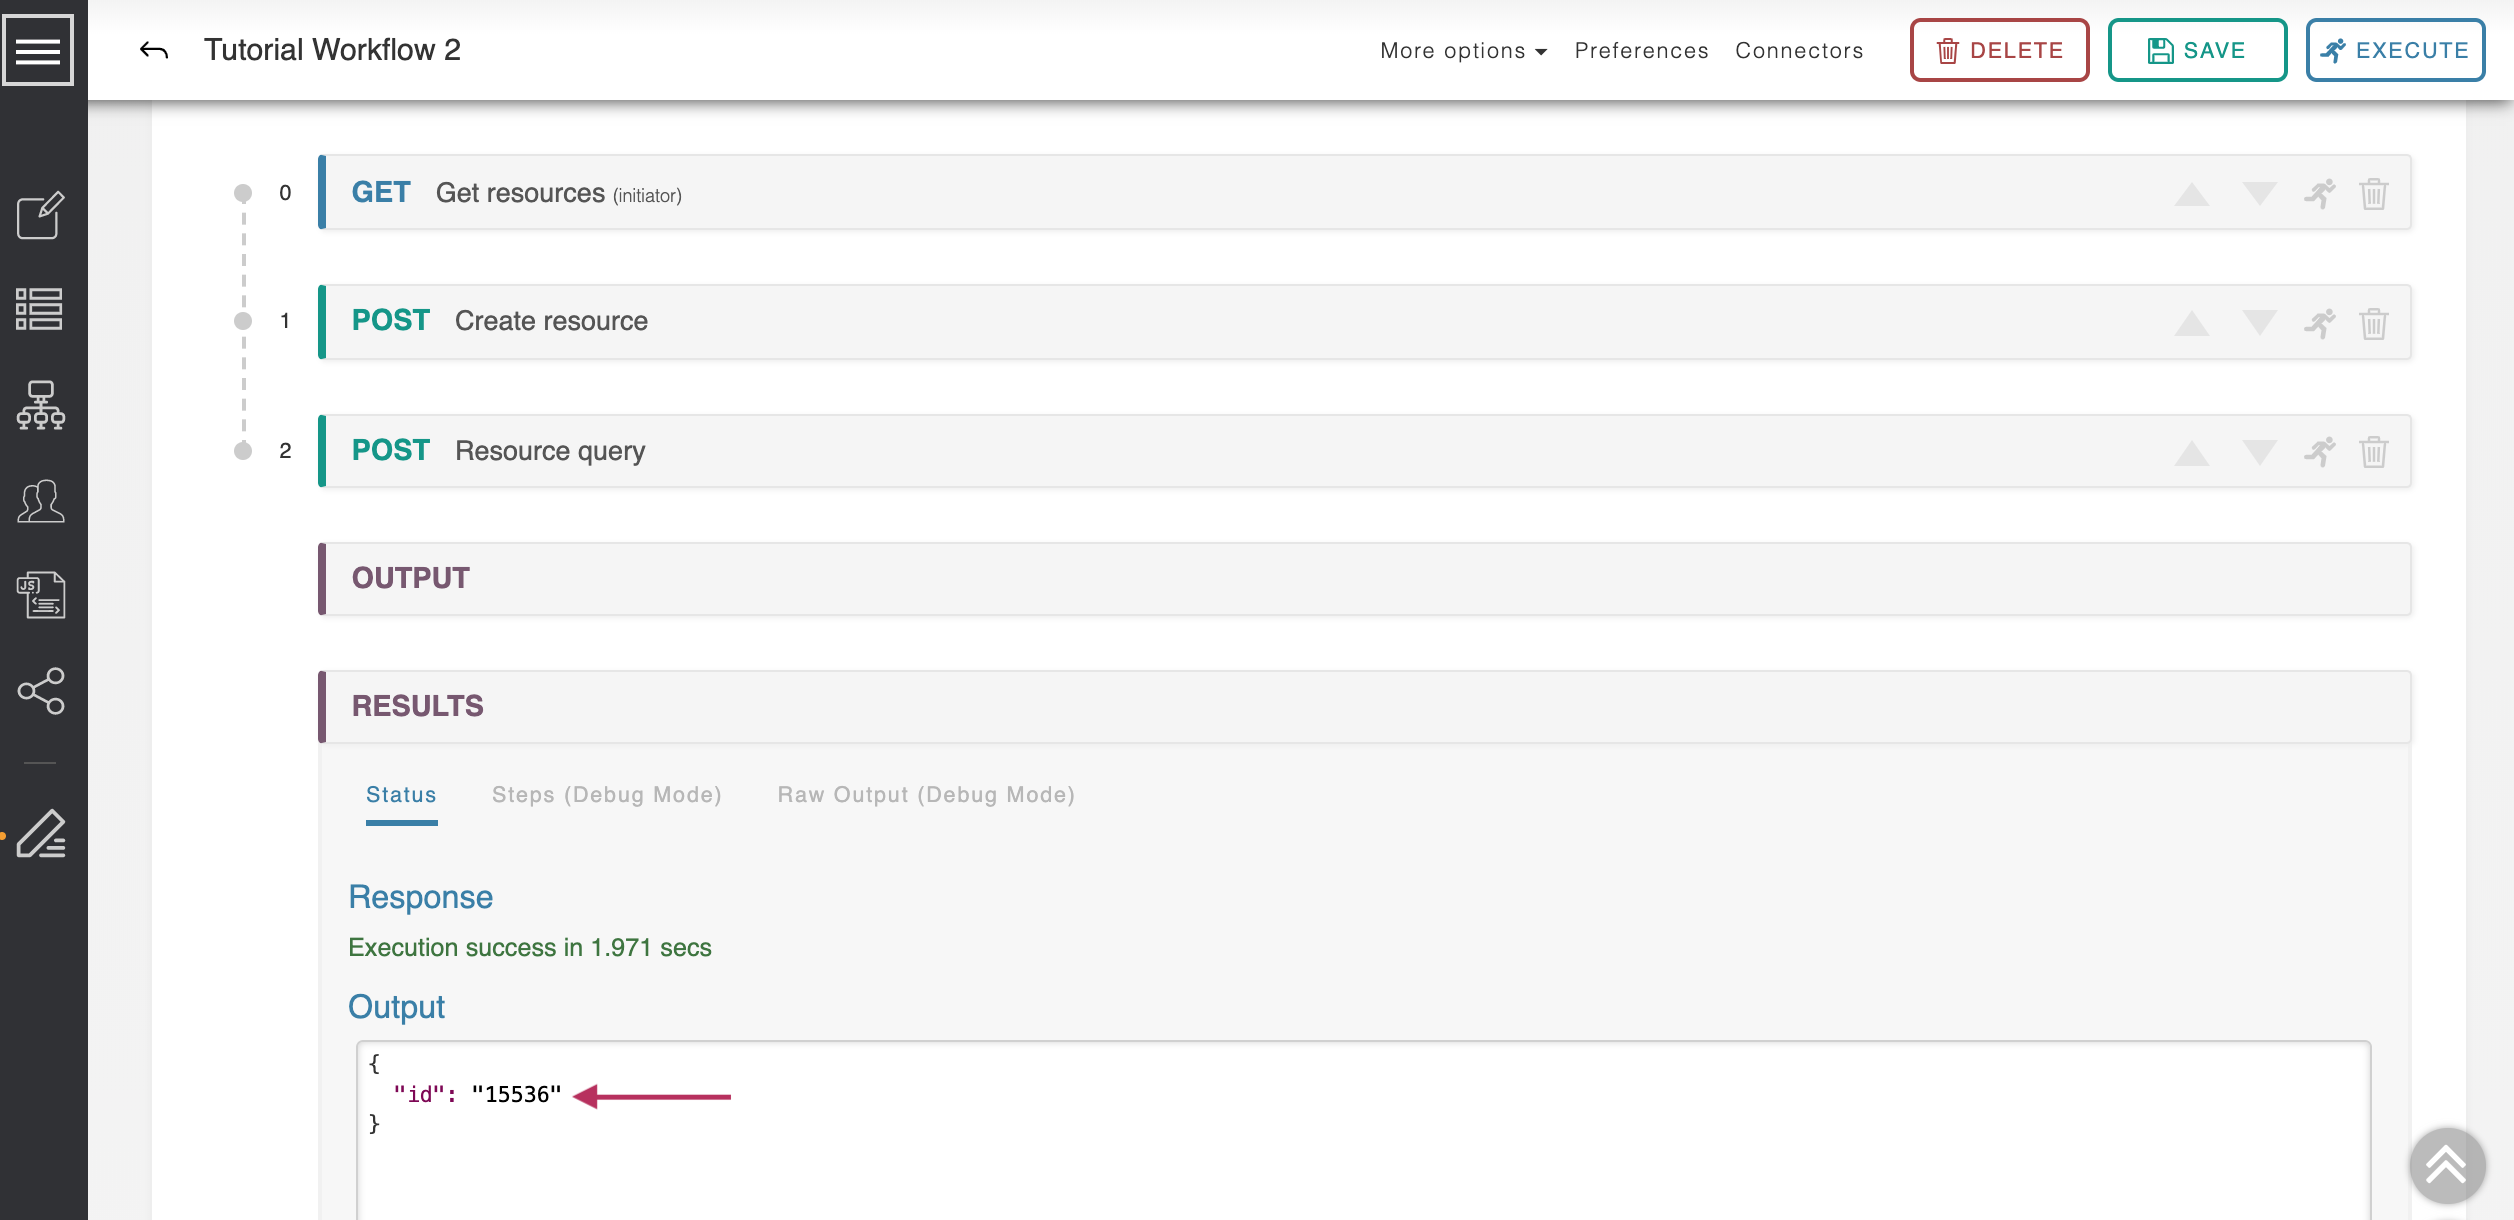
In the "Results" section, click on the "Status" tab to view the response. As before, the returned id will be 1.
Step 17: Execute Workflow - Resource Not Found Condition
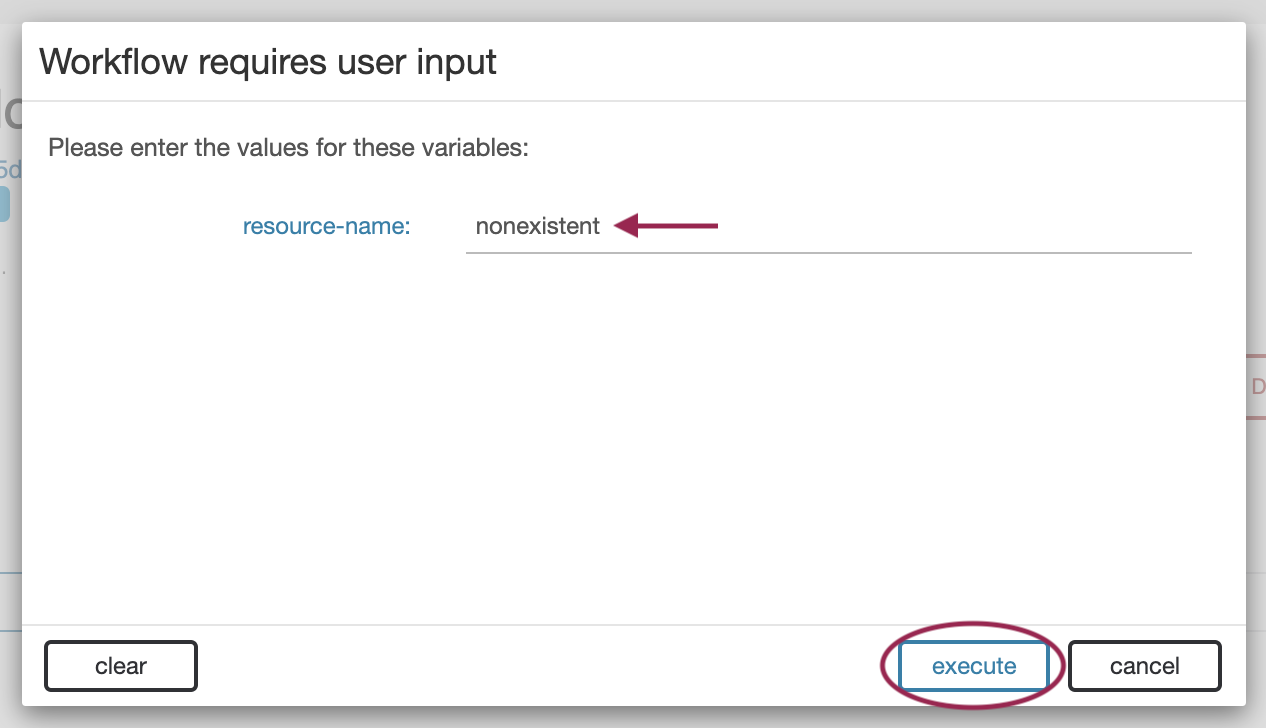
Execute the workflow again, but this time with a resource name 'nonexistent’.
As this resource is being created by the system, its id will be the next available.
Step 18: Execute Workflow - Verify Resource Created
Execute the workflow again, again with a resource name ‘nonexistent’.
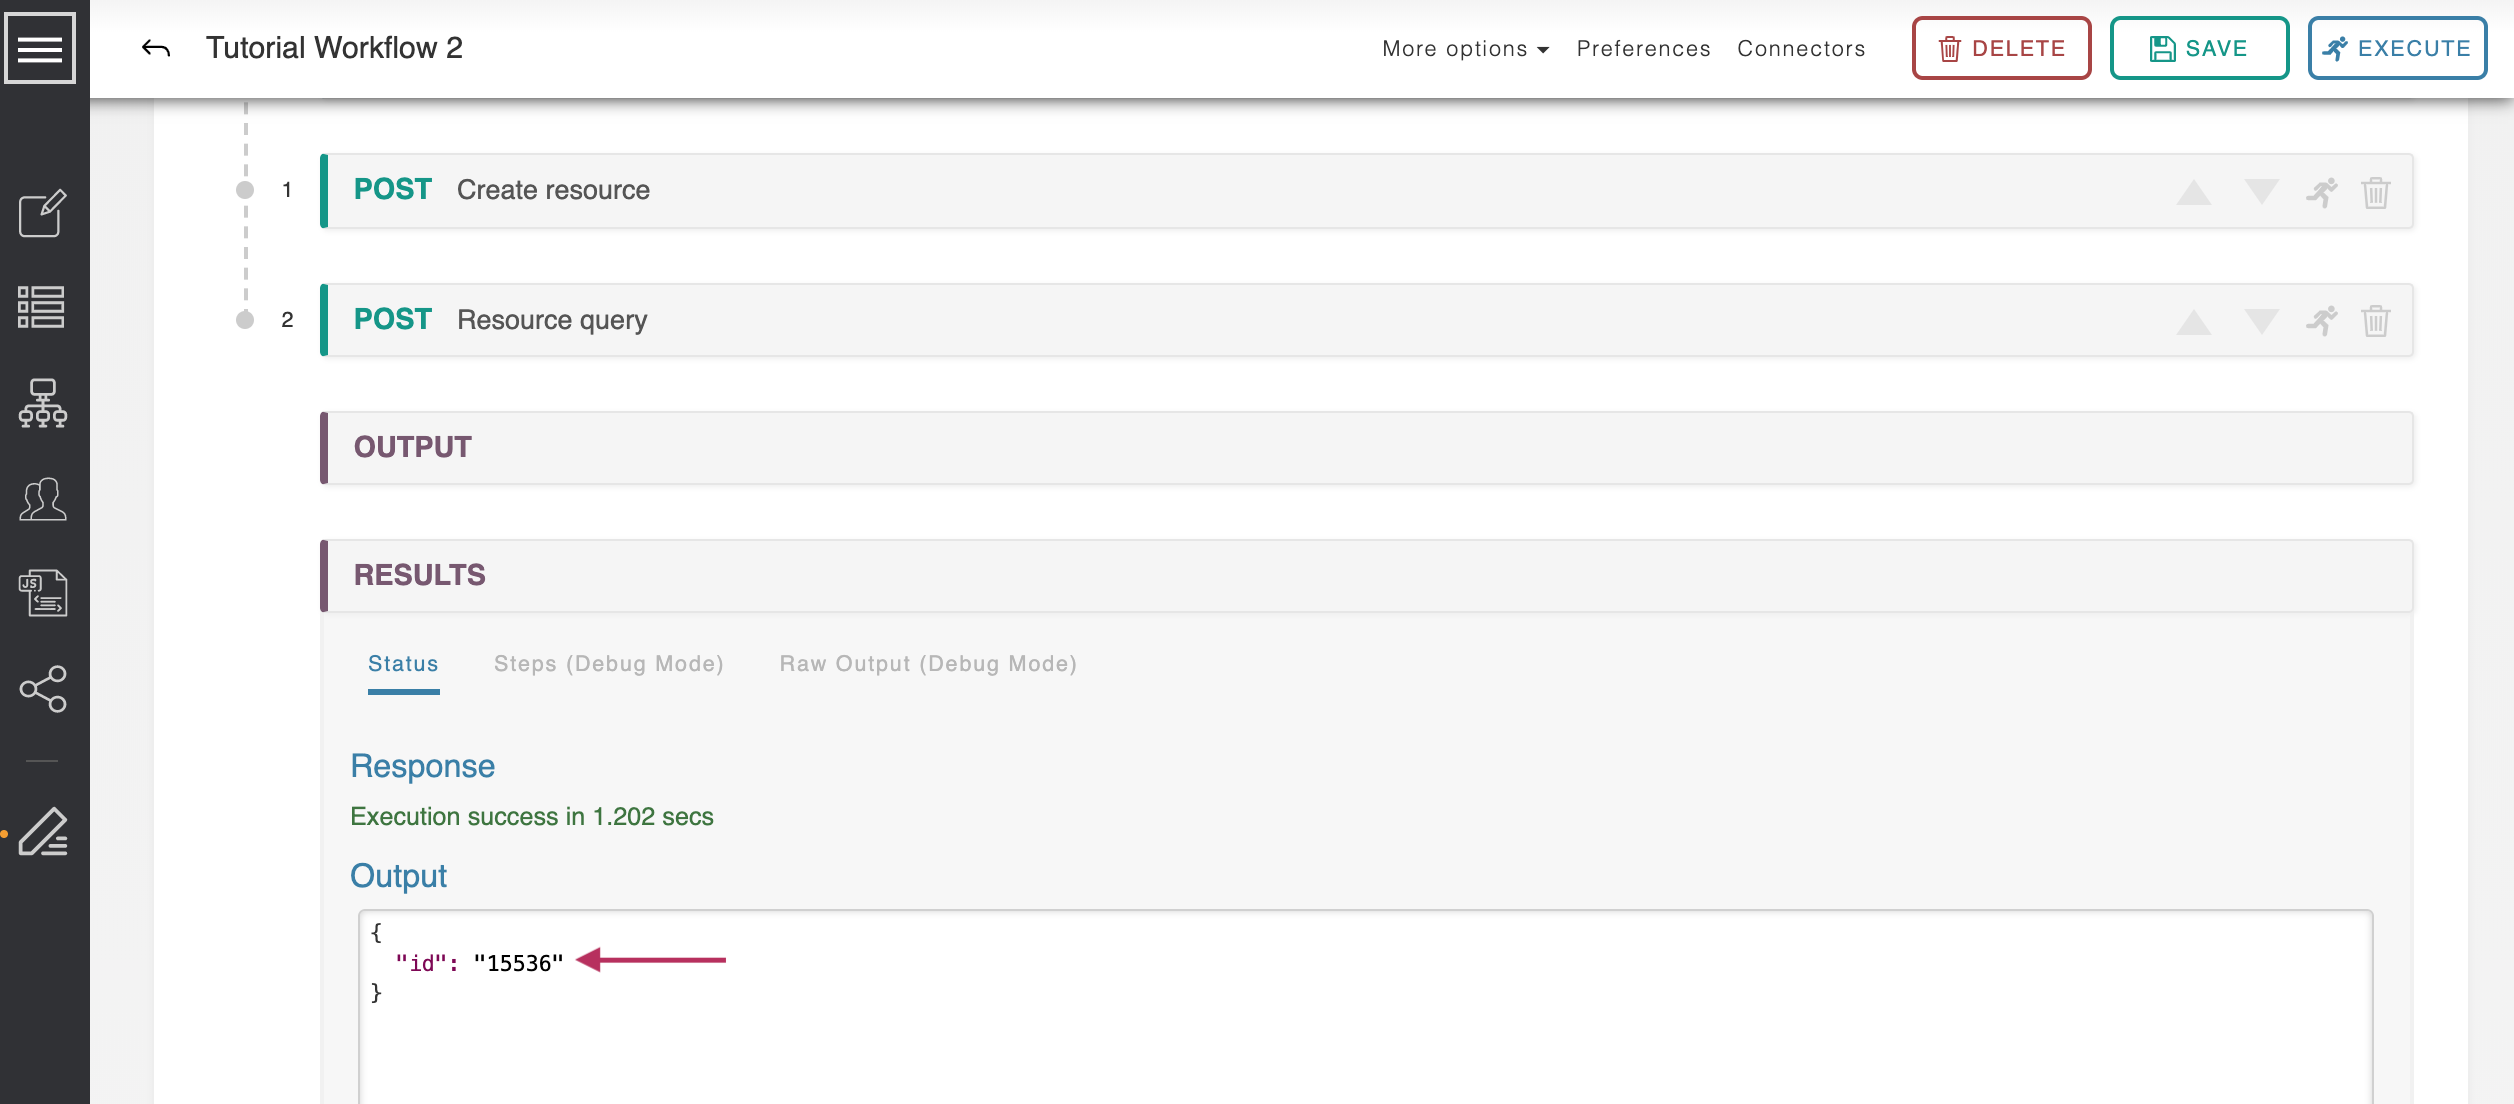
This time the resource does exist, as we created it on the last execution. Its id is unchanged.
Debug Mode
For additional insight into how Workflow Routing functions, enable Debug Mode:
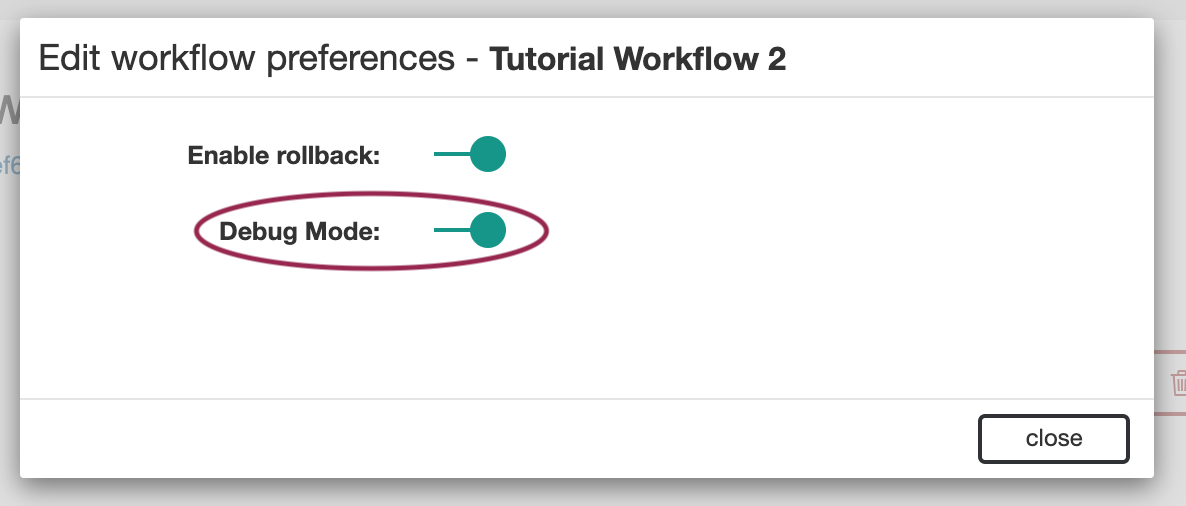
Click on the 'Preferences link at the top of the screen near the Workflow options.
Under Edit Workflow preferences, enable 'Debug Mode' ('on' displays as green, with the toggle button to the right).
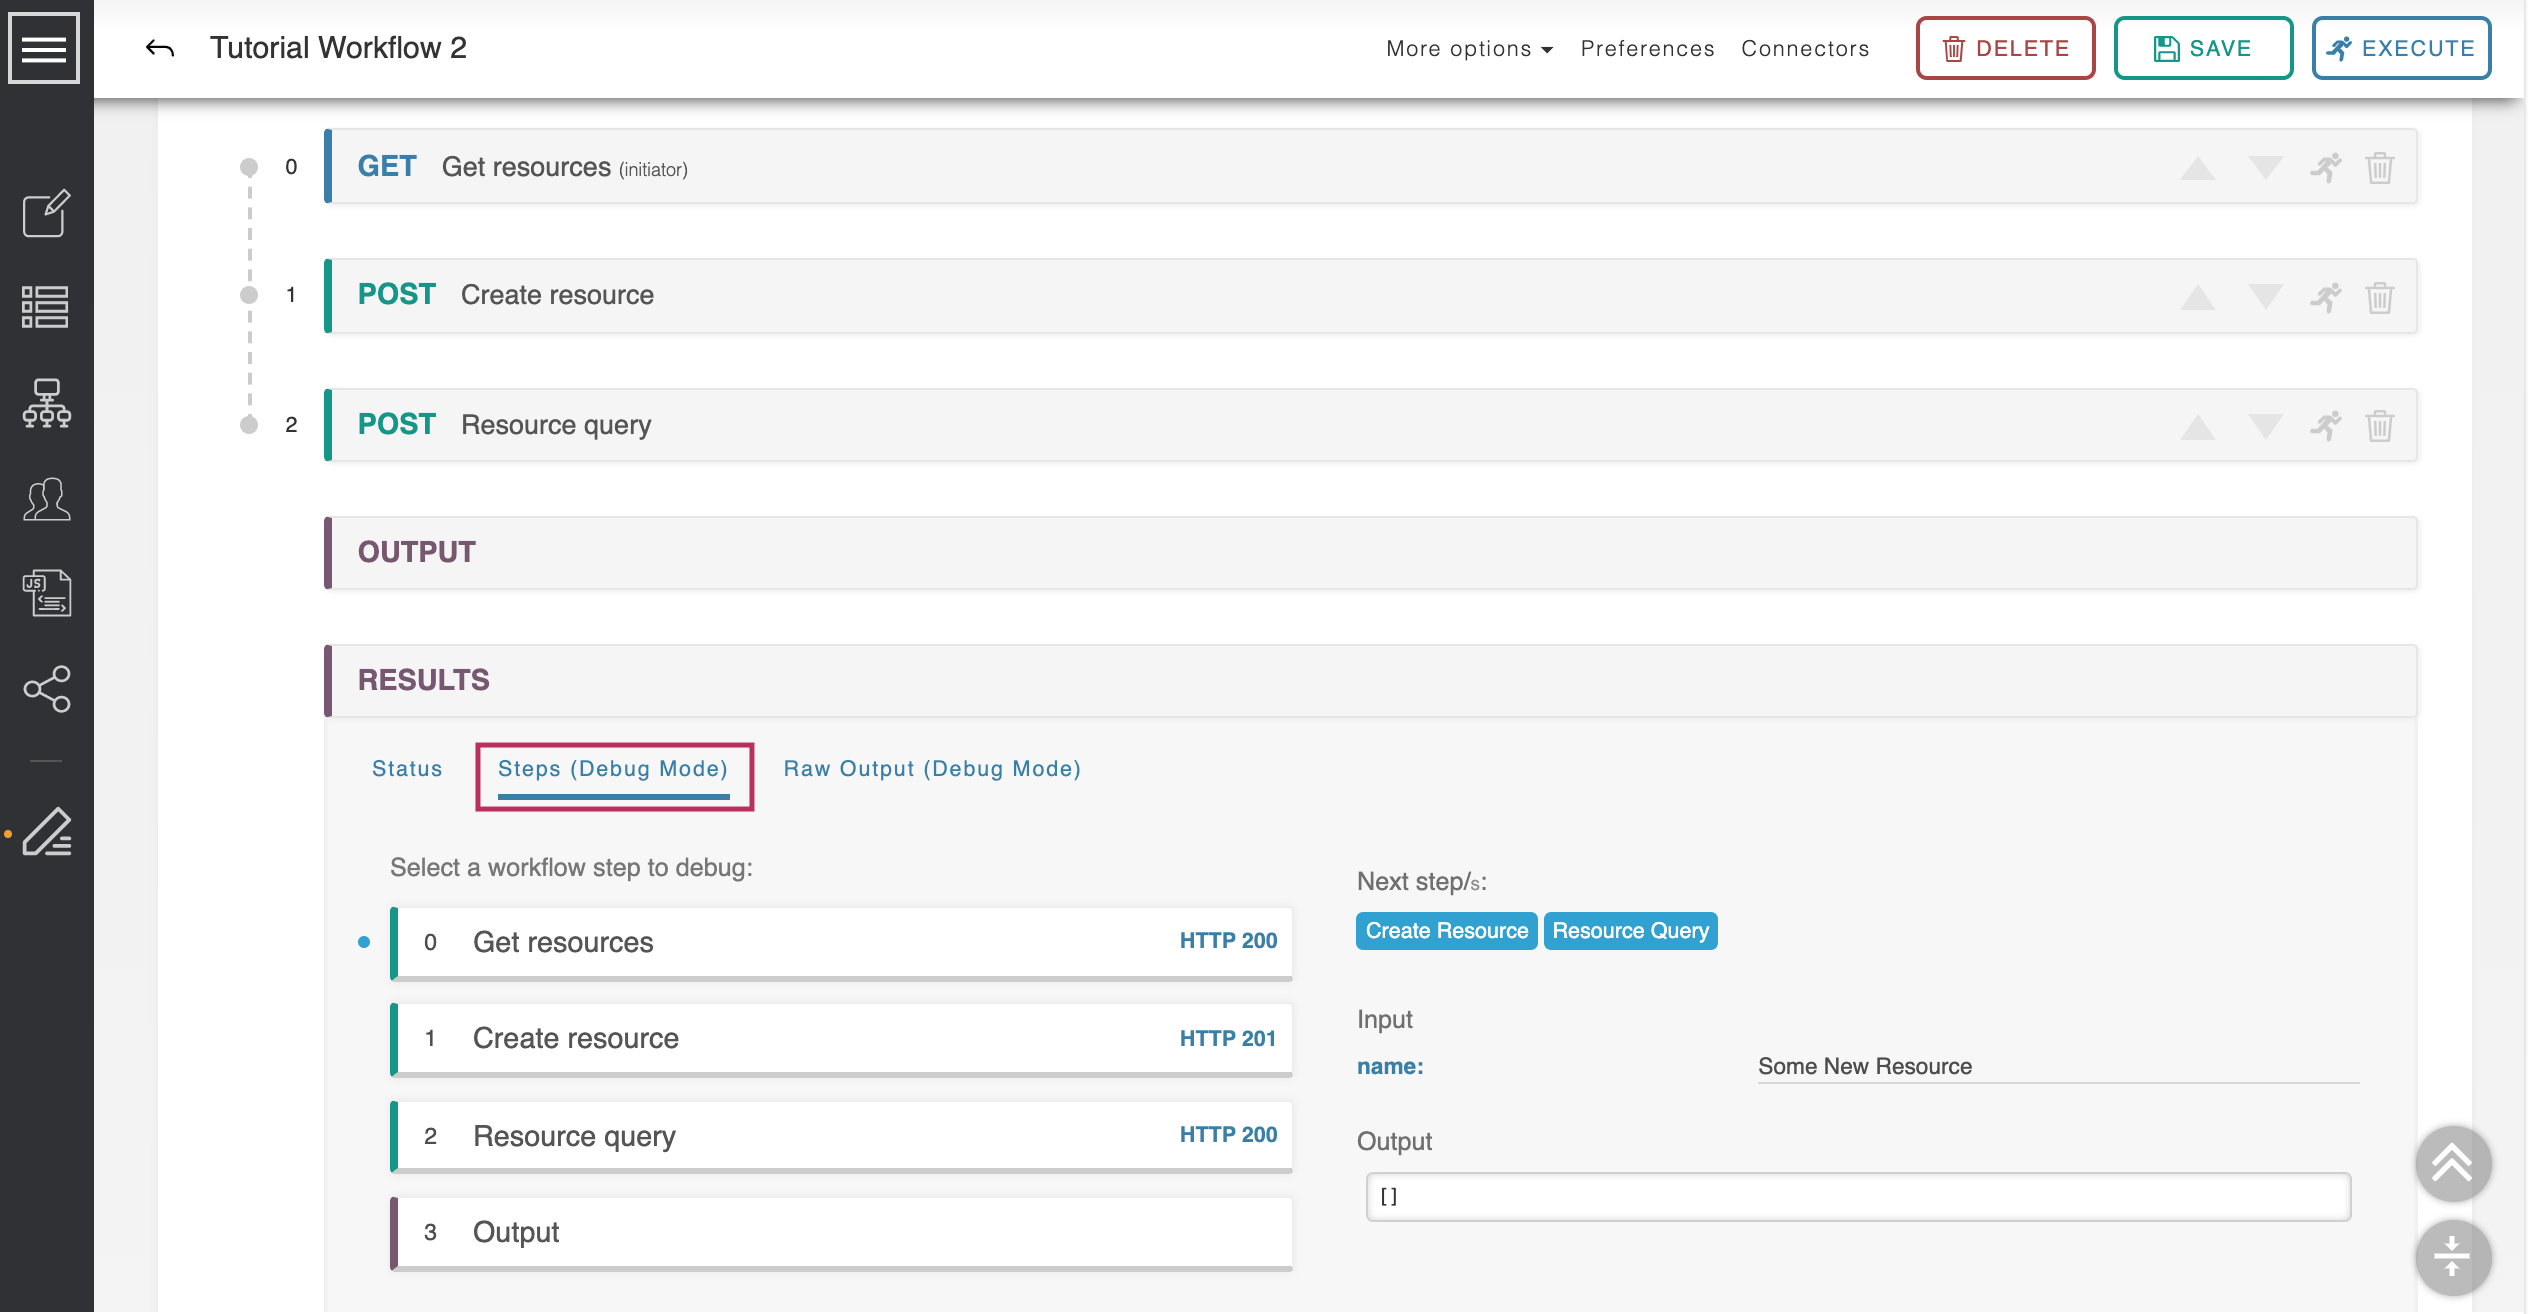
Running the workflow with Debug Mode on will show all the steps of the workflow and what order they were run, as well as if they were skipped.
Executing the Workflow once again with a resource that doesn't exist ("Some New Resource"), then viewing the results tab "Steps (Debug Mode)", shows the condition path taken where the resource was not found and a new one created. This can be very helpful for debugging complex processes.
Additional Information
Continue on to the User Guide for detailed information on working in ACP:
