Quick-Start Tutorial 1
Here are the steps needed This is a basic walkthrough to set up a complete, working ACP workflow.
This tutorial assumes you have access to a working 6connect ProVision instance. If you do not have a working 6connect ProVision instance, but if not any other supported service can be used with minor conceptual tweaks.by substituting the applicable service and desired API endpoint information in Steps 4 through 7.
| Table of Contents | ||
|---|---|---|
|
| Note | ||
|---|---|---|
| ||
ACP Workflows may only be saved once they have at least a single working step, in order to ensure that data transmitted is valid for the connector and system. Before starting this tutorial, or any other workflow creation, ensure that you:
|
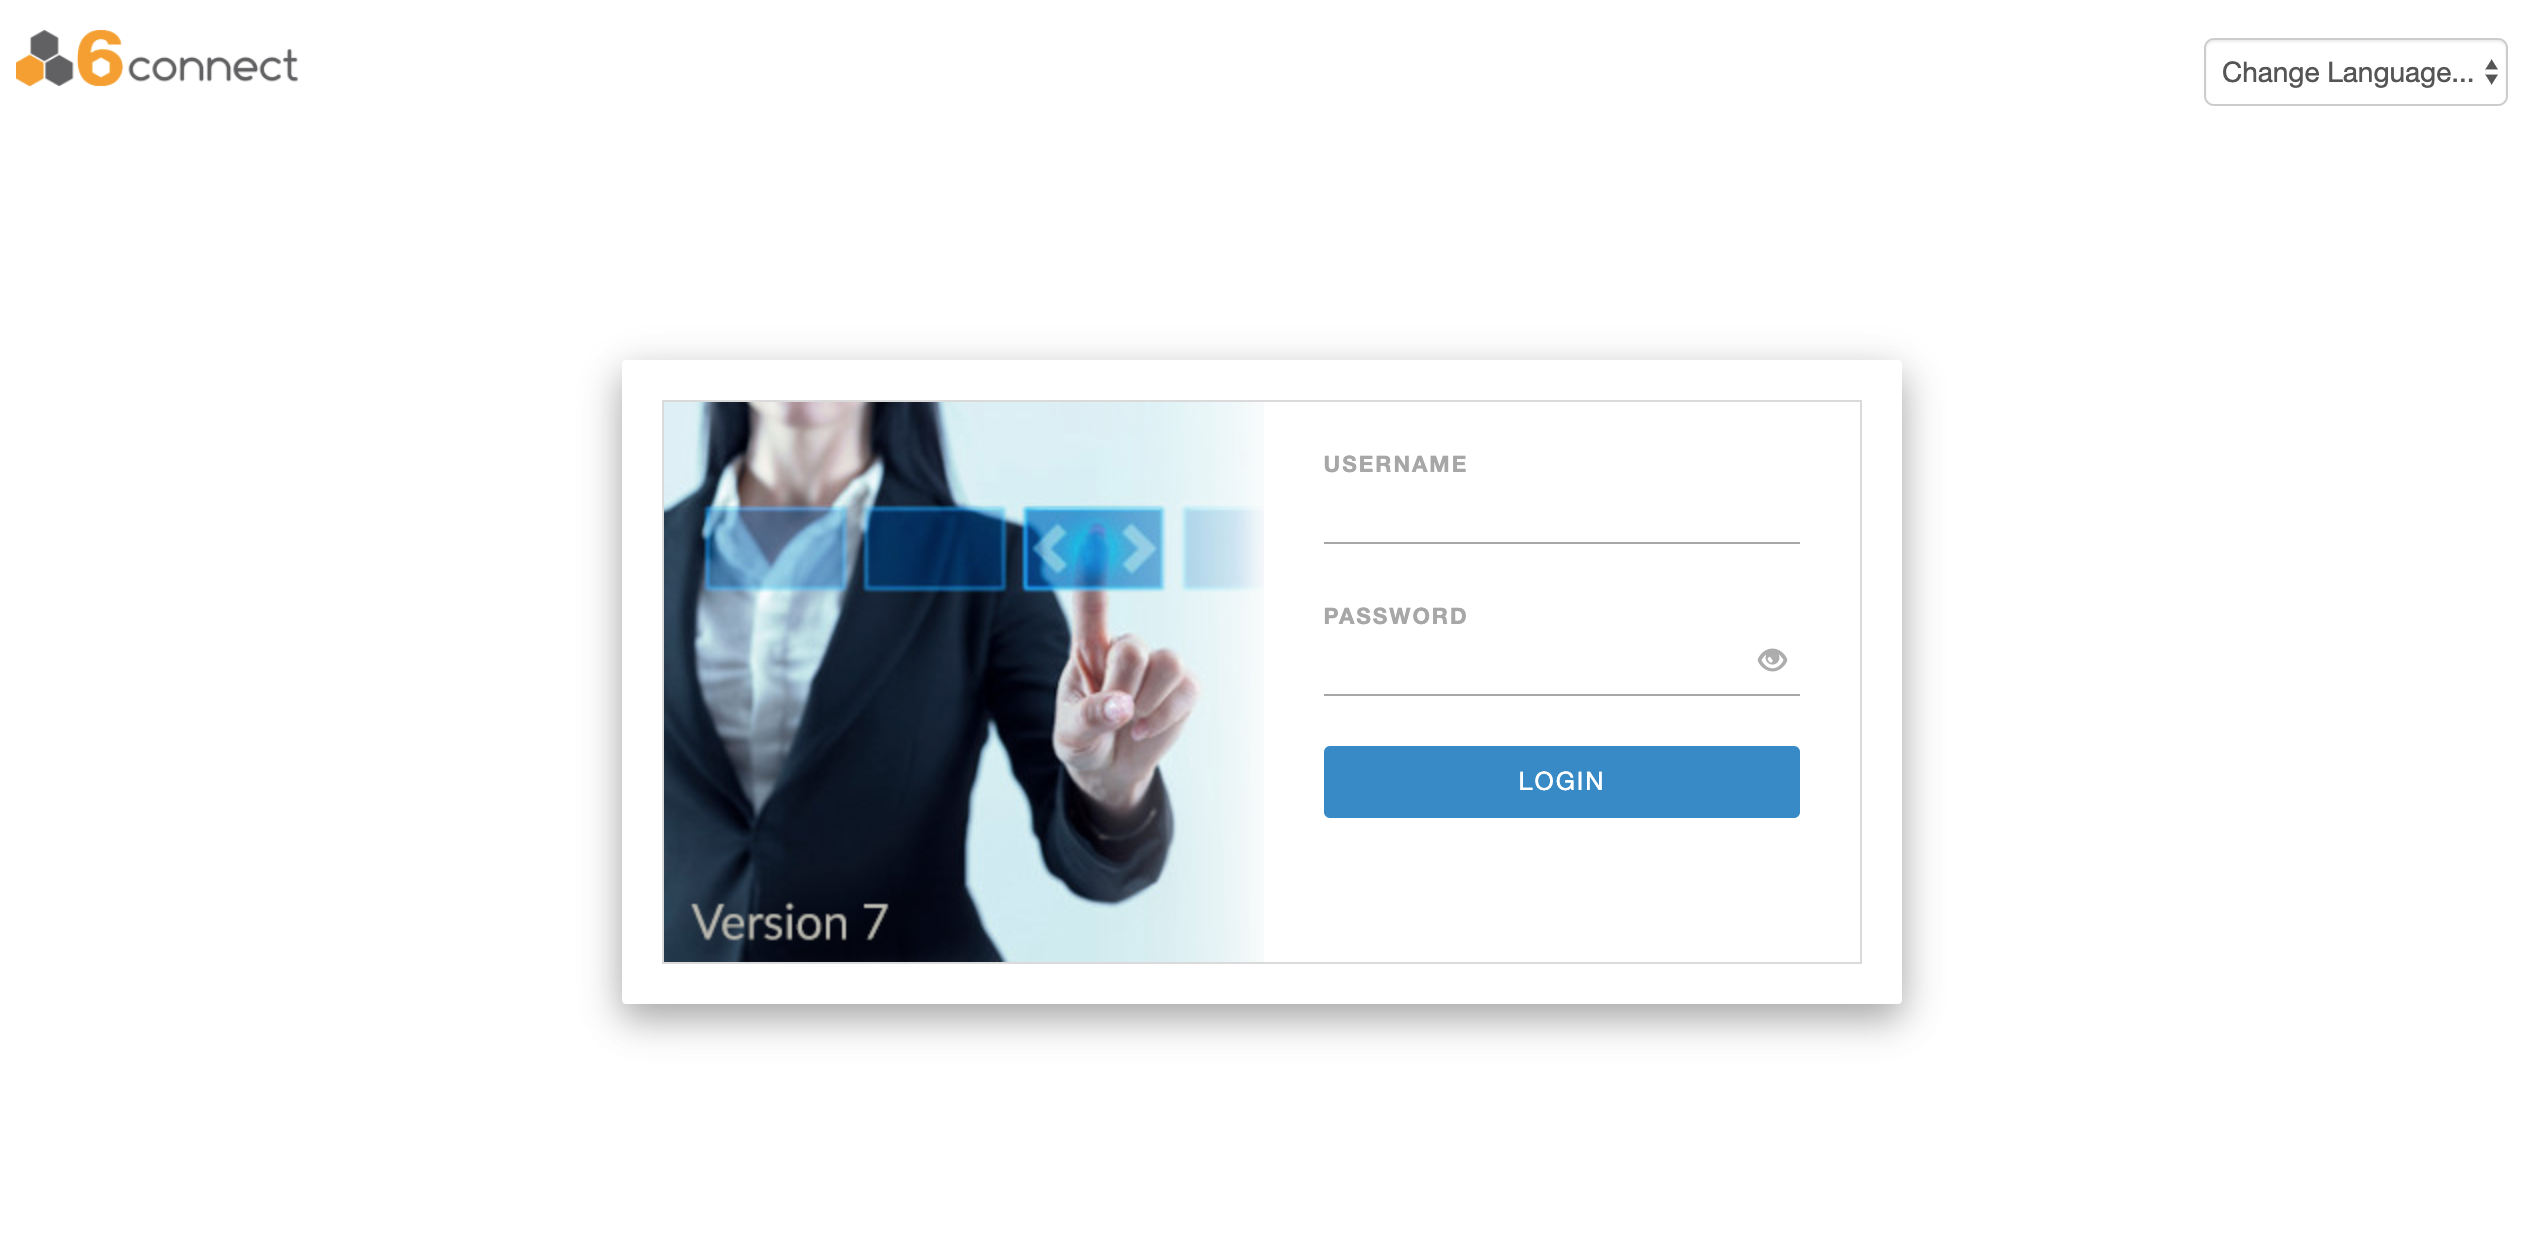
Step 1: Login to ACP
Step 1: Open up a web browser and navigate to the login screen of the ACP installation. Your username and password will have been provided with your license information, or sent to you by your network administrator. Log in.
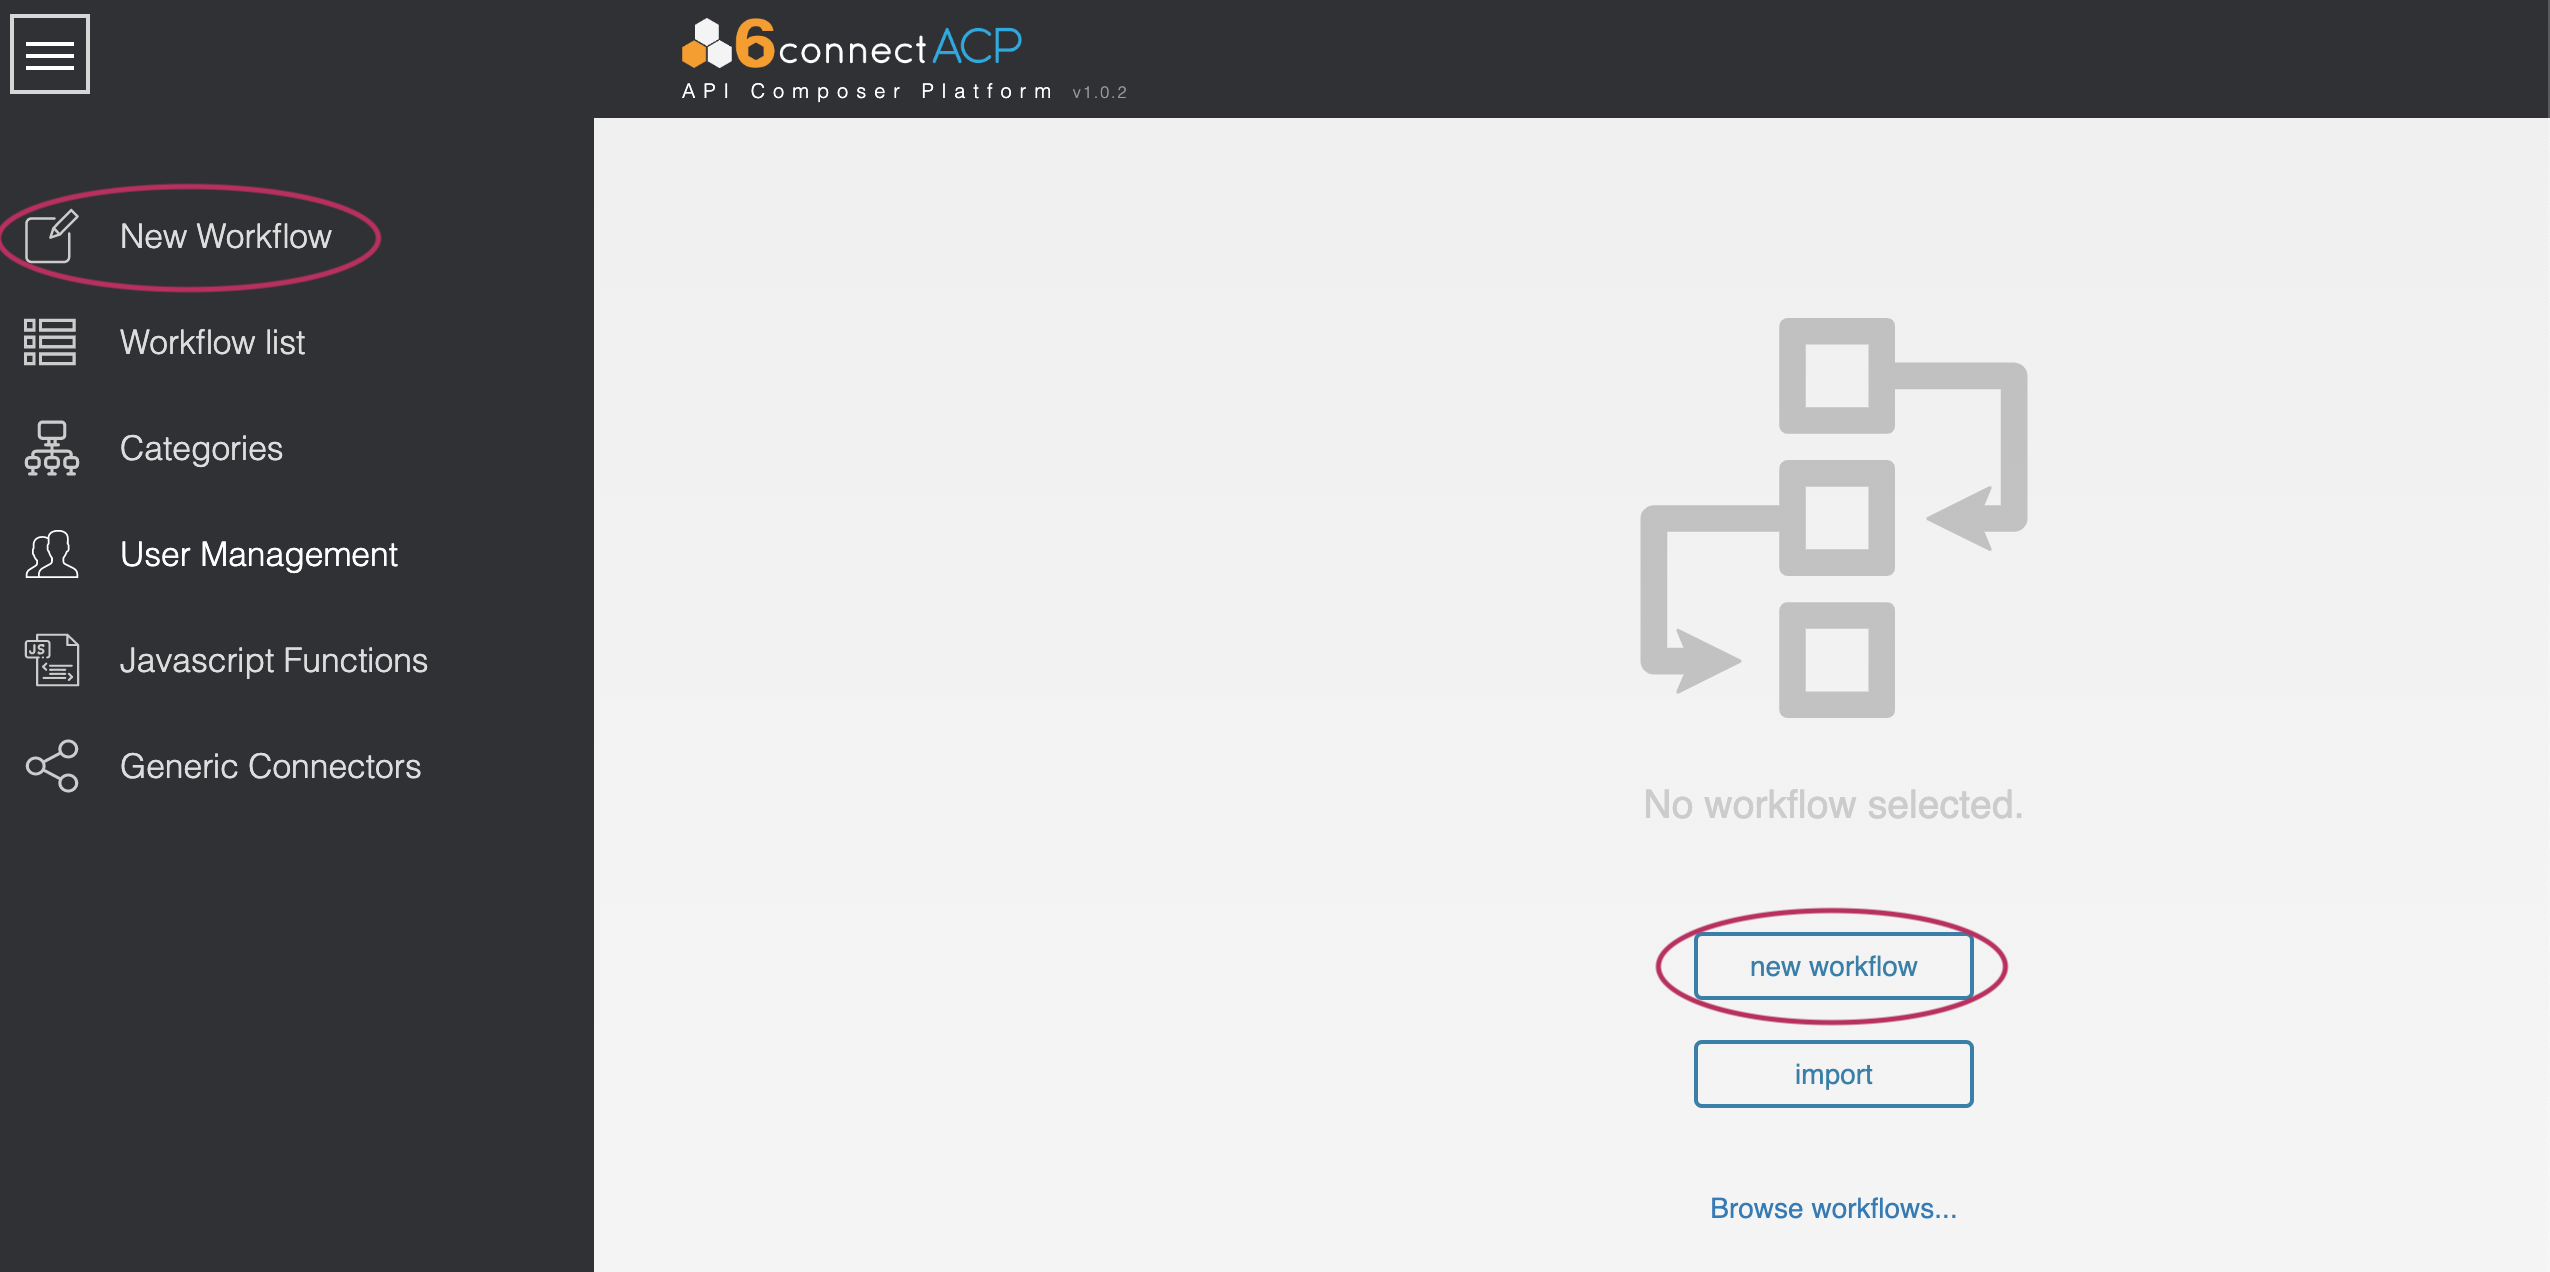
Step 2: Create a New Workflow
Once you are logged in, select the “New Workflow” button from the center of the screen, or from the sidebar menu.
Step 3: Edit Workflow Information
Name
Give your workflow a new name. New workflows are initially named “untitled”, and this name appears in the upper-left.
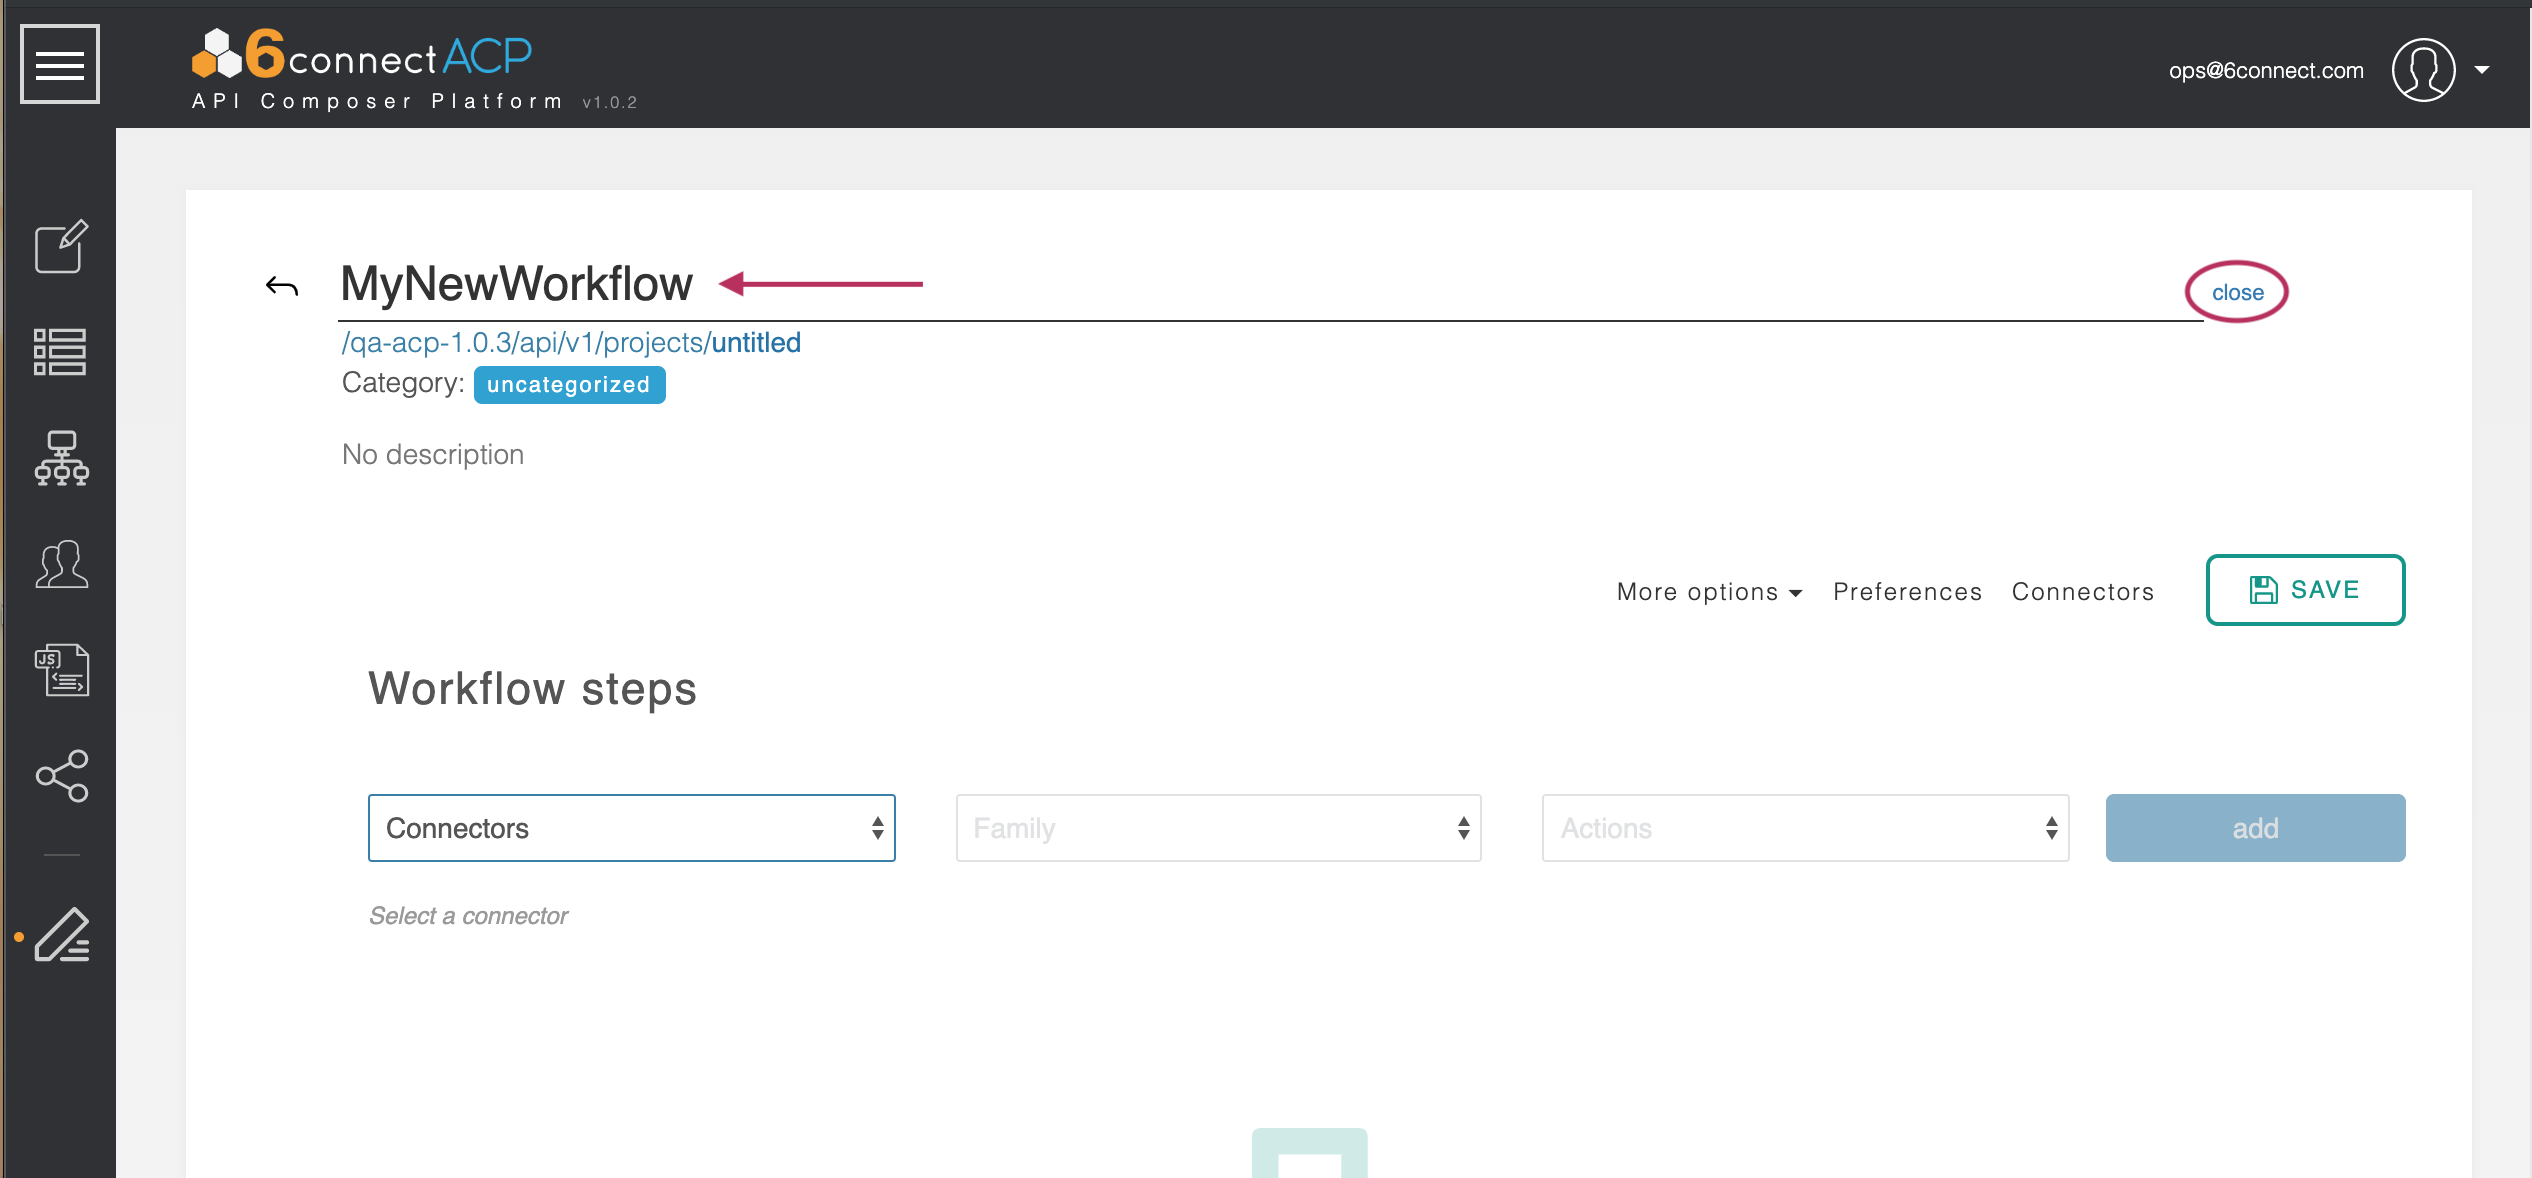
Give your Workflow a new name by clicking “edit” next to the current workflow name. Rename it as desired, then hit "close". Click “edit” and rename the Workflow “Tutorial Workflow.” Hit “close.”
Category
If desired, you can edit the category for your new workflow. Click on the current category ("uncategorized", for a new Workflow) to open the Select Category screen.
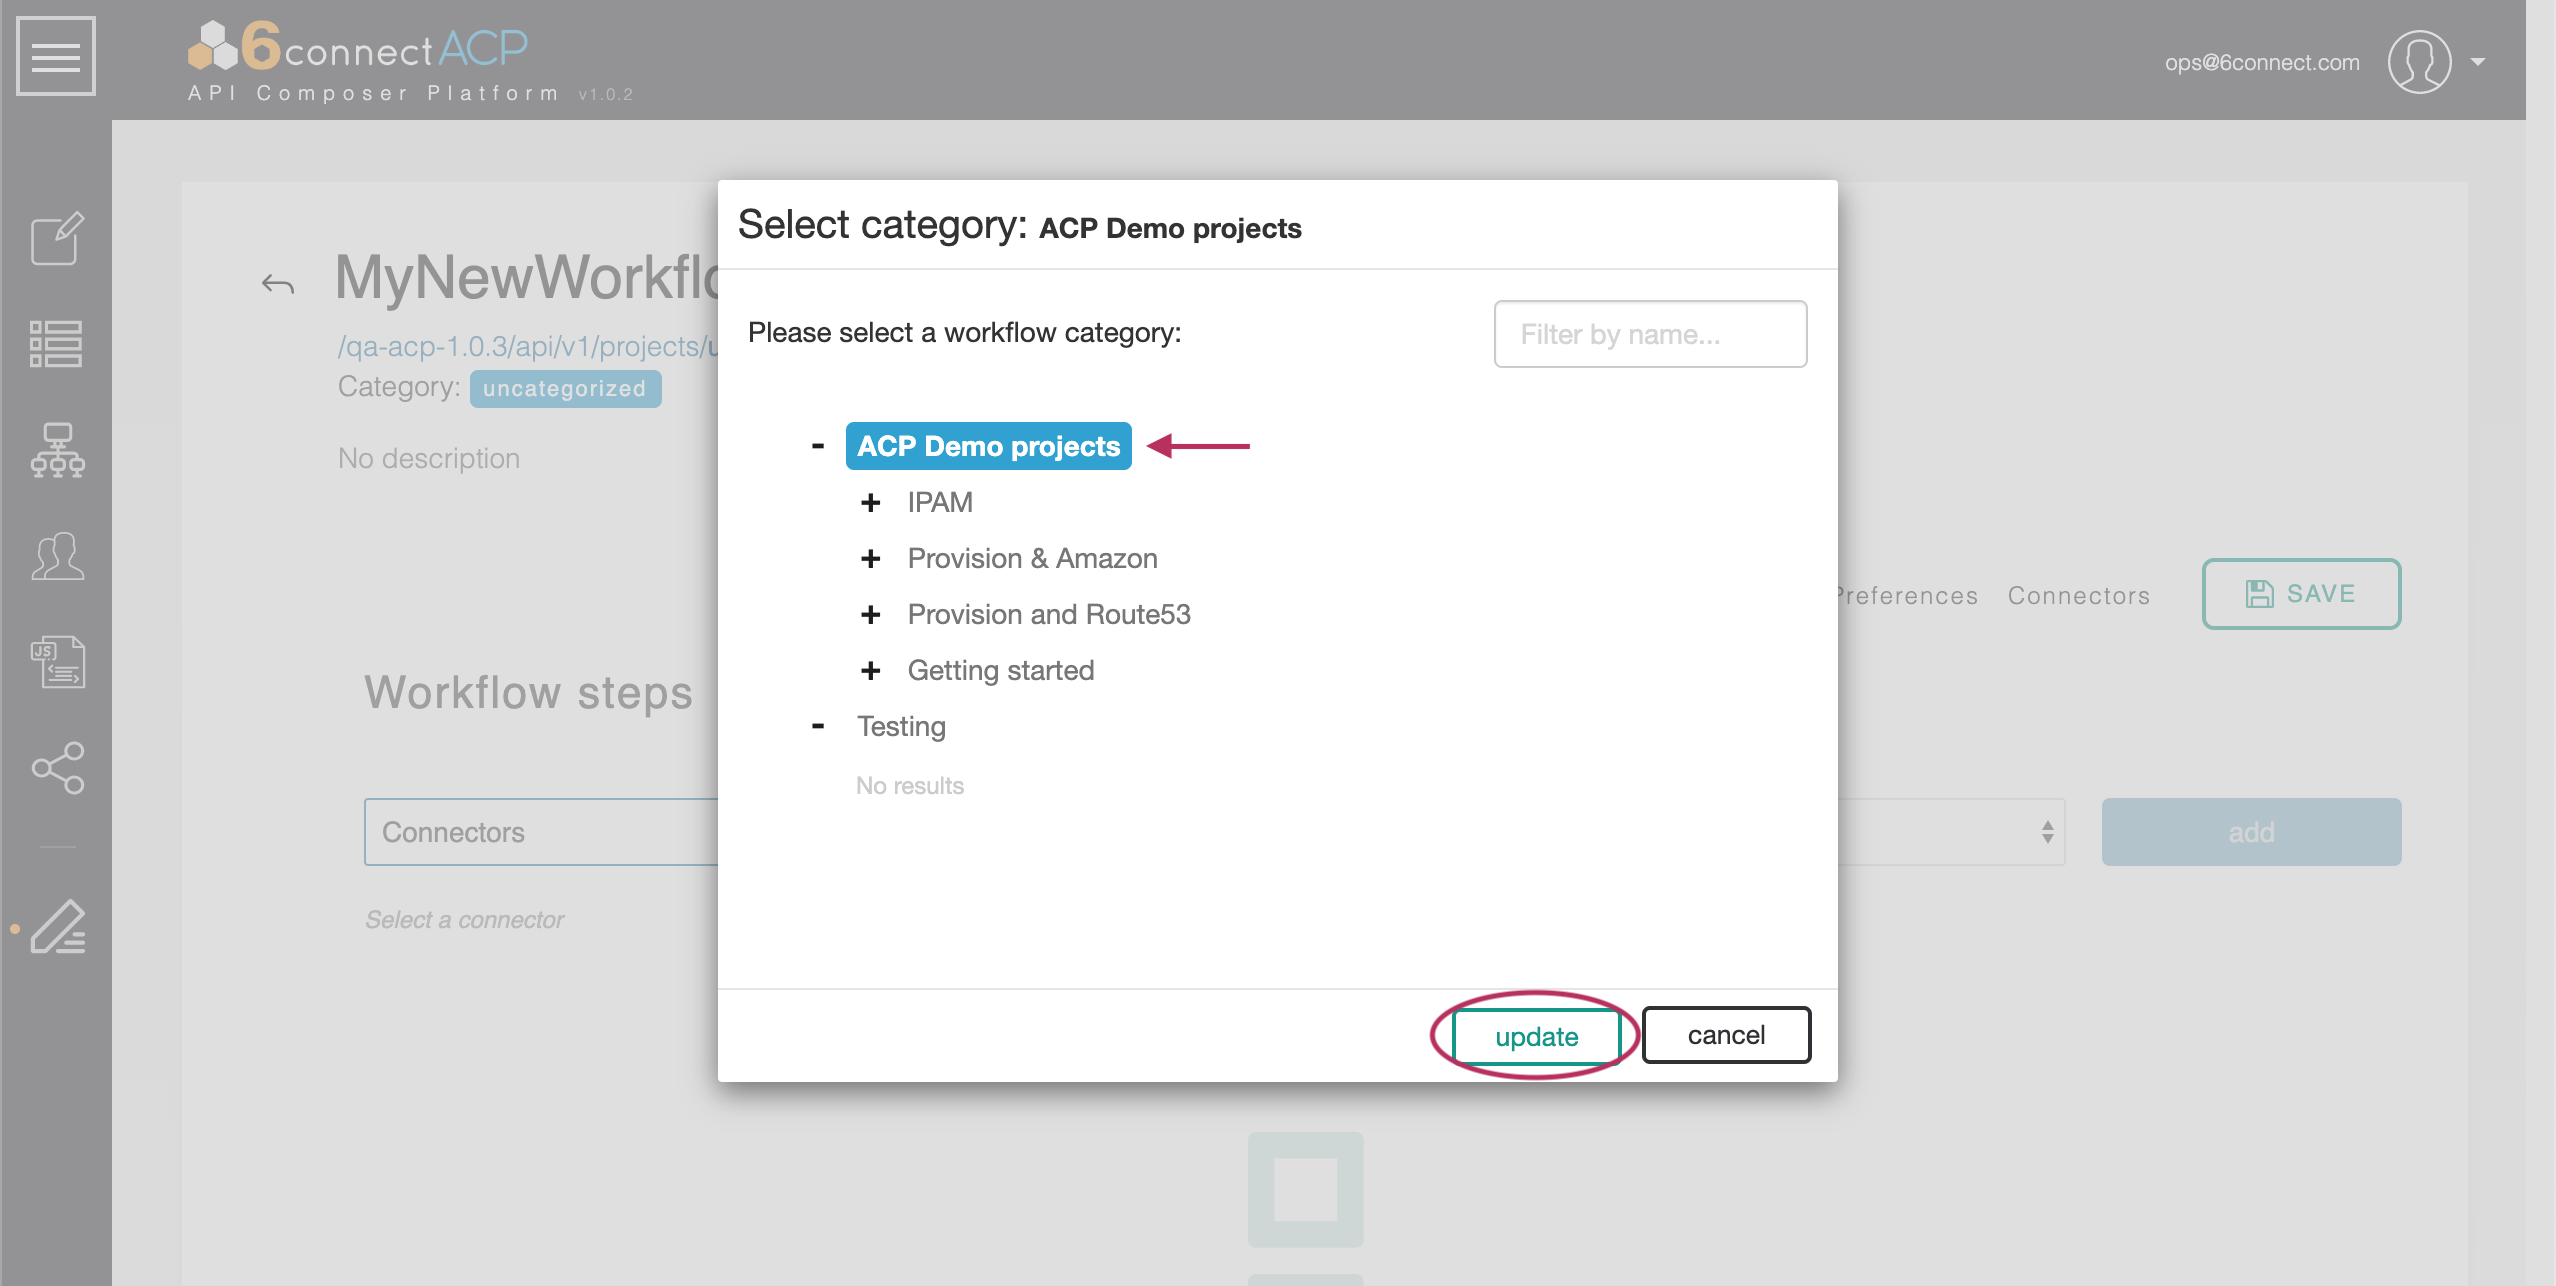
Click on the expand icons ![]() to browse the category lists, or filter from the search box. Click on the desired category to select it, then click "update" to apply the category to your Workflow.
to browse the category lists, or filter from the search box. Click on the desired category to select it, then click "update" to apply the category to your Workflow.
Description
You may also add a description to your Workflow.

Double-Click inside the description field to edit the description, when complete click "Close" or click anywhere outside of the description field to exit out.
Step 4: Configure Connector
The next step is to configure Step 4: Configure a connector to your 6connect ProVision (or other supported connector) service. Connectors are associated per-Workflow, so a new Workflow will need to either have a new connector instance created or one imported from an existing Workflow.
For this example, we will configure a new connector to a ProVision instance.
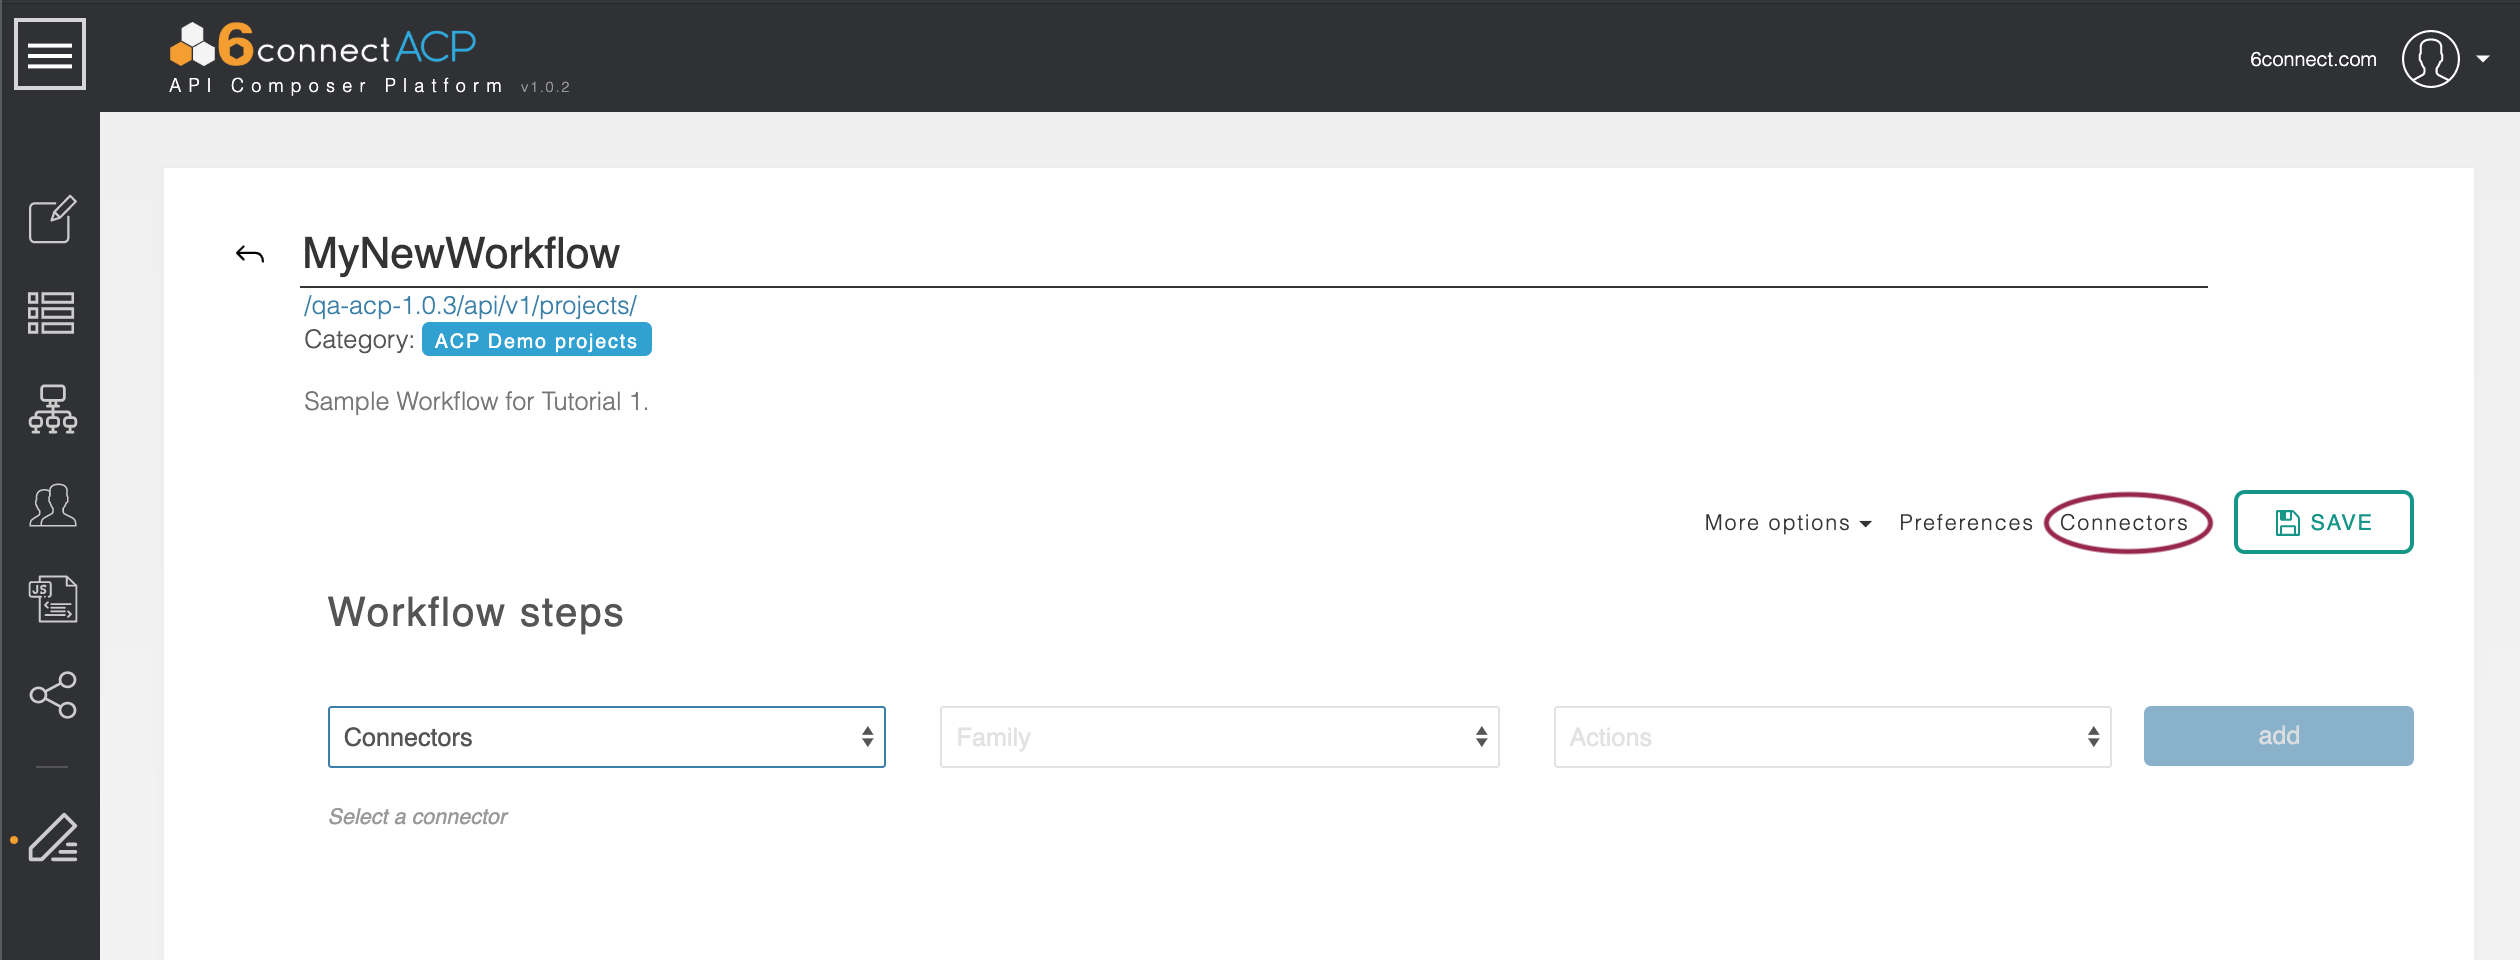
Click the “Connectors” button to the left of the “Save” button in the upper-right corner to bring up the Edit Connectors screen.
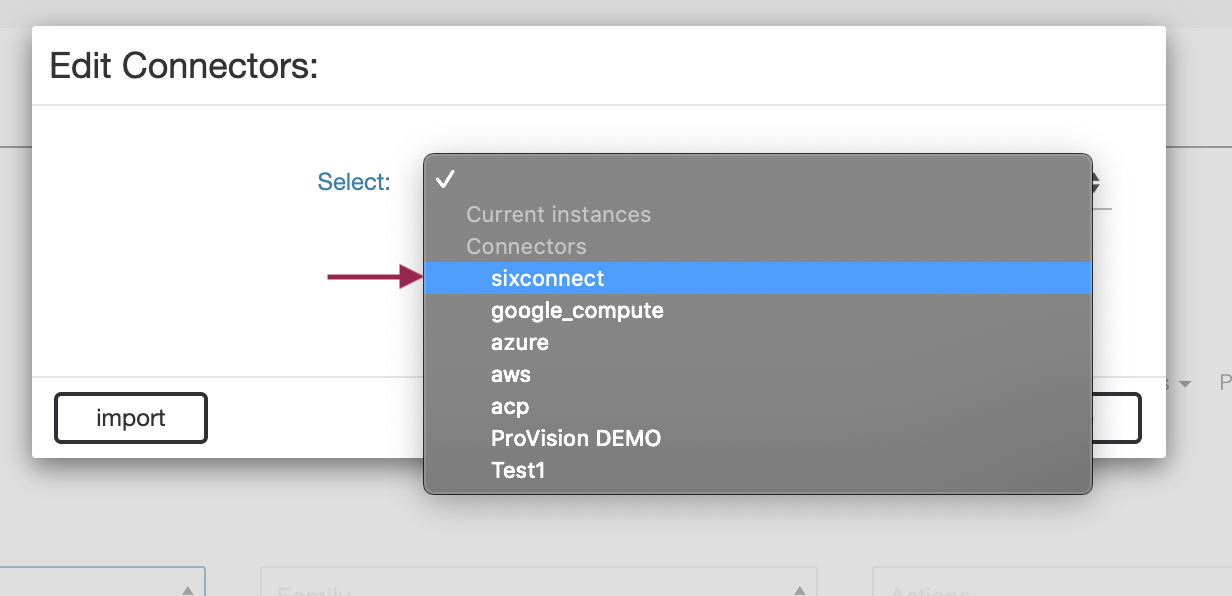
From the select box, pick “sixconnect.”
Name this connector “ProVision 1” and supply the URL for your ProVision instance and a valid username and password for that instance. Ue
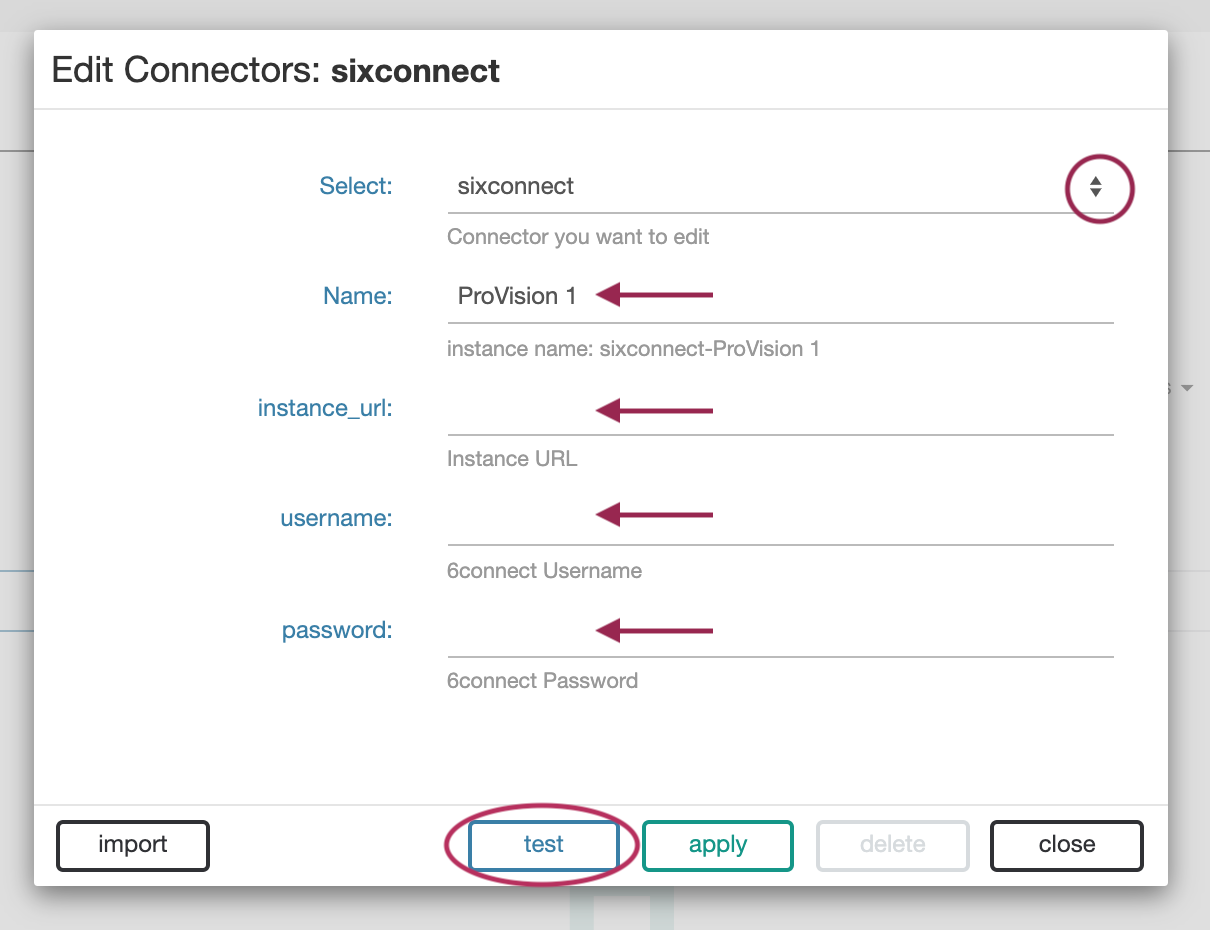
Use the ‘Test’ button to make sure the information is correct. Hit ‘Apply’ and then ‘Close.’If successful, a "Connector test success." message appears to confirm a valid connection.
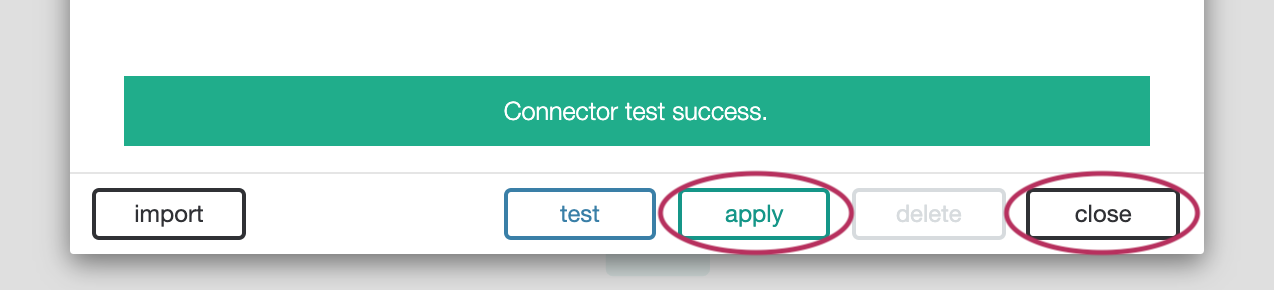
After confirming the test succeeds, save the connector by clicking ‘Apply’, then ‘Close' to exit out of the connector screen and return to the Workflow page.
Step 5: Add Workflow Steps
Now it is time to add the first step of the Worfklow.
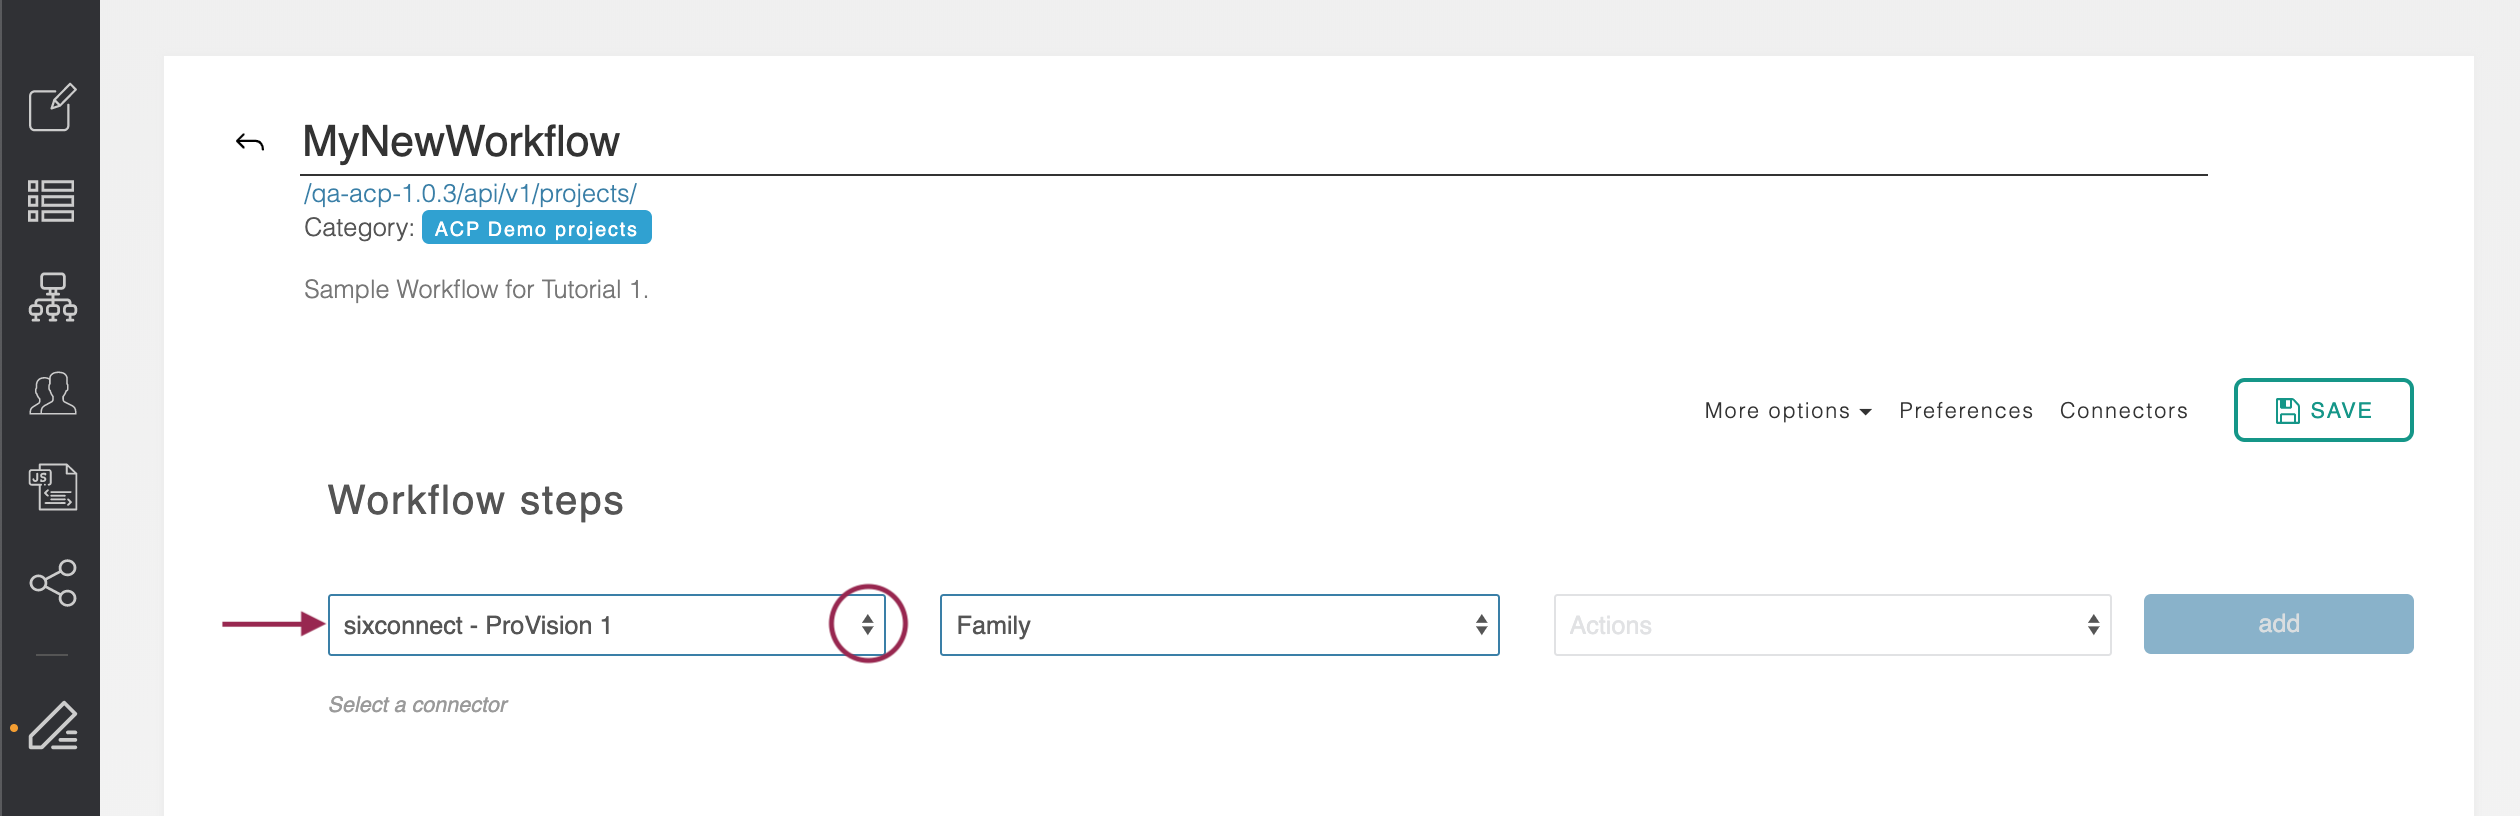
From the “Add New Step” form in the main ACP area “Workflow Steps” area on the Workflow page, select the connector we have just made: “sixconnect - ProVision 1”.
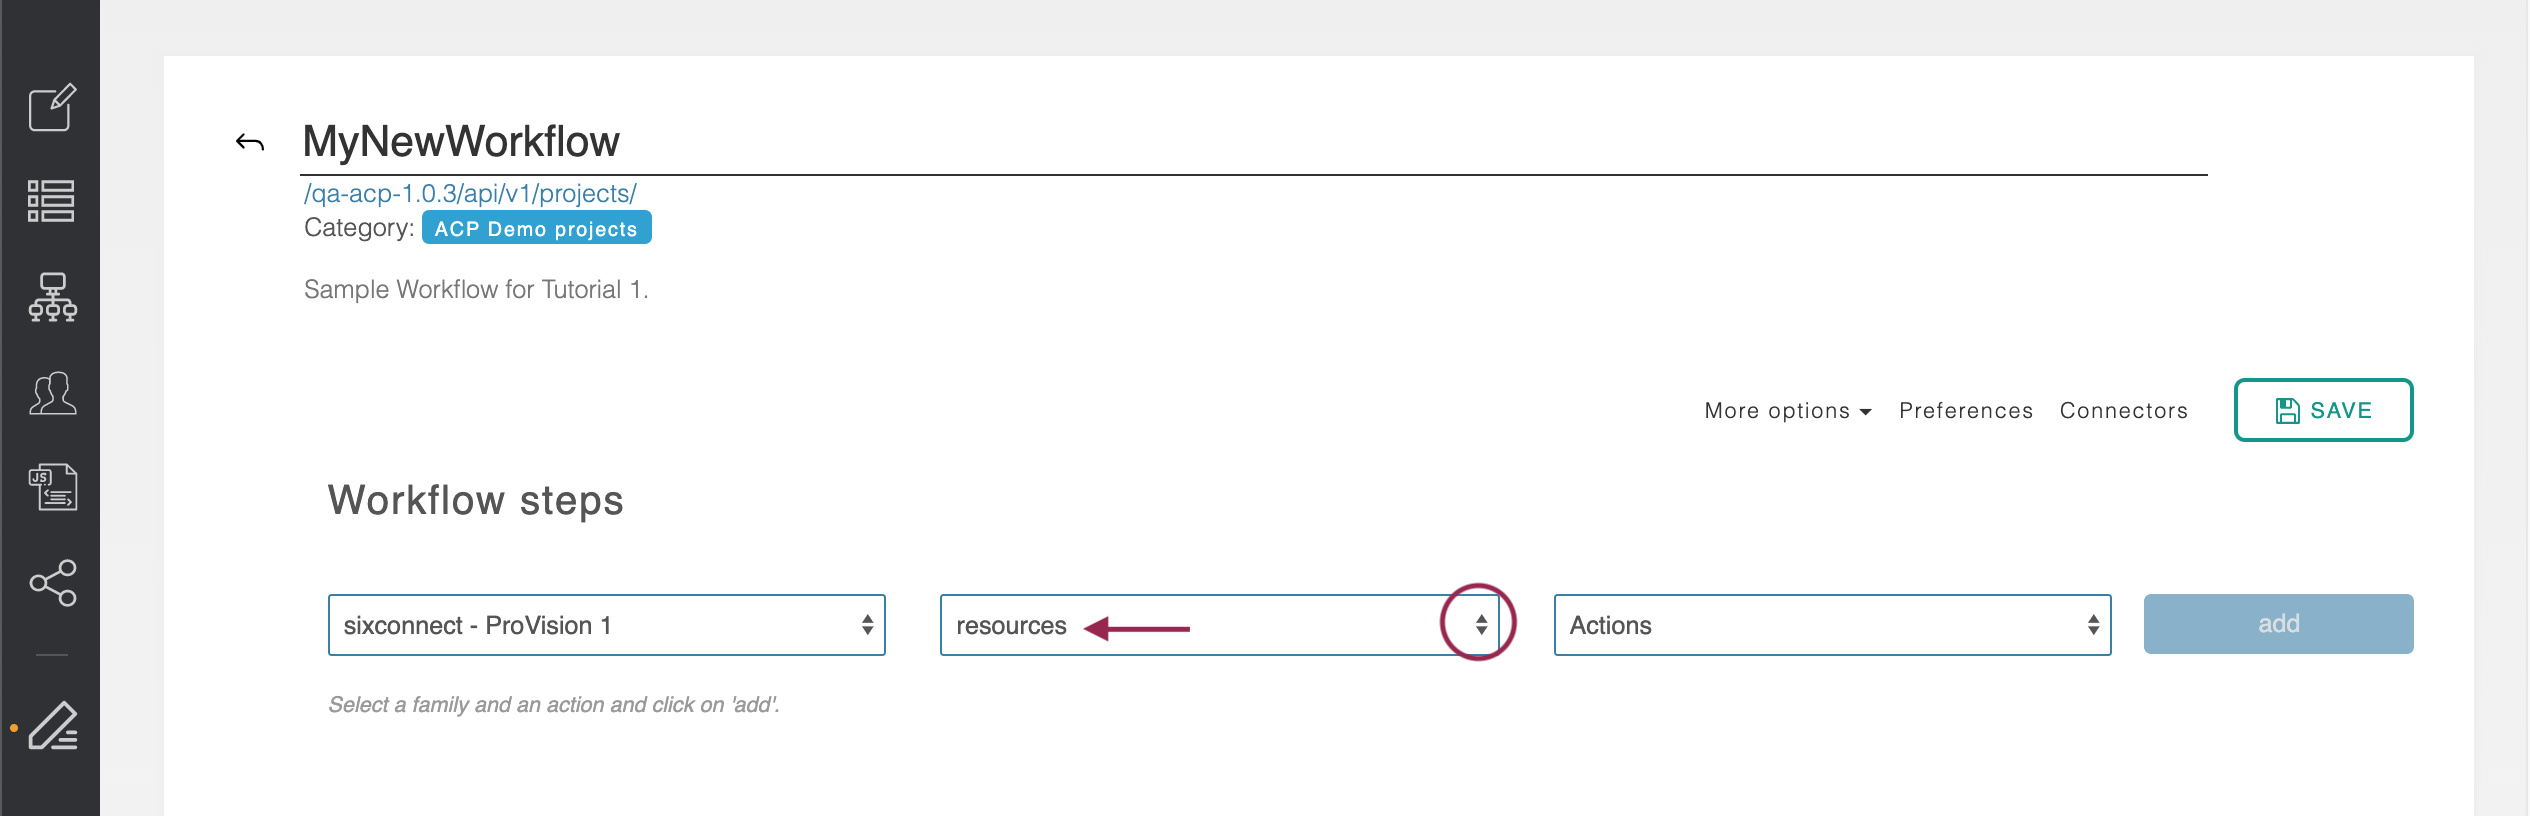
The middle box of the form will pull in all the API Endpoint Families for this product. Pick ‘resources.’
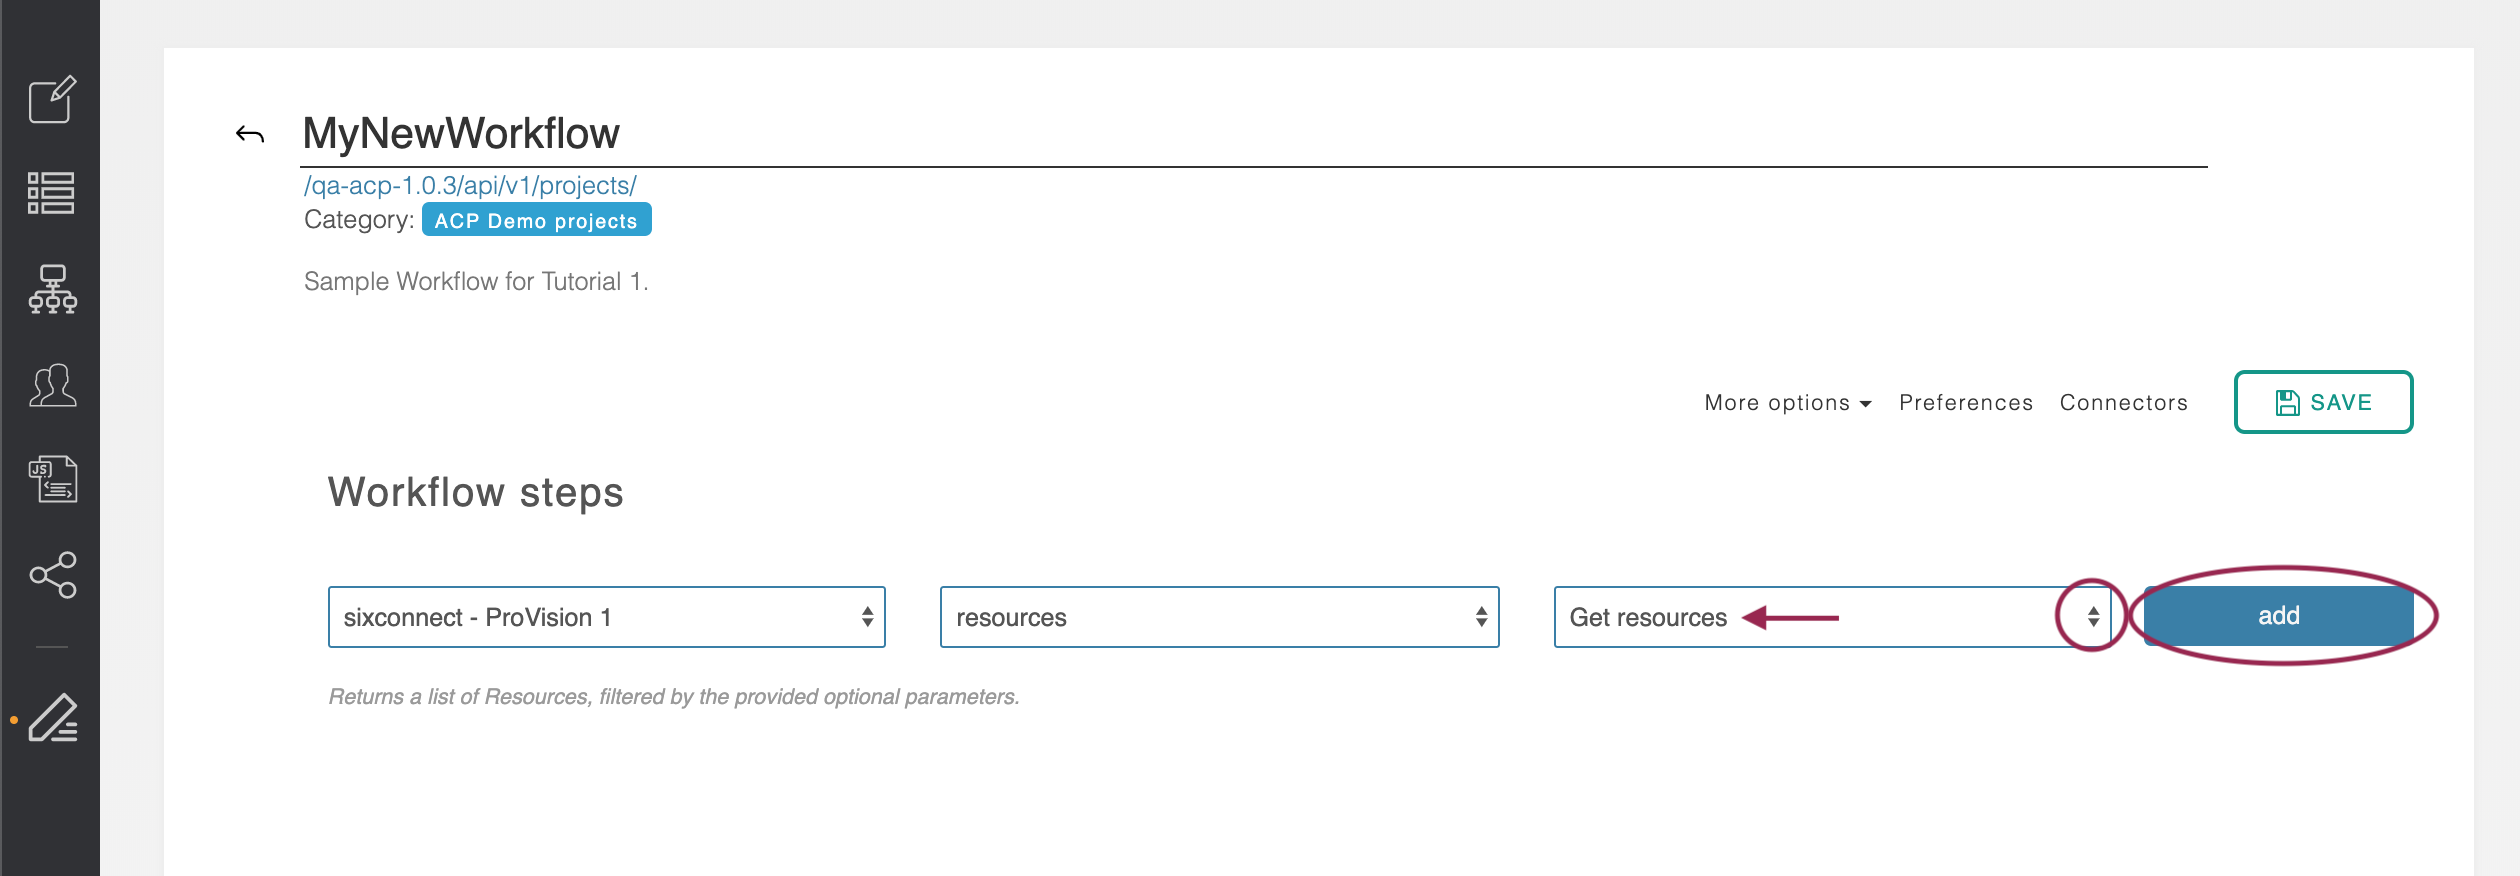
The final box will pull in all of the specific endpoints belonging to that family. Pick “Get resources” and click the ‘+’ ‘Add’ button to the right of the form.
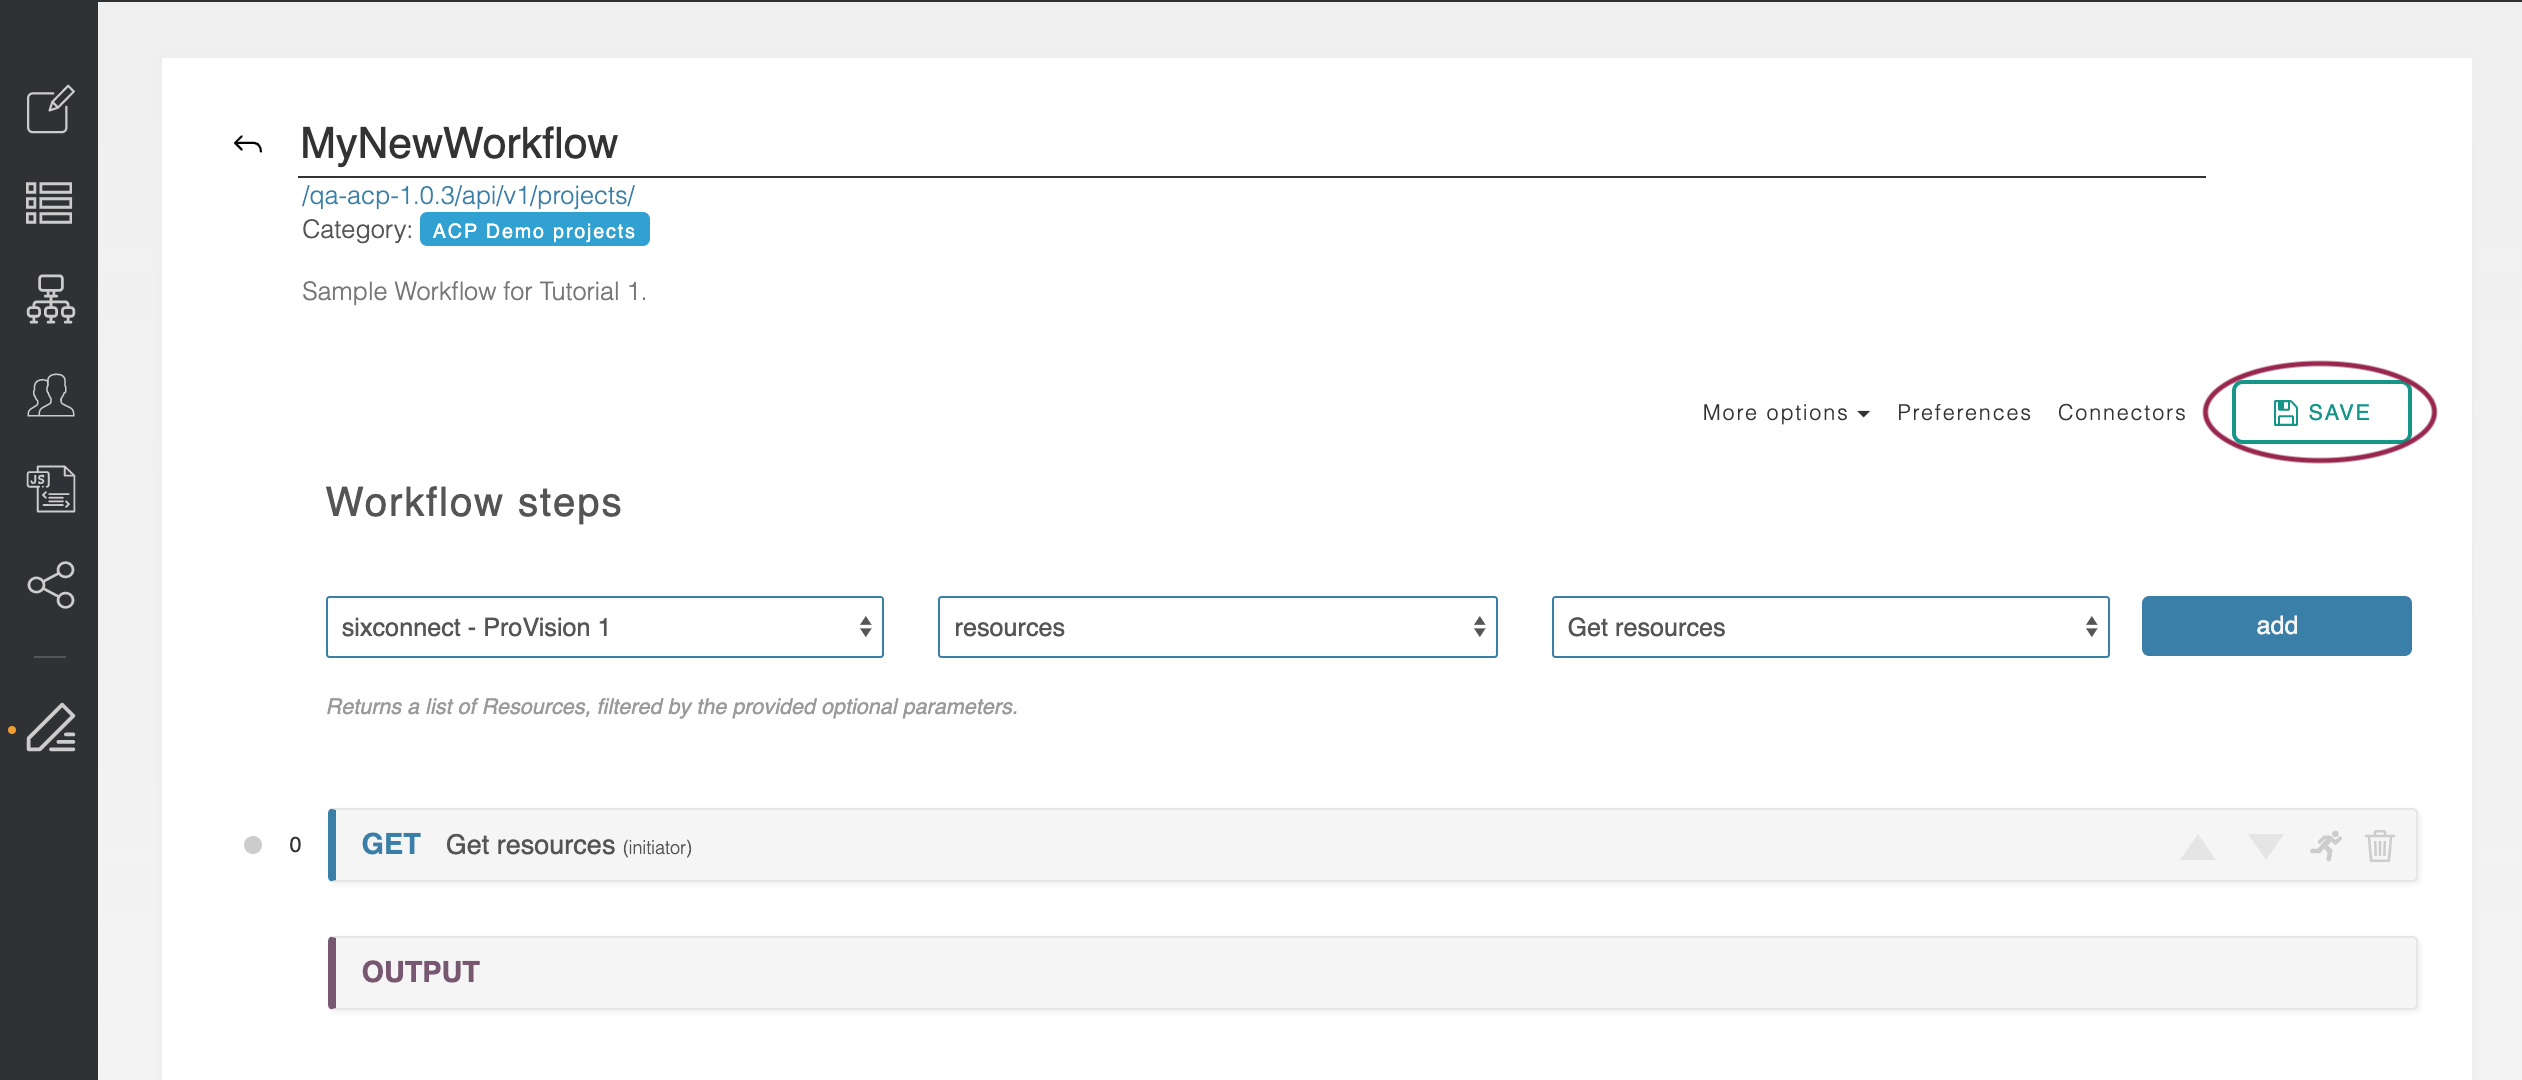
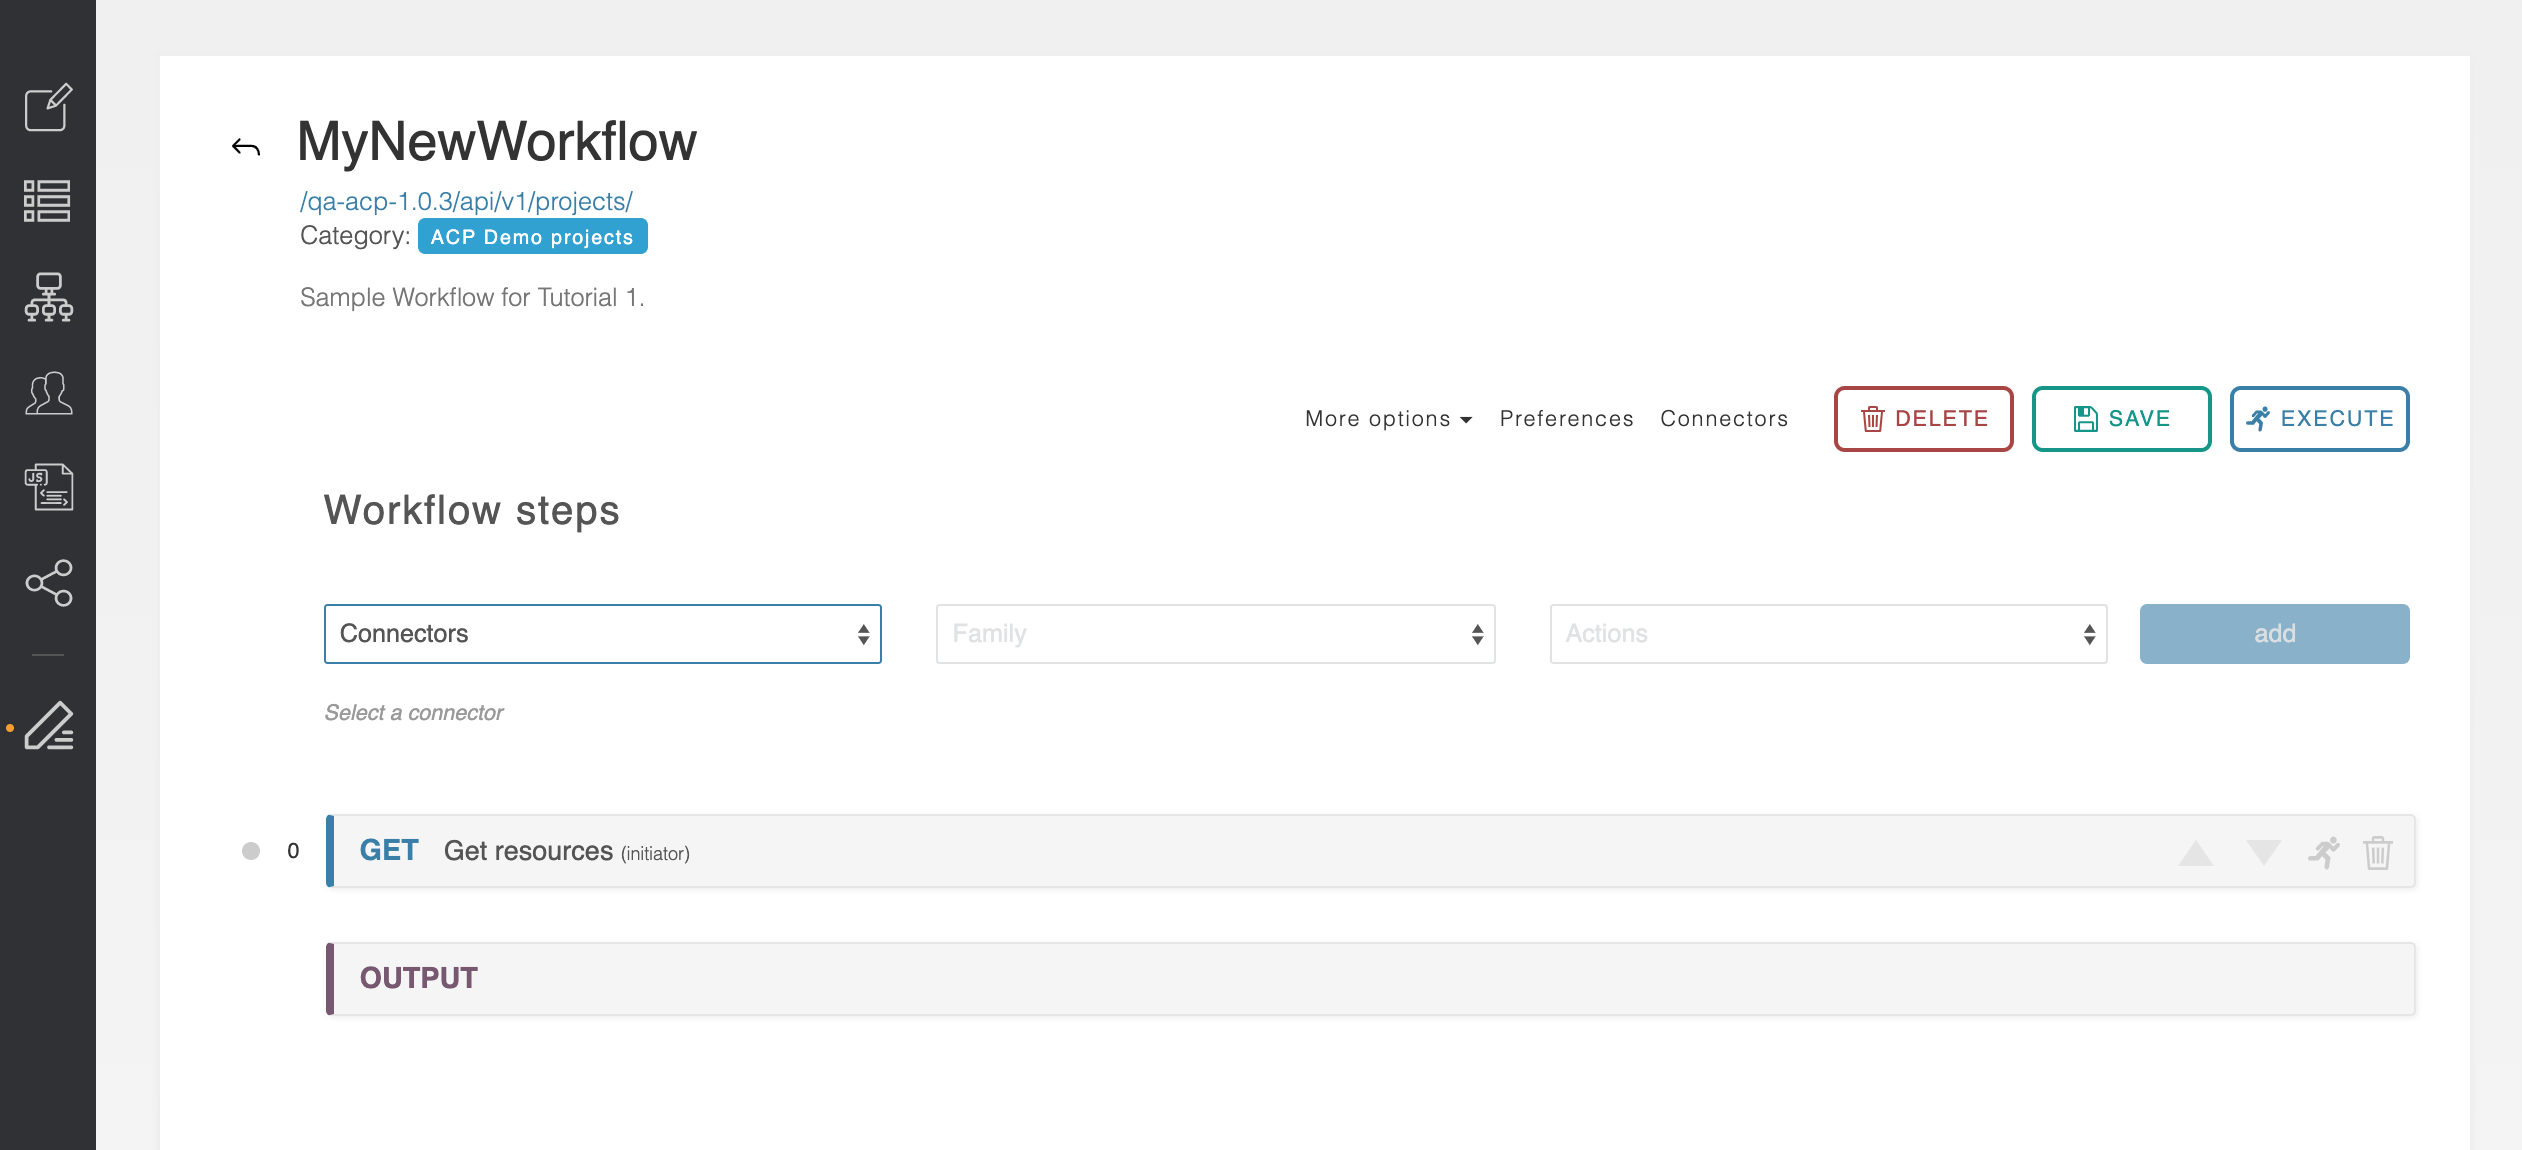
The new step is added to the main ACP work area. An ‘Output’ step is automatically created below it.
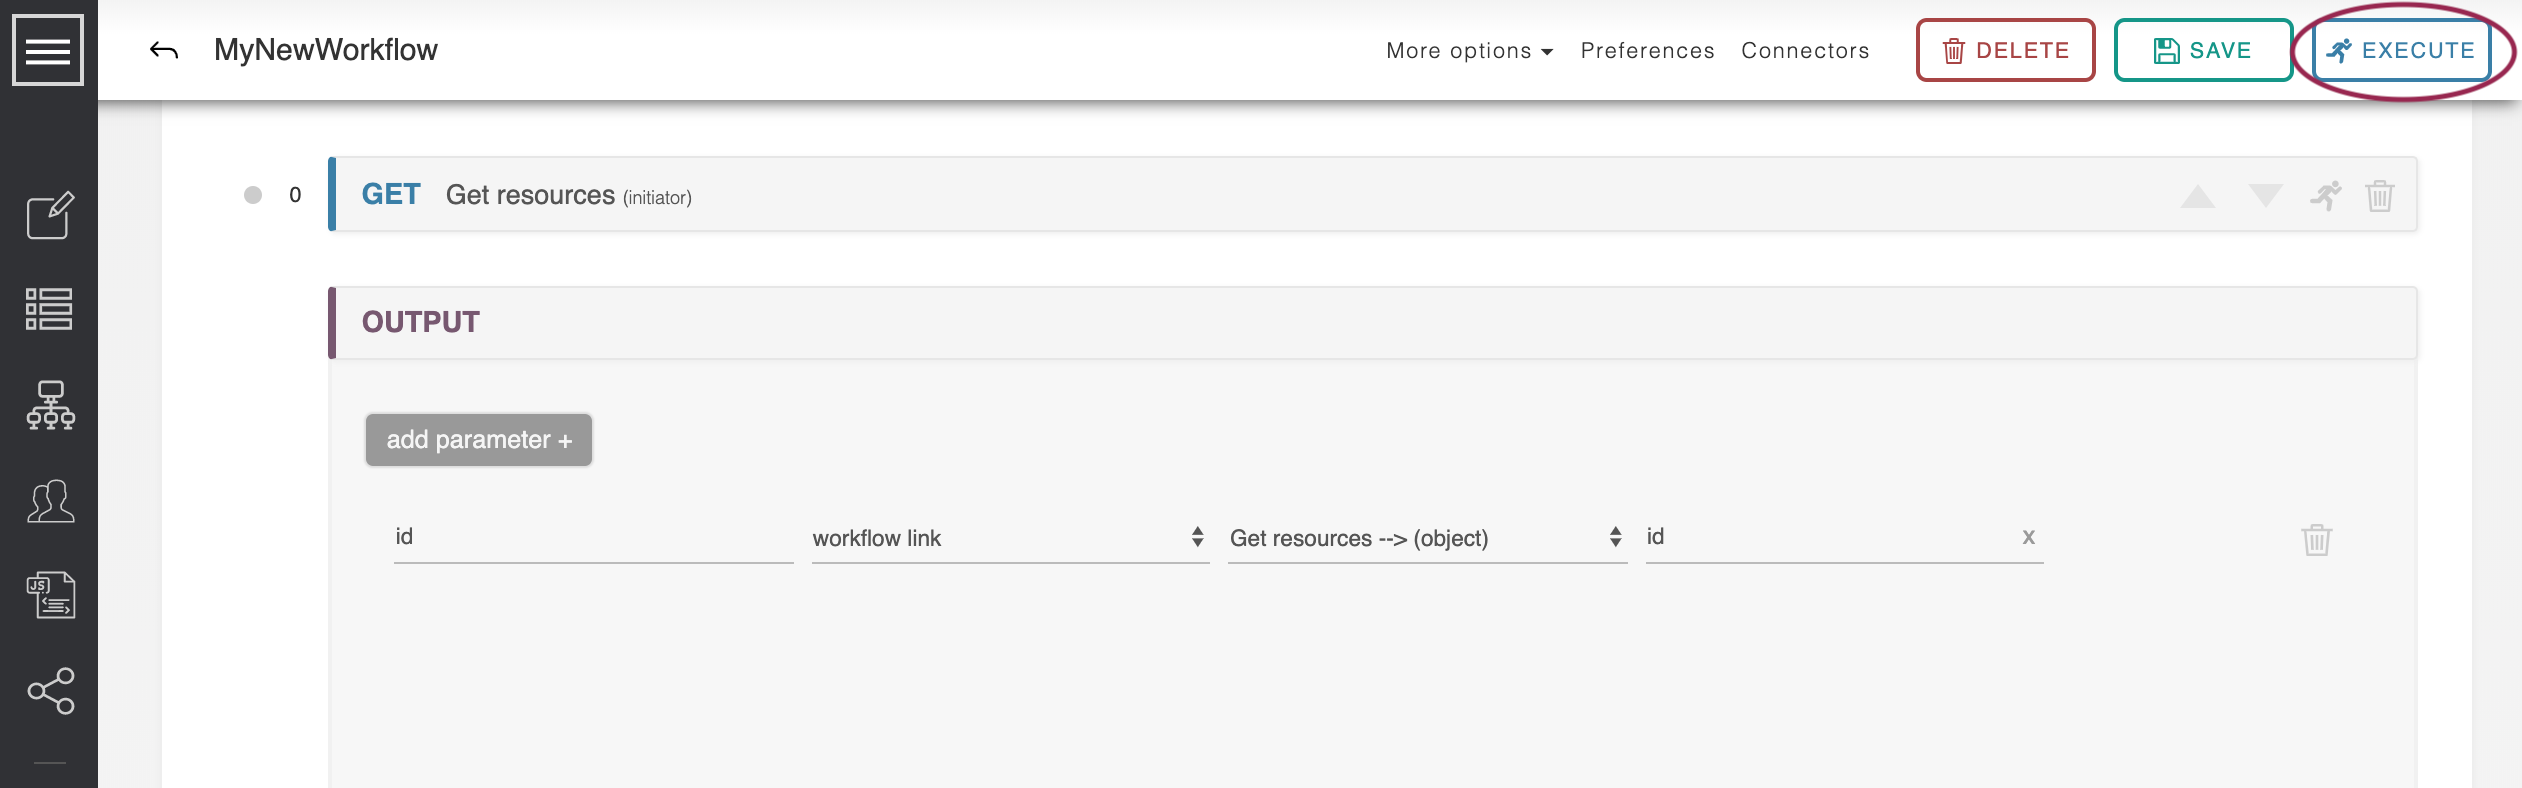
At this point - being that a valid step has been added - you can save your new workflow by clicking "Save" near the top right of the Workflow page.
After the first successful save of a new Workflow, the "Delete" and "Execute" buttons will be available.
Step 6: Review Step Inputs & Options
Click the blue ‘Get Resources’ step we just created to view detailed information for the step.
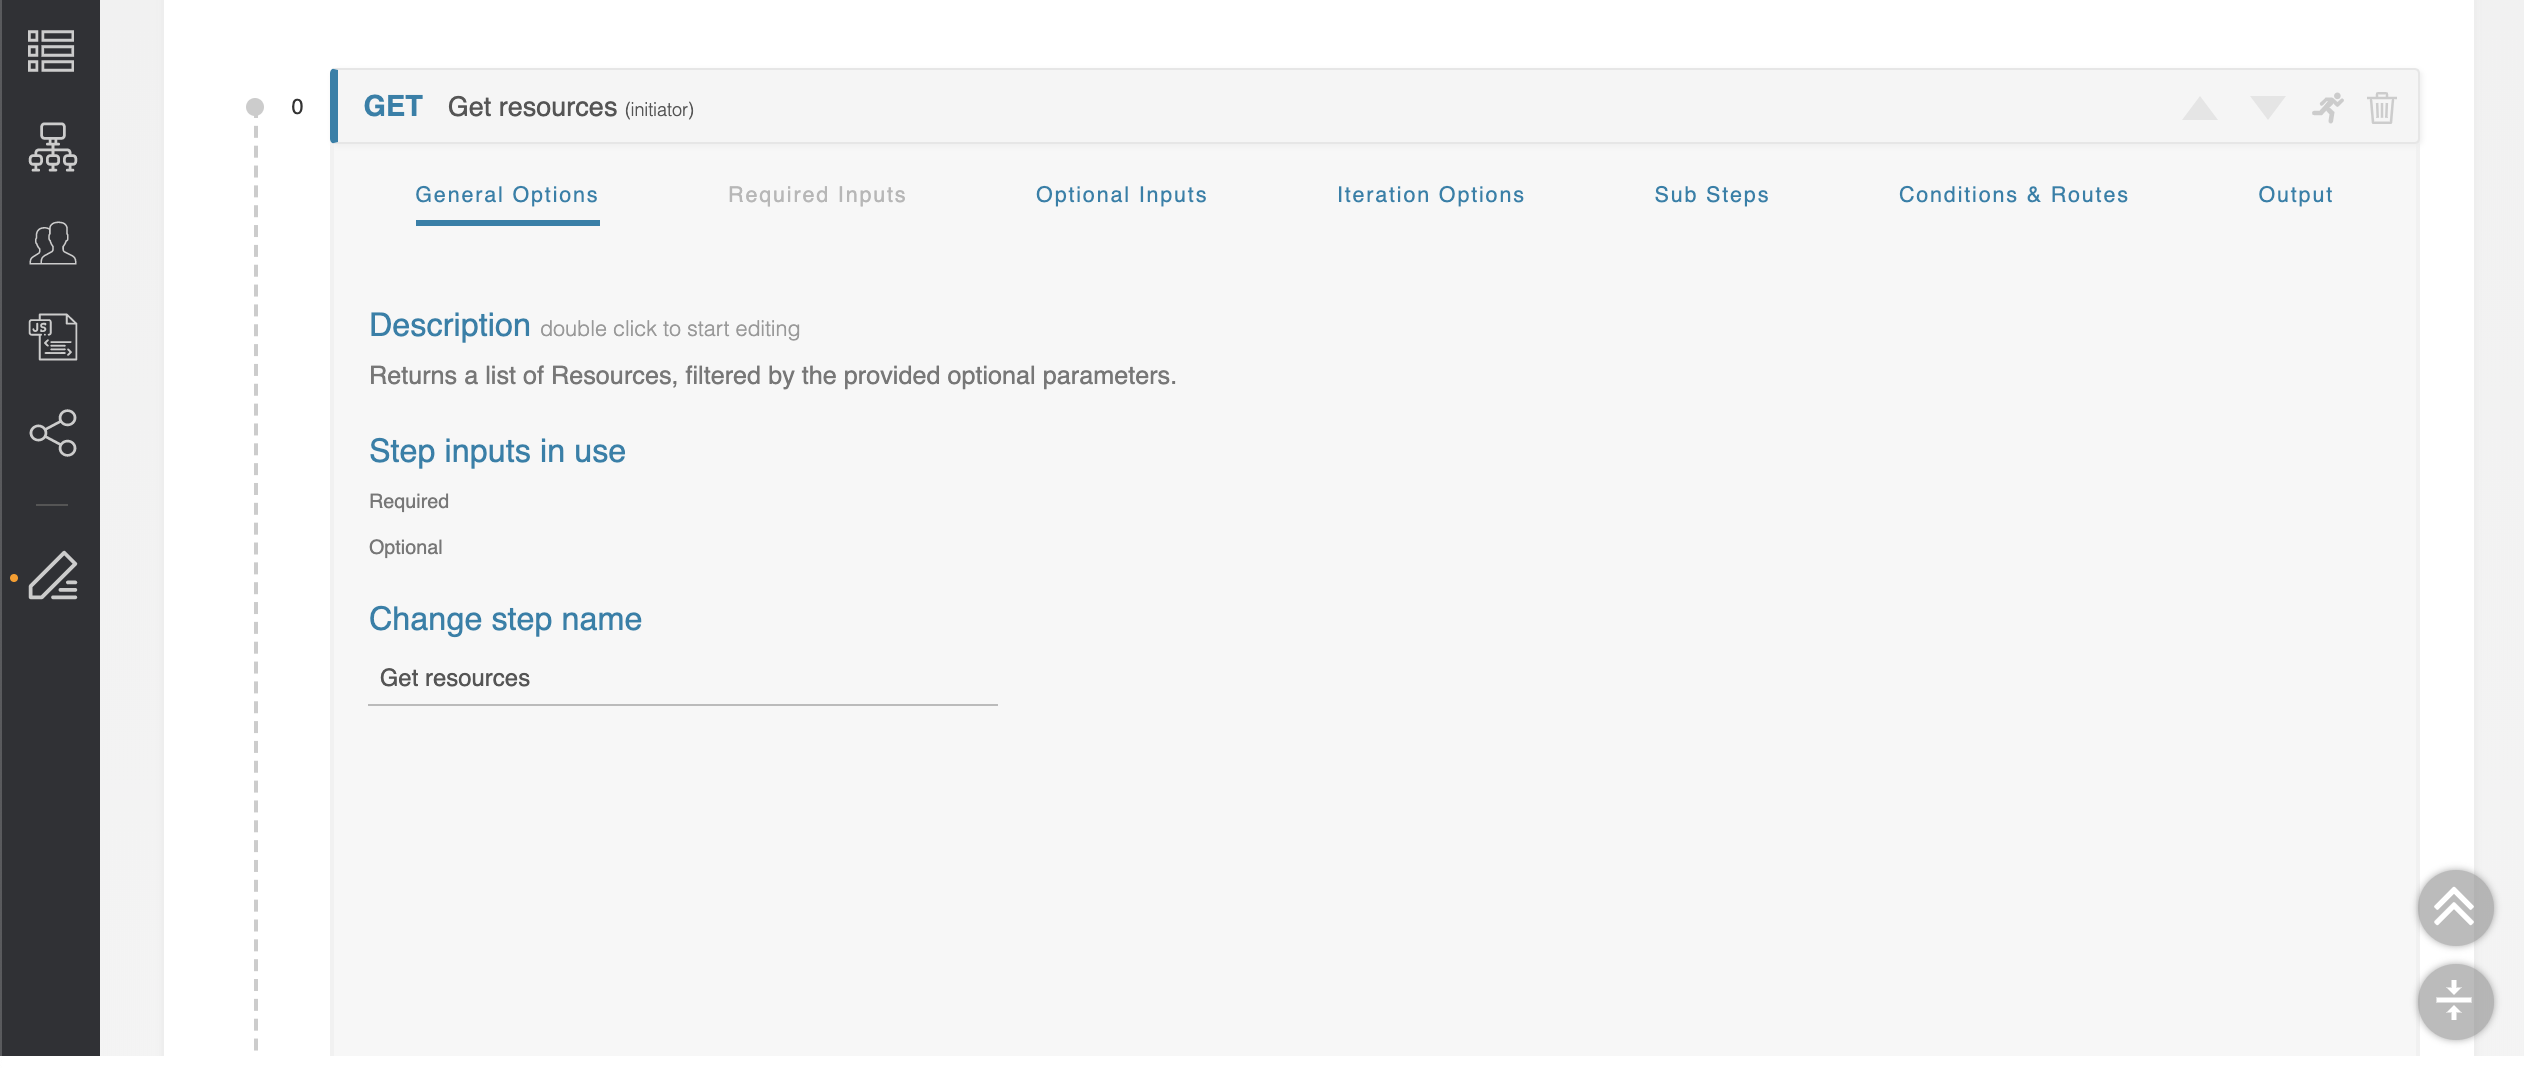
ACP has read in the API specification for this endpoint and will display forms for required and optional parameters, as well as additional step options.
Available tabs for this step include General Options, Optional Inputs, Iteration Options, Sub Steps, Conditions & Routes, and Output. The ‘Get resource’ API call does not have any required parameters, so the "Required Inputs" tab is disabled.
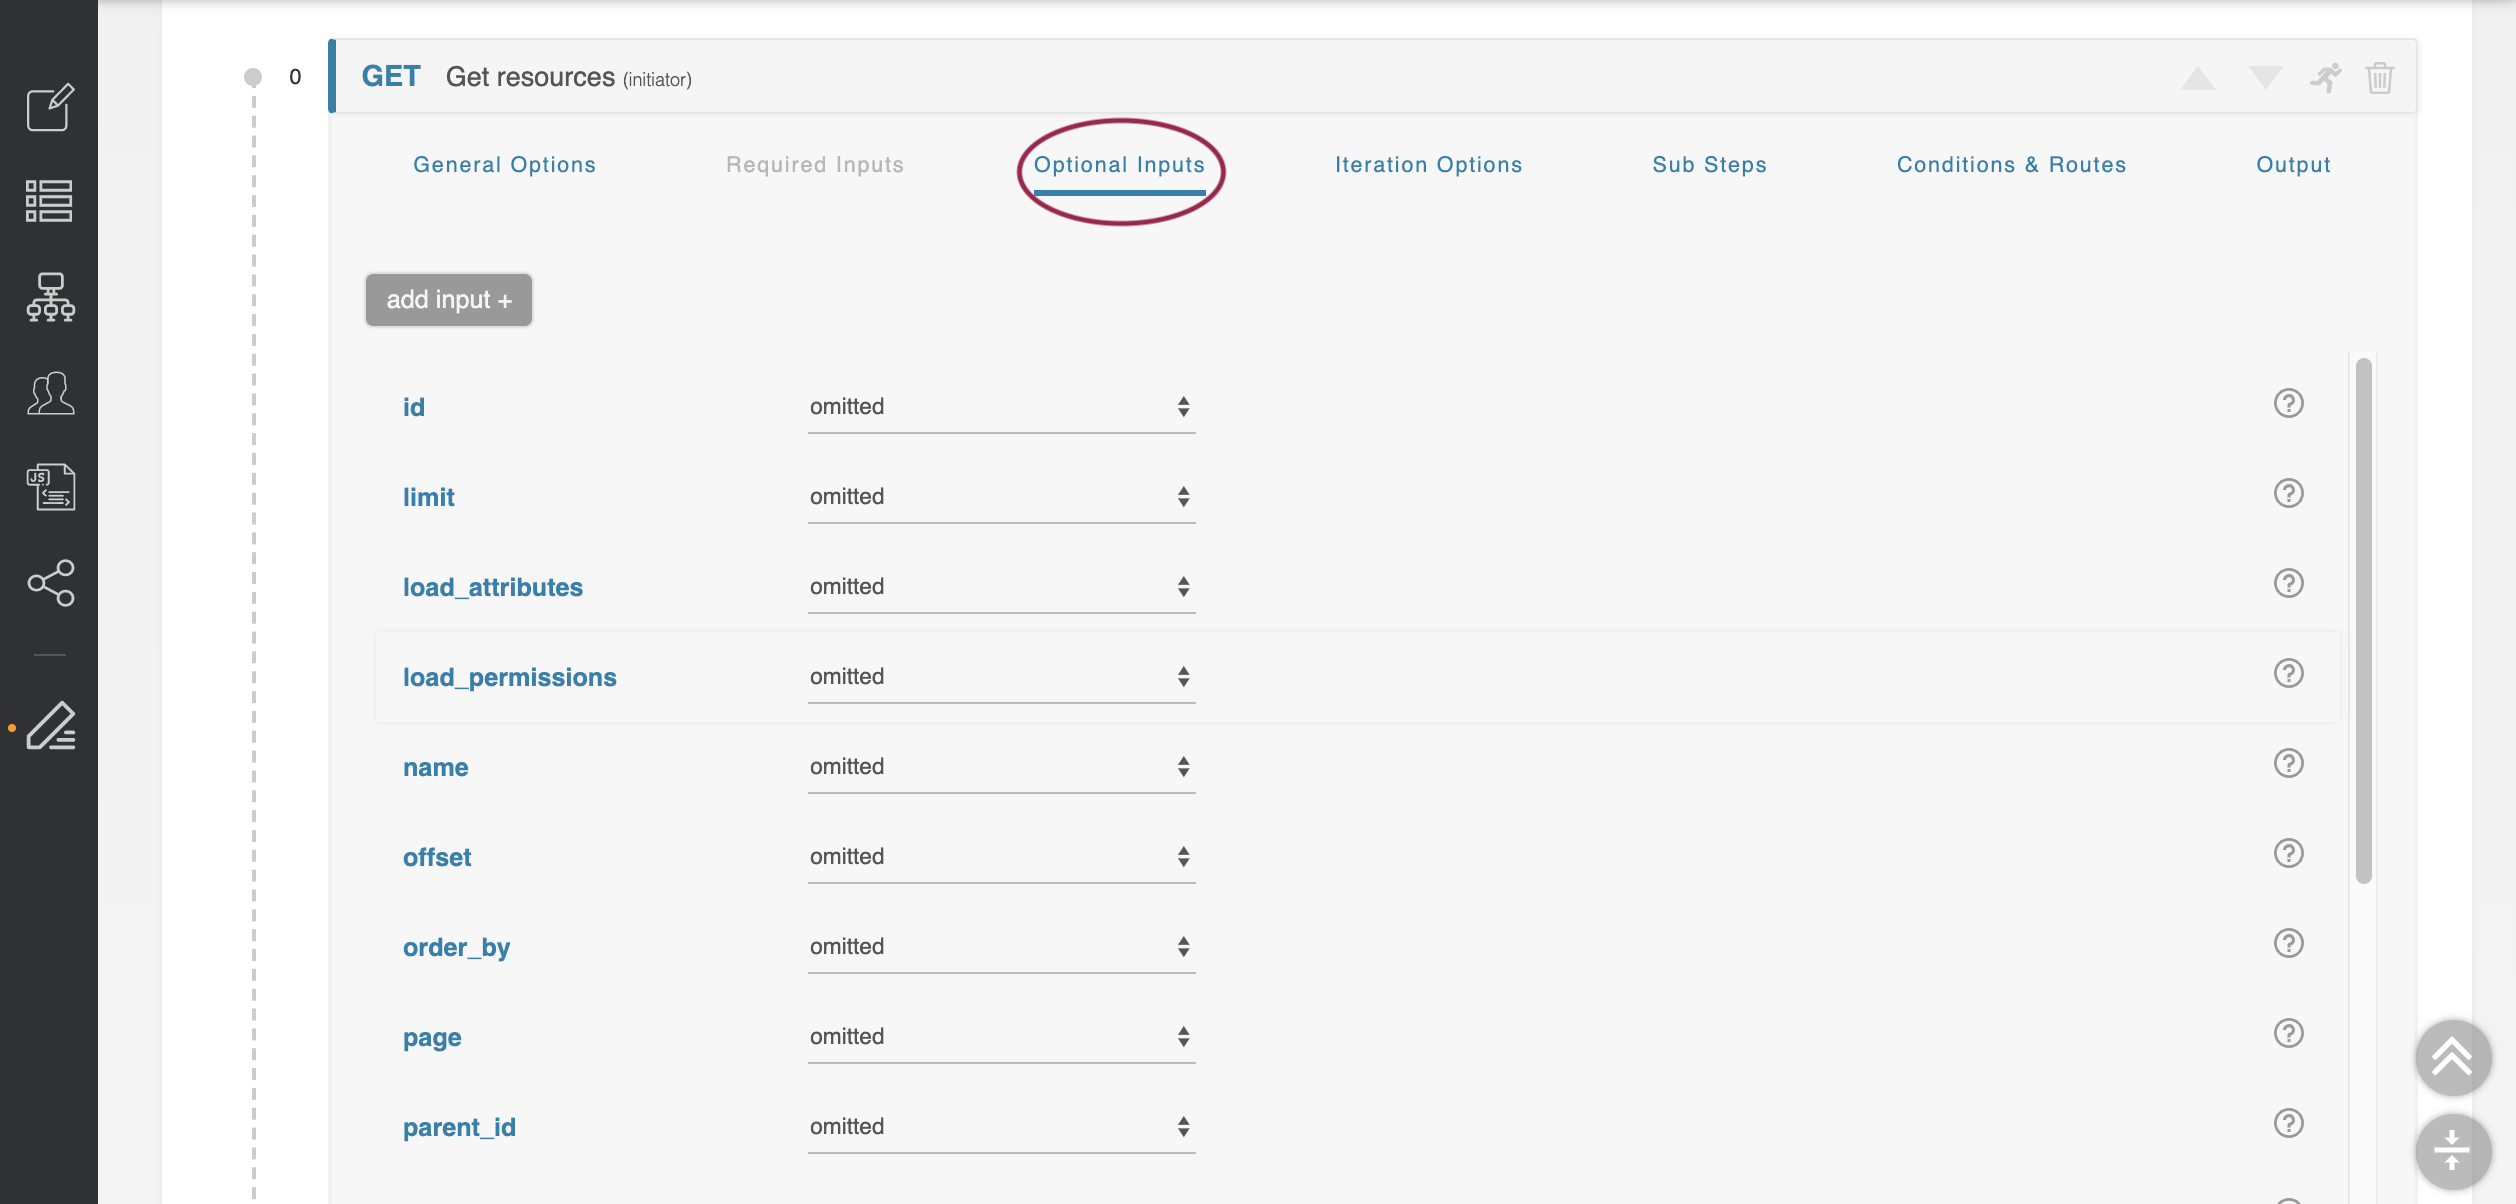
Click on the "Optional Inputs" Tab. none are shown here. All optional parameters are initially set to ‘omitted,’ meaning they will not be included with the API call on this step.
 w
w
To make this step do something a bit more useful, find the ‘Name’ parameter in the list of optional fields. Change its drop-down from ‘omitted’ to ‘default value.’ This means this parameter will be a constant, defined in the text box which appears to the right. Place the text ‘TLR’ in the 'default value' box.
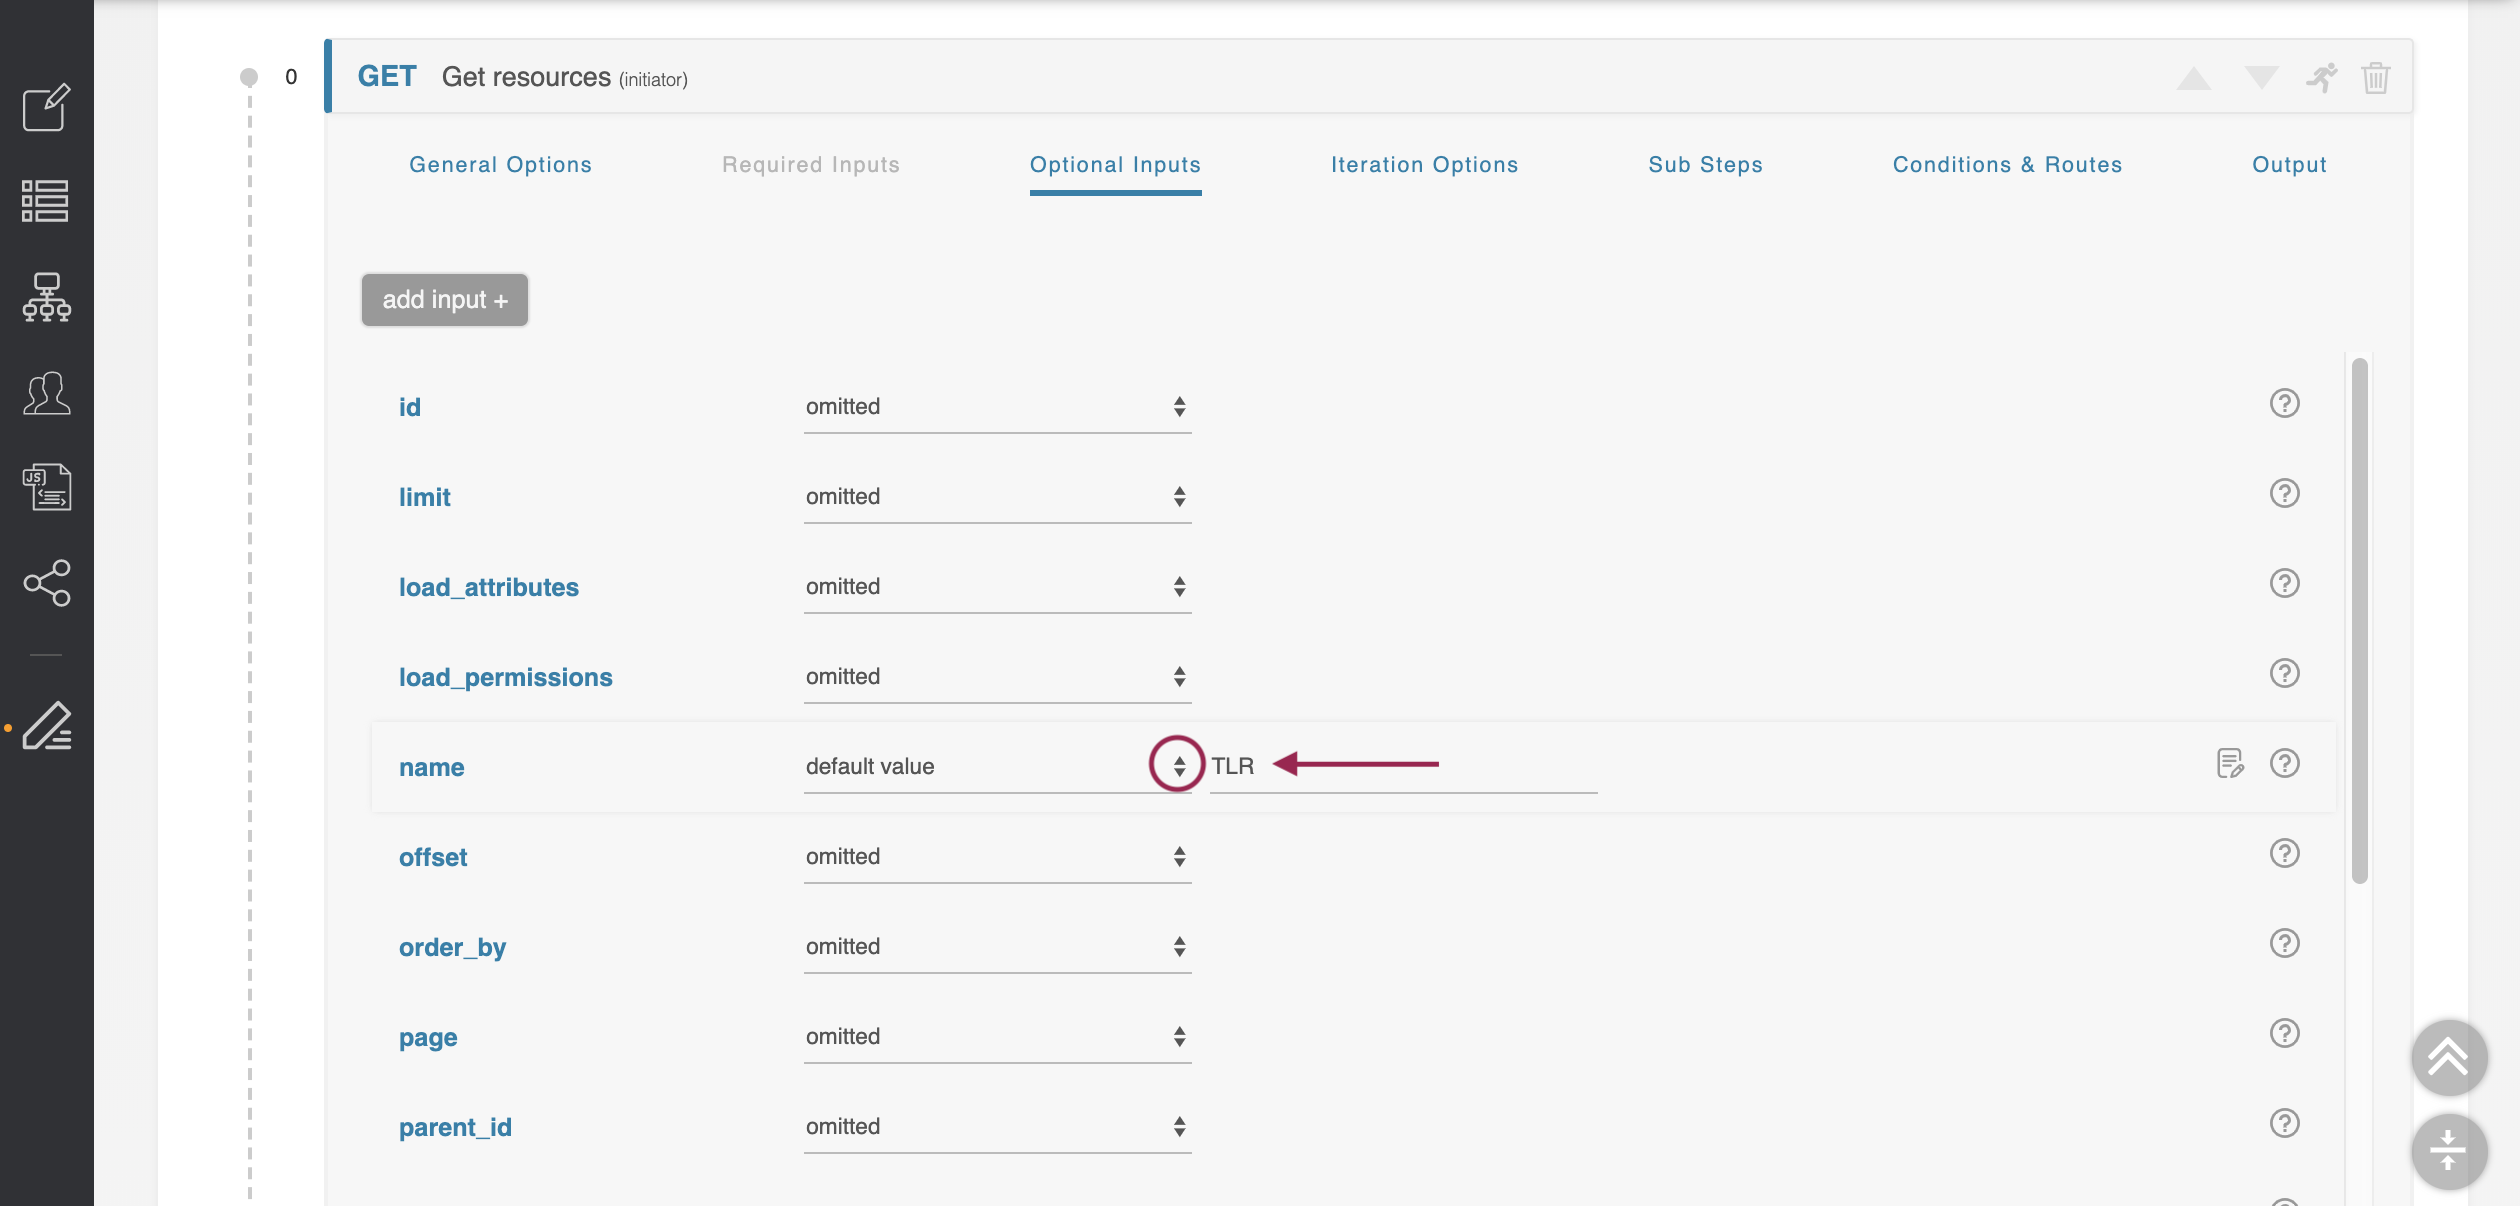
This configures the API call to pull all the information about the resource named ‘TLR,’ which is the root of the ProVision resource hierarchy.
Step 7: Configure Output
While the previous step has fetched the data we need, we need to configure the Output step to return it to us. Click the blue ‘GET RESOURCES’ header to collapse the first step.
Then click the black ‘OUTPUT’ header to expand the output section. Currently, nothing is configured, and when the workflow is run it will return nothing.
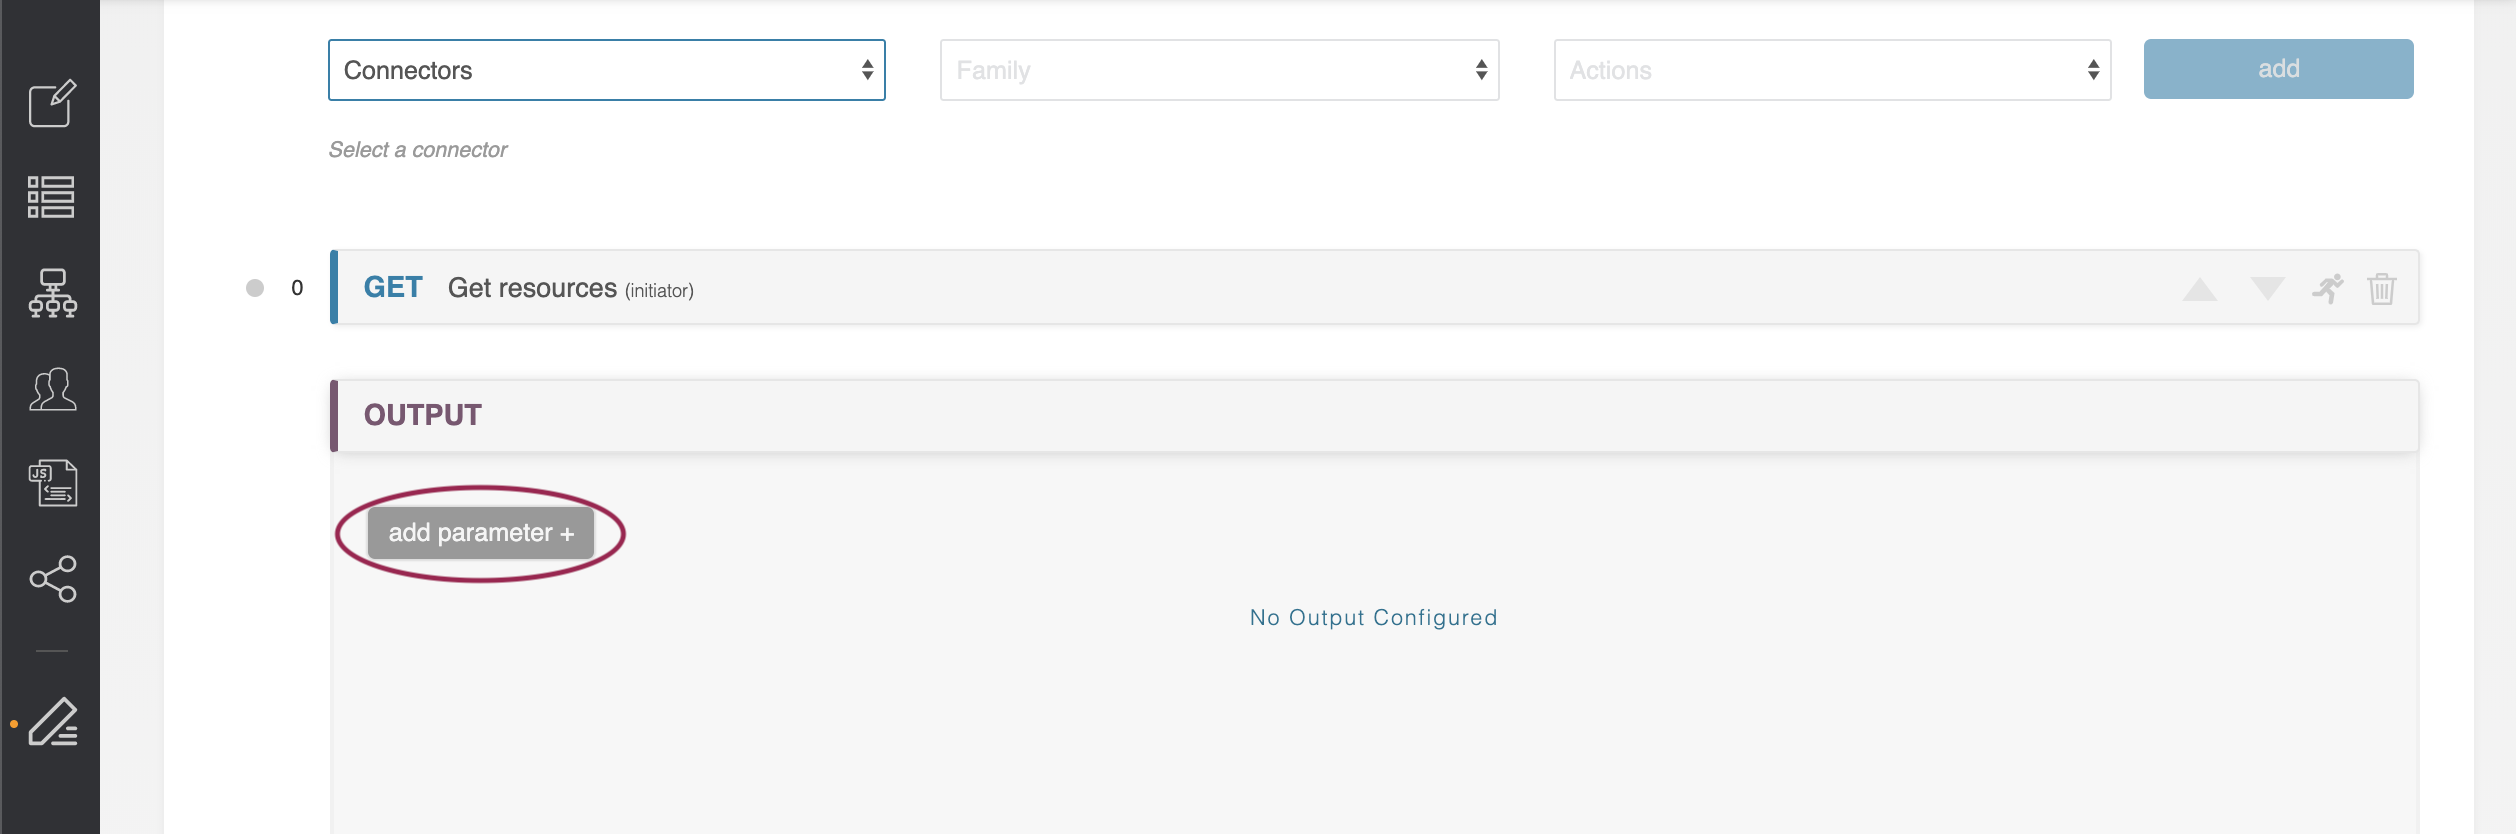
Click ‘Add Parameter’ to add a new field to the output of this Workflow. Output parameter options will appear.
Change the name from ‘output-param-1’ to ‘id’, and then select ‘Workflow Link’ from the adjacent drop-down. The form expands.
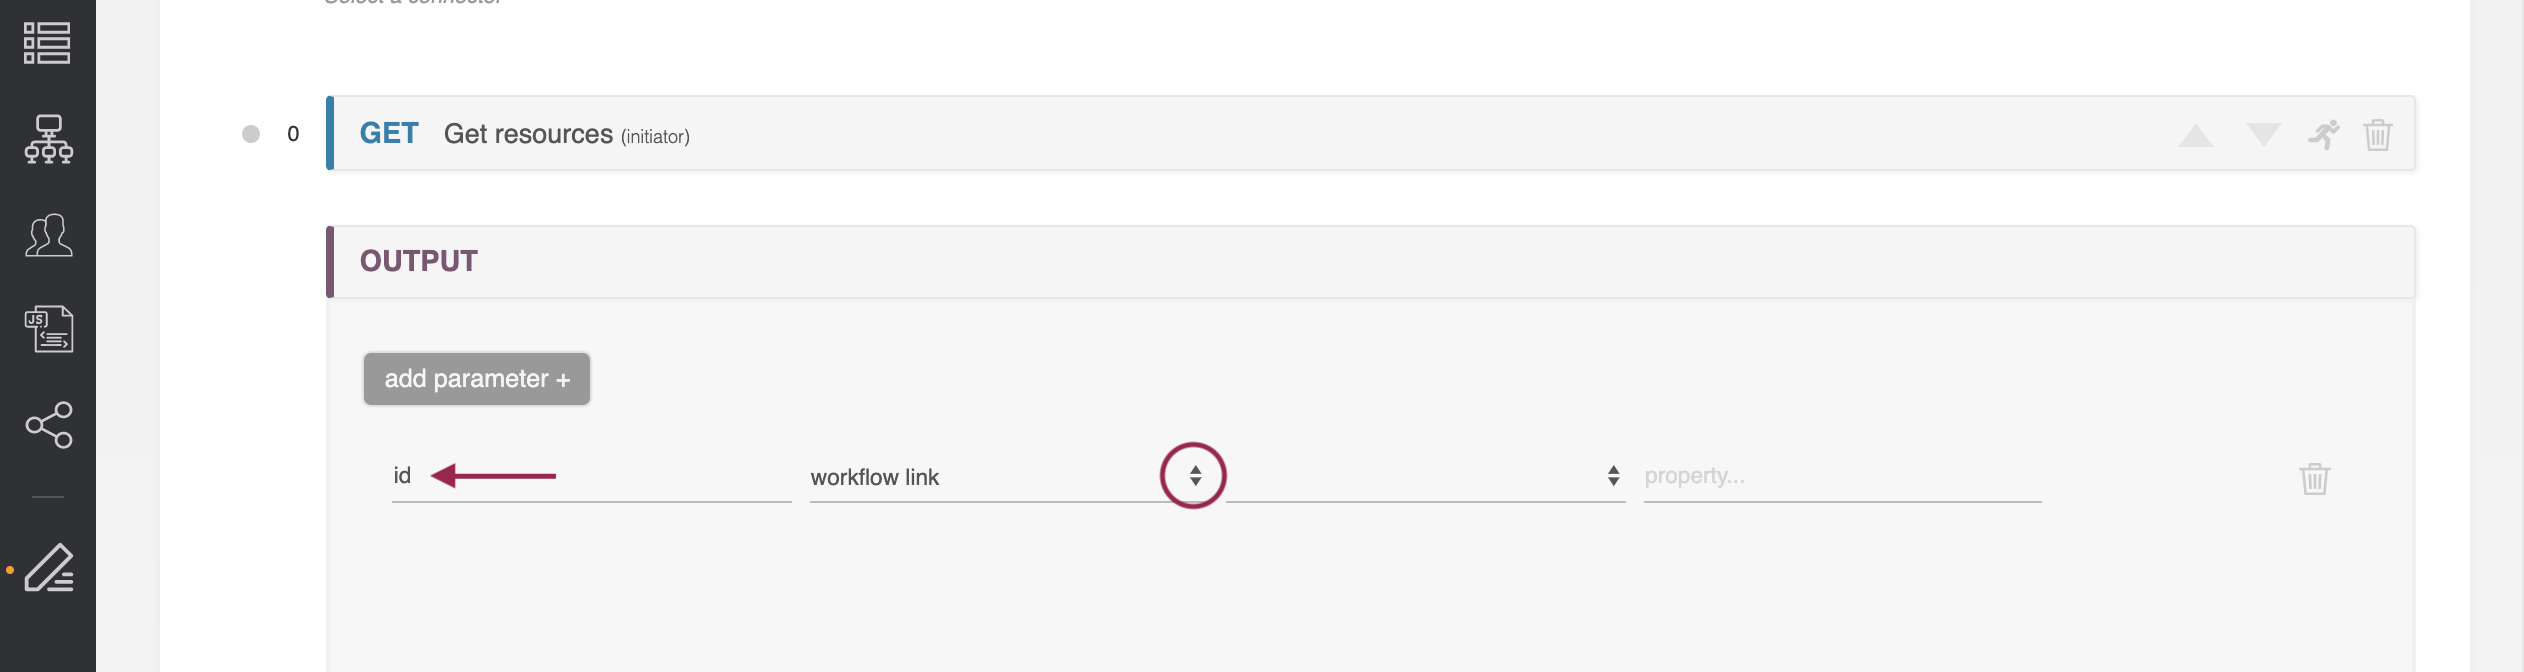
In ‘Workflow Link’ mode the third box contains all the steps of the workflow. You can select parameters from any call to return in the output, either in whole or in part.
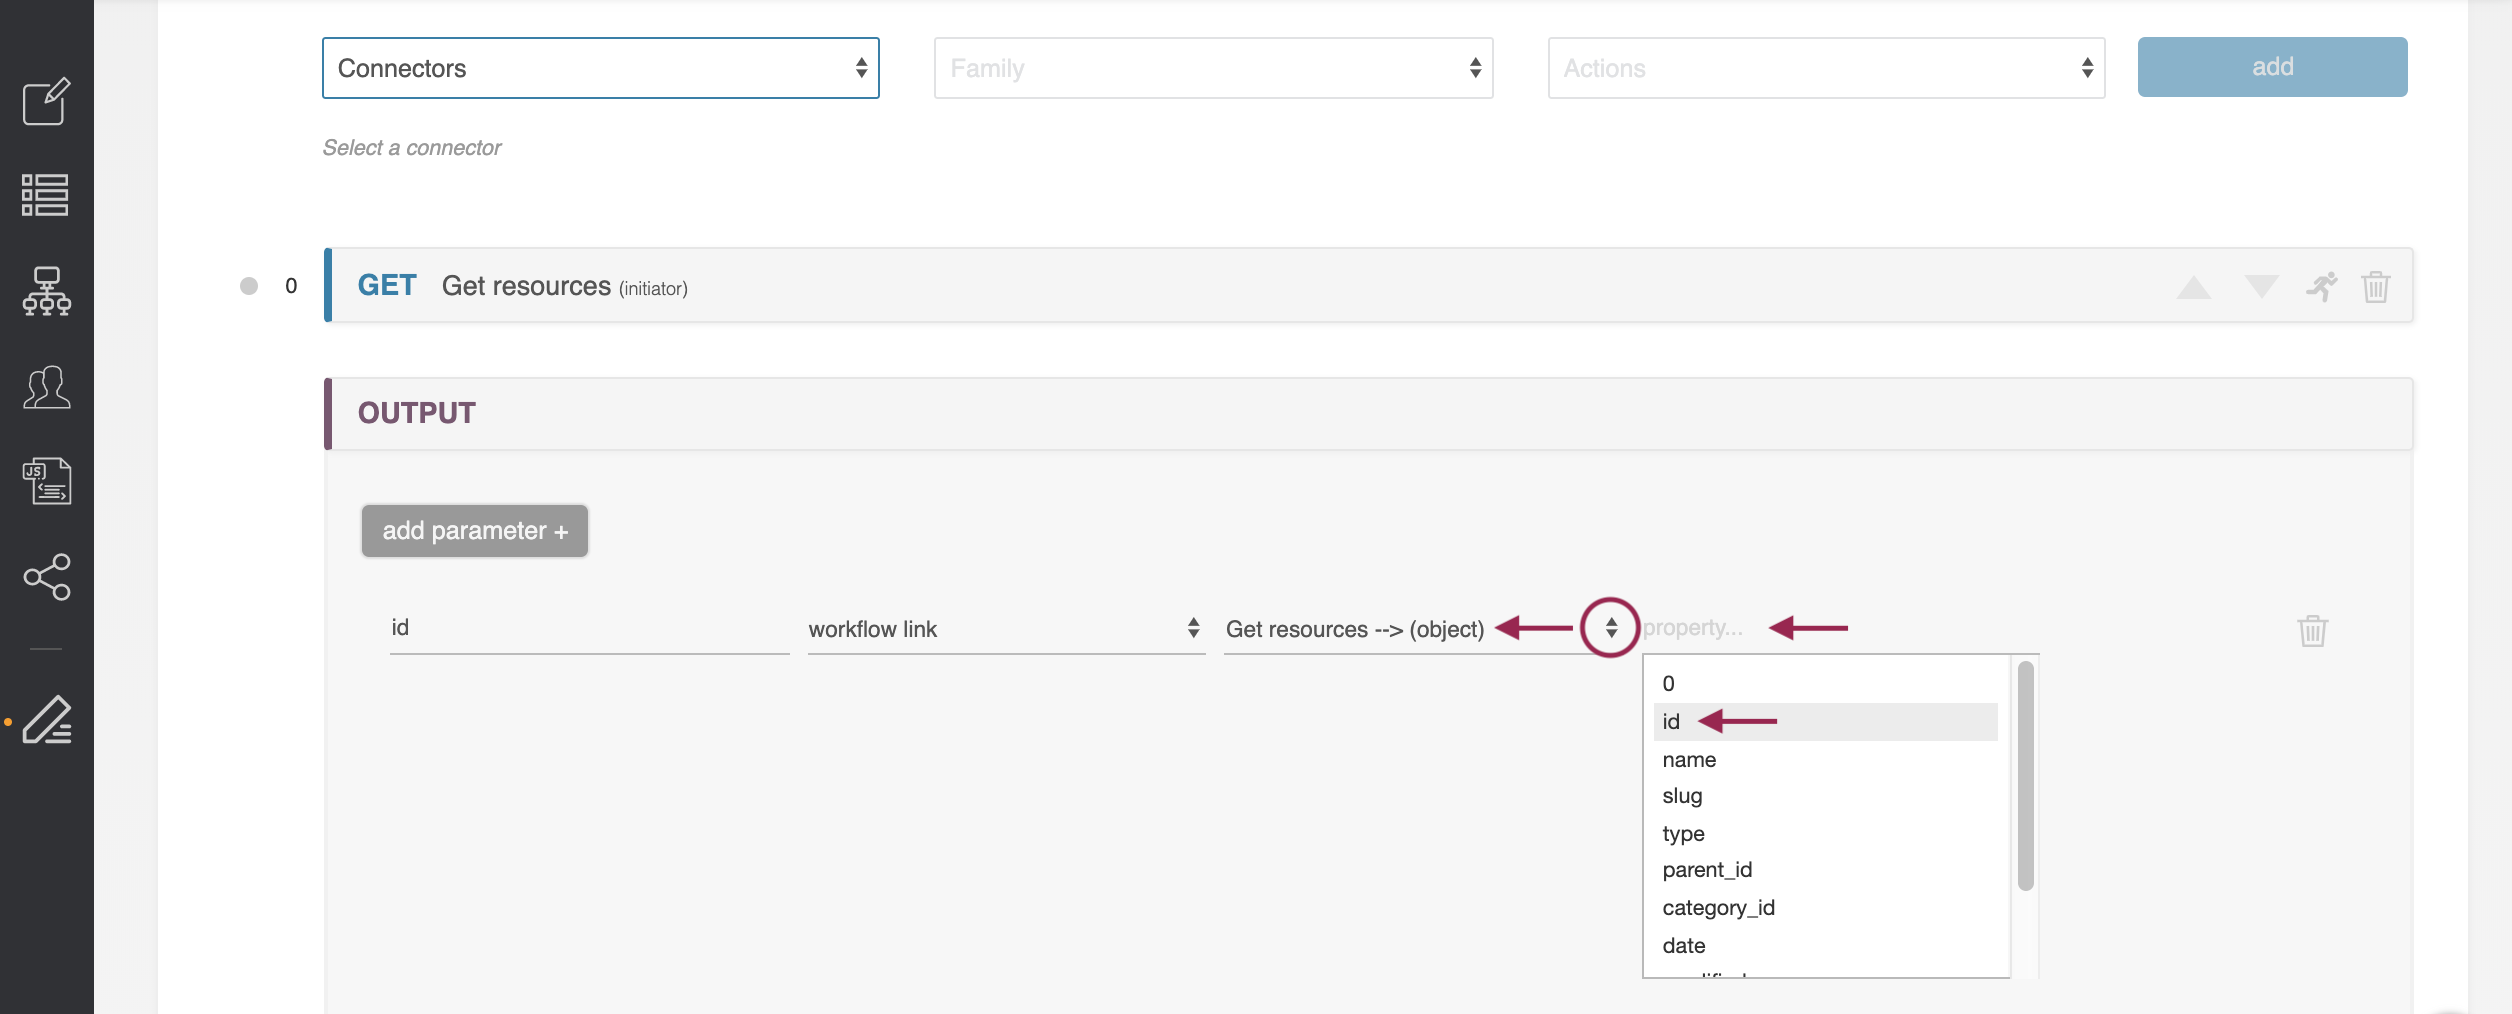
Select ‘Get Resources → (object).’ Clicking on the fourth and last box will bring up a listing of all the parameters returned by the Get Resources call.
Choose ‘id.’ This will return a single field, which is the id of the resource named ‘TLR.’
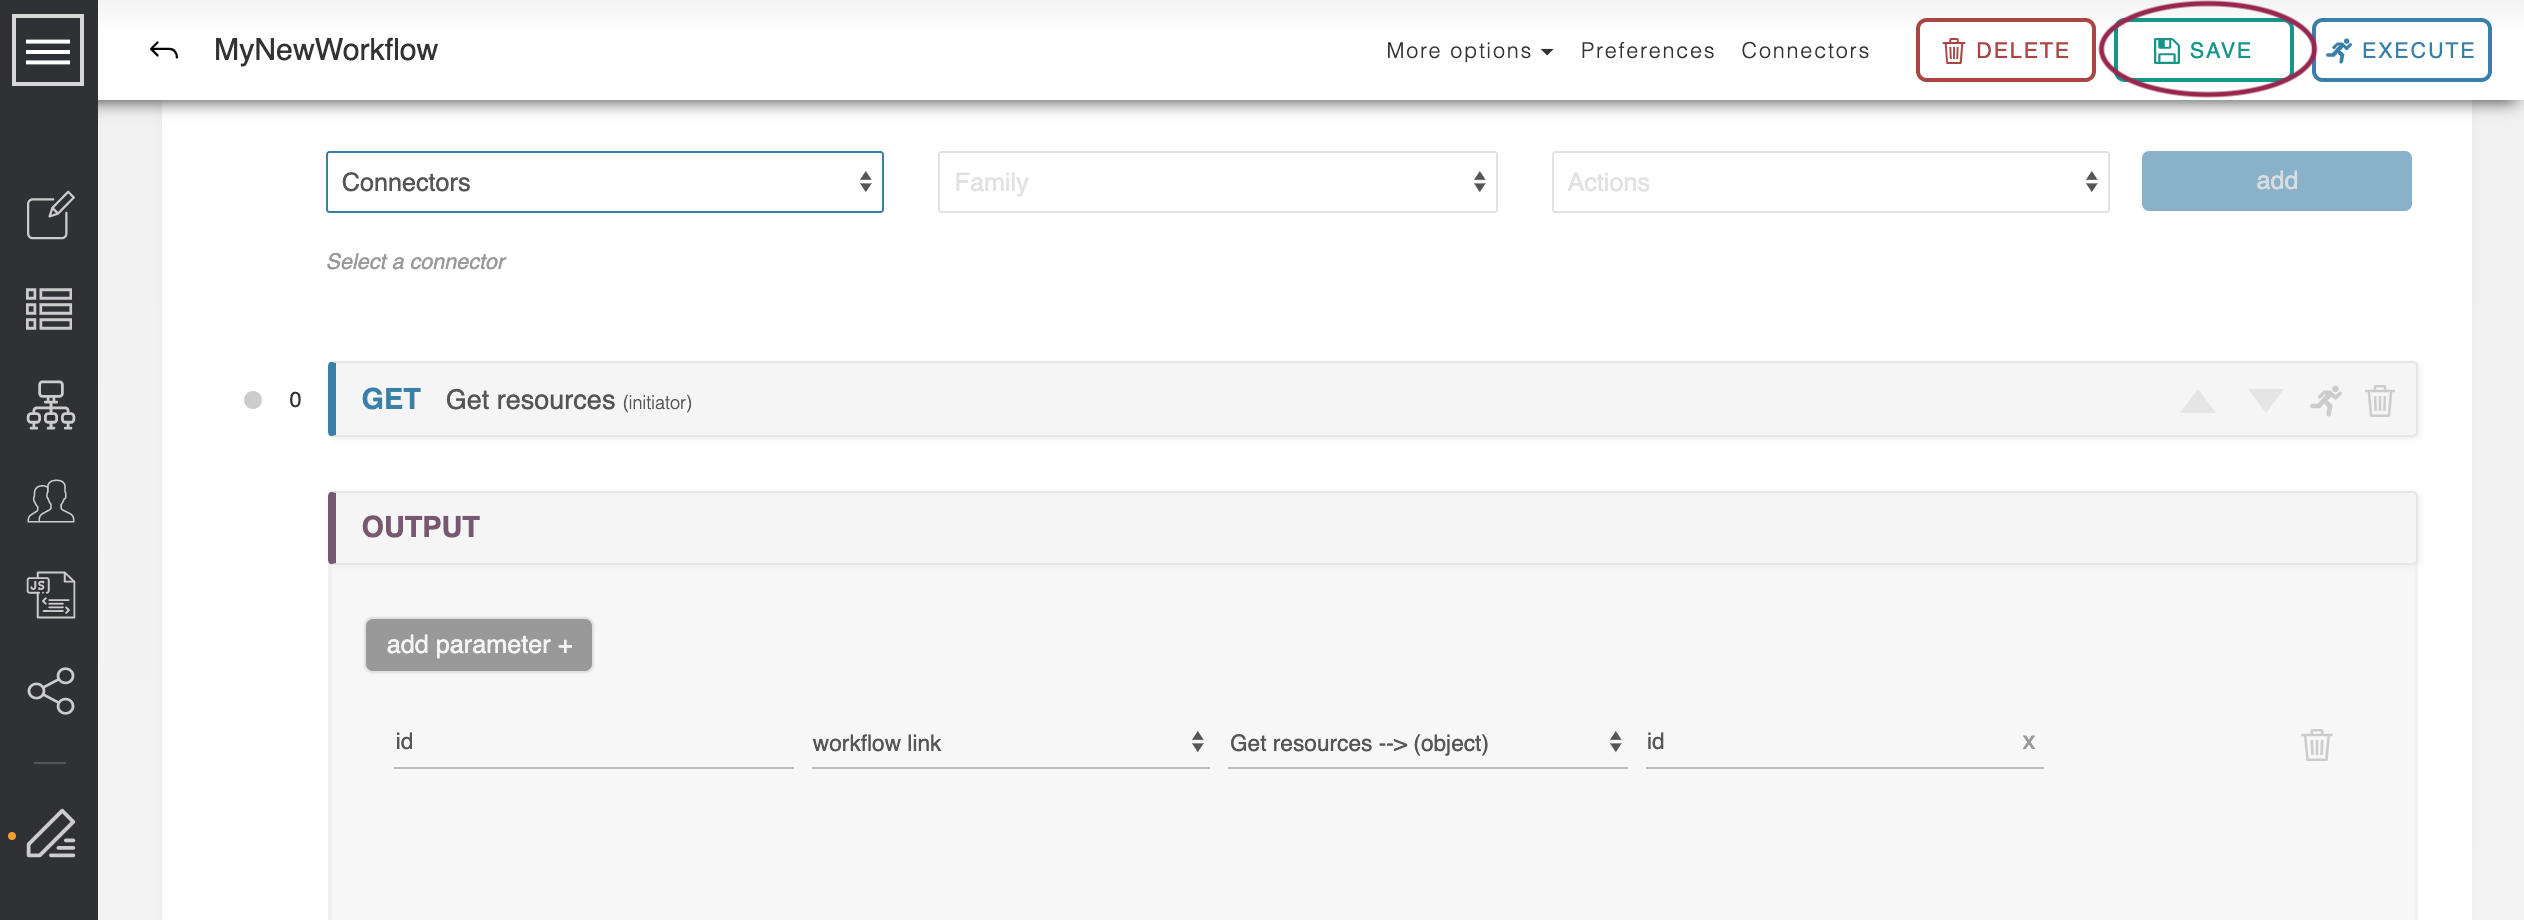
Step 8: Save Changes
Hit the ‘Save’ button in the upper-right to save the changes made to any steps or the output.
Step 9: Execute Workflow
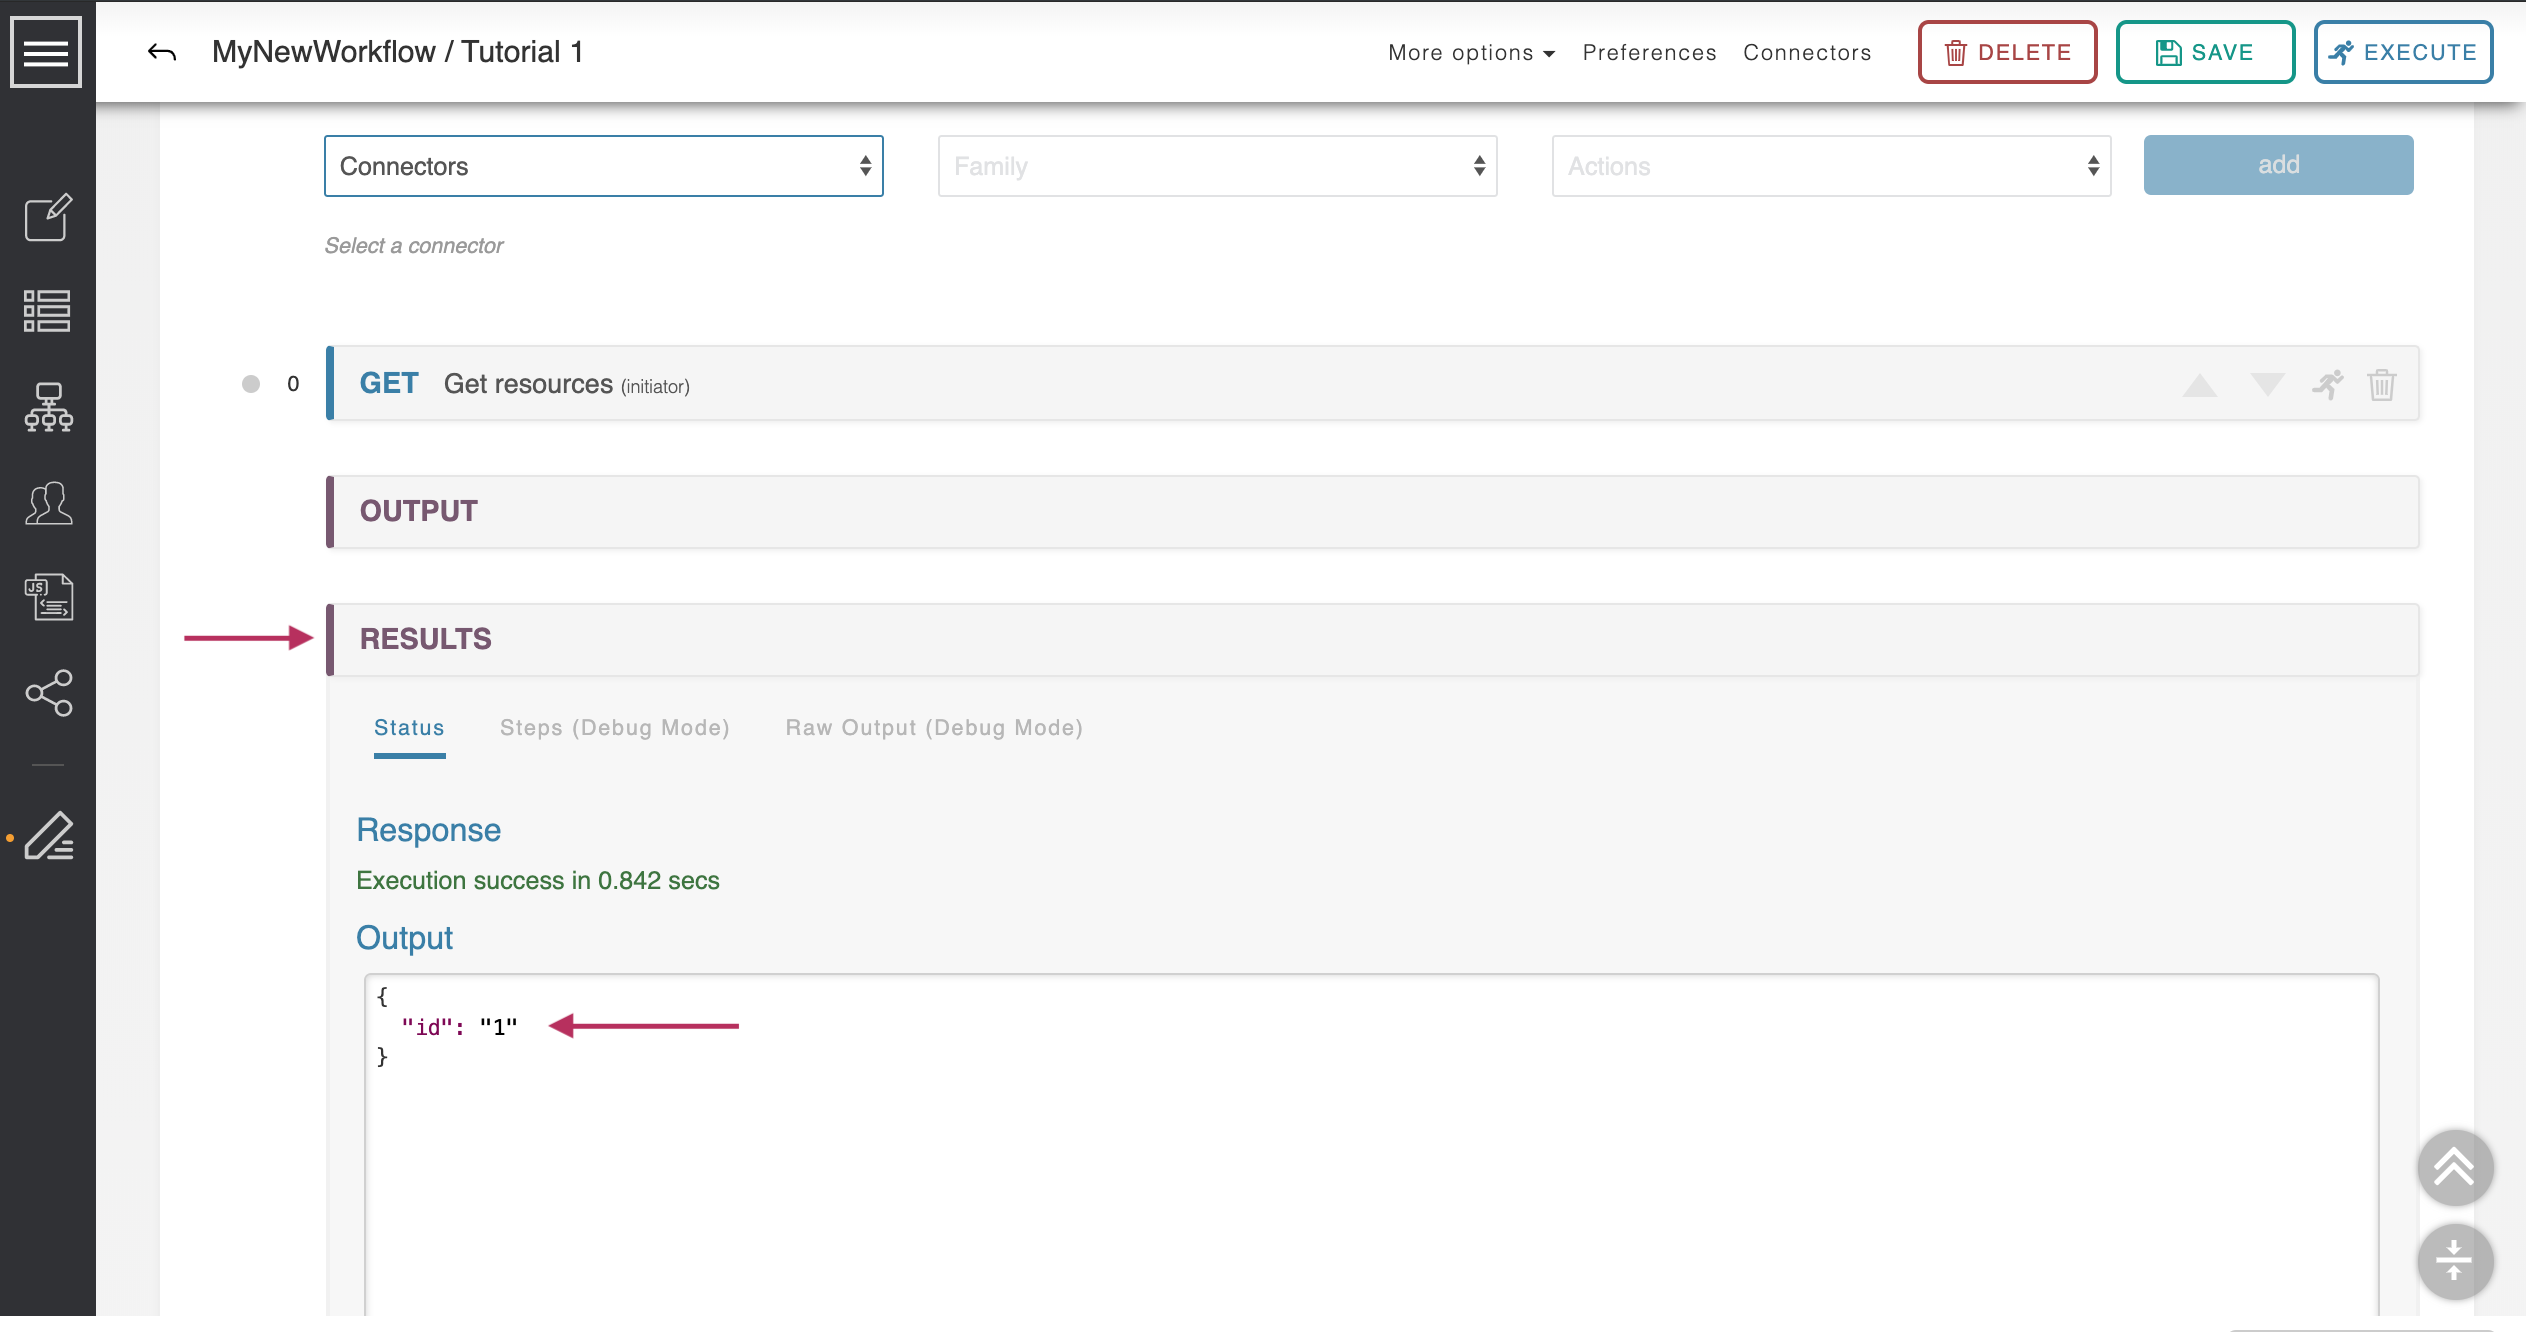
Step 9: Hit the ‘Execute’ button next to ‘Save.’
After the processing timer finishes, a Results section appears with the response object: { "id": "1" }. We have queried the API for a resource named ‘TLR’ and have found that its resource id# is 1.
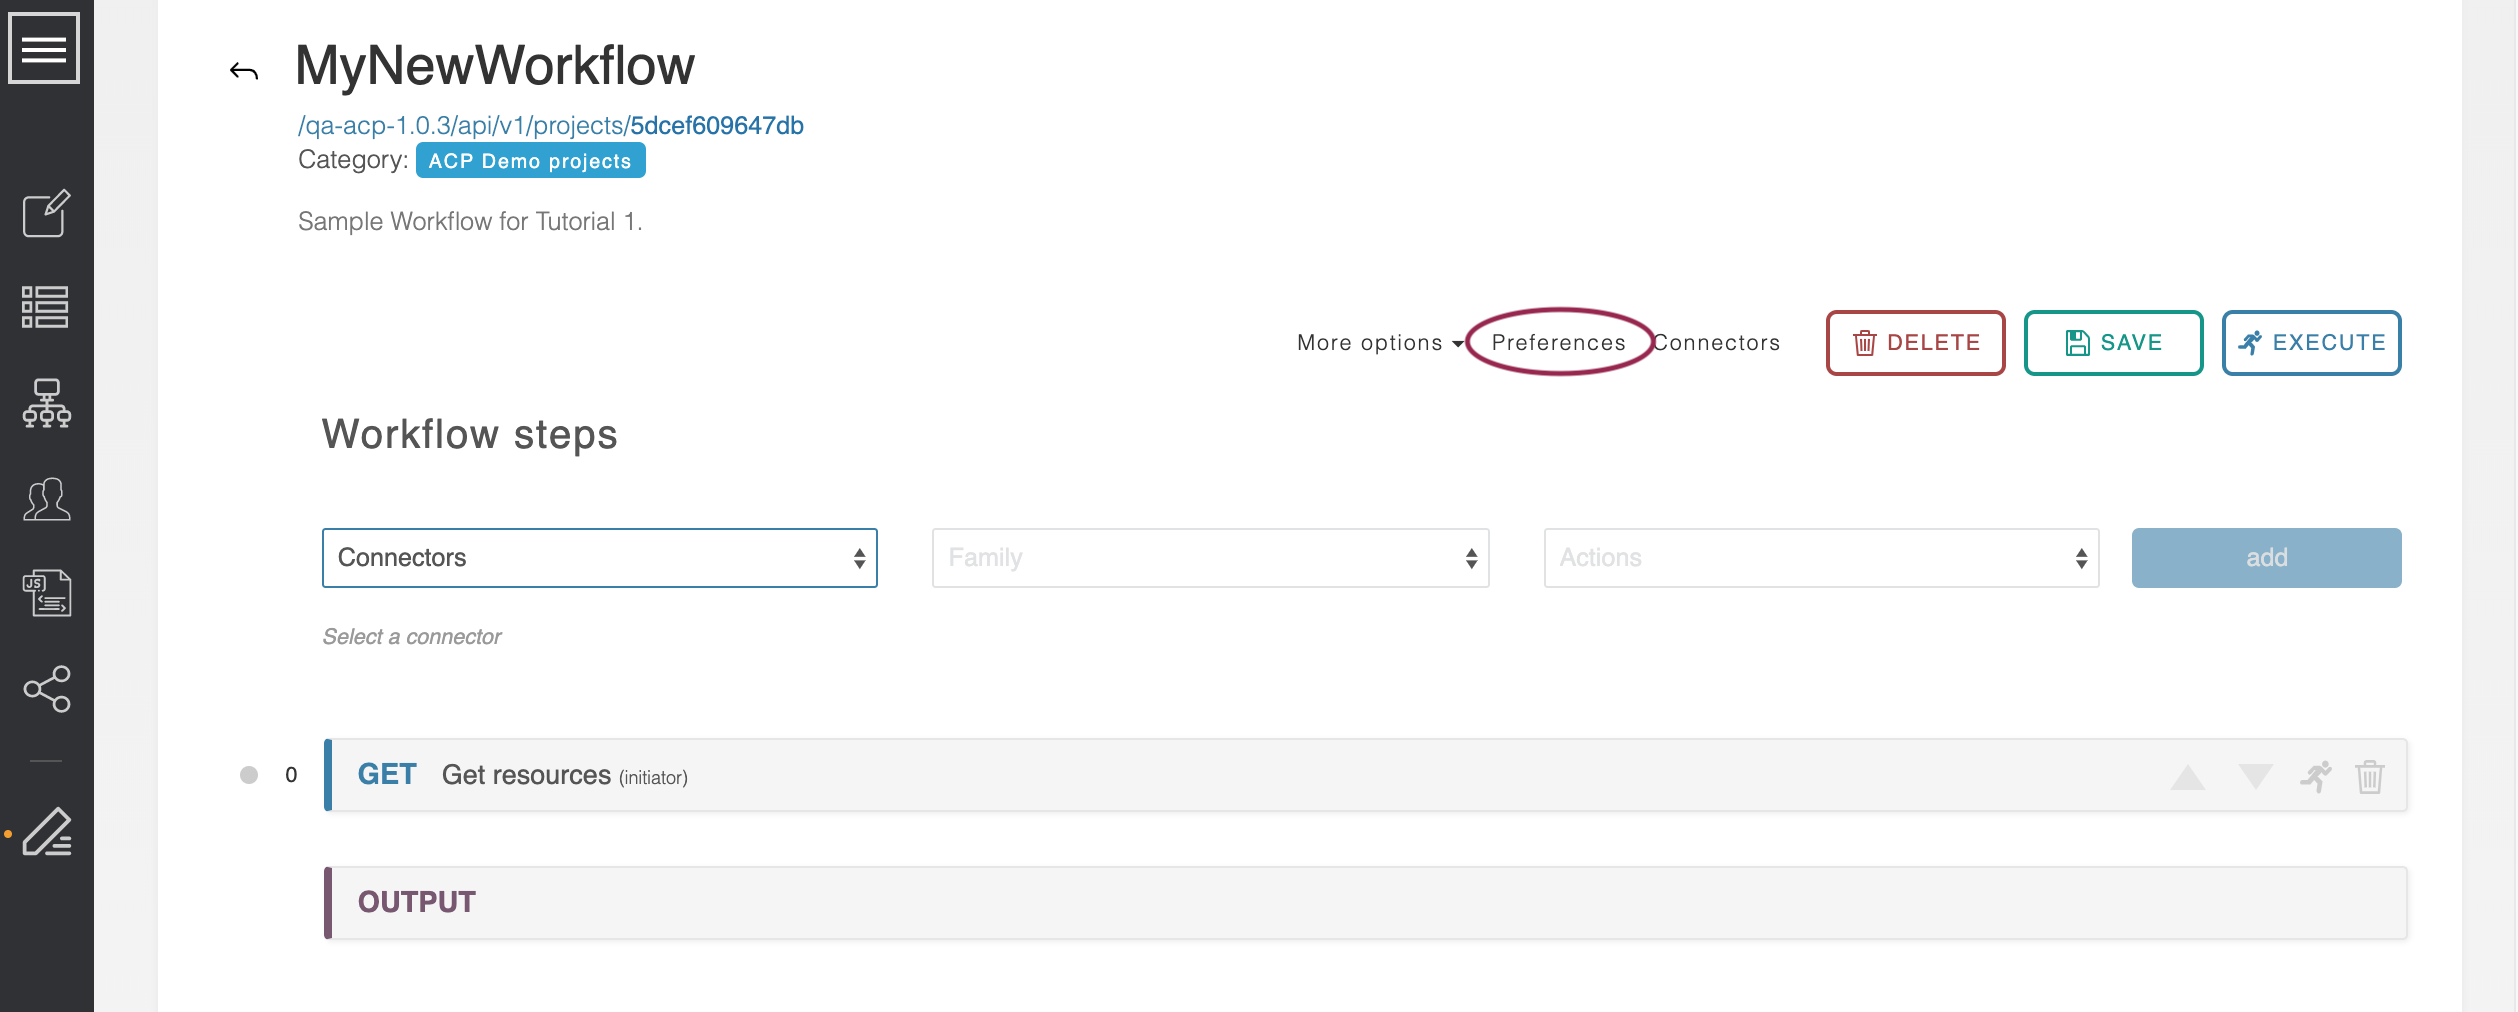
Step 10 (Optional): Review / Debug Workflow
: For a more detailed look at what is going on, click on the ‘Preferences’ button between the ‘More Options’ and ‘Connectors’ links at the top of the screen.
Turn ‘Debug Mode’ on. , then Save the Workflow and re-execute it.
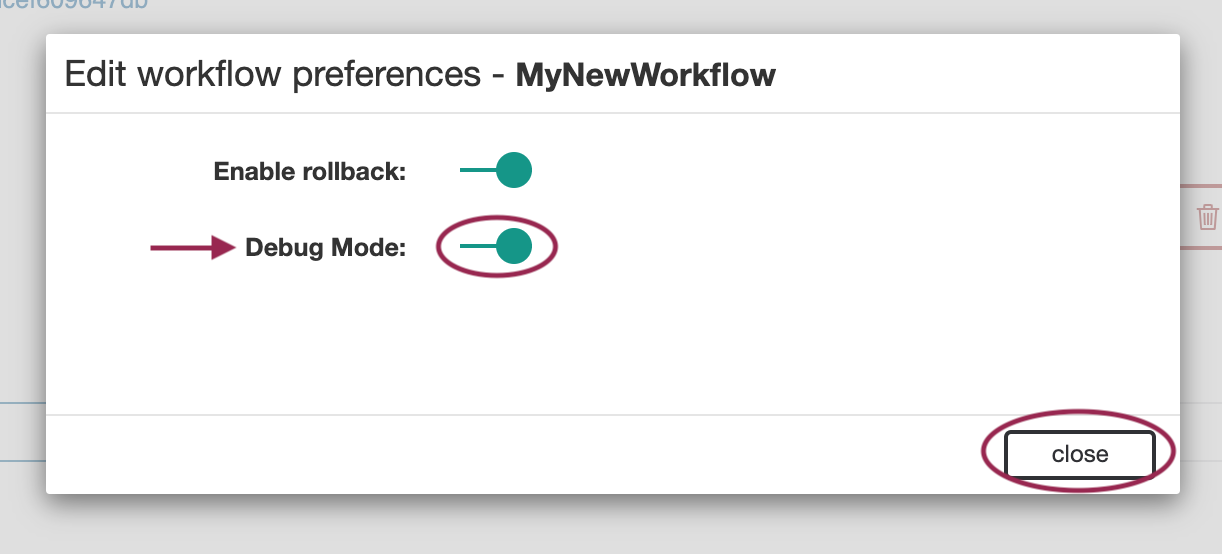
This time the Results section expands into detailed reporting of what parameters were sent at each step, what data came back, and what routing path was taken.
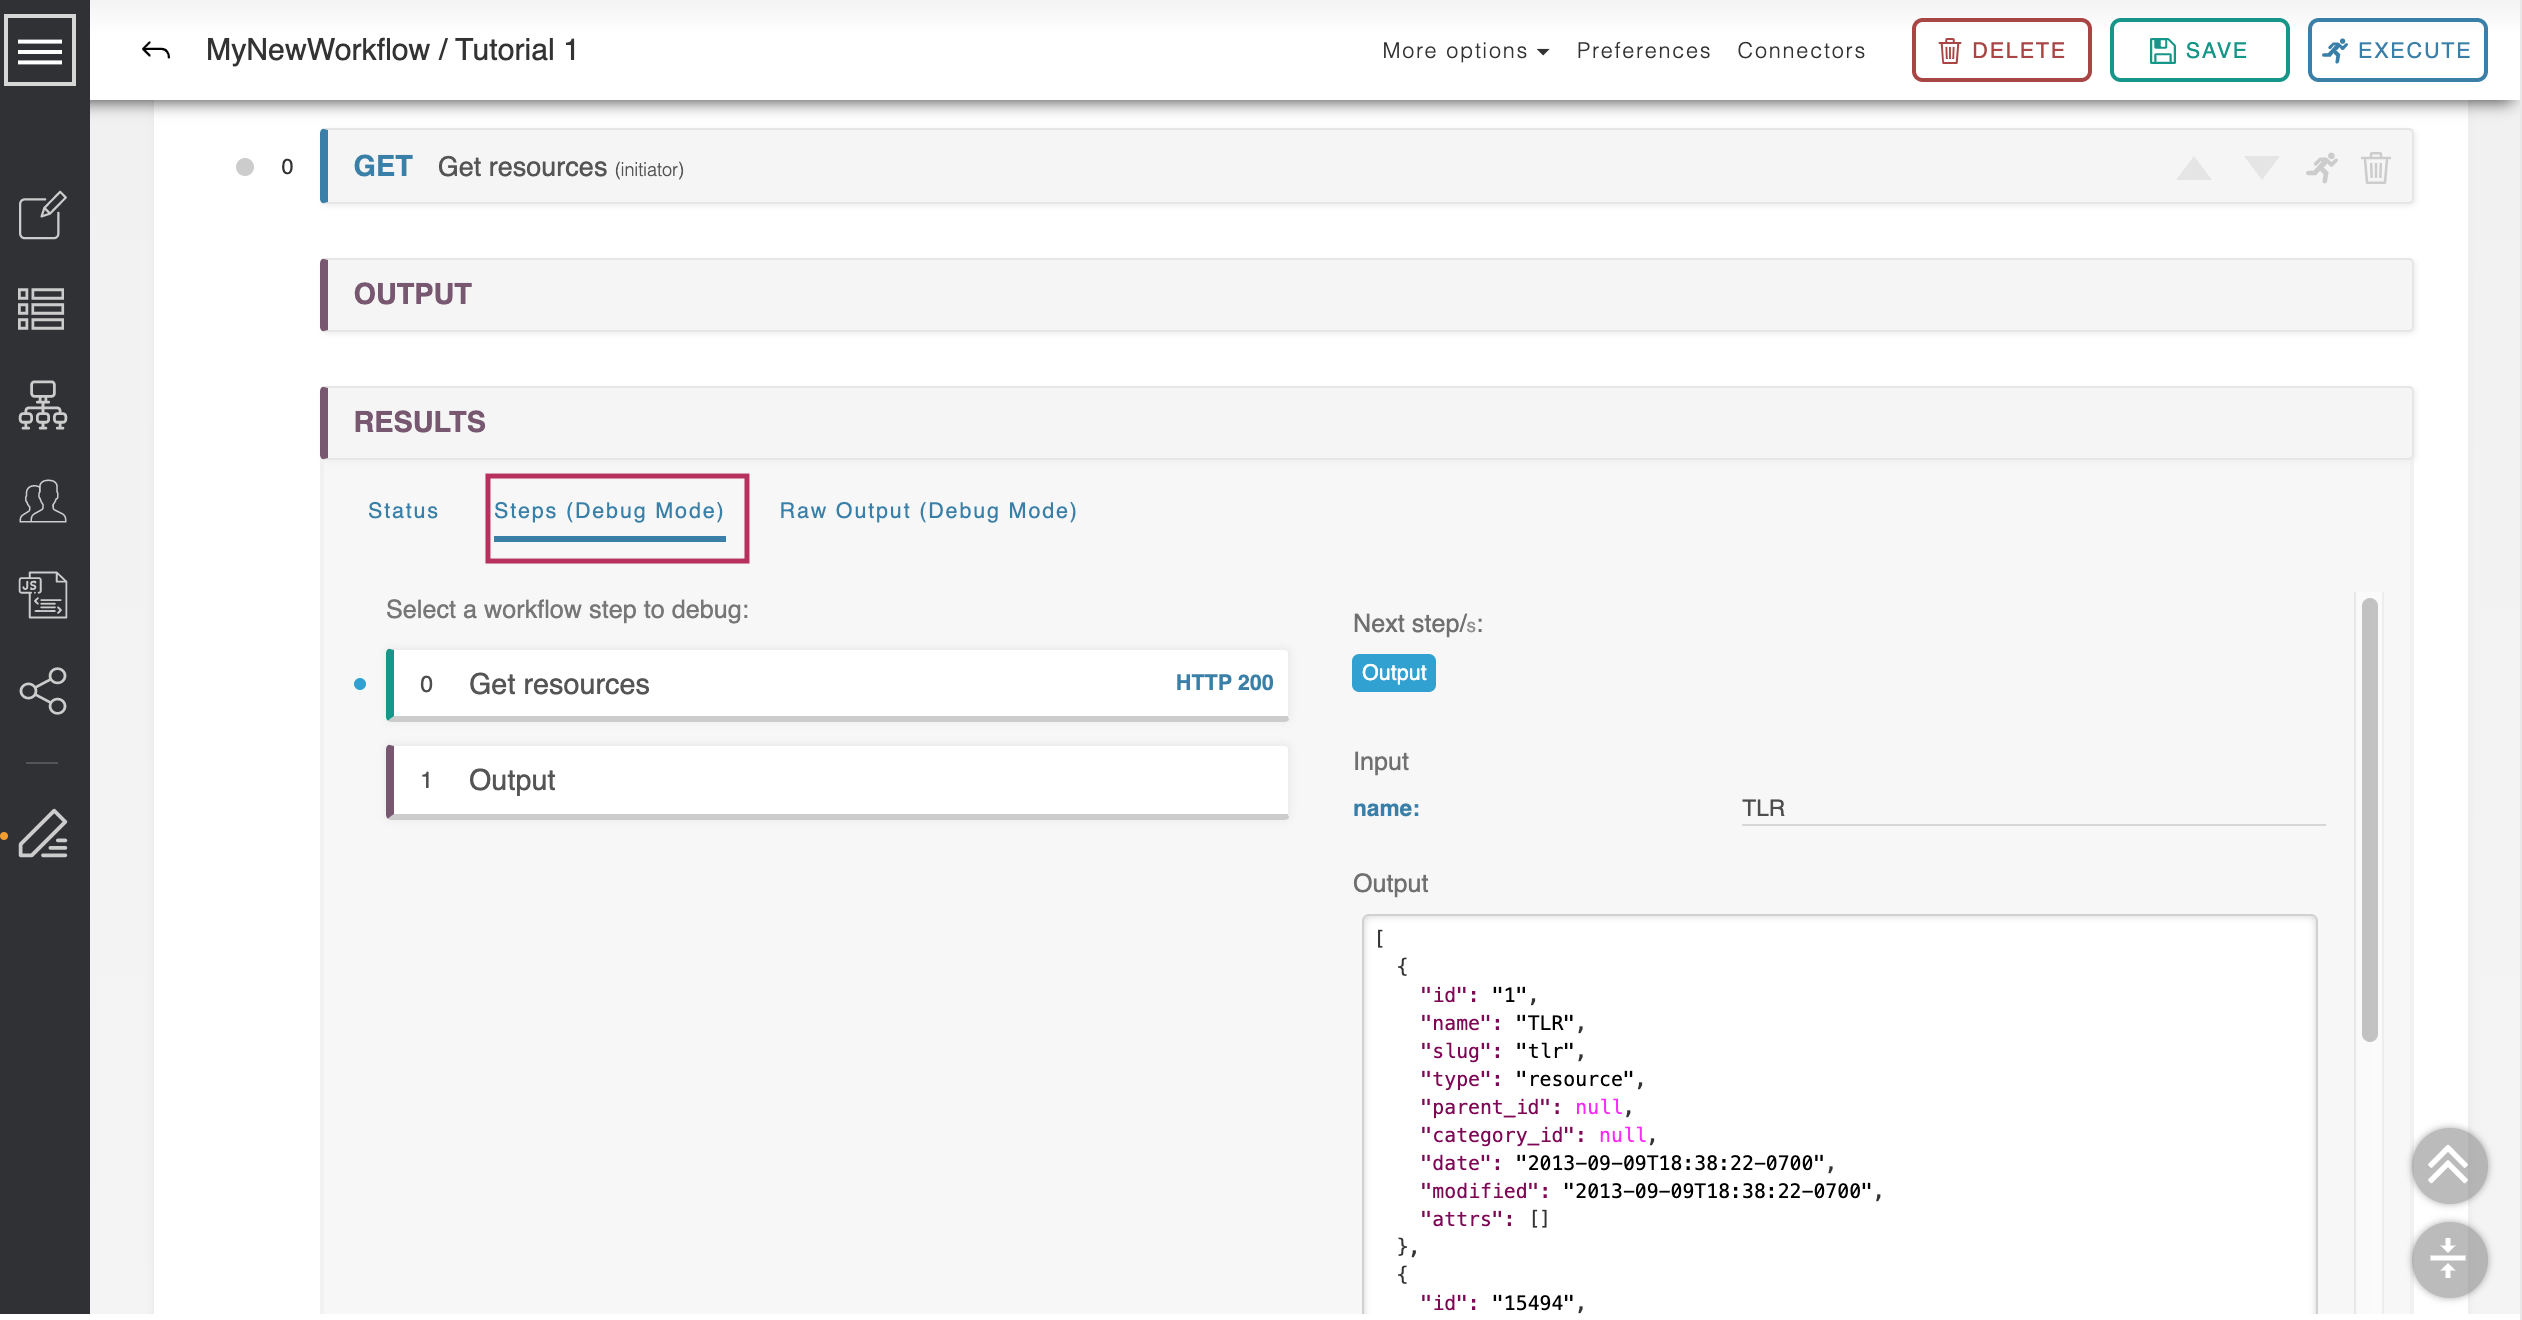
Steps Tab
While Debug Mode is enabled, the results tab "Steps (Debug Mode)" will be available after executing a Workflow.
Each step of the workflow is listed on the left side of the results panel; clicking on a step will detail the inputs and outputs of that step. This will also show you what steps which step(s) fail.
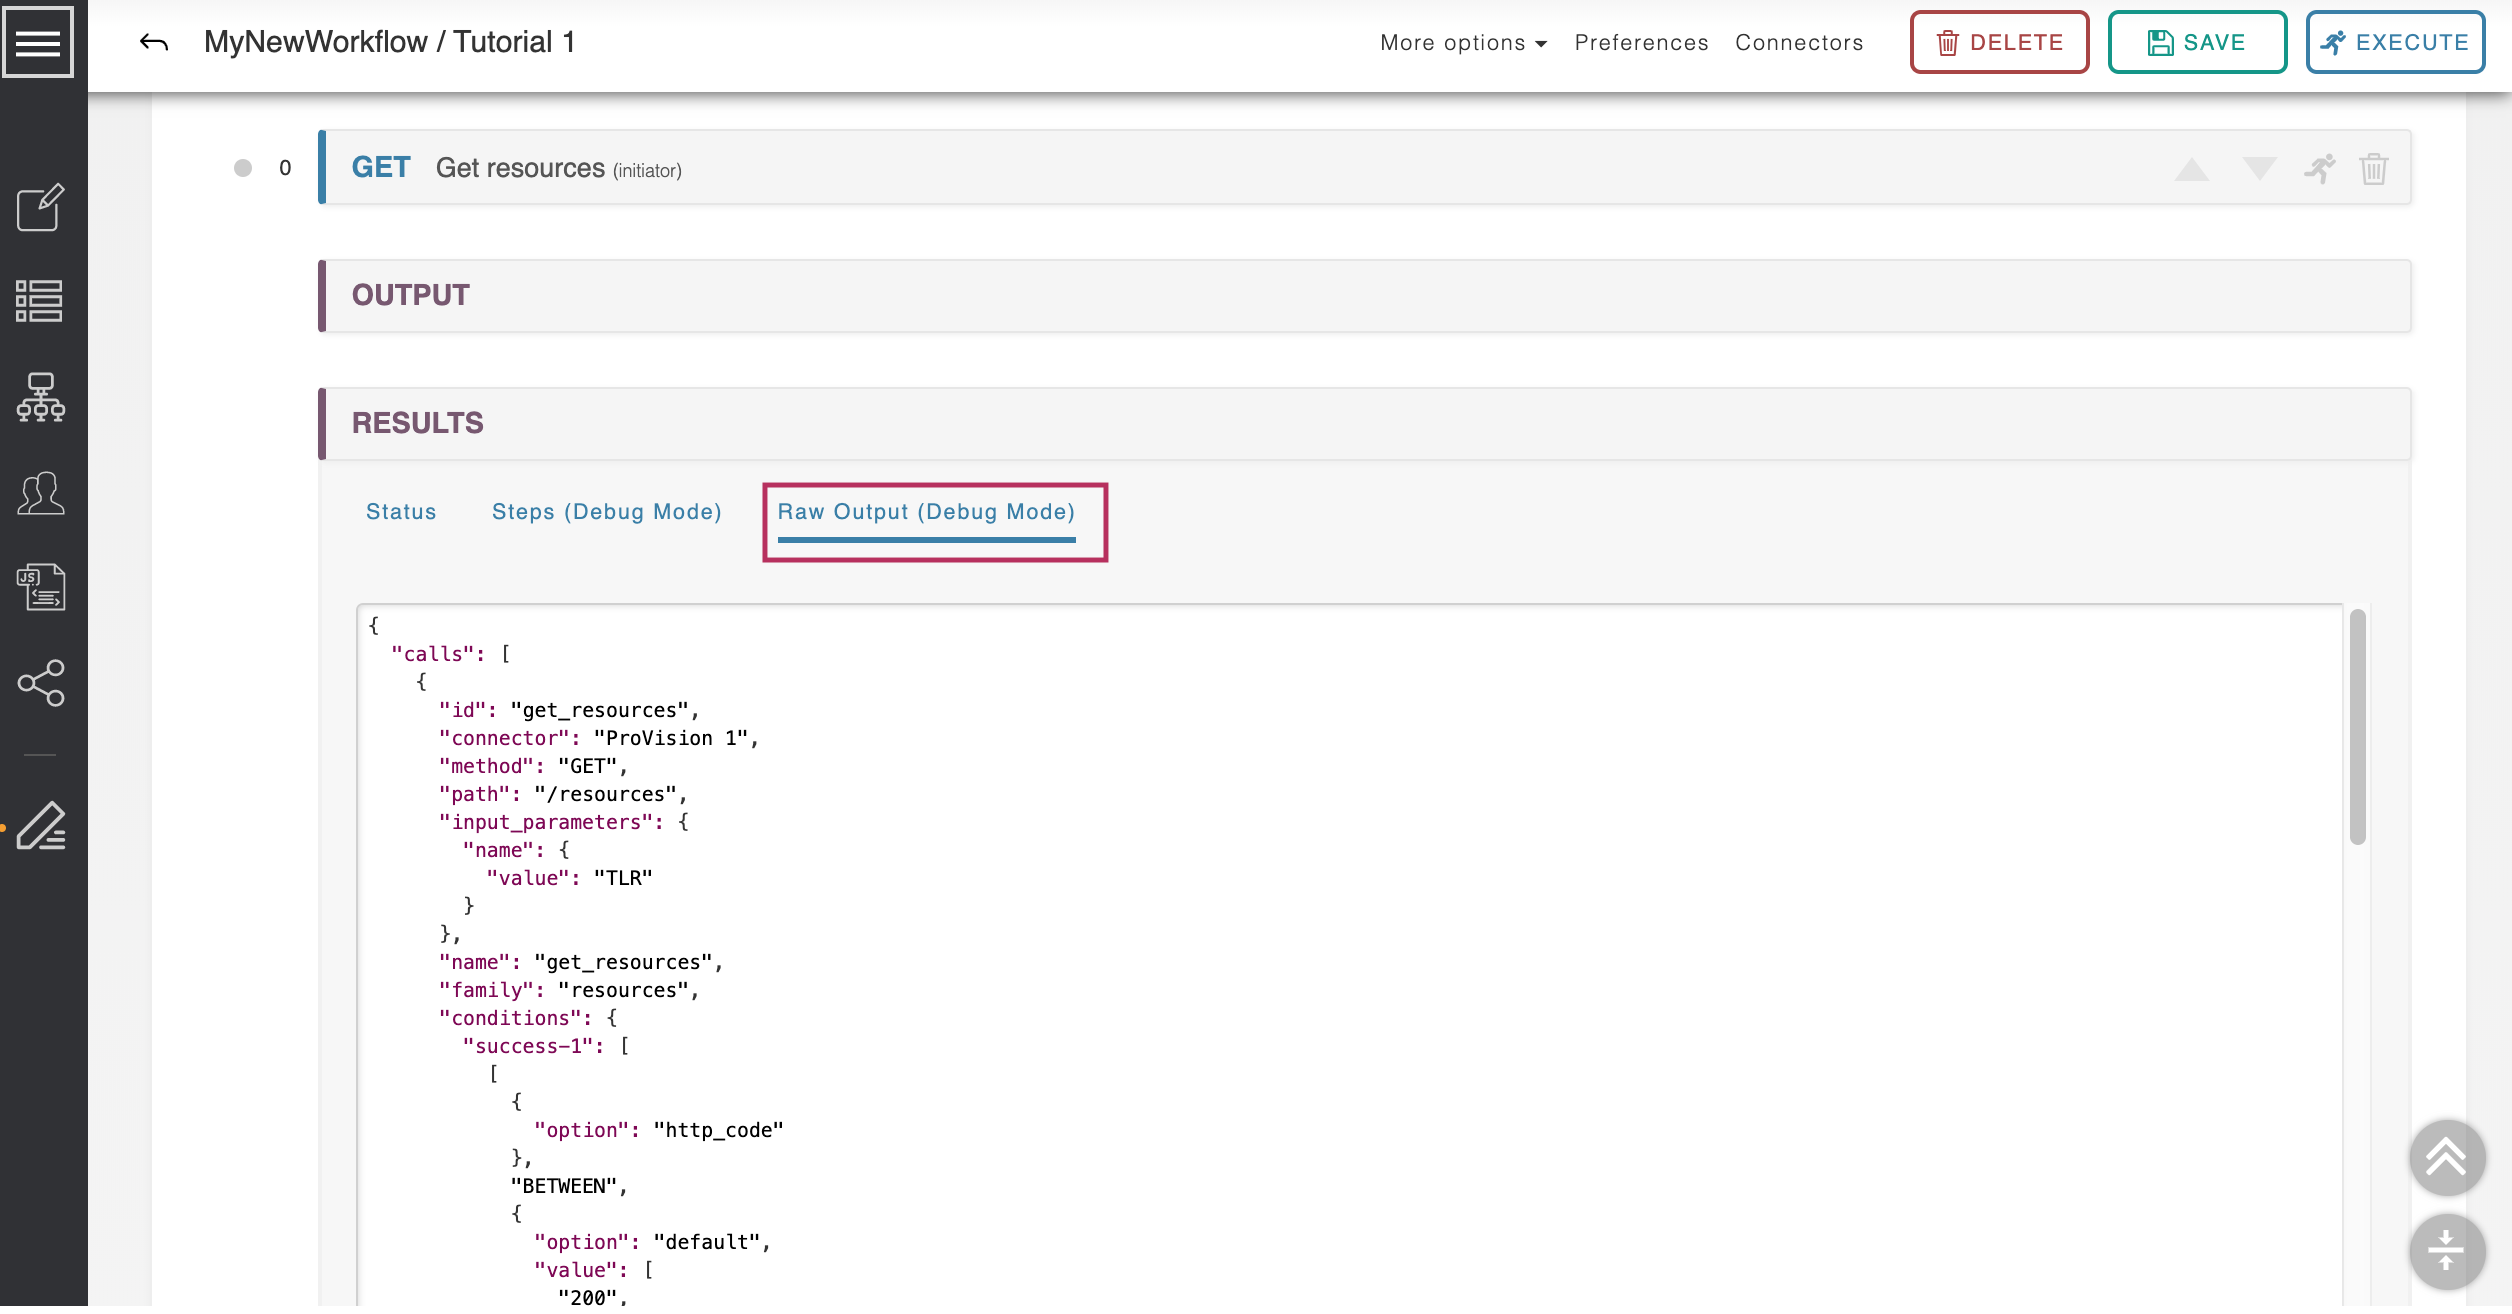
Raw Output Tab
Click on ‘Raw Output’ for the ‘Get resources’ step to see the full, raw response to our query. This is very helpful for finding errors.
Quick-Start Tutorial 2
Now lets expand a bit on the previous Tutorial and introduce some more advanced ACP concepts.
Step 1: Navigate to your ACP instance and open the Actions Menu by clicking on the icon in the upper-left. Find the ‘My Workflows’ area and click the ‘more…’ link.
Step 2: Find the “Tutorial Workflow” you created following the Quick-Start Tutorial 1. Click on the blue ‘Clone’ button and enter “Tutorial Workflow 2” as the new name. Click ‘clone.’
Step 3: Click “Tutorial Workflow 2” to open your new workflow. This workflow is an exact copy of the previous tutorial, complete with all steps, settings, and connectors.
Step 4: Click the ‘Get Resources’ step we created previously and scroll down to the ‘name’ field we assigned to ‘Default Value: TLR’. Change this field to ‘user given.’
The form changes to allow you to name this user-given variable we just declared. Name it ‘resource-name.’
Step 5: Save the workflow and execute it. A form pops up listing off all the user-given variables required to run the workflow. In this case there is only one, but there can be as many as are needed. Enter ‘TLR’ as the resource-name and click ‘execute.’
The resultant id is the same.
Step 6: Execute the workflow again, but this time enter in the name ‘does not exist.’
This resource obviously does not exist, and so the id returned is ‘null.’ Lets instead alter the routing of the Get Resources create the resource if it is not found.
Step 7: Add a new step to the workflow by selecting the ‘sixconnect’ connector, then the ‘resources’ family, and finally the ‘Create Resource’ action.
Step 8: Add a third step to the workflow by selecting the ‘sixconnect’ connector, then the ‘resources’ family, and finally the ‘Resource Query’ action. Note this is different from the ‘Get Resource’ action we use as Workflow Step #1.
You should have a 3-step workflow, like so:
Step 9: Open up the first step, in blue, of the workflow. Scroll down to the ‘Conditions and Routes’ area at the bottom. This is the area where the decision logic is stored. Currently it is configured to proceed directly to the Output whenever the step successfully returns data. We are going to add a second condition to handle the case where a resource is not found.
Step 10: Click the ‘+’ icon in the upper left of the Conditions area to add a new Condition. It is added at the bottom of the list.
Change the name of the first condition to read ‘Resource Not Found’ and the name of the second condition to read ‘Resource Found.’
Step 11: Edit the ‘Resource Not Found’ condition so that the left value is set to ‘body’ and its ‘id’ property.
Set the operator for the ‘Resource Not Found’ condition to ‘NULL.’
Set the ‘Route’ to ‘Create Resource’.
Step 12: Change the route for the ‘Resource Found’ step to ‘Resource Query.’
Step 13: Close the ‘Get Resource’ step by clicking on the blue header, then expand the ‘Create Resource’ step by clicking on its green header. Scroll down to the two required parameters, ‘name’ and ‘type’.
Change ‘name’ to be ‘user given’, and as its value put ‘resource-name’, which is the same variable we defined in the previous step. The same value will be used for both parameters.
Change the ‘type’ input to ‘default value,’ and give it a default value of ‘resource’
Scroll down to the Conditions area and change the Route for the only condition to be the final step, ‘Resource Query.’
Close the ‘Create Resource’ step.
Step 14: Expand the ‘Resource Query’ step. We have two previous steps which can route into this step under different conditions. This is a unification step, to standardize the data coming back. Scroll down to the optional parameters and find ‘name.’ As in the previous step, make this parameter ‘user given’ with a variable name of ‘resource-name’.
This will use the same variable we’ve used in previous steps.
Close the ‘Resource Query’ step.
Step 15: Lastly, open the ‘Output’ step and change it so we are taking the ‘id’ parameter from the ‘Resource Query’ step, and not the ‘Resource Get’ step.
Step 16: Save and execute the workflow with the resource name ‘TLR’. As before, the returned id will be 1.
Step 17: Execute the workflow again with a resource name “nonexistant’. As this resource is being created by the system, its id will be the next available.
Step 18: Execute the workflow again, again with a resource name ‘nonexistant’. This time the resource does exist, since we created it on the last execution. Its id is unchanged.
...
Additional Tutorials
Congratulations! You have completed Quick-start Tutorial 1. If you would like to proceed to more advanced topics, continue on to the following tutorial: