...
These steps appear under the "Workflow Steps" portion of the Workflow page.
In order to create a new step To add steps, at least one connector must needs to have already be been applied to the Workflow (see Connectors).
After expanding each step, the following step management tabs are available:
- General Options: Provides overview data for the step. Here, you can view or edit the description, step name, and view the step inputs that are in use.
- Required Inputs: Lists input fields for endpoint parameters that are required for the call.
...
Add a Step
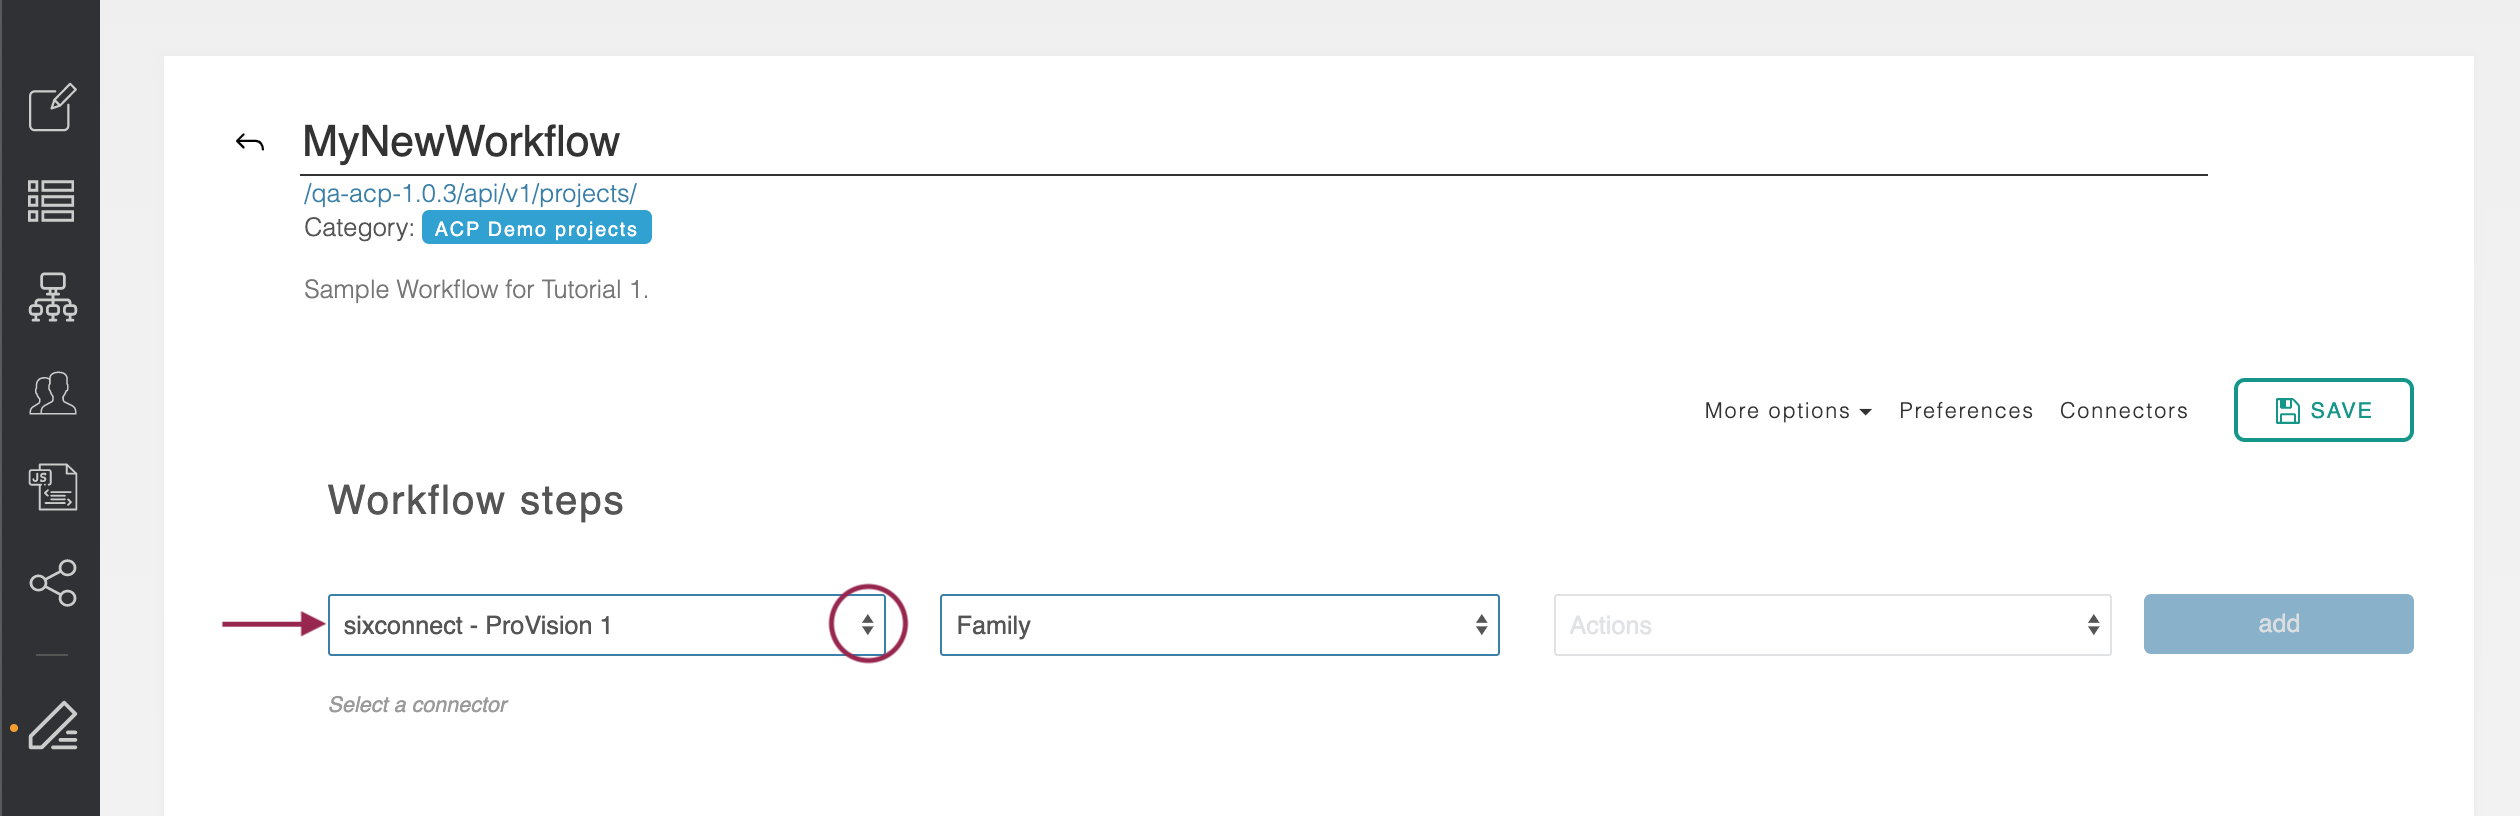
At the top of the "Workflow steps" section is the area to add a new step to the current workflow. First, select the desired connector.
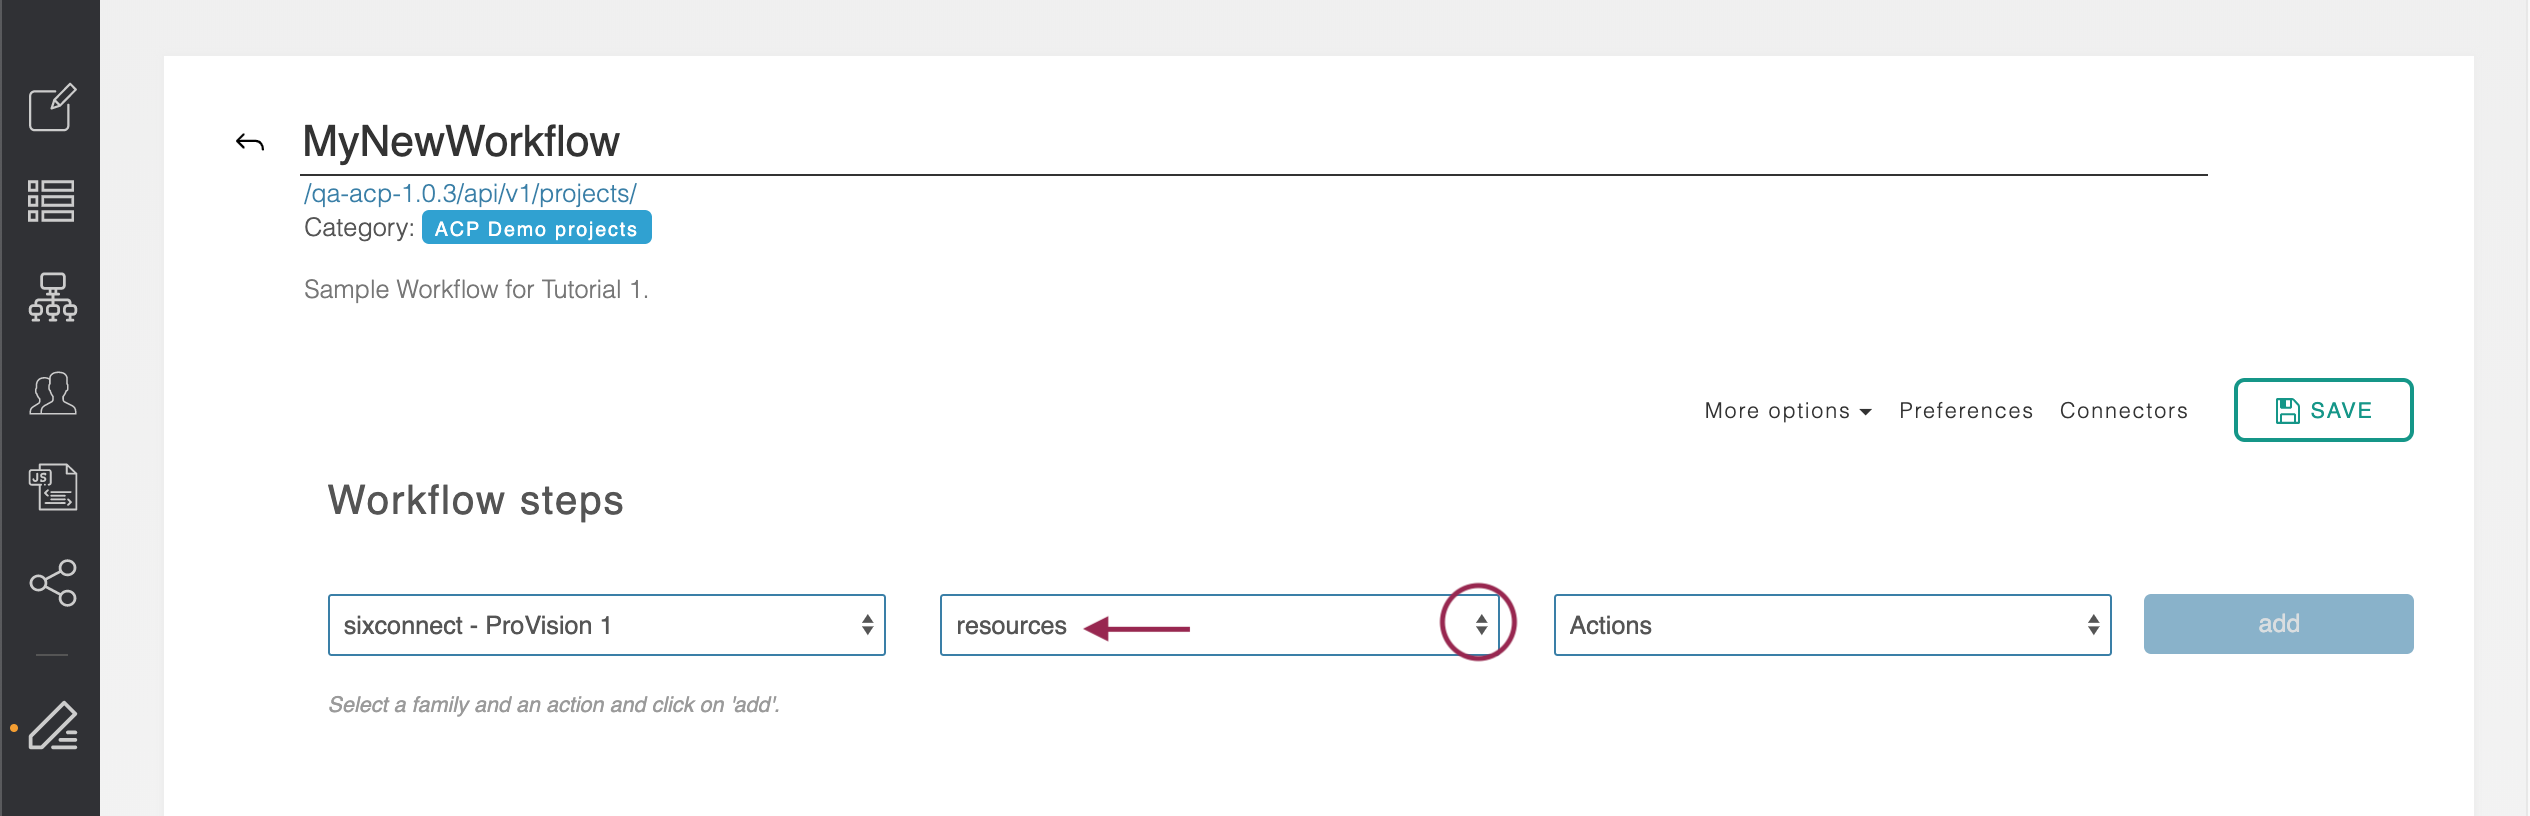
The middle box of the form will pull in all the API Endpoint Families for this product. Select the endpoint family you wish to use.
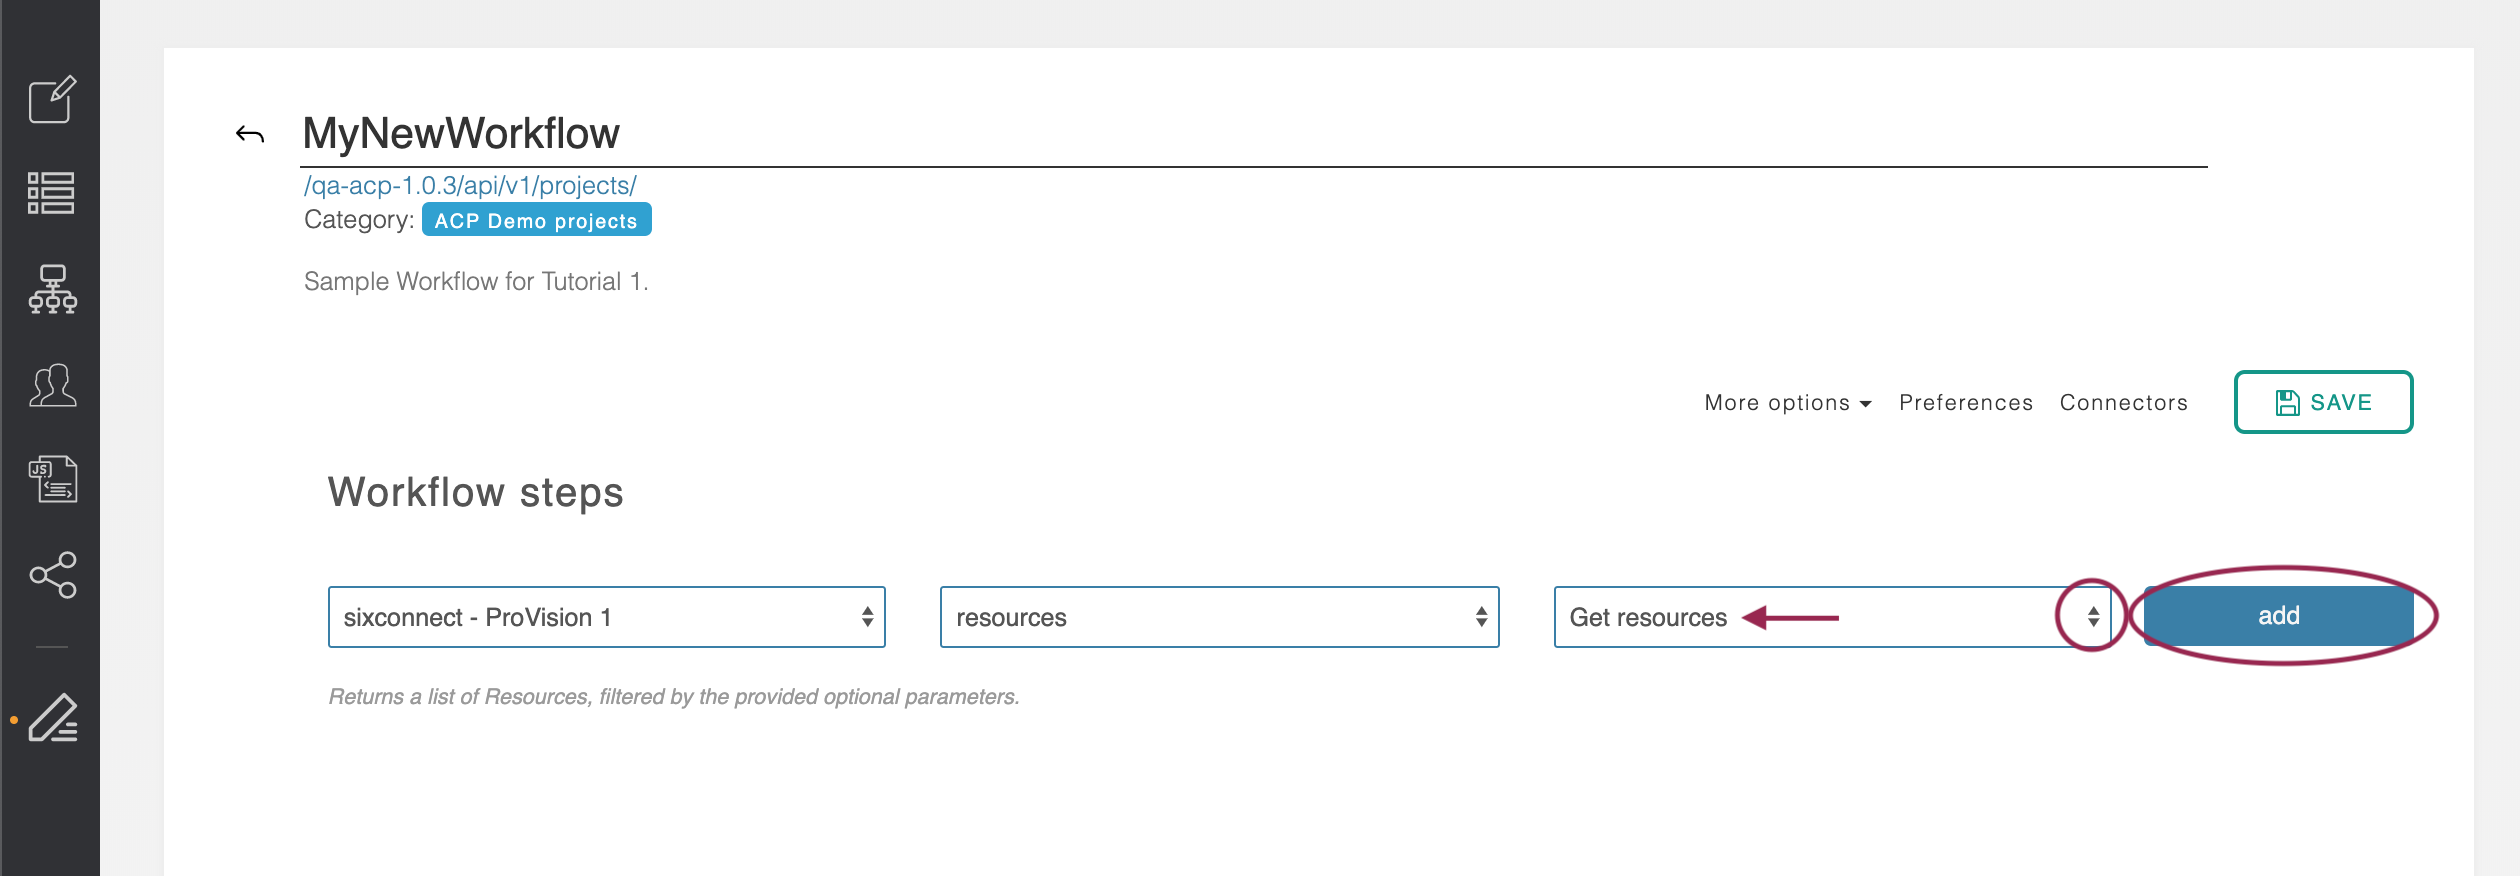
The final box will pull in all of the specific endpoints belonging to that family. Select the specific endpoint action to perform, then click "add" to create the step.
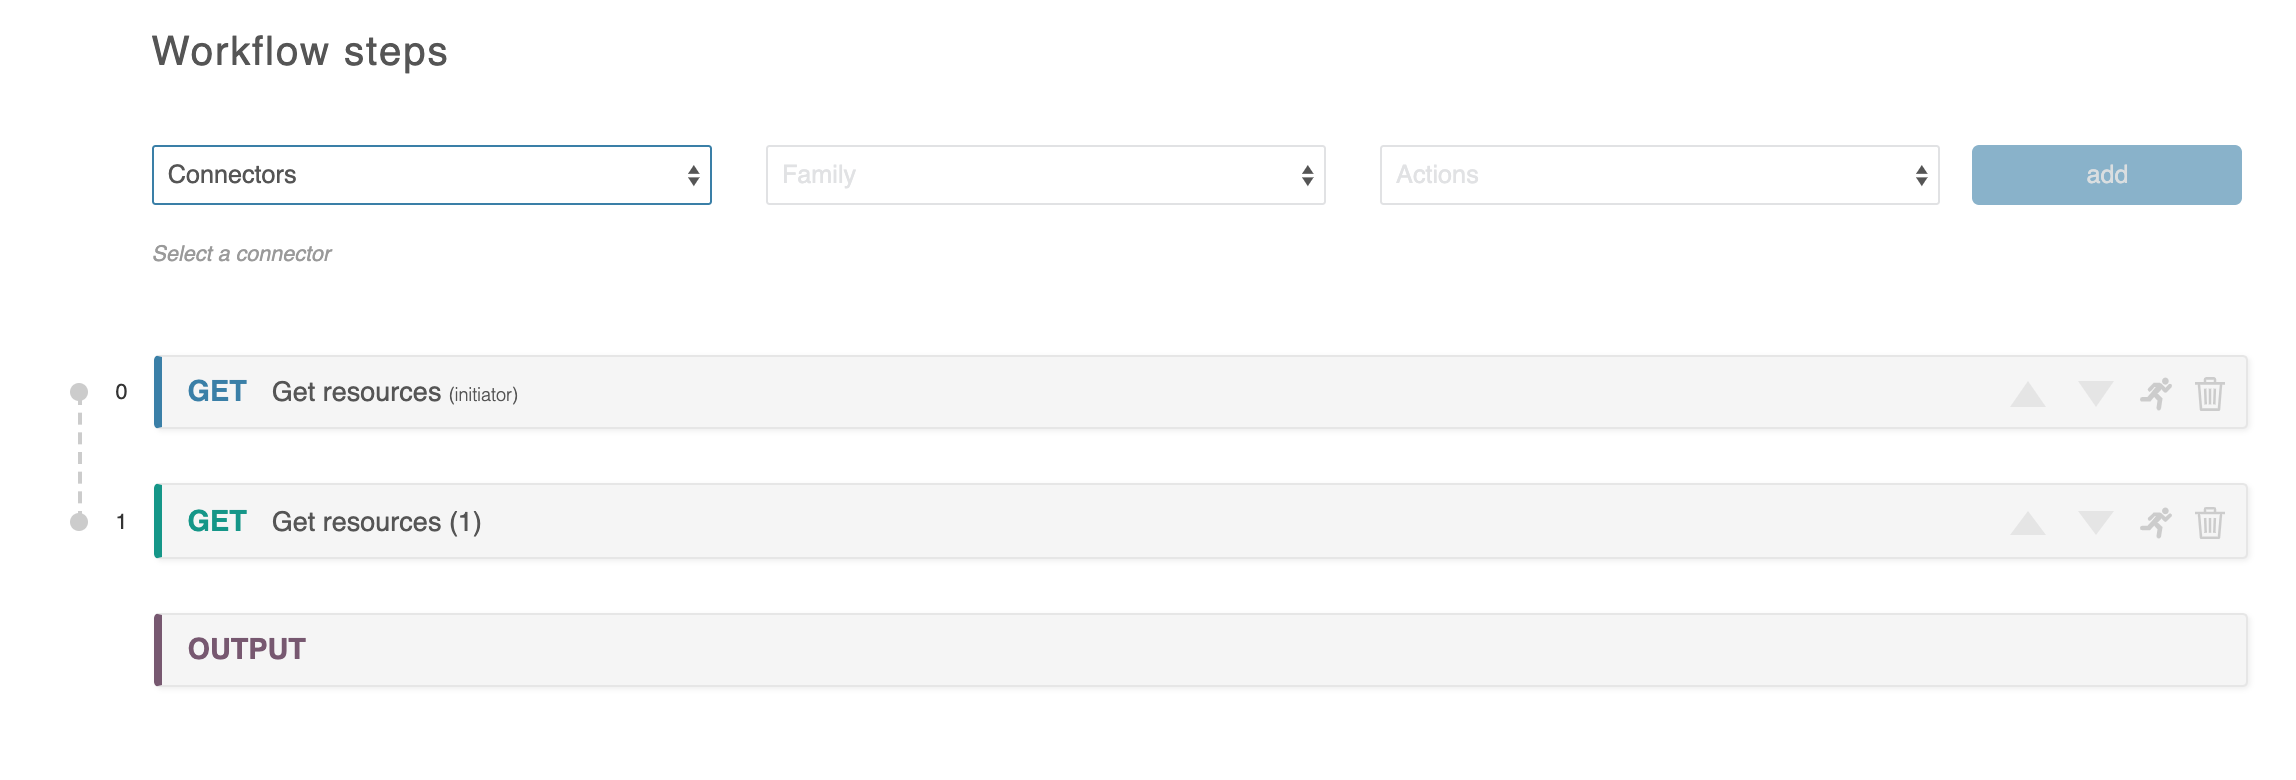
The new step is added to the main ACP work area. An ‘Output’ step is automatically created below it.
At this point - being that a valid step has been added - you can save your new workflow by clicking "Save" near the top right of the Workflow page.
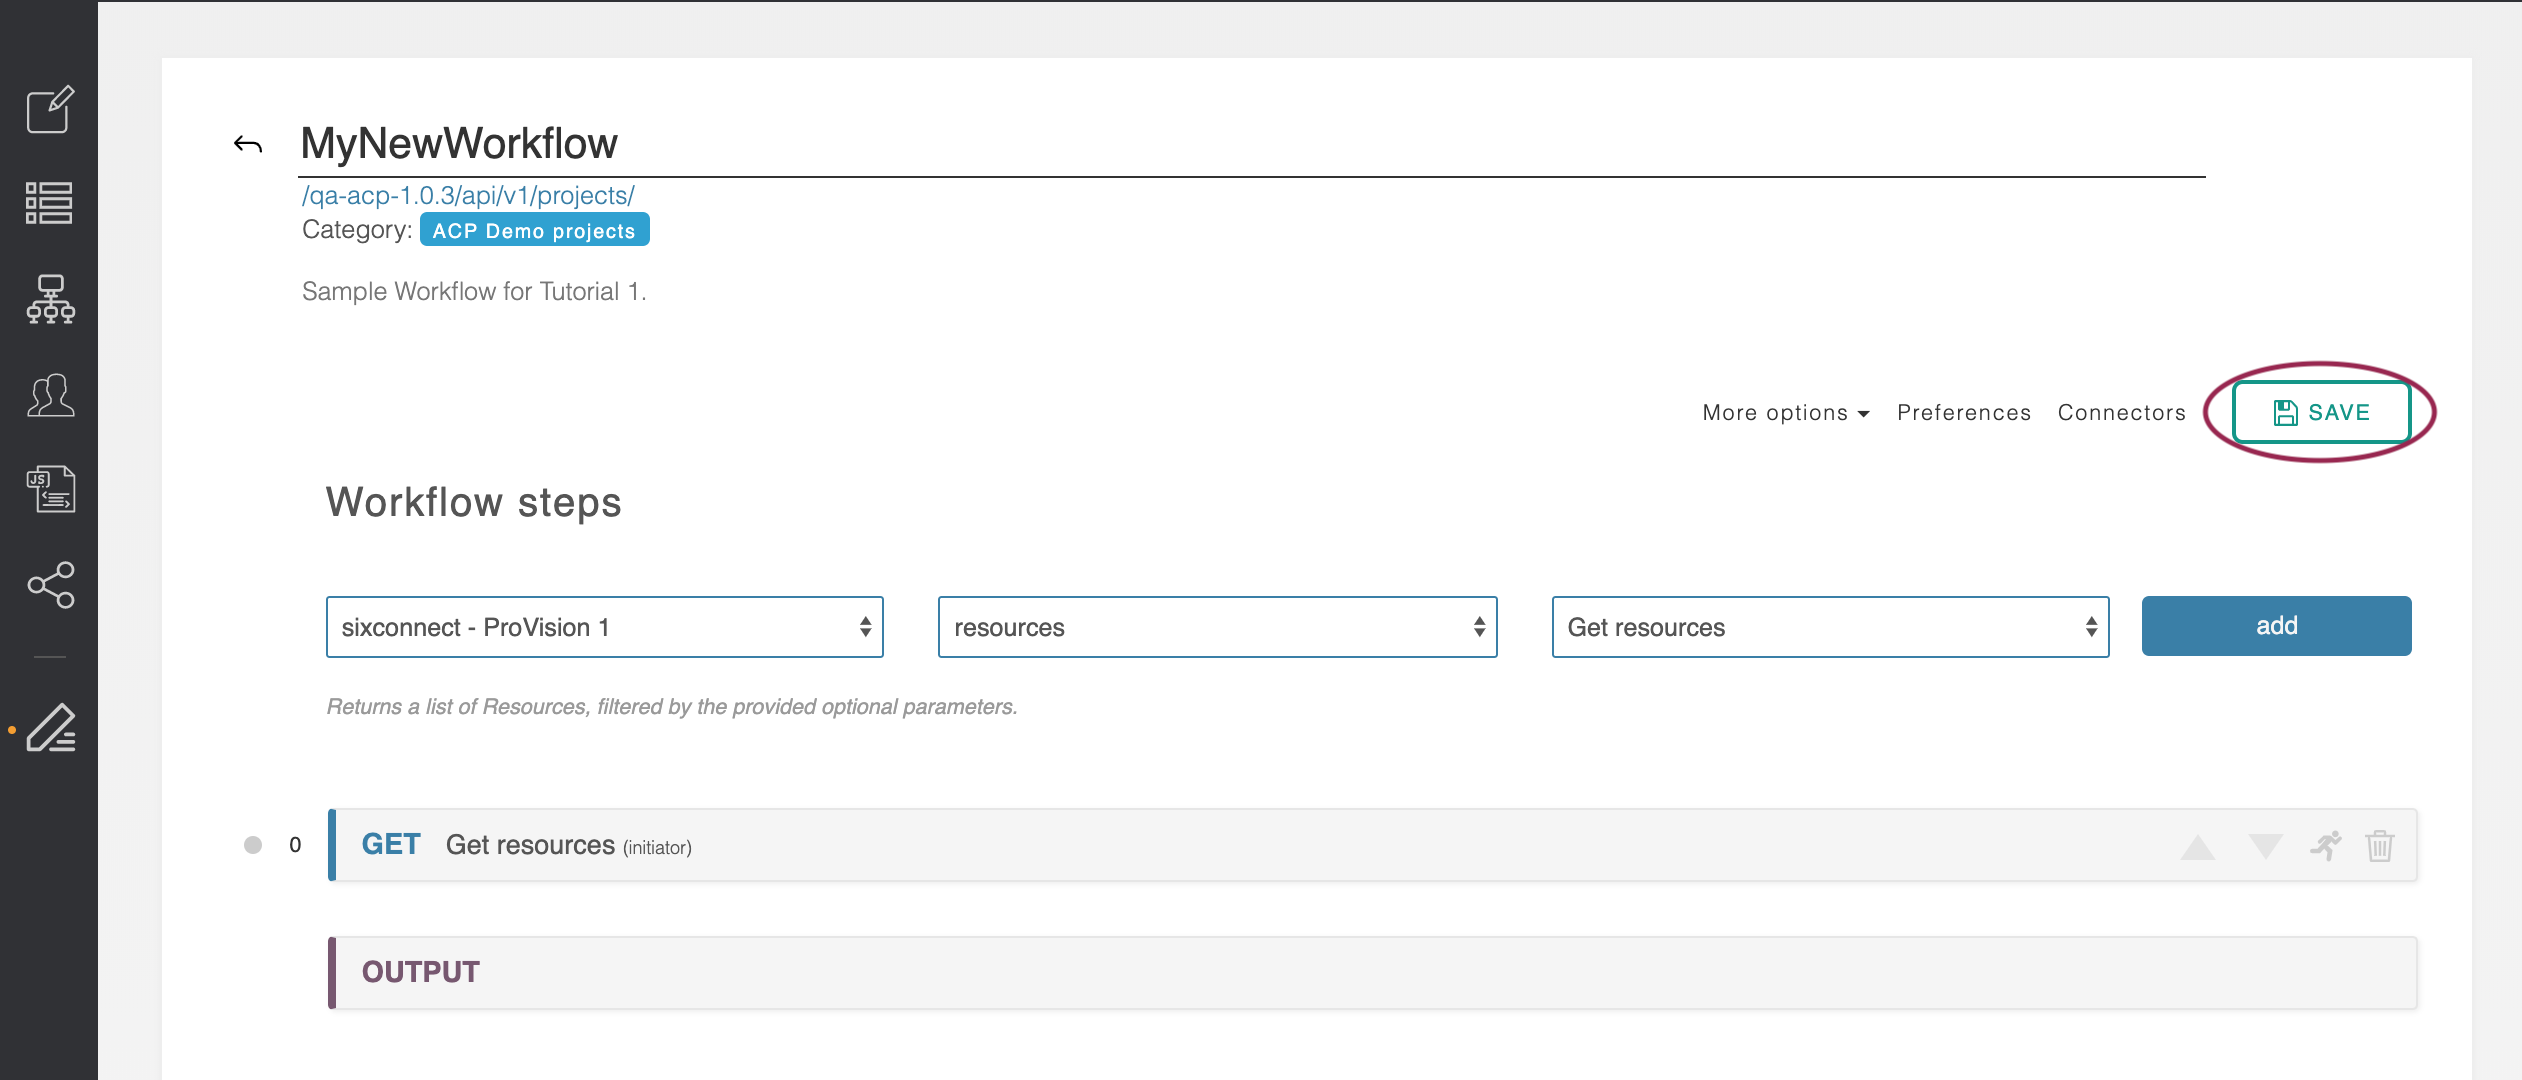
After the first save, the "delete" and "execute" options will become available for the workflow.
The Step List
Workflows are represented as a series of steps (see ‘Getting Started 3. Connecting Steps’ from the examples library) that are displayed in the 'Workflow steps' area of the Workflow page.
The Step Header
Each Step header bar, when collapsed, shows basic information such as the step number (with a line leading to the following step), the endpoint action and name, whether the step is an initiator or dependent step, and basic step actions.
- To open/expand the step, click on the step header.
- Move a step up or down a spot in the workflow order by using the up/down arrow buttons on the left of their entry
- Execute the individual step by clicking the "Execute" button ("Run" icon) - useful for debugging
- Remove a step from the Workflow by clicking on the "Delete" button (Trash can icon), at the far right of the bar
The output section is required cannot be removed or relocated.
Step Colors
Step headers in blue are initiators, and are candidates for being the first step executed when the workflow is invoked.
...
Step headers in red also display a ‘view response’ link on the right-hand side. This can be clicked to bring up a window which shows what the API service is responding with. This can be very helpful in debugging. Also, turning on Debug Mode can show the full logical pathway of the ACP Workflow.
A new step can be added by using the ‘Add New Step’ form at the top of the screen. Select the connector you want to use, then the API Endpoint Family, then the specific API Endpoint you are interested in.
Steps can be removed from a Workflow by clicking the ‘x’ button on the far right of their entry.
Steps can be re-ordered by using the arrow buttons on the left of their entry.
The output section is required cannot be removed. An ACP workflow must have at least one step in addition to the output section.
Anatomy of a Step (Workflow Options)
Clicking on any step header will expand the step to reveal the individual sections which it uses to define its behavior. The step header also has a series of buttons on the right which allow you to move the step up in the workflow-order, move the step down in the workflow-order, execute this step in isolation (useful for debugging), and to delete this step from the workflow entirely.
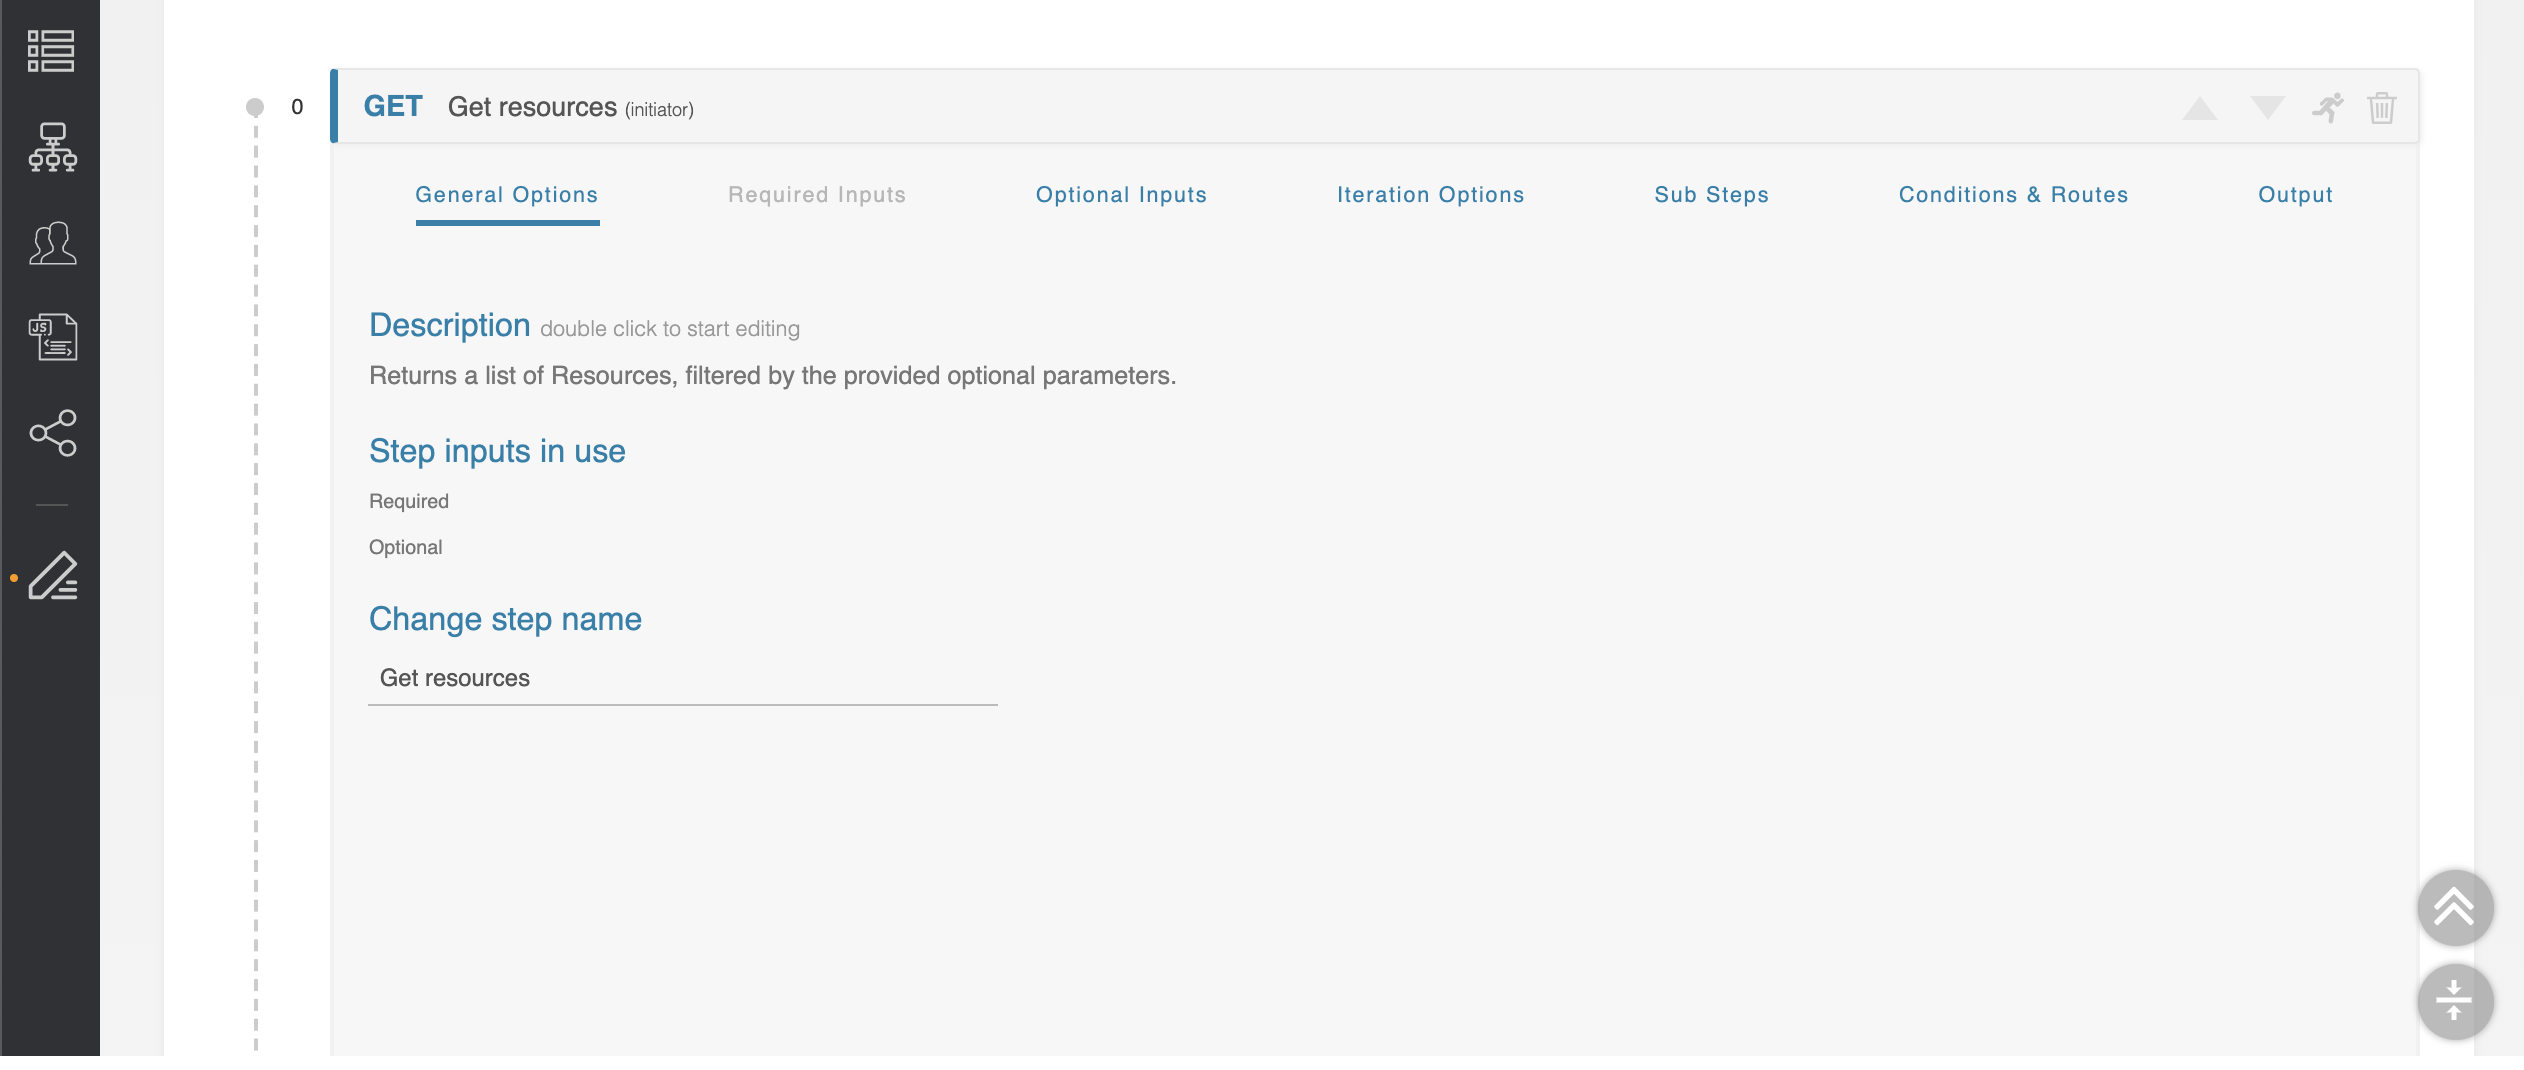
General Options
The first section is ‘General Options,’ and it contains a field where you can add a description of what the step is trying to accomplish. You can also customize the name of the step. This section also provides a list of user-given inputs used in this step.
Required Inputs
The ‘Required Inputs’ section contains variables that must be set for the API call to proceed. This section is not always present, as not all API calls have required parameters.
Optional Inputs
The ‘Optional Inputs’ section contains those parameters that the API call might make use of which are not explicitly required. Some APIs are flexible and allow you to add additional optional parameters not explicitly defined in the API specification. To allow for this, the ‘add input’ button lets you define an arbitrary optional inputs to complete the API call.
| Info | ||
|---|---|---|
| ||
All types of inputs have a small green ‘?’ next to their name which will supply help text as to what that parameter does. For more details, see the official API documentation for the API service you are using. All types of inputs can be customized with the following states:
The next section is ‘Iteration Options’ and deals with how to loop over array responses. This section will be covered in more detail later. |
Iteration Options
The next section is 'Iteration Options' and deals with how to loop over array responses. For more detail on iteration, see Initiator Conditions and Iteration.
Sub Steps
The ‘Sub Steps’ section describes how to iterate over an array of return objects, similar to the ‘iteration options’ previously. This will be described in more detail later. For more detail on sub-steps, see Initiator Conditions and Iteration.
Conditions & Routes
The ‘Conditions & Routes’ section describes the flow-control by which the ACP system chooses what step is next. The logic involved is complicated and receives its own section later in this document.is detailed in Inputs, Conditions, and Outputs.
Output
Lastly, the ‘Output’ section shows an example return of the API endpoint, for use in establishing Workflow Links.
Links Between Steps (Workflow Links)
Setting an Input to be a ‘workflow link’ will indicate that this parameter is to be taken from the results of a previous step. The result can come from any previous step so long as it has already run.
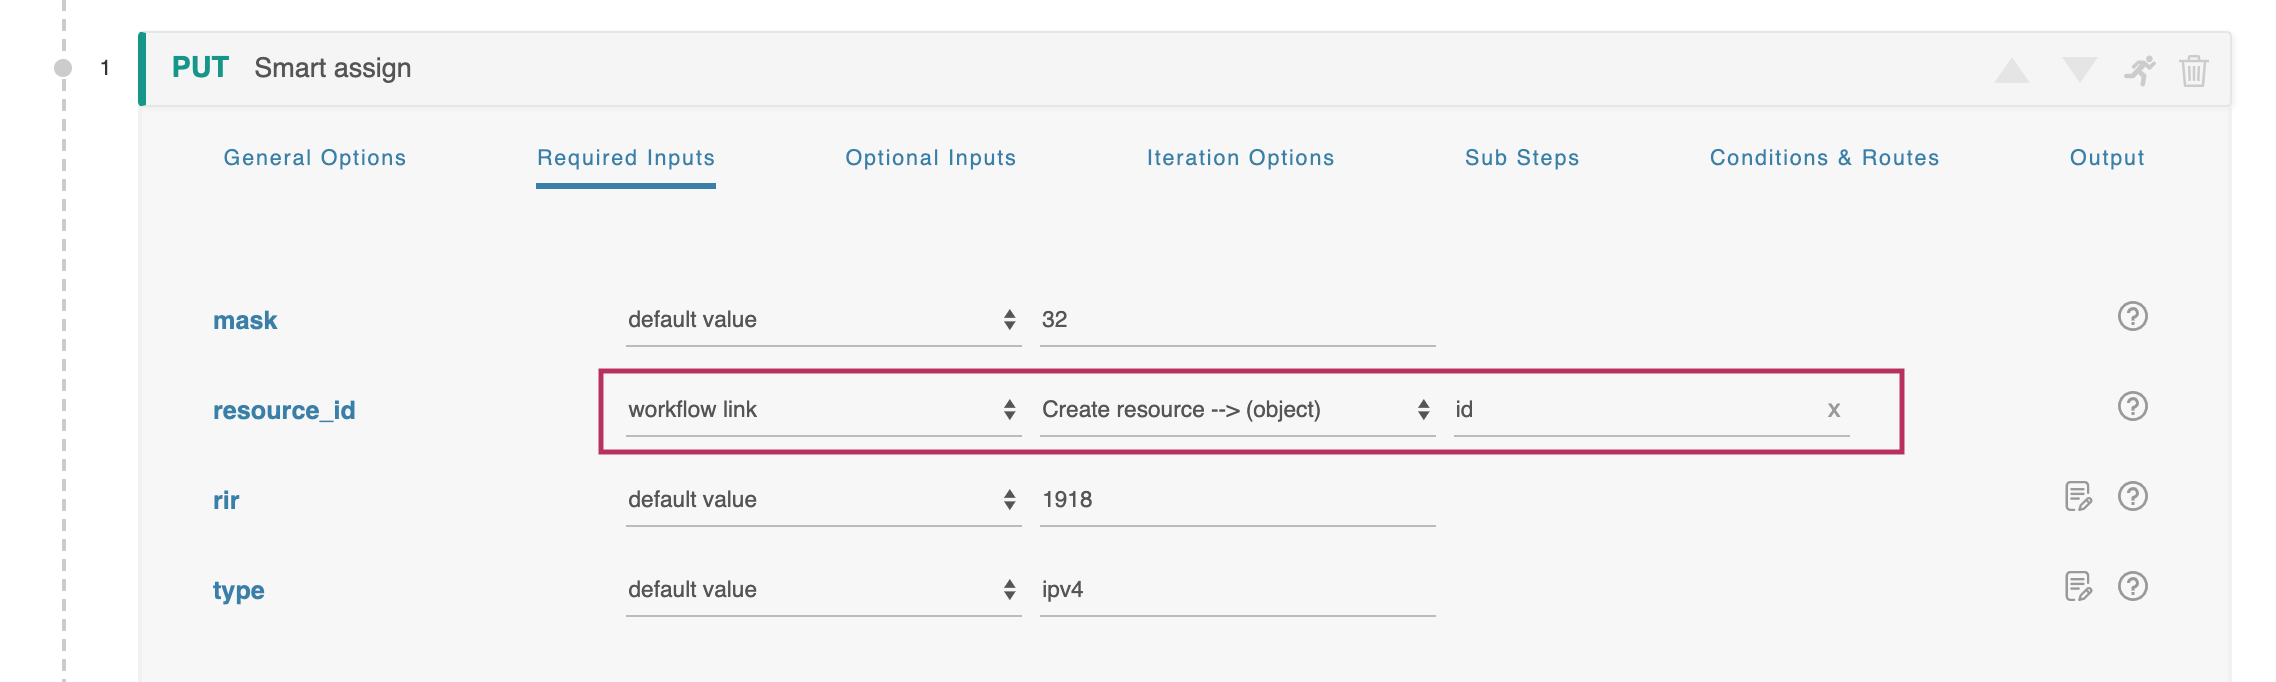
When the ‘workflow link’ option is selected the form expands to gather the necessary information. The middle drop-down selects what step you will be taking this information from. Once a step is selected, the rightmost ‘property’ box accepts the name of a parameter.
...
If the parameter name or array index provided does not exist in the corresponding return object, null will be used.
Examples
A simple example of using the ‘workflow link’ parameter can be found in the ACP examples library as ‘Getting Started 3. Connecting Steps.’
...