The DHCP Tab
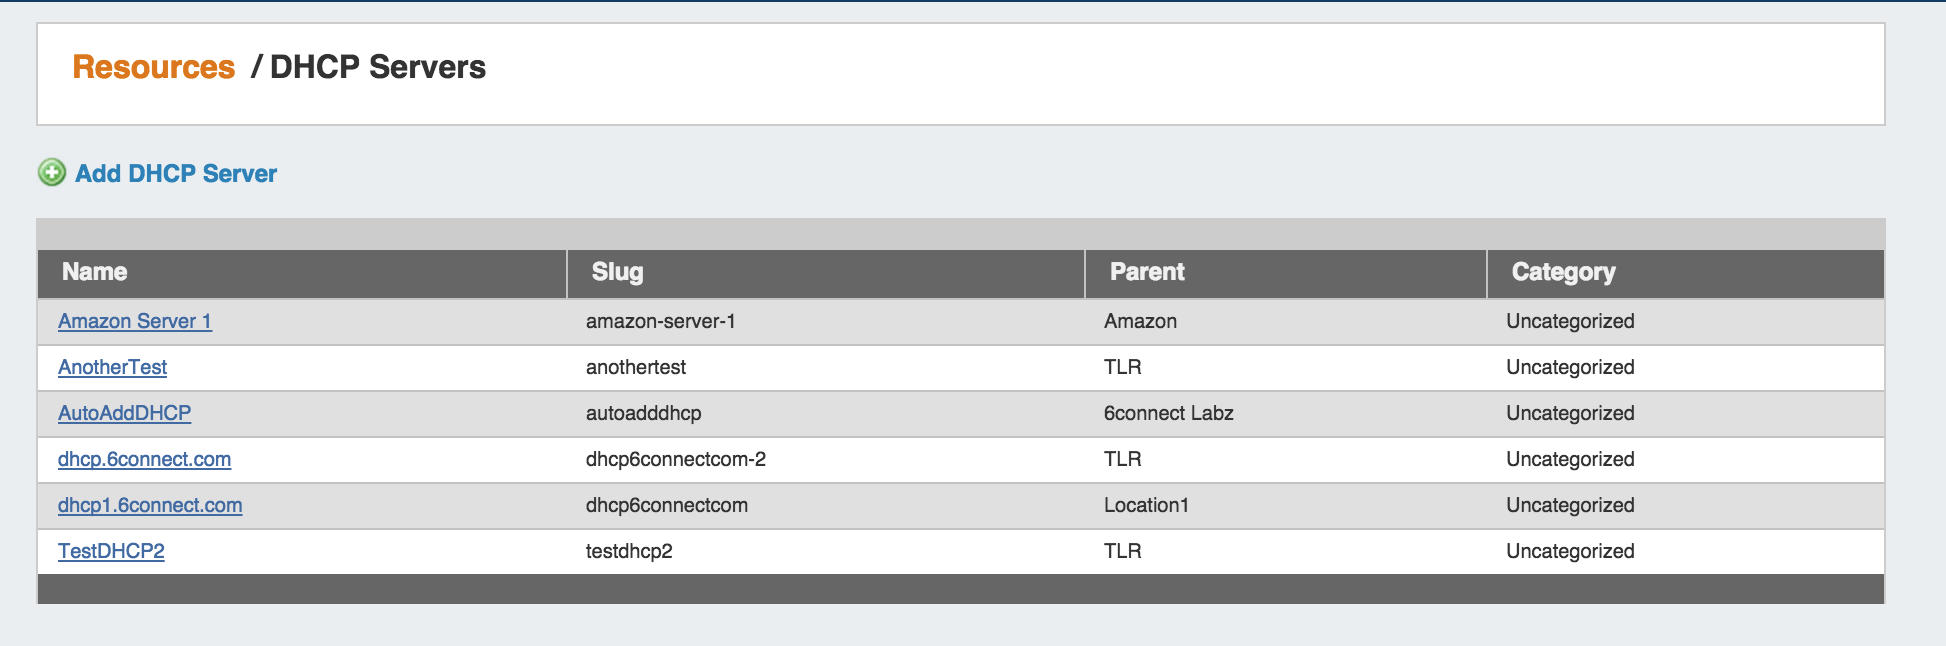
The DHCP Tab provides an overview of DHCP servers currently existing in ProVision, and links to the Resource pages for those servers. In ProVision, DHCP server configurations are tied into the Resource Manager system, so it is essential to associate servers with the proper parent Resource.
Adding DHCP Servers
To add a DHCP Server to ProVision from the DHCP Tab, click on the "Add a DHCP Server" link. The create server dialog area will open.

Type the server name, then under "Select Customer", choose the resource to which the DHCP server belongs. This creates a hierarchical relationship, with the server as a child resource under the selected parent.
When you are done providing this information, click on the green "+" icon to add the server.

Working with the DHCP Gadget
Before You Begin:
Attach / Enable the DHCP Gadget
Verify that the DHCP Gadget is attached to the Resource Section. Then, you can enable the gadget by selecting the radio button next to "On", and click "Update".

Once enabled, the DHCP Management Gadget will show sections for Connection Configuration, Server Details, DHCP Pools, and Create a New DHCP Pool.

These sections will be reviewed in detail further on in this section.
Defining DHCP Scopes - Create DHCP Aggregates
In order to use DHCP functions and add DHCP Pools, the IP blocks need to be defined in the IPAM section to create a DHCP specific aggregate.
Under the IPAM tab, select "Add Aggregate". It will open the Add Aggregate dialog.

Fill in the aggregate information, and select the "DHCP Aggregate" checkbox option as outlined below. "Allow Sub-Assignment" will be selected automatically,so that smaller blocks may be assigned to DHCP pools.
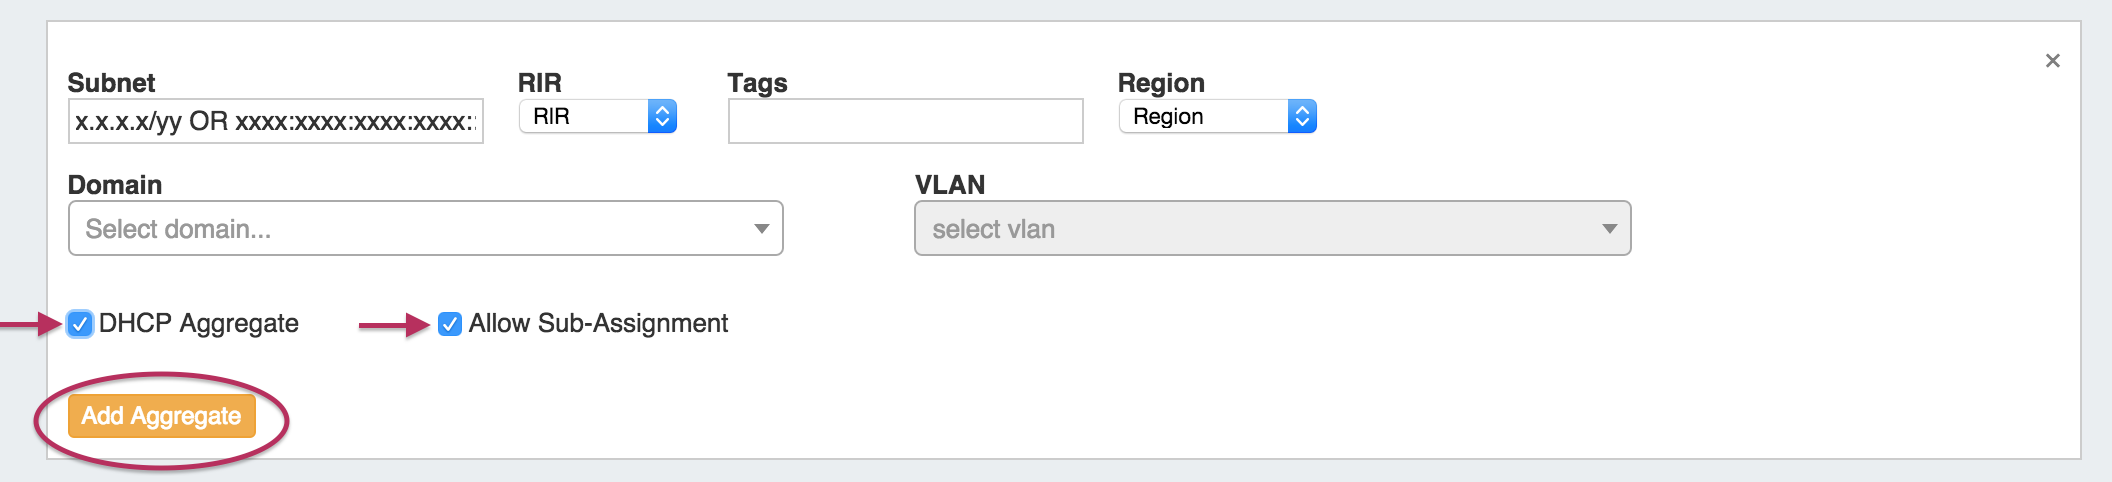
This will ensure the block is automatically added to the DHCP Available Resource, and thus usable when building DHCP Server Configurations and defining DHCP Pools.
When done, click "Add Aggregate"
Using an Existing Aggregate
If you would like to use an existing aggregate or part of an existing aggregate, you simply need to "assign" the block to the Resource Holder "DHCP Available".
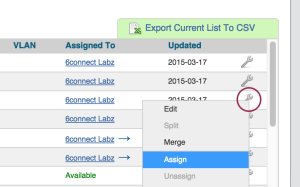
1) From the IPAM Manage screen, click on the Action Menu, then select "Assign".
2) In the Assign Block dialog, scroll until you find "DHCP Available". Select it, then click on "Assign Block".
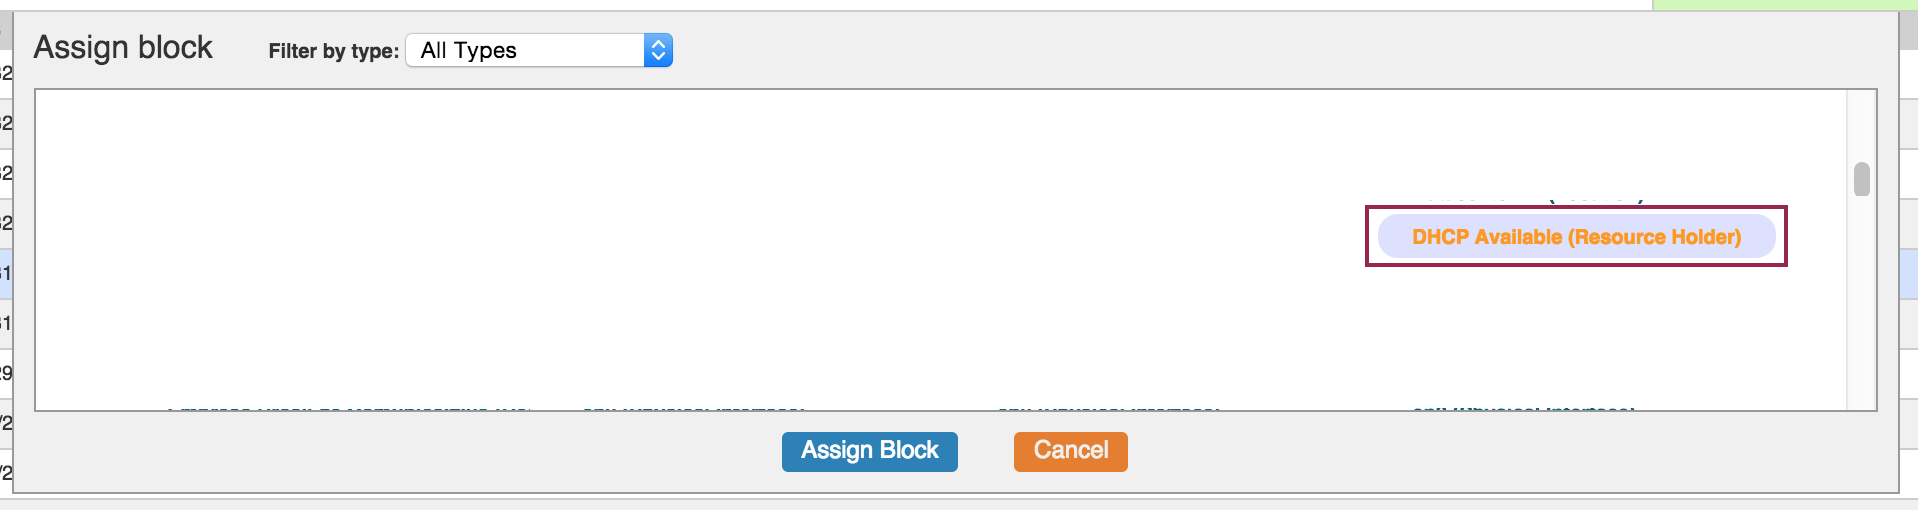
Once the IP block is assigned to DHCP Available, it will be available to assign to a DHCP Pool via the DHCP Gadget.
Managing DHCP Server Configurations
Once DHCP functions are enabled for a Resource Section, you will be able to manage configurations per Resource by expanding the relevant areas on the Resource's Entry page.
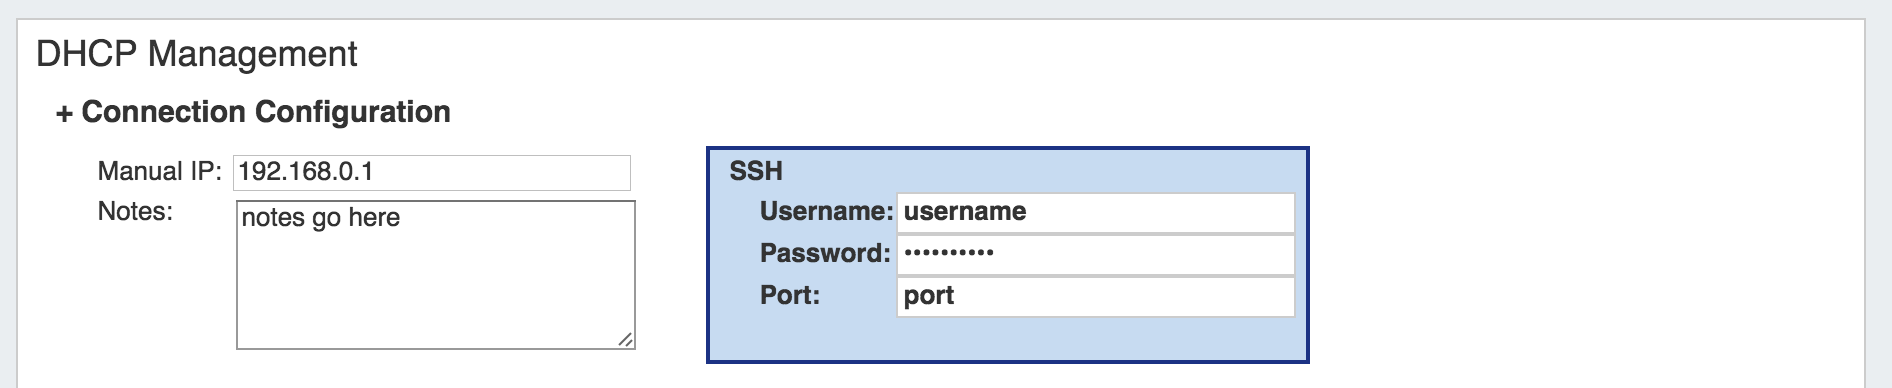
Connection Configuration
In this gadget area, you may enter in the information that will be used for ProVision to communicate to the DHCP Server.
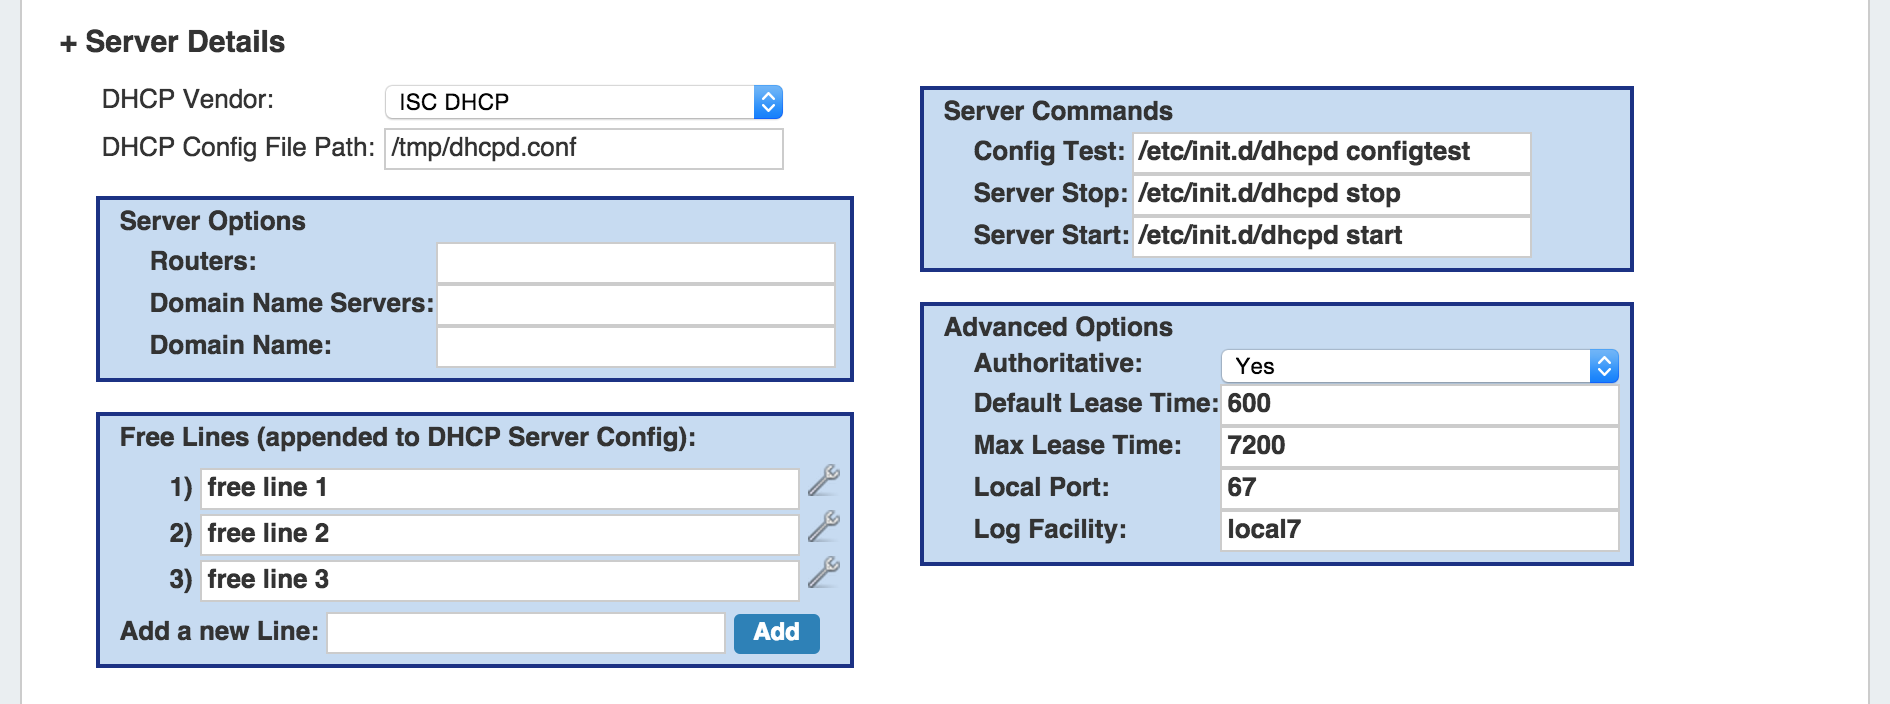
Server Details
Server details and advanced options may be entered under this portion of the gadget.
DHCP Pools
In this area, the admin can specify what DHCP Pools are linked to the DHCP server. This includes any host reservations as well as DHCP Pools as defined in the next section.
Use the Action menu to Link to Server, Delete, or Remove Link from Pools.


Additional edits may be made to pools by clicking on the Pool name. This allows the Pool name, assignment, and lines to be changed. Be sure to hit "Save" after making changes.
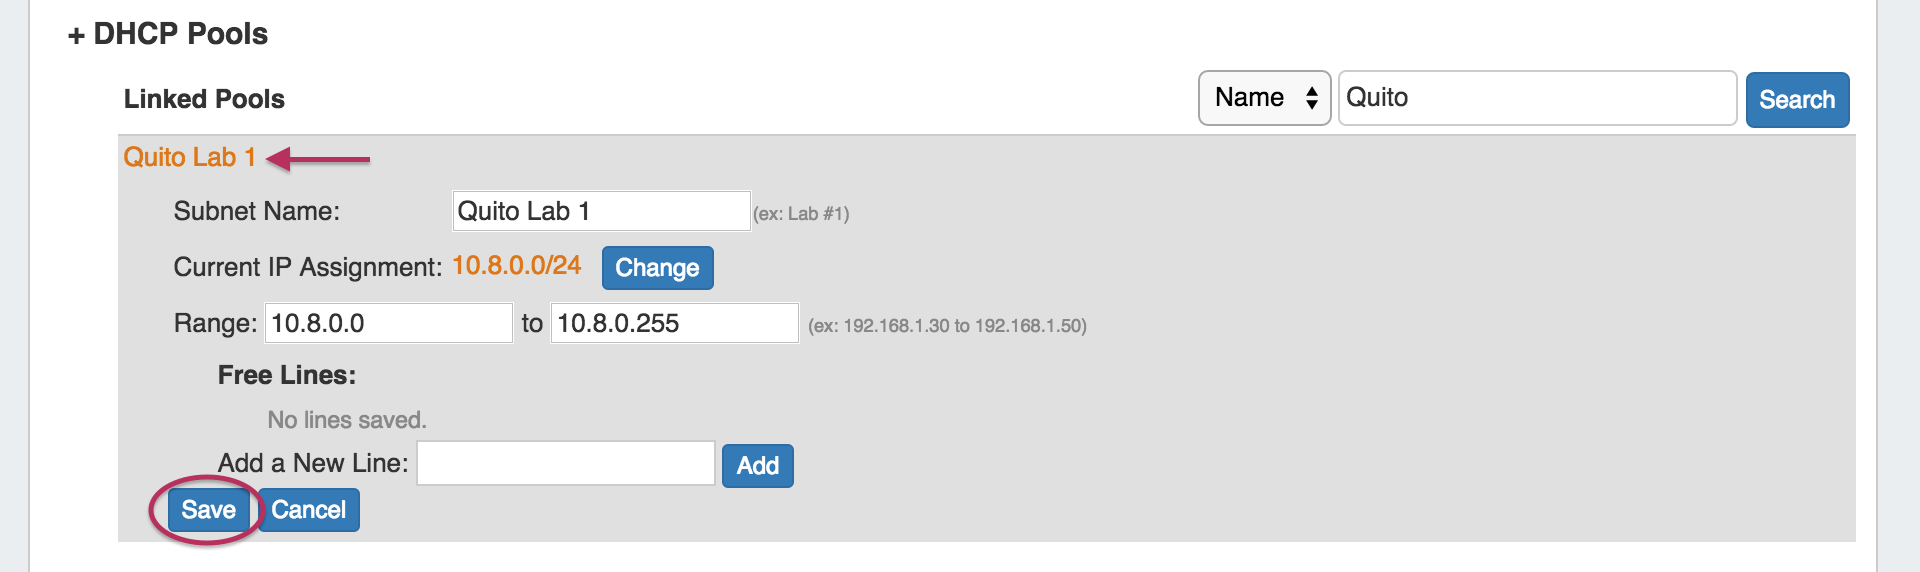
DHCP Pool Search:
Both Linked and Existing DHCP pools have field-specific search options to filter the DHCP pool list(s). Select the search term type from the dropdown list, type the search term in the search box, then hit "Search".

For both Linked and Existing pools, search terms include:
Name: The full or partial name of the pool (ex: "Lab")
MAC: The full (ex: 00:11:22:33:44:55:66:77) or partial (:22) MAC address, for pools that were created as "Host" type. MAC address searches must include a colon.
IP: Search by IP Block by providing the CIDR assigned to the pool. (ex: 10.0.0.0/24)
For Existing Pools, additional filter terms may be included to further filter the IP search by Region or assigned Resource.

After entering your search terms, click "Search", and the pool list will filter to the results.
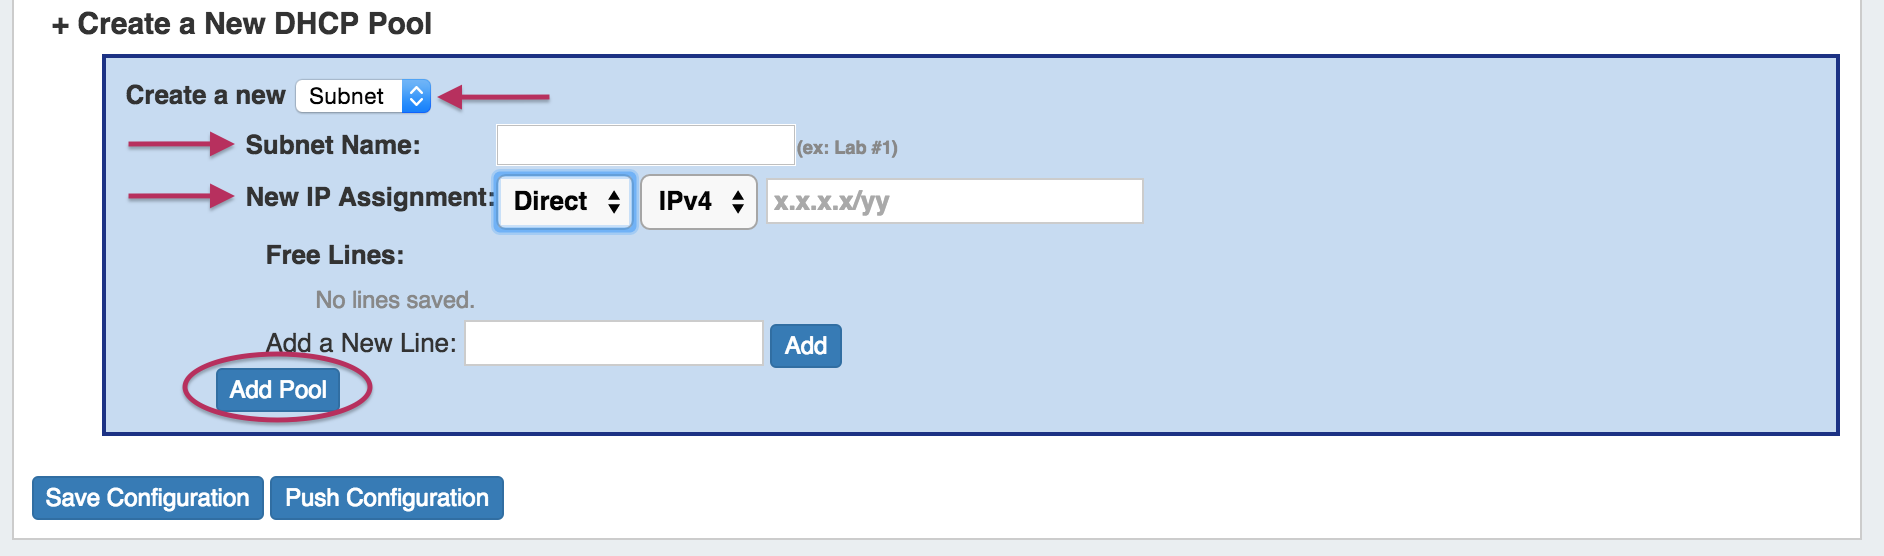
Create a New DHCP Pool - Subnets
When Assigning a Subnet (via dropdown) the IP Assignment selection will pull the data from the DHCP Available blocks that you defined earlier. You can use either a Smart or Direct assignment depending on your preference.
Enter the name of the Pool / Subnet, and select the assignment criteria:
For Smart Assign: select IPv4 / IPv6, Mask, then optional Region, Resource assignment, Domain, and VLAN criteria, add free lines if desired, then click "Add Pool".

For Direct Assign: select IPv4 / IPv6 and enter the block in CIDR format, add free lines if desired, then click "Add Pool".
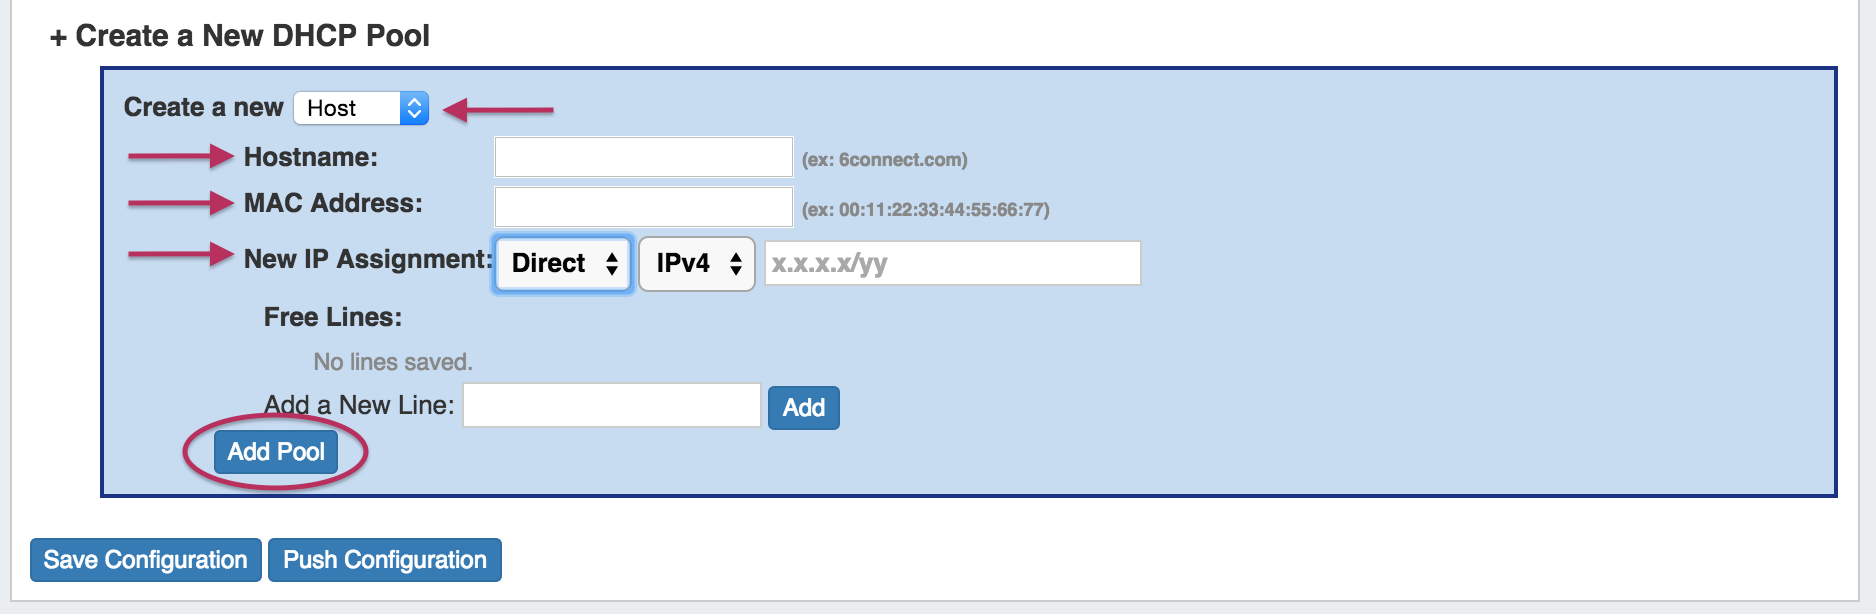
Create a New DHCP Pool - Host
When reserving Hostname/MAC data, change the Dropdown to "Host". This will also give you an option to assign from an existing DHCP block (smart assign) or a specific IP address (direct assign).
Enter the name of the Hostname and MAC address, then select the assignment criteria:
For Smart Assign: select IPv4 / IPv6, then optional Region, Resource assignment, Domain, and VLAN criteria, add free lines if desired, then click "Add Pool".

For Direct Assign: select IPv4 / IPv6 and enter the block in CIDR format, add free lines if desired, then click "Add Pool".
Saving/Pushing DHCP Server Configurations
It is recommended that you save your configuration after changes. When you Push a Configuration the configuration is automatically saved.
Permissions
DHCP Management integrates with ProVision's resource and permissions hierarchy, as well as the IP Management system. Individual DHCP servers can be assigned via Resource Permissions to different internal user groups, to be managed by only the appropriate parties.