Importing Resources
Step 5: Drag rows from the .csv Grid to the Section Grid
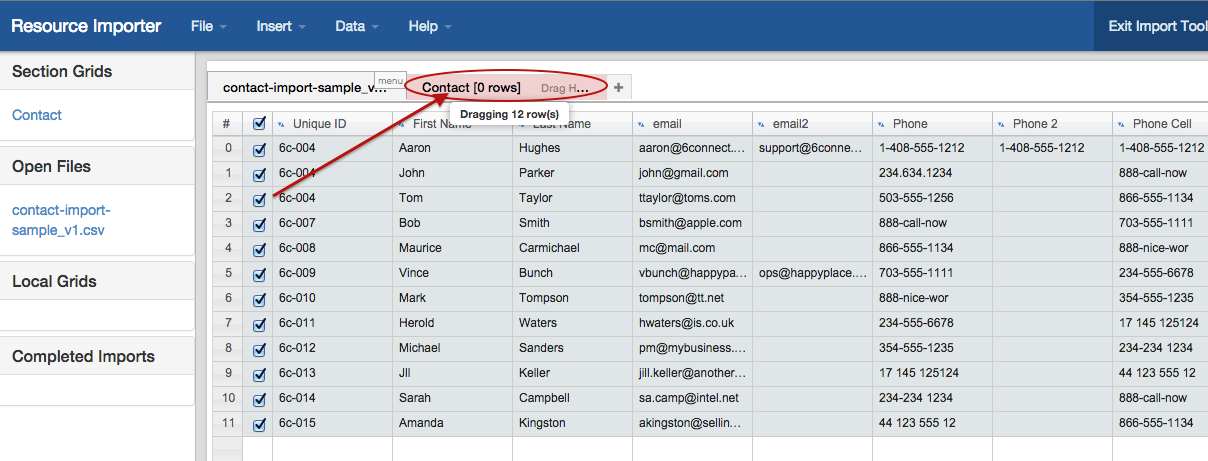
Once you have set the columns to match exactly between the .csv Grid and the Section grid, it's time to pull in the data from one to the other.
Simply click the checkboxes for the rows you wish to import (or use the "Select all" checkbox at the top), click anywhere on the row, and drag & drop onto the Section Grid tab ("Contact"). The tool will tell you how many rows you are moving as you drag them.
Click on the "Contact" tab when you are done, and you will now see your data in there, instead of the original .csv.
If you had to hide columns in the Section Grid prior to moving the .csv data, verify that all columns are visible and the required data filled in. In this case, we filled in the "Name" Column that was missing in the original .csv.

Step 6: Import into ProVision
When all of the data is under the Section Grid tab, and any required field data filled in, you can import the data into Provision! From the Data menu, select "Import active Sheet into ProVision". You will see an import progress bar. Once complete, you data will be in provision, filled into the Section fields for your chosen Resource.