Importing Resources
Step 4: Edit data as needed
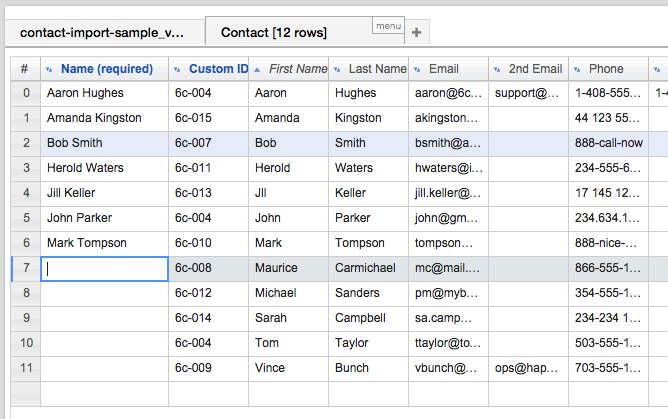
As you may have noticed in Step 3, with this example we have a couple of columns that don't quite match up to the Section Grid. The "Title" column in the .csv data is an additional column we are not tracking in our Section. Also, although we have a "First Name" and "Last Name", we are missing a data column for the top-level "Name" required in the Section Grid.
To hide extraneous column information:
Right click on a header and deselect the check box for the column you wish to hide. In this case, we want to hide "Title".

To Edit Data in the Resource Importer
Data in the grids can be edited directly by clicking on the cell(s). In our example, we can see that "Amanda Kingson" should really be "Amanda Kingston". Let's fix that! Click in the cell, type in the edit you wish to make, and then click outside of the cell to exit edit mode. To edit a full row of data, you can right click on the row, select "Edit" row, and make multiple changes in the form box.

If a column header is over the wrong data:
If just the header is in the wrong spot (doesn't match the data below it), you can move just the column header in the Resource Importer, without moving the data below it.
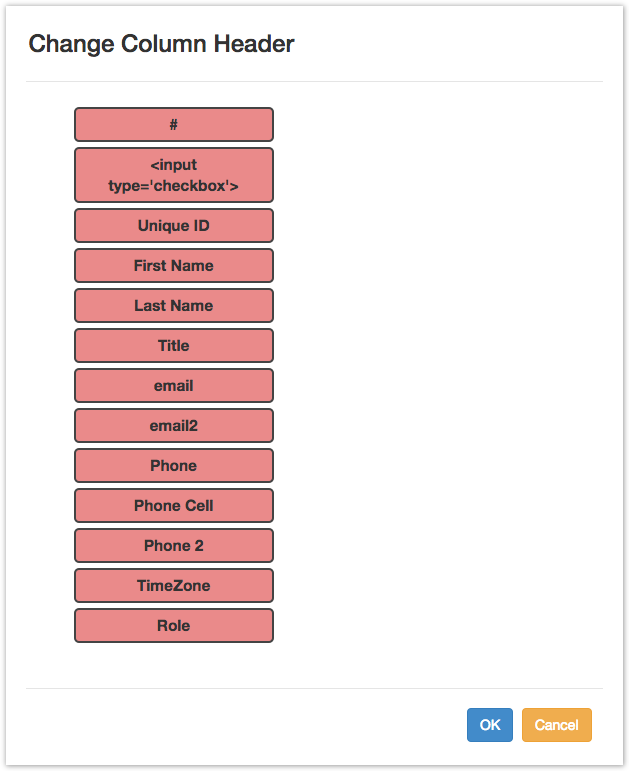
1) Right click on a row of the grid to edit and select "Set Columns":

2) In the "Change Column Header" dialog box, drag and drop the column header(s) into the desired order. Remember, this only moves the headers, not the data below them! Then, hit "OK".
If your .csv data is missing a data column needed for the Section grid:
In our case, the .csv data is missing the required "Name" column for the Section grid. Think of the "Name" as the information you would want to search for in Provision. We wouldn't want to search just for "Bob" or "Smith" when looking down a list of names, so under the "Name" column, we need to see the full first and last names, like "Bob Smith".
Currently, our options to fix this are:
1) Edit the .csv directly in your spreadsheet program: (Recommended) Simply revise the .csv to include another column for "Name", and re-open the .csv in the importer. The benefit to this method is your .csv file will be set up as a template for future imports.
Or:
2) In the Resource Importer, temporarily hide the extra column in the Section Grid: Make the columns between the .csv and the Section Grid match exactly by temporarily hiding the column (in this case, "Name") in the Section Grid, proceed to move the data into the Section grid (see Step 5), then unhide the "Name" column and manually add the data as needed prior to completing the import.
Step 5: Drag rows from the .csv Grid to the Section Grid
Once you have set the columns to match exactly between the .csv Grid and the Section grid, it's time to pull in the data from one to the other.
Simply click the checkboxes for the rows you wish to import (or use the "Select all" checkbox at the top), click anywhere on the row, and drag & drop onto the Section Grid tab ("Contact"). The tool will tell you how many rows you are moving as you drag them.
Click on the "Contact" tab when you are done, and you will now see your data in there, instead of the original .csv.
If you had to hide columns in the Section Grid prior to moving the .csv data, verify that all columns are visible and the required data filled in. In this case, we filled in the "Name" Column that was missing in the original .csv.
Step 5: Import into ProVision
When all of the data is under the Section Grid tab, and any required field data filled in, you can import the data into Provision! From the Data menu, select "Import active Sheet into ProVision". You will see an import progress bar. Once complete, you data will be in provision, filled into the Section fields for your chosen Resource.