DNS Zones
DNS Zones are accessed under the DNS tab, DNS Groups or DNS Zones sub-tabs. The DNS Zones sub-tab features the DNS Zone List - a straightforward list of all zones existing in ProVision, including those not attached to DNS Groups. From here, you can create a new zone, view all Forward, Reverse, and Catalog zones, delete, push, check, view pending approvals, or edit permissions (admin only) on a zone.
This page focuses on a general UI overview of the DNS Zones and Zone View pages.
For detailed instructions on how to perform specific zone tasks, see Working with DNS Zones.
DNS Zone List Interface
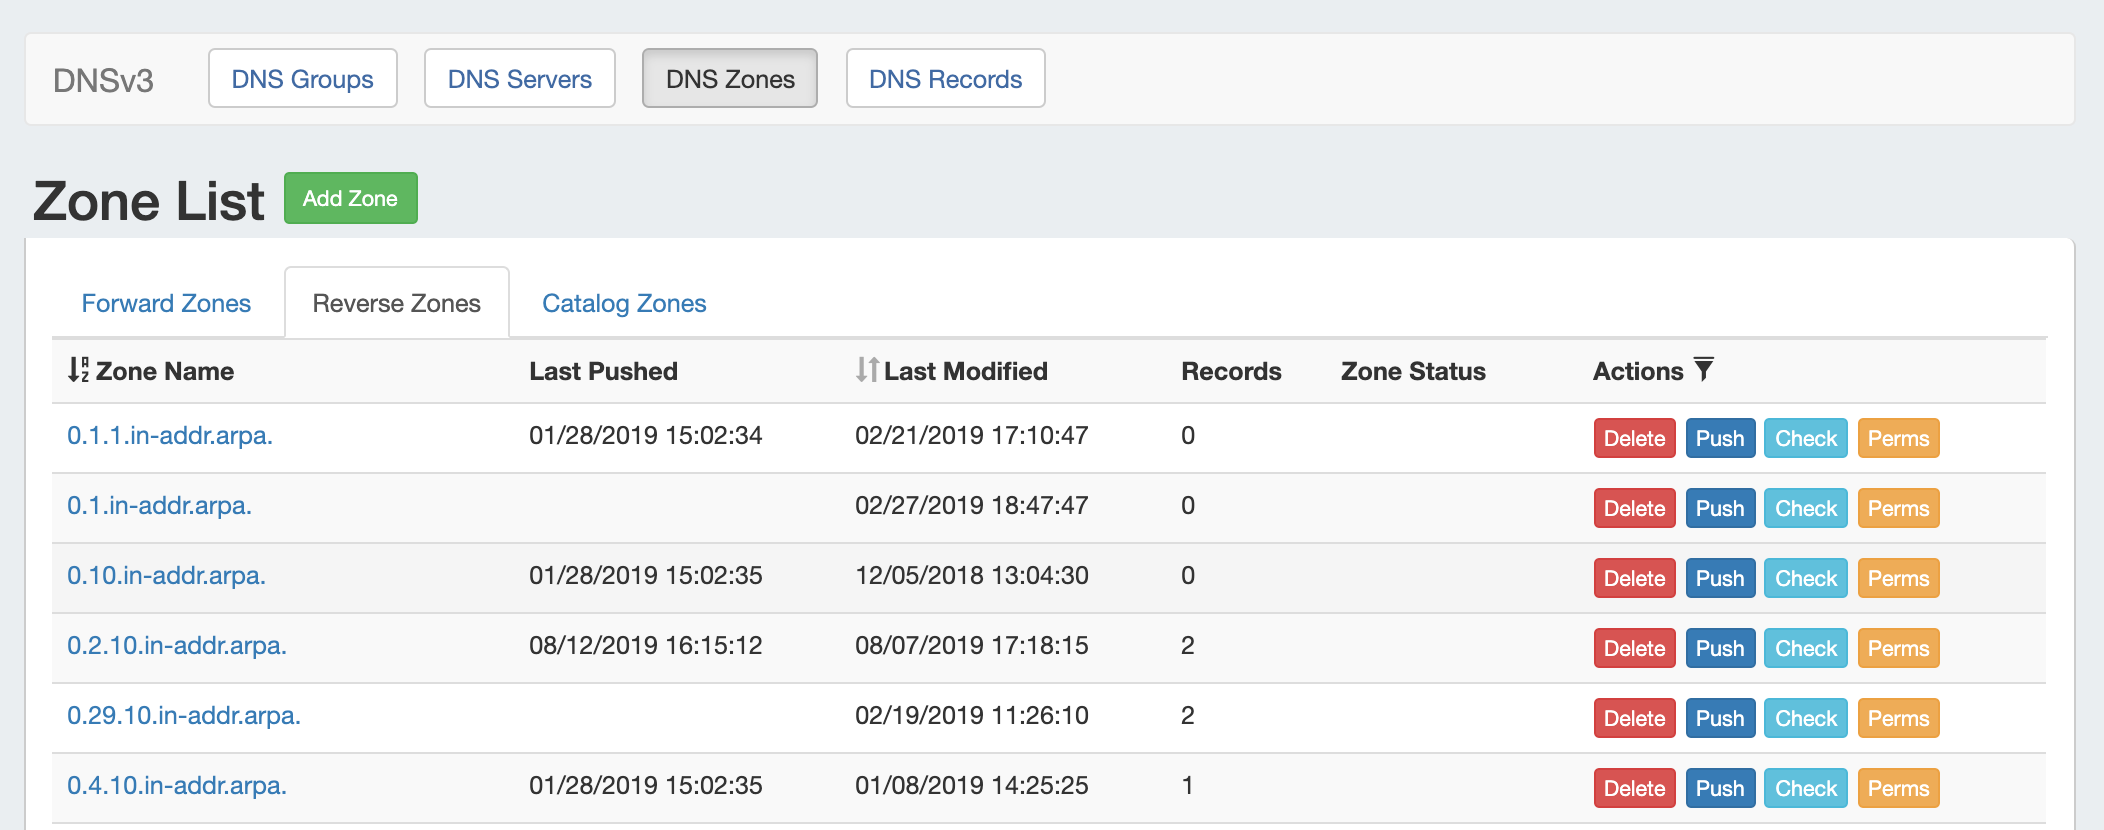
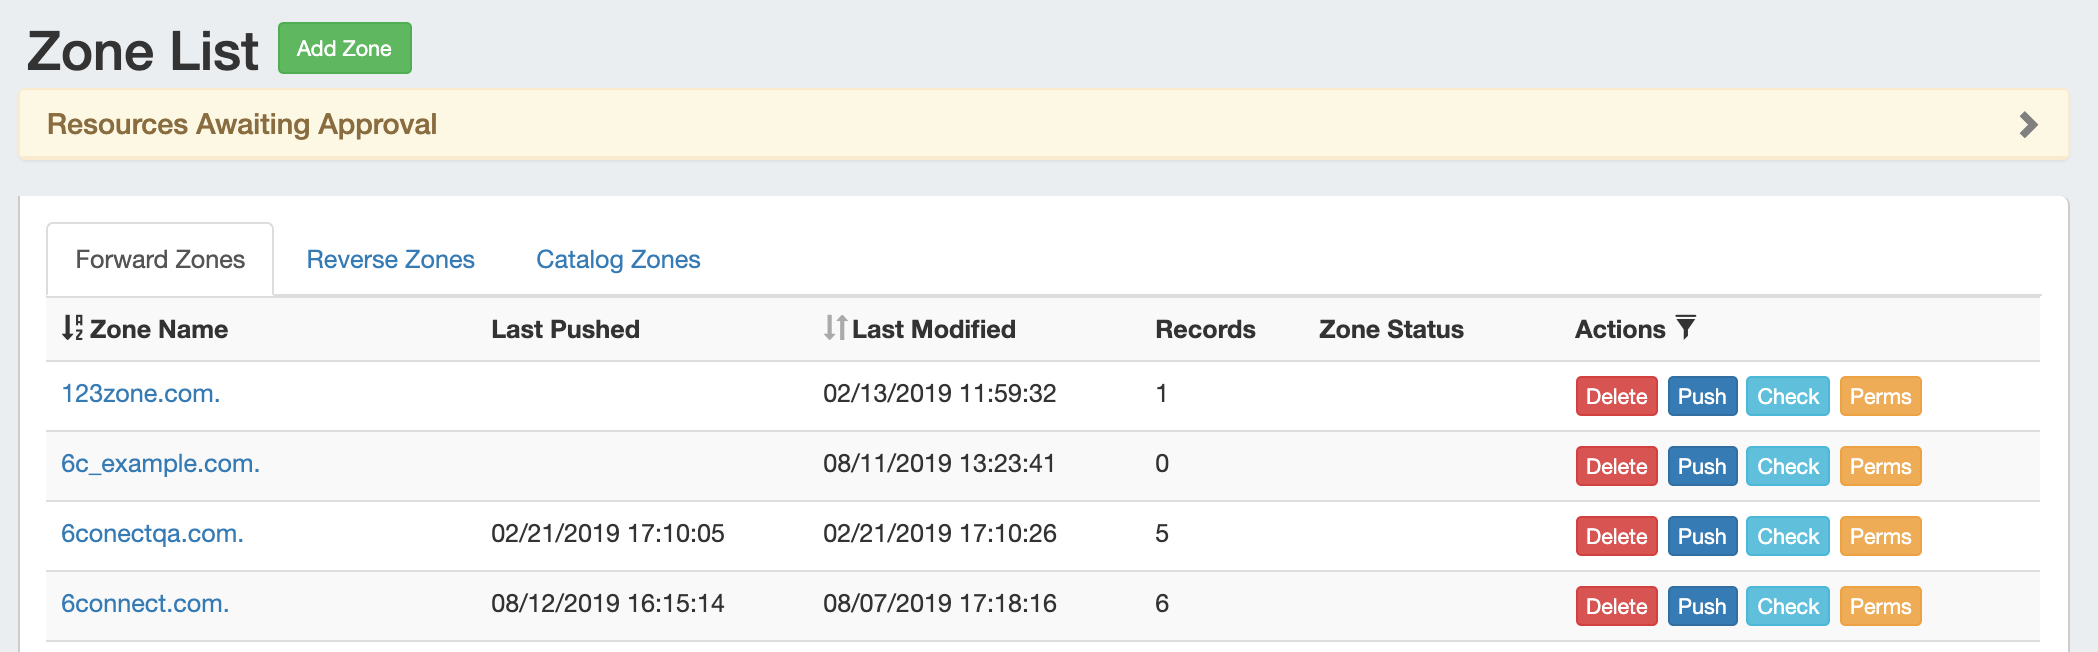
The DNS Zone List shows all zones existing in ProVision, organized into three tabs - Forward, Reverse, and Catalog Zones. By default, the zones load in ascending alphabetical order with 25 zones per page. To switch between the two lists, simply click on the tab for the desired zone type.
Sort / Filter the Zone List
The Zone list may be sorted by either "Zone Name" or by "Last Modified" time.
To sort the Zone List, click on the up/down arrows next to either column header to toggle between ascending/descending order.

To filter the Zone List, click on the filter icon next to "Actions".

Then, type in all or part of the zone name, or select zone status. Click "Filter."

The zone list will filter the zones to only those fitting the selected criteria.
Resources Awaiting Approval
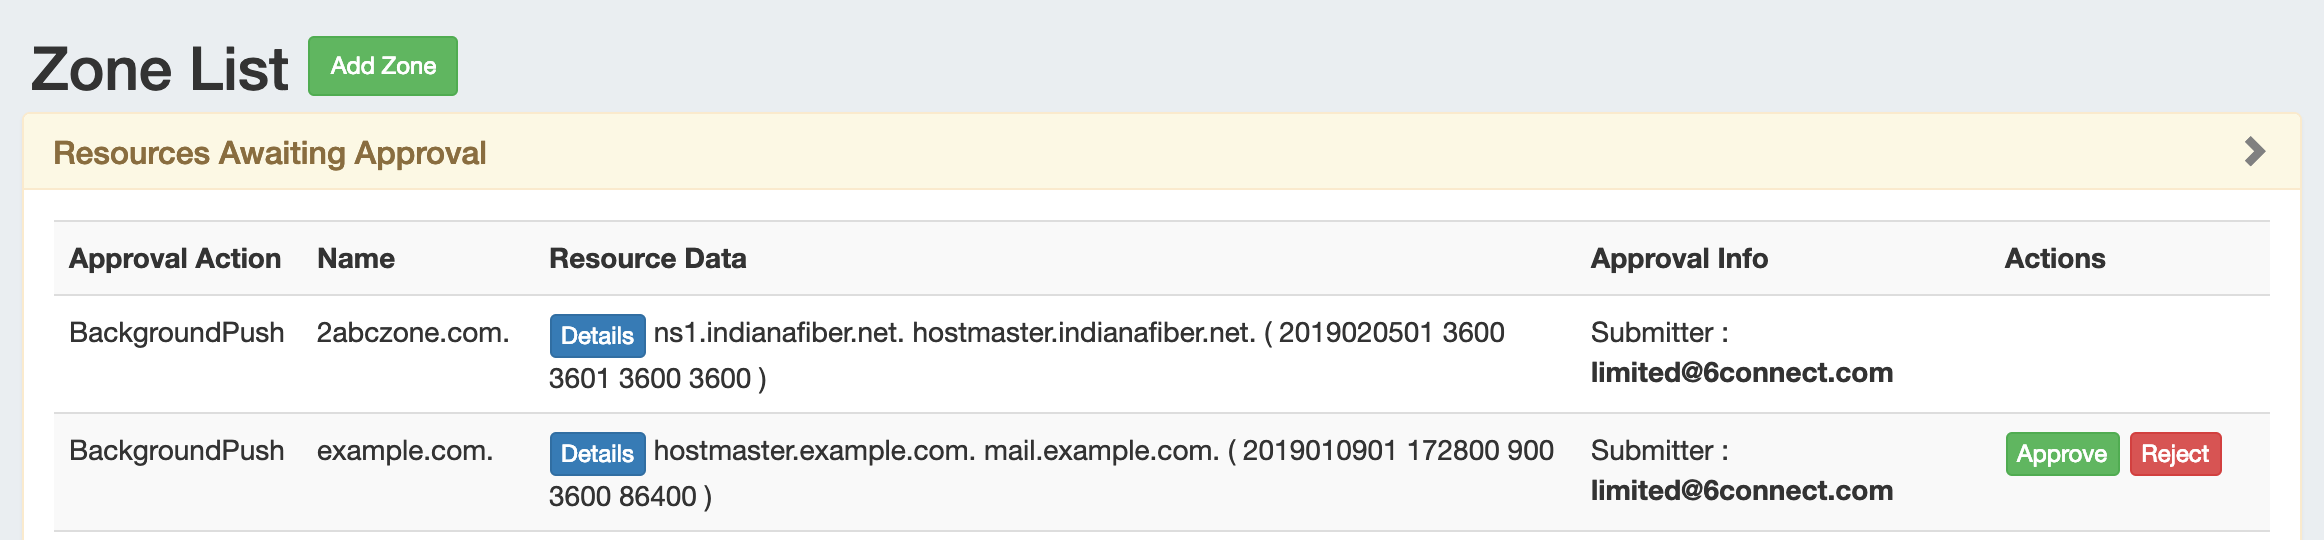
If the Approval system is in use, pending zone approval items will be shown in a "Resources Awaiting Approval" module above the Zone List.
Users who submitted a change for approval will see the details of their change request in this module.
Admin users with permissions to approve or reject the request will have the option to Approve or Deny the change.
View Zone Details (View Zone Page)
To view details or manage a zone, click on the zone name from any Zone List to go to the Zone View page.

The View Zone Page Interface
Zones may be edited by clicking on the Zone name in any zone list in which it appears - from the DNS Zones Zone List, zones listed under DNS Groups, under DNS Server attached zones list, or from the DNS Gadget.
Clicking on the zone name opens up the View Zone page, from where comments may be added, records added or updated, servers attached to the zone, advanced settings edited, backups restored or the zone pushed / exported.
This section focuses on a general UI overview of the Zone View page.
For detailed instructions on how to perform specific zone tasks on this page, see Working with DNS Zones.
Areas of the Zone View page include:
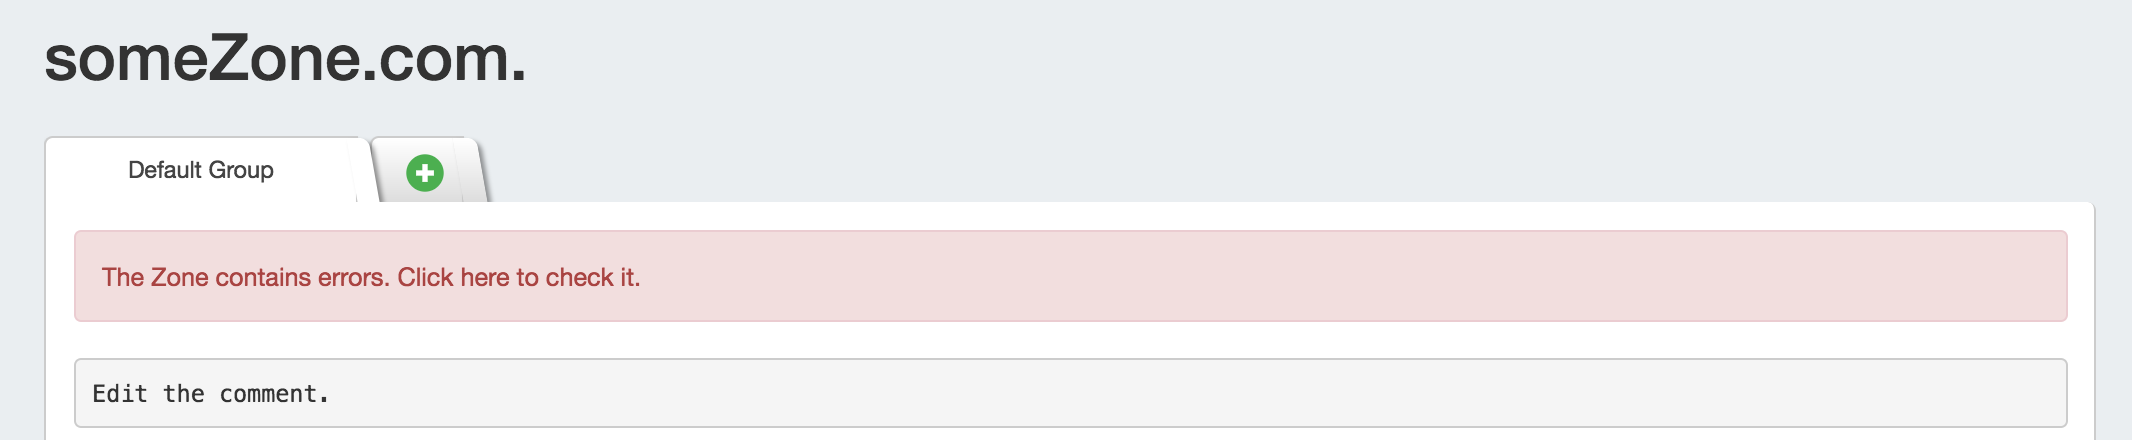
Error Notification
If errors are detected for the zone, an error notice will be given at the top of the group tab for the zone. To review the error, click on the message, and it will list the number of errors present, and details if available.
Records will errors will be highlighted in red in the records list.
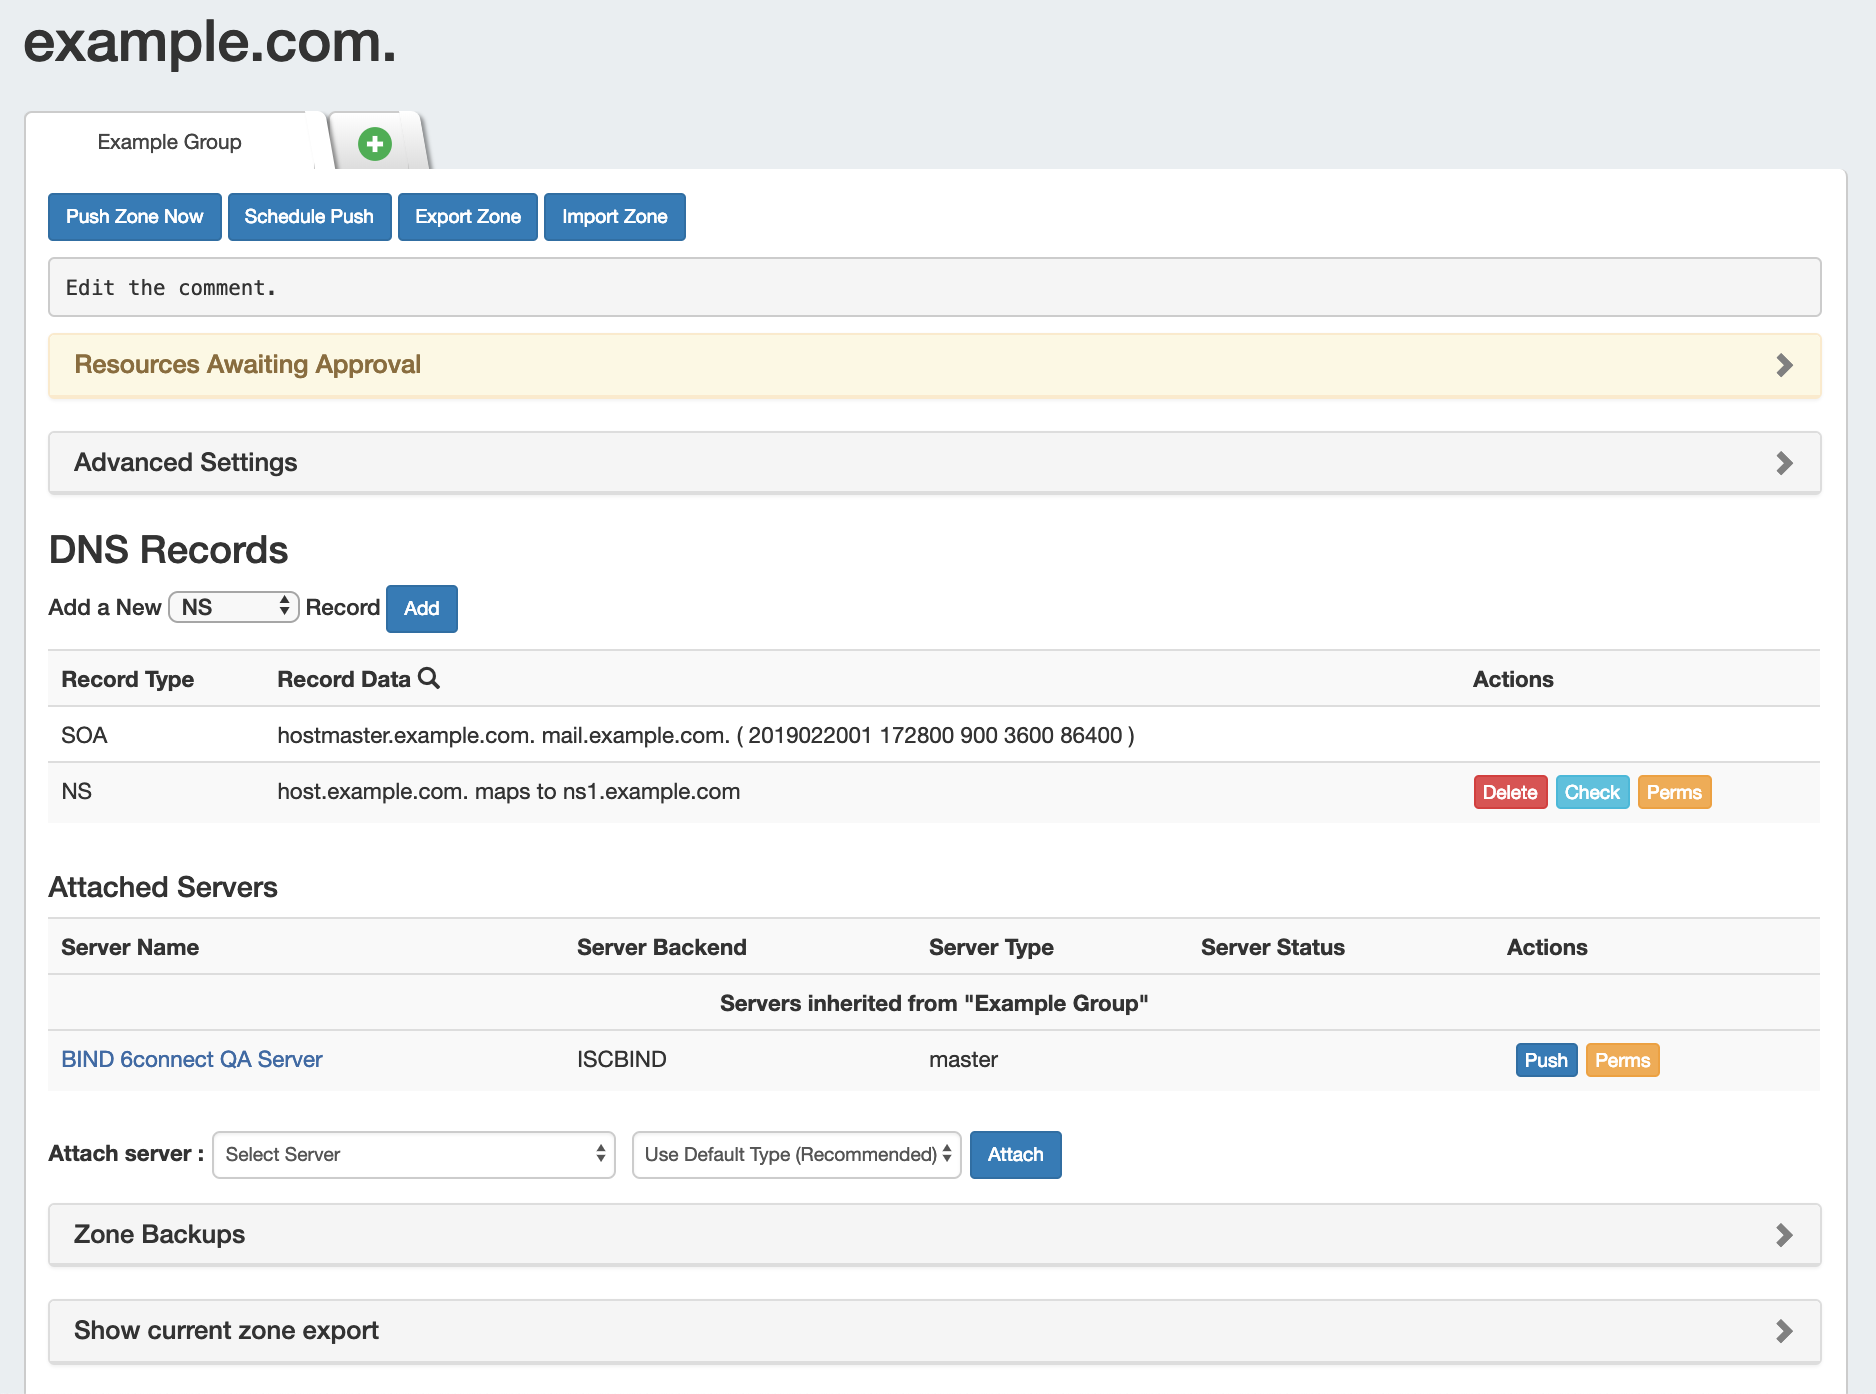
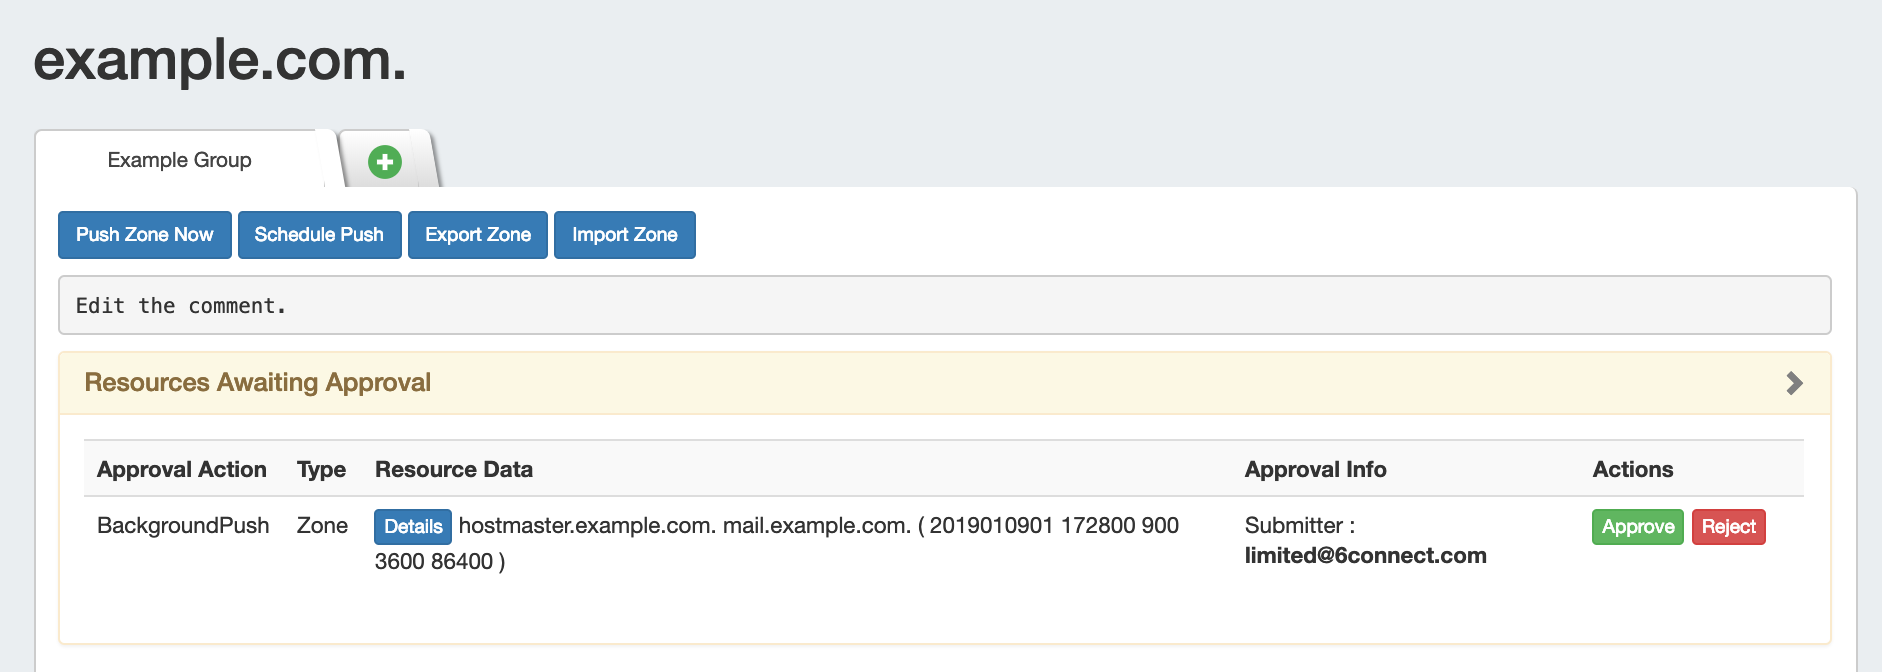
Zone Actions
Zone actions that may be taken include pushing the zone ("Push Zone Now"), scheduling a zone push ("Schedule Push") or exporting the zone to a .zone file ("Export Zone").

Comments
To add a comment to a zone, click anywhere inside the comment area and begin typing. The comment will be saved when an area outside of the comment box is clicked, deselecting the comment area.

Pending Approvals
If the Approvals system is used, pending approval events for the zone or records will appear in an expandable module under the zone comment.
Users who submitted a change request will see the action and data details for their request.
Admin users who can approve/reject the change will see all details plus buttons to Approve or Reject the change. See Approvals for additional information.
Advanced Settings
Open the zone "Advanced Settings" section by clicking on the header or the expansion arrow (>).
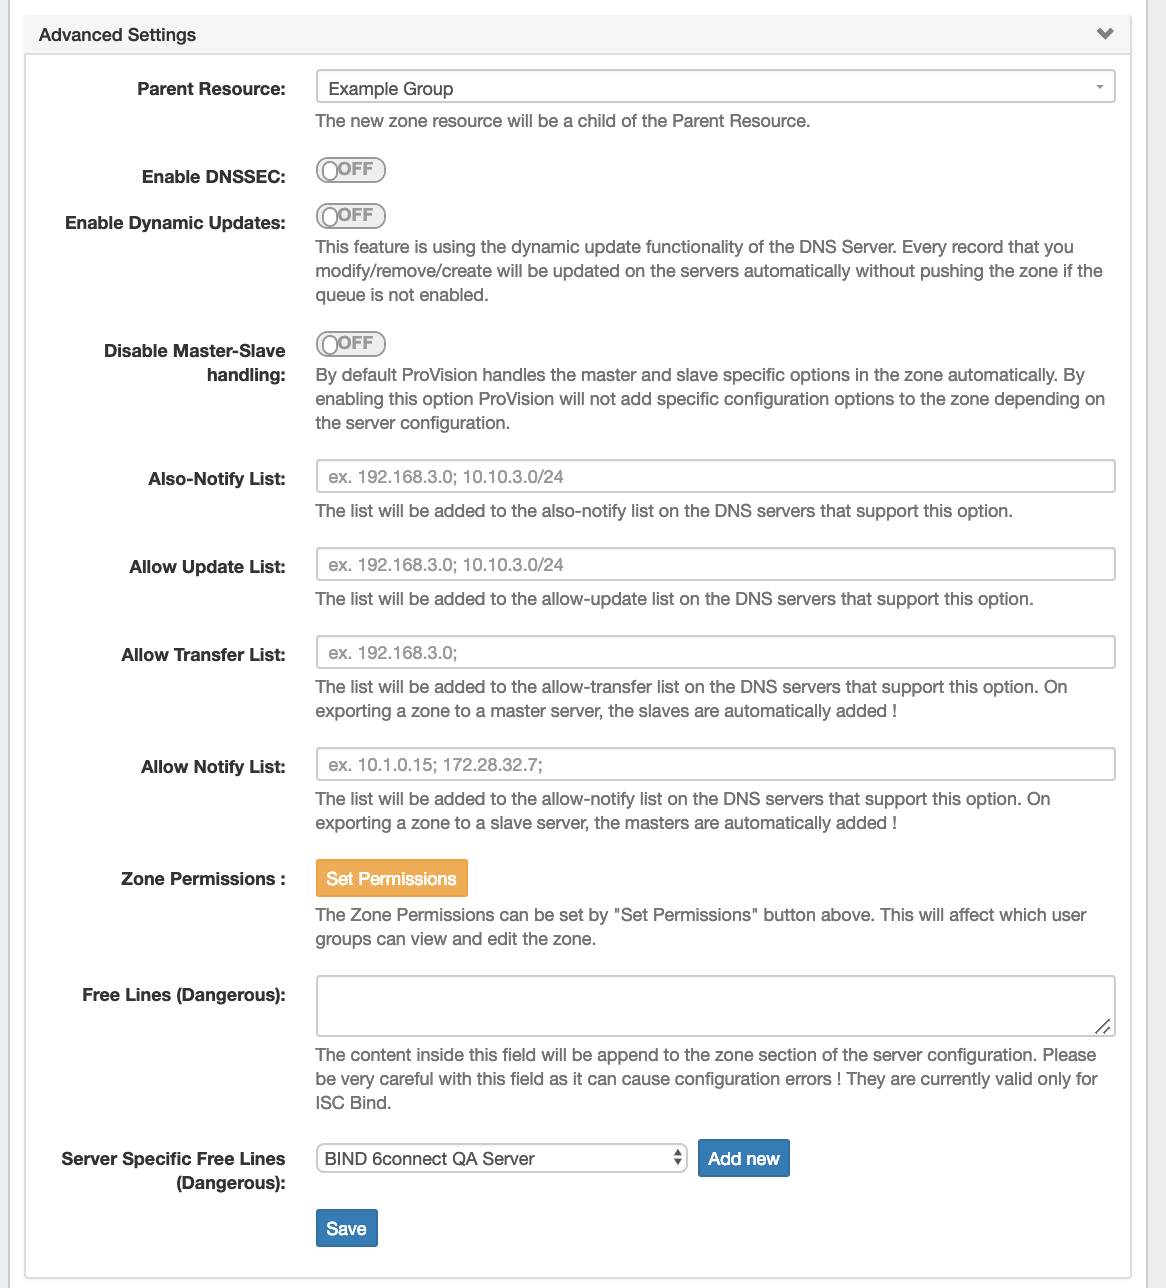
Here, you will find options for:
Parent Resource: Sets the zone's Parent Resource, which affects the permissions access for the zone. By default, the parent is set as the DNS Group the zone is in.
Enable DNSSEC: Toggle "On" or "Off" to enabled DNSSEC for the zone, if supported by the attached server.
Enable Dynamic Updates: Toggle "On" or "Off" to enabled Dynamic Updates for the zone, if supported by the attached server.
Also-notify List: Add IPs to also-notify list of the attached DNS sever, if supported.
Allow Update List: Add IPs to the allow updates list of the attached DNS sever, if supported.
Allow Transfer List: Add IPs to the allow transfer list of the attached DNS sever, if supported. Slaves are automatically added if exporting a zone to a master server.
Allow Notify List: Add IPs to the allow notify list of the attached DNS sever, if supported.
Zone Permissions (Admin): Directly adjust User Group CRUD permissions for this zone.
Free Lines: Enter free lines to append to the zone section of the server configuration for the attached server (ISC BIND only). Use with caution - this can cause configuration errors if mistakenly included.
Server Specific Free Lines: Select a DNS server and click "Add New" to add server-specific Free Lines.
Save Button: Be sure to click "save" when edits are complete, or changes will not be saved.
DNS Records
The DNS Records list on the View zone page contains options to add a new record of the selected type, edit record information, delete a record, check record, or edit permissions (admins only).

Filter Records
Filter the records list by clicking the "filter" icon next to "Record Data".

Then, select the desired record type, host / value names, or status. Then, click "Filter".
DNS records may also be reviewed and managed from the DNS Records sub-tab.
Scheduled Tasks
If scheduled tasks (zone pushes) have been set up for the zone, they will appear under a "Scheduled Tasks" section.
Tasks here will also show in the Admin Scheduler task list.

The task may be deleted by clicking the "delete" button.
See Working with DNS Zones for details on Scheduling zone pushes.
Attached Servers
Servers attached directly to the zone, or inherited from the zone's parent DNS Group will be shown here.
Additional servers may be attached by selecting the server name, type (default, master, slave), and clicking the "Attach" button, as long as the user has permissions on both the zone and the server to attach. After attached, users with sufficient permissions may detach, push, or edit permissions on the server.

To detach a server from a zone, look for the server under the "Attached Servers" list, then click "Detach" under actions for that server.
Servers that are attached via inheritance from a DNS Group will not be able to be detached at the zone level.
Zone Backups
If a zone has had changes sucessfully pushed, a "Zone Backups" section appears near the bottom of the page, showing the date and time of the backup.

To view details, or restore the zone to the previous version, click on the row of the desired date/time backup, and the "Zone Restore" module will open.

From here, you may restore individual records by clicking on them, or restore the entire zone by clicking the "Restore Zone" button.
To exit without saving, click the "Close" button.
Current Zone Export
To view or download current zone information, expand the "Show Current Zone Export" module. Then, select the DNS server to pull from and select either "View Here" or "Download".

"View Here" will display a read only text data display of the zone information directly in the module.
"Download" will download a .zone file for the zone from the selected server.
Addiitonal Information:
For more information on working with DNS Zones, Groups, and Servers, see the following sections: