Configuring PowerDNS Support
Environments supported
- PowerDNS version 3.0 or above on the target server(s)
- BIND or MySQL backend
Step 1: Add a PowerDNS Server
To create a new server, start from the DNS Tab, select the DNS Servers sub menu. Then, click the "Add Server" button next to "DNS Server List".
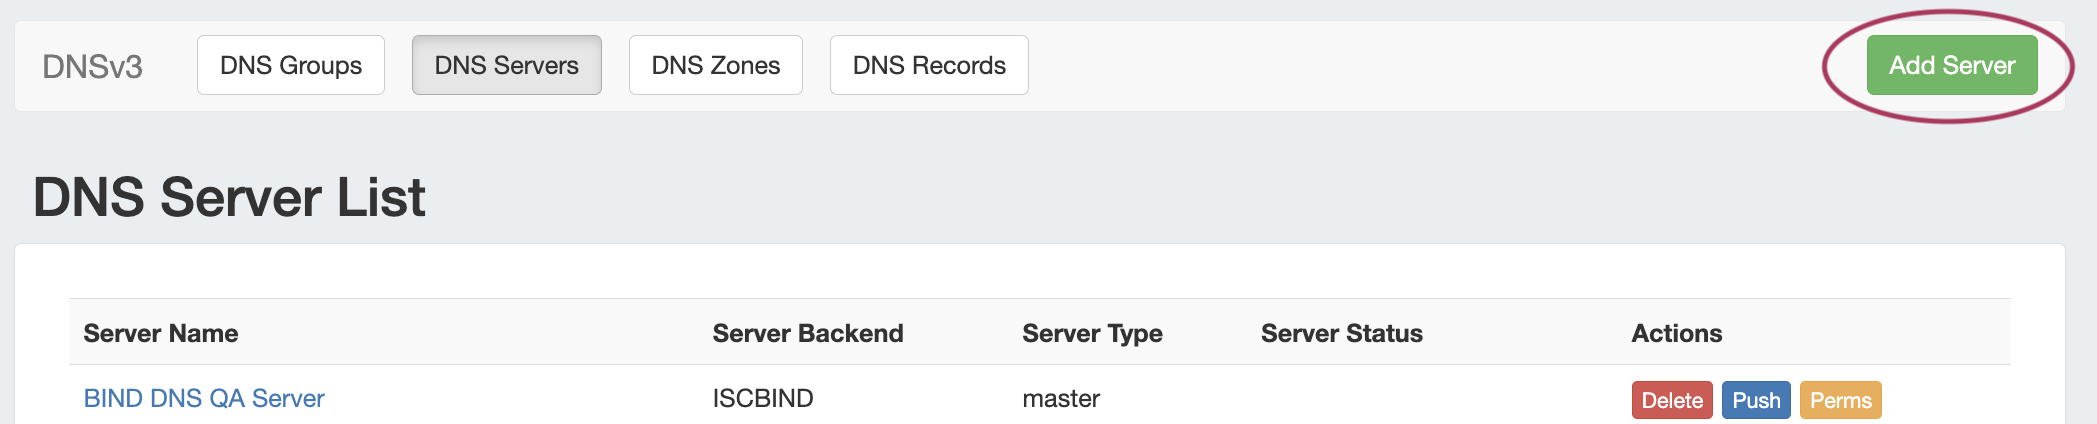
This will open the "Server Settings" page.
Server Settings
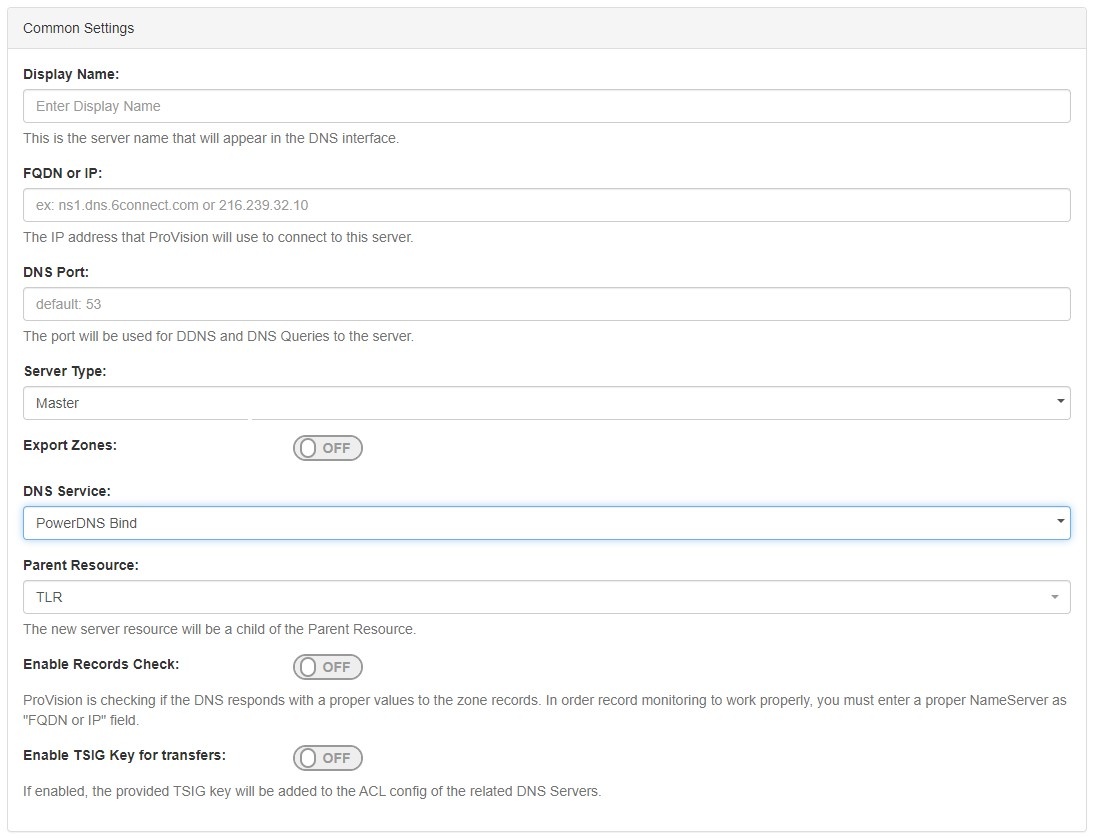
1) Set Server Common Settings
In the "Common Settings" section of Server Settings, enter the new server's Display Name (the name that will appear on the ProVision interface), the FQDN / IP, server type, DNS service type, and desired parent Resource (may be left at the default Top Level Resource). For PowerDNS servers, ensure that either "PowerDNS BIND" or "PowerDNS MySQL" is selected under DSN server type.
2) Set Server Specific Settings
The next section is entering server service-type specific settings. The options visible in this section will depend on the "DNS Service" type chosen under "Common Settings".
Here, we see the fields for PowerDNS BIND server settings. Enter the server Username, Password, Port, Remote Director, Named Conf. Path, and Pre/Post Command (if desired). Your fields may vary for other server types.
For SSH Public Key Authentication, DNSSEC, and Dynamic Option updates, click on the ON / OFF toggle to select "ON" or "OFF" for each as needed.
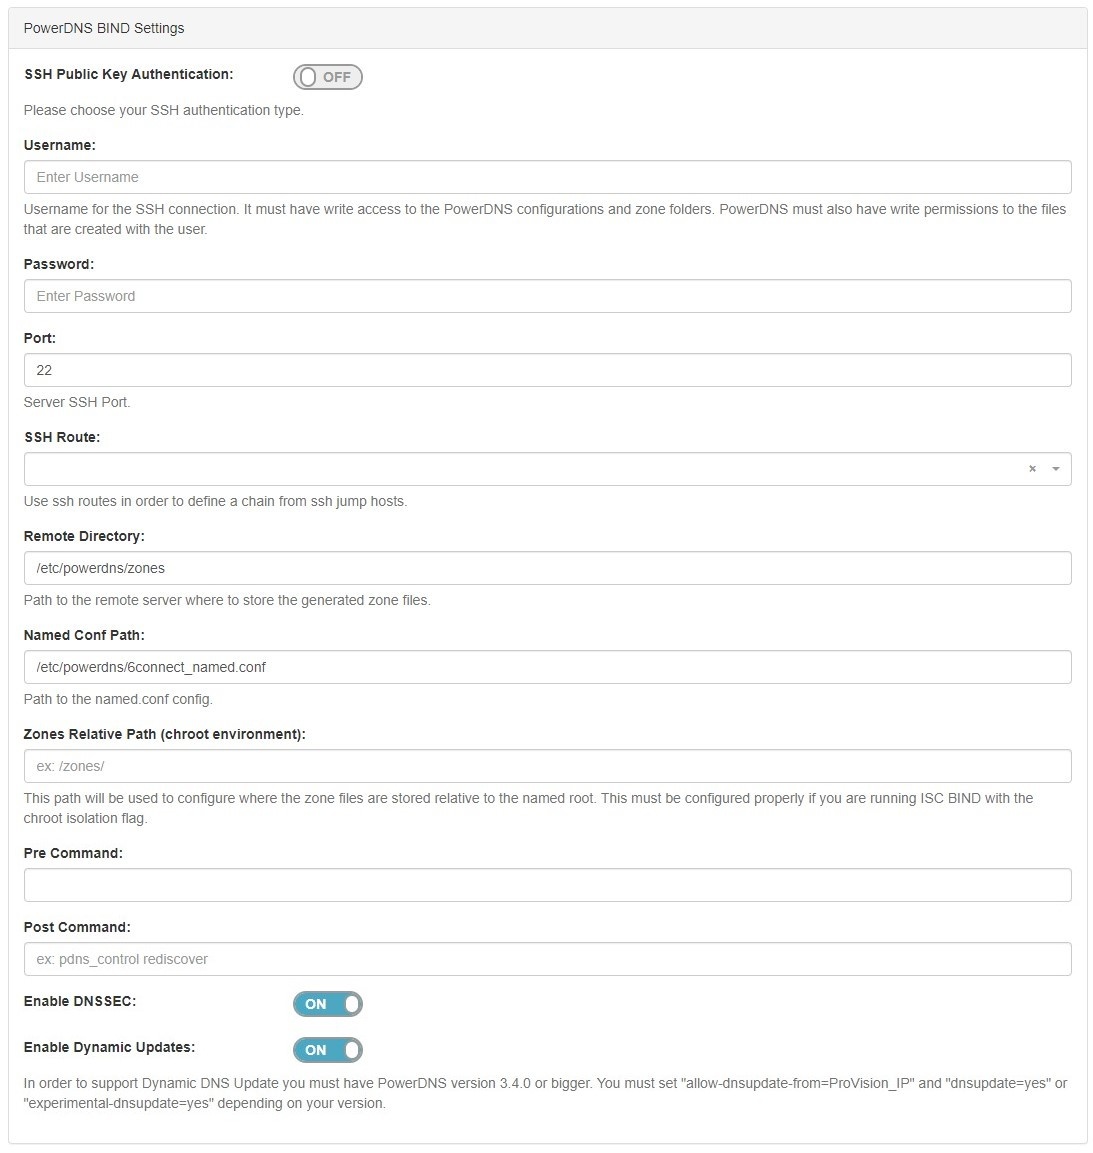
After entering the server-specific settings in this section, you can click the "Test Connection" button at the bottom right of the page to test the server connection and authentication.

A window will pop up showing a success or failure response.

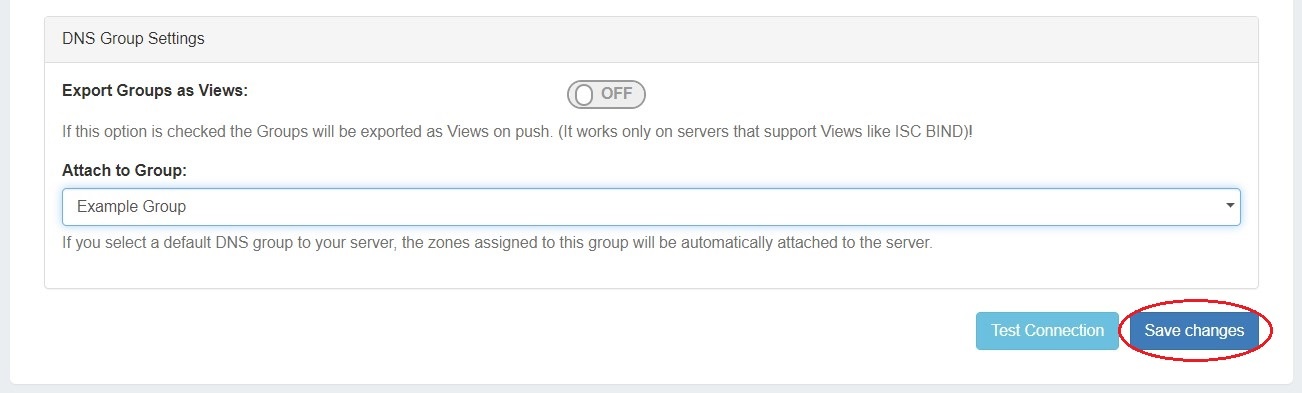
3) Set DNS Group Settings for Server
In the last section, select a default Group to be associated with the server. Zones assigned to the selected Group will automatically be attached to the server.
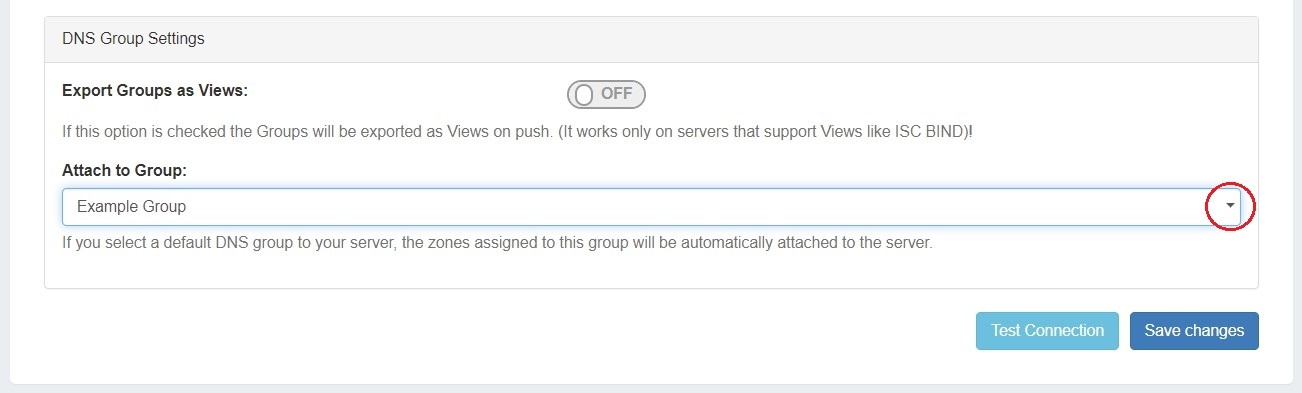
4) Save Changes
Save your changes when done! Just click the "Save Changes" button at the bottom right of the page.
The new server will now be added to the DNS Servers list. These settings may be changed at any time by selecting the server from the server list and editing the information.
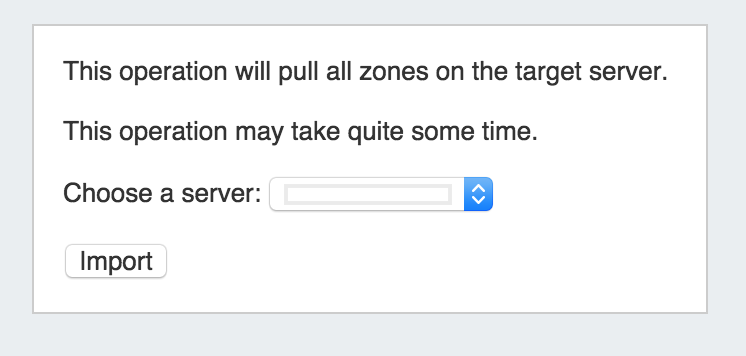
Step 2: Import PowerDNS Zones
While in the Admin section, navigate to the Data Import Tab. Select the "Power DNS Zone Import" link.
To import your data, simply choose your PowerDNS server and click "Import".
Step 3: Push zones to PowerDNS
Navigate back to the DNS tab, and select the "DNS Servers" tab.
Locate the PowerDNS server in the DNS Servers list, and then click the "Push" button under "Actions" at the end of the row.

BIND Backend
Note on SSH
The integration does not require a remote database connection, but it does require an SSH account and a writable directory. The SSH account must have access to the server. This account will also be used for DNSSEC functionality within PowerDNS.
MySQL Backend
Note on SSH
The integration requires a remote database connection, so will need a mysql user with permissions for remote administration. We highly recommend using ACLs to ensure that configuration only occurs from intended sources.
For DNSSEC functionality, you will need a standard SSH user account withing your PowerDNS user group
Please note that Views are not supported with the MySQL backend
Only BIND and MySQL backends are supported.
Additional Information
For additional information on working in DNS, see the following sections: