Gadgets
What are Gadgets?
Our gadget system is similar to the Atlassian Gadget system (and Google Gadgets). When creating or editing a Section, gadgets can be added in a way similar to how you would add or remove a field (see Customizing Sections). Gadgets are best described as self contained webapps; widgets but with more power. Gadgets can have their own fields, HTML templates, and even accompanying scripts and stylesheets. They can interface with the API to display simple information such as the Type of the Resource, or they can perform much more complex functions as demonstrated with the IPAM gadget in the following section.
Available Gadgets
Resource View
This visual element is used on the Resource Holder Section type. The Resource view displays and provides links for the Section and Category for the Resource.
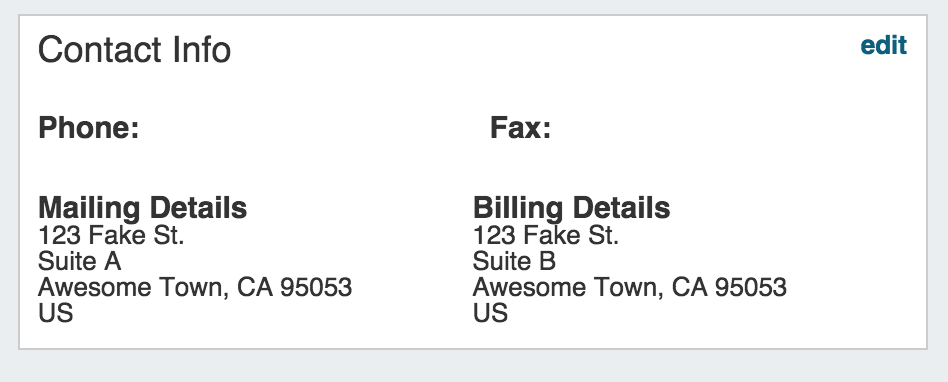
Contact Info
This visual element is used on the Resource Holder Section type. In the Contact Info Gadget, you can track information such as mailing / billing addresses, phone number, and fax number for that Resource.
Contacts
The Contacts gadget may be used on any Section type to assign a contact (from the Contact Manager) to a Resource.
To assign a contact, search for and select the desired contact in the search box, then click "Assign". The Contact will show in the list below.
Contacts Action Menu:
The Action Menu (wrench icon) in the contacts gadget has three options:
Set Role: Select to create a new role, or assign an existing role to the contact.
Unassign: Unassigns the contact from the resource
View: Redirects to the contact's detail page in the Contact Manager
Refer to the Contact Manager page in the documentation for more detail on working with the Contacts gadget and the Contact Manager.
A Note on Permissions
The ability to view and assign a contact to a resource is restricted by the Parent assigned to the contact upon creation. If a user does not have permissions for a contact's Parent Resource, that contact will not be able to be viewed / assigned via the gadget.
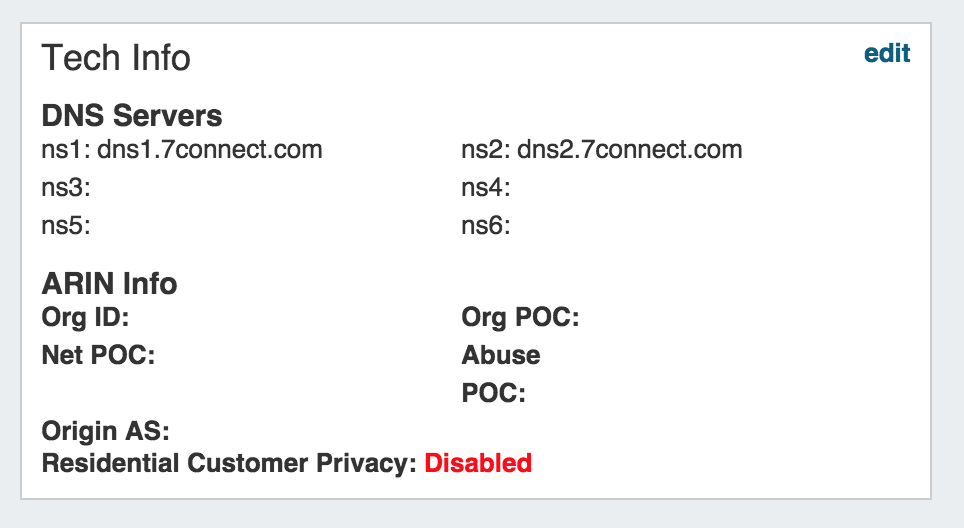
Tech Info
This visual element is used on the Resource Holder Section type. This Gadget allows you to list DNS servers, ARIN information, and enable/disable customer privacy.
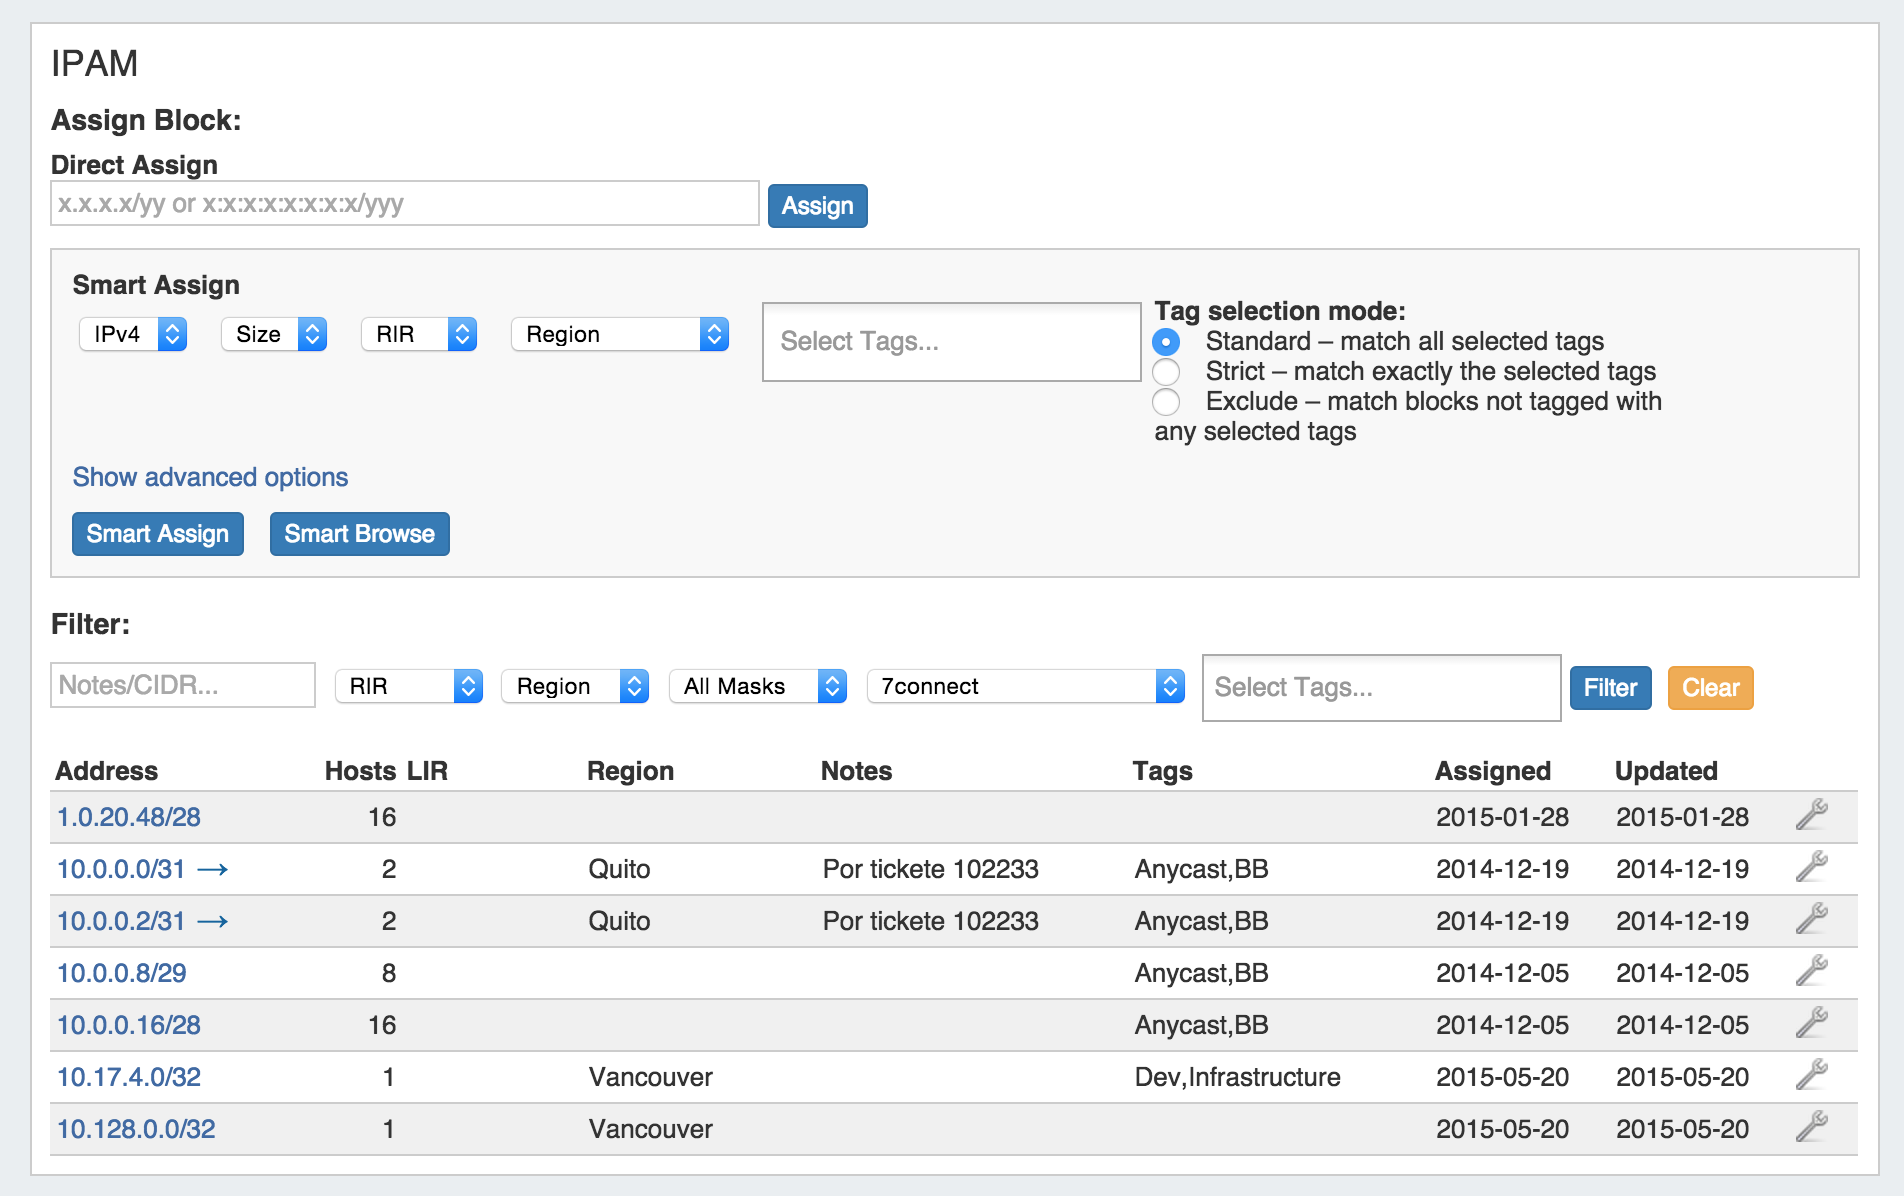
IPAM
This gadget is used on the Resource Holder Section type. IPAM Gadget allows you to view, assign, and manage blocks for that resource.
For more information on assigning and managing blocks, see Working with IP Blocks - Assigning IP Space.
Document Storage
The Document Storage gadget allows you to upload documents to a resource, and have those documents accessible to download from the 6connect cloud to your local machine. It may be enabled on any Section type.
Upload Files
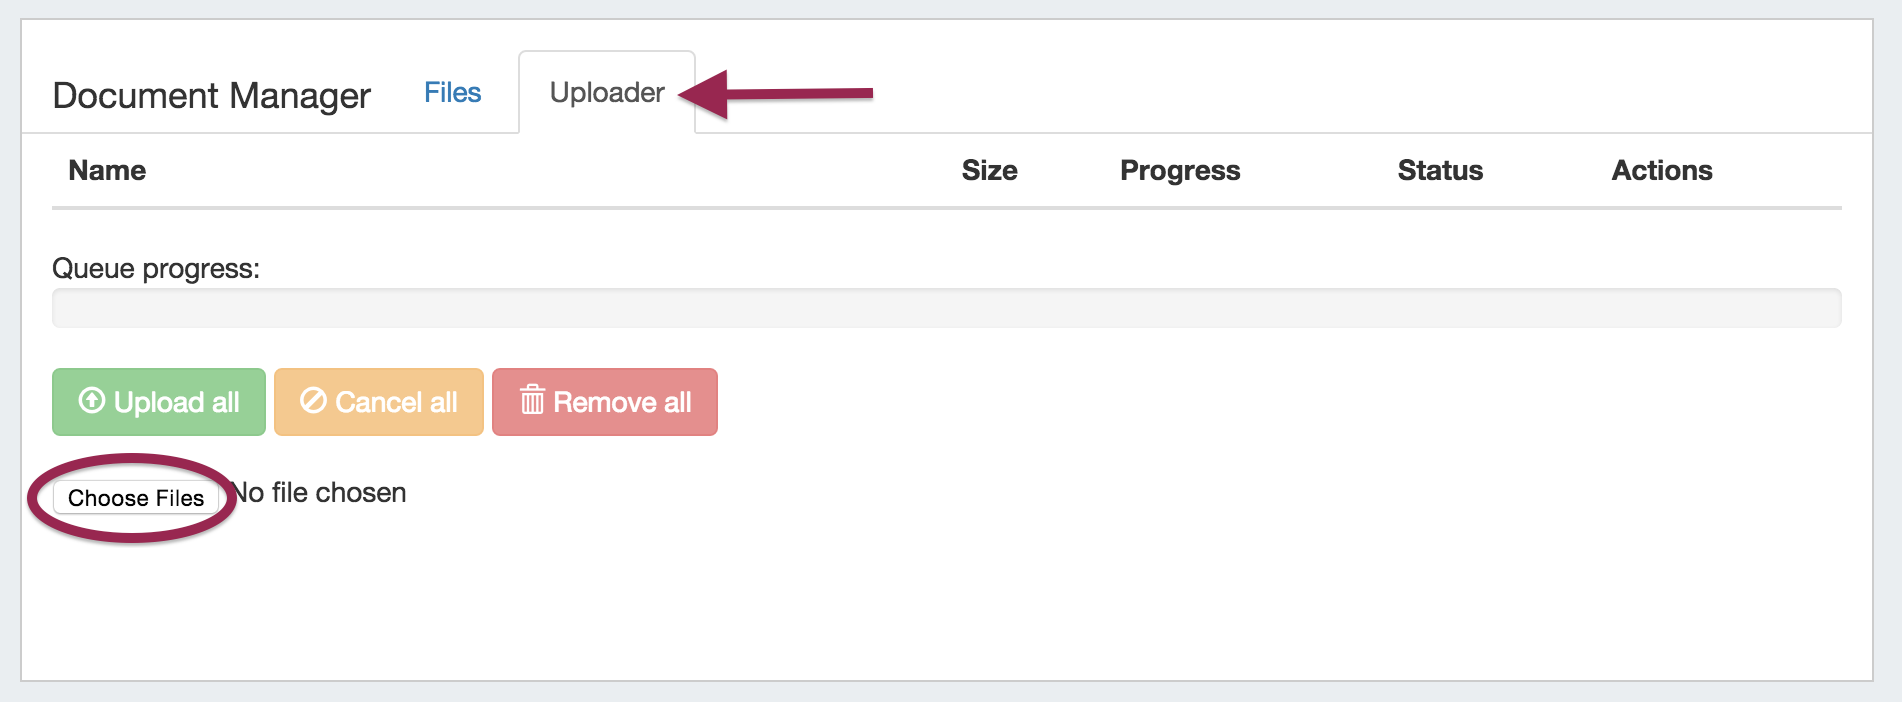
First, ensure the Document Storage gadget is enable for the Section type. Then, select the "Uploader" tab under the Document Manager gadget.
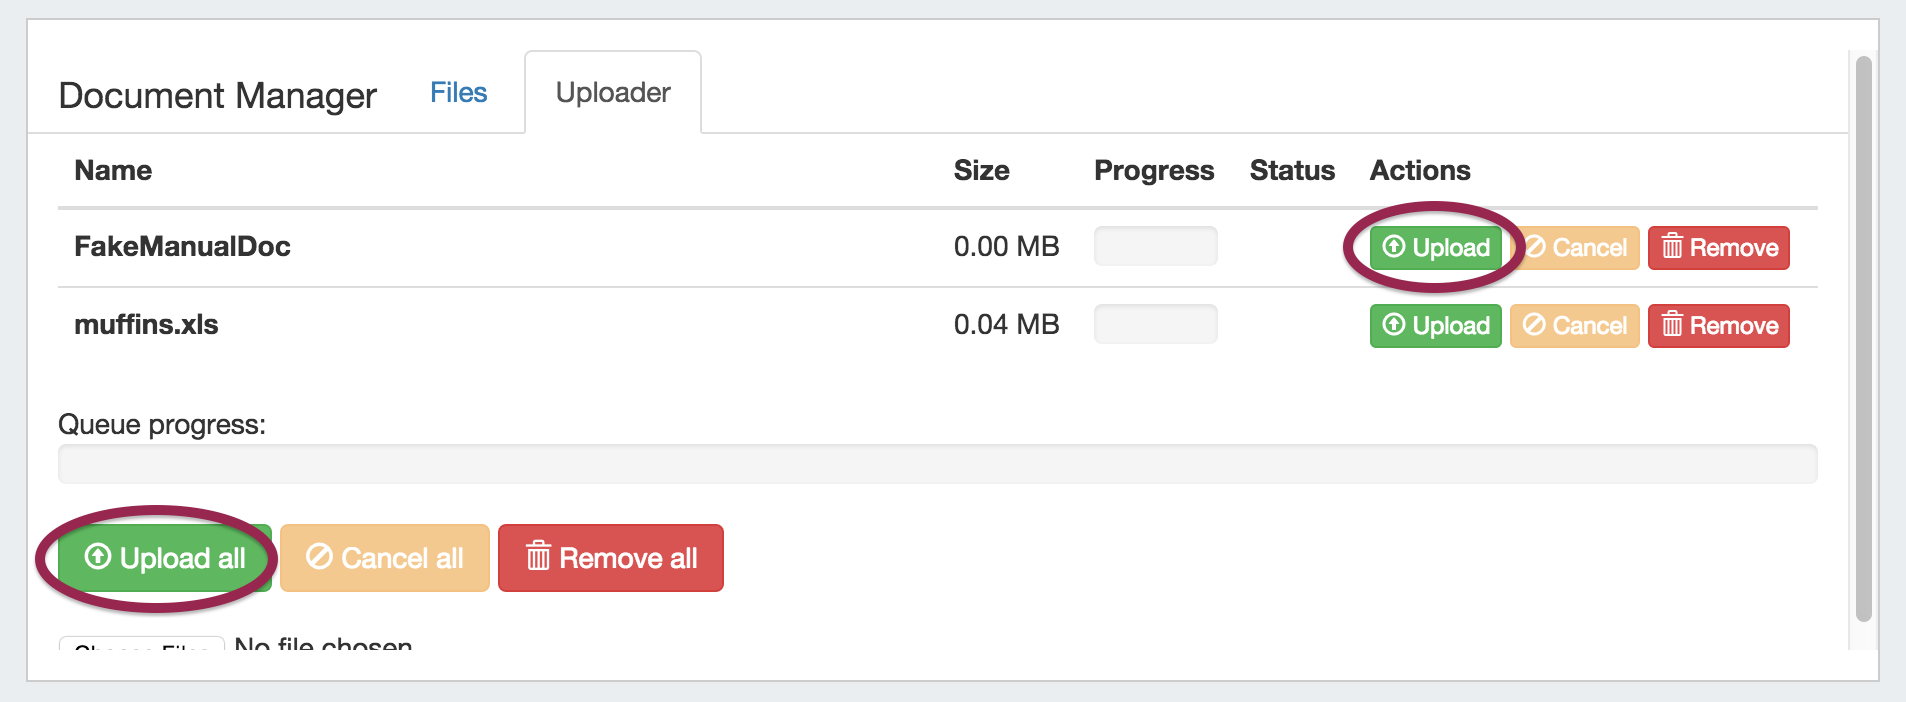
Click on the "Choose Files" button, and select the file(s) you would like to upload.
The selected files will show in a list under the Uploader tab. To upload the file(s), click on either the "Upload" button adjacent to the file to upload the individual file, or the "Upload All" button to upload all files listed. You may also choose to remove files from the upload list, or cancel.
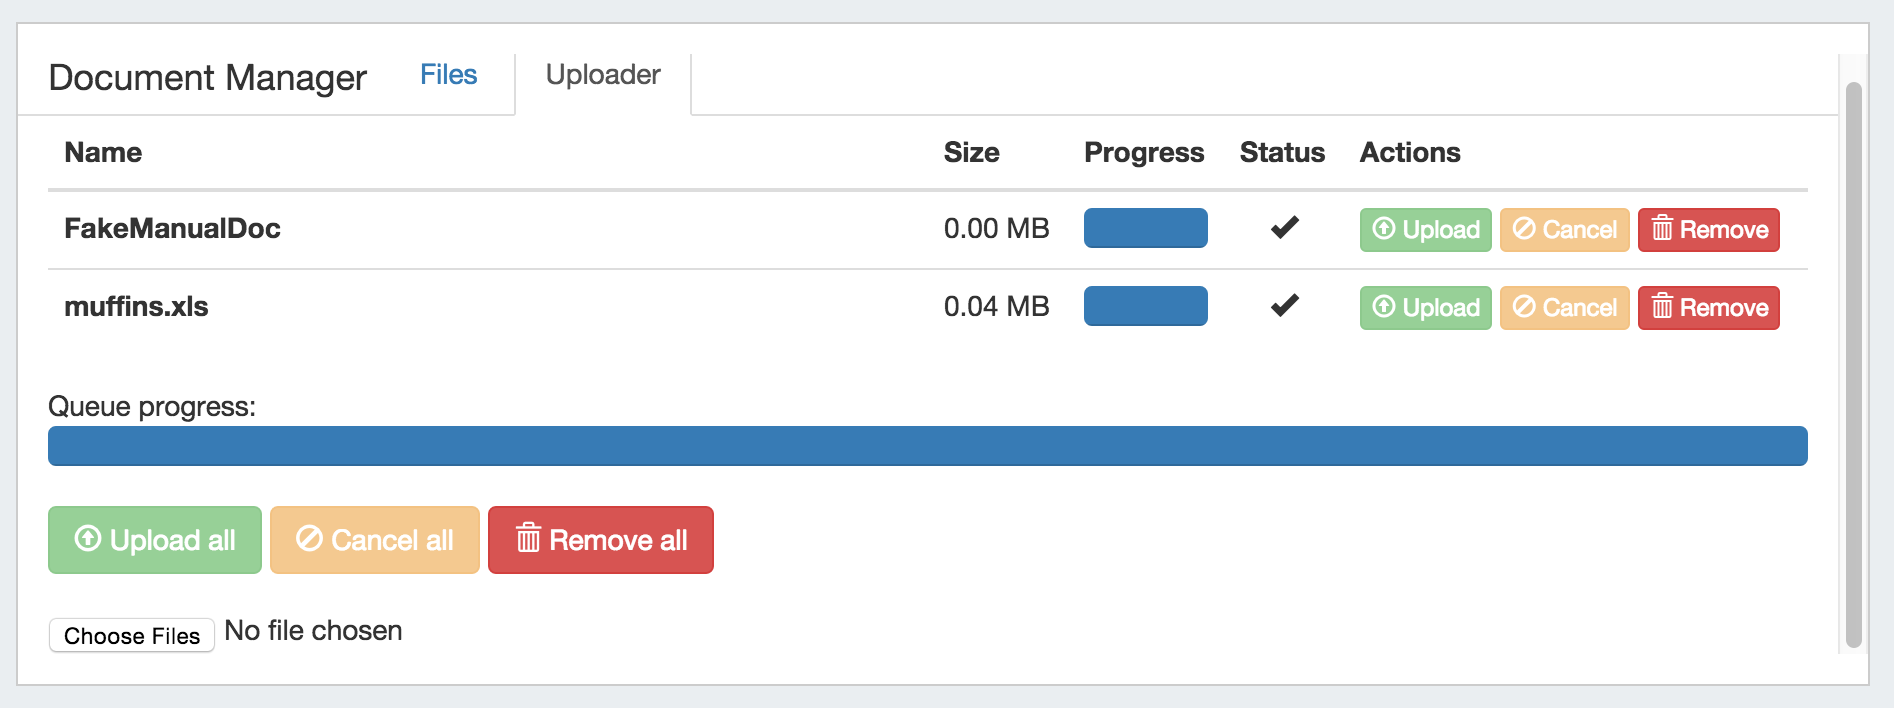
Once the progress bar is filled in, your upload is complete! Your files will show under the "Files" tab.
Download Available Files
Successfully uploaded files are listed under the "Files" tab of the Document Manager gadget. From here, you can see the file Name, Size, Type, Date, and available Actions.
To download a file to your local machine, ensure you are on the "Files" tab, then click on the "Download from Cloud" icon.
If a file is no longer needed, you may delete the file from the Document Manager by clicking on the Delete (trash can) icon.
DNS
This gadget is used on the Resource Holder Section type. The DNS Gadget allows you to add new Zones as well as view and manage existing zones. For more information on DNS functions and managing zones, refer to the documentation for the DNS Tab.
DHCP Management
This visual element is used on the Server Section type.
The DHCP Management Gadget in the "Off" configuration:
To enable the DHCP Management Gadget, select the "On" radio button next to "DHCP Services", and click the "Update" Button.
The DHCP Management Gadget in the "On" configuration:
Each of the four sections in the DHCP Management Gadget - Connection Configuration, Server Details, DHCP Pools, and Create a New DHCP Pool - may be expanded to change settings in each area.
For detailed information on working with the DHCP Management Gadget, see DHCP Tab - Managing DHCP Server Configurations.
Peering Session
This visual element is used on the Router Section type. In Peering Sessions Gadget, by clicking on the Action Menu (wrench icon) you can perform basic session edit functions such as Edit, Config Manager, Email, Admin Up/ Down, and Delete. For additional information on Peering, see Peering v2.
Peer Groups
The Peer Group Gadget allows you to add peer groups for IPv4 and IPv6 for a selected exchange from a router's Resource Entry page.
To do this, simply select the exchange, type in a Peer Group name in the text box, select IPv4 or IPv6, the click "Add Group".
Peer Groups added from this gadget will be then be available to select in the "Add Session" dialog box in the Peering tab.
Note
Peer groups listed in the Gadget are for ProVision only and should reflect groups that exist on the router.
Adding or deleting peer groups from the Gadget will not add or delete them on the router.
For additional information on Peering, see Peering v2.
Peering VRF
The Peering VRF Gadget allows you to add VRFs from a router's Resource Entry page.
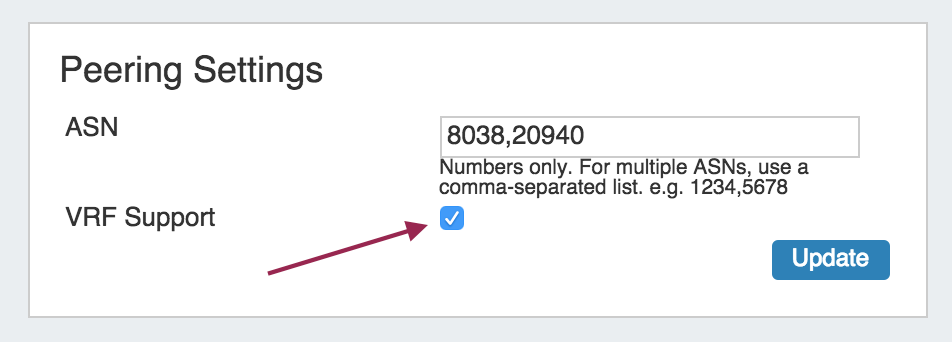
Enabling "VRF Support" in the Admin home page under "Peering Settings" will automatically add the VRF gadget to the router Section.
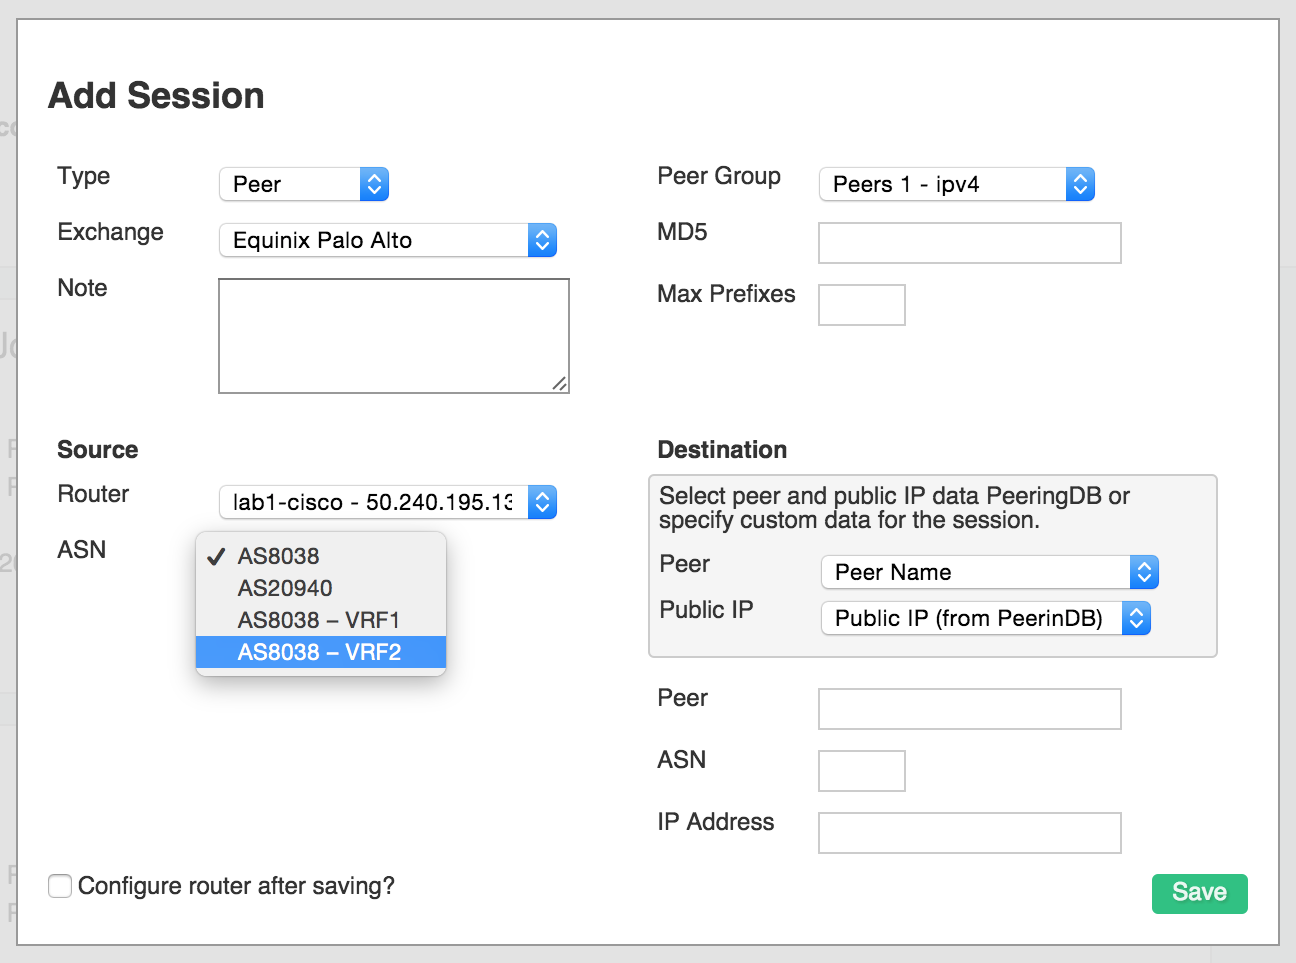
Once VRFs are set up for a router, the source ASNs for the associated VRFs will appear in the Source ASN dropdown when adding or editing a session for that router from the Peering tab.
Reverse API Console
The Reverse API Console Gadget allows you to add endpoints from a Resource Entry page, and view customizable javascript displays set for the selected endpoint. The Reverse API Console may be added to any type of Section / Resource, and must be enabled for a Resource for certain rAPI processes to successfully complete.
After adding the gadget to a section, the Reverse API console will appear as whitespace with the option to add an endpoint display. Endpoints must already be created via rAPI or through the Admin Reverse API interface in ProVision to be selectable via the gadget.
Selecting an Endpoint and clicking "Add" will allow the javascript display code (added via rAPI or the Admin Reverse API interface) associated with that endpoint to display on the Resource Entry page.
An example display might be integrating Observium to display server status modules and alerts for Resources with the "Server" Section:
As a completely customizable area, displays can be designed to meet individual Resource needs - create charts, alerts, command buttons, or any other type of data that you wish to view.
Creating your own Gadgets
6connect provides XML specifications for users interested in creating their own gadgets for ProVision. See the XML Specifications section linked below for more information.
User created gadgets are not supported at this time and the specification below could change without notice. If you want to make your own gadget, please get in touch so we can help you

