DHCP Gadgets
The following gadgets are available to support DHCP.
DHCP Server Management (Legacy)
The DHCP Server Management Gadget has functionally been replaced by the DHCP Tab updates in version 7.0.0.
Although the DHCP Management Gadget may still be used, we recommended checking out the DHCP Groups, DHCP Servers, and DHCP Pools pages instead for an improved user experience.
The DHCP Server Management Gadget should be used with the "Server" Section.
When initially added to the section, it will show in the "Off" configuration:

To enable the DHCP Management Gadget, select the "On" radio button next to "DHCP Services", and click the "Update" button.
The DHCP Management Gadget in the "On" configuration:
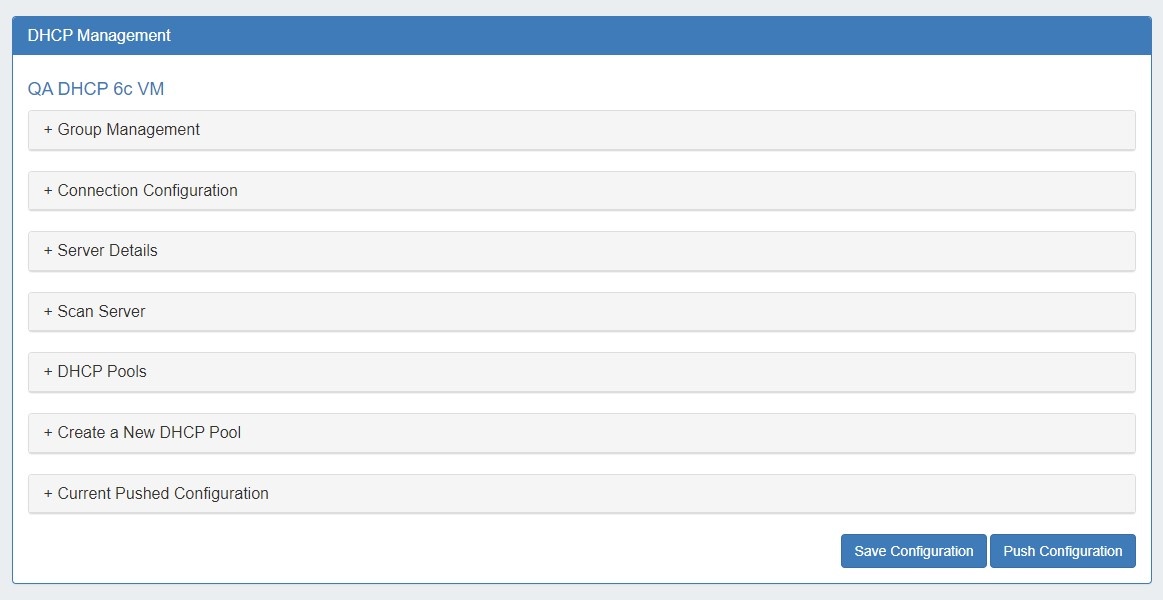
Each of the sections in the DHCP Management Gadget - Group Management, Connection Configuration, Server Details, Scan Server, DHCP Pools, and Create a New DHCP Pool - may be expanded to change settings in each area.
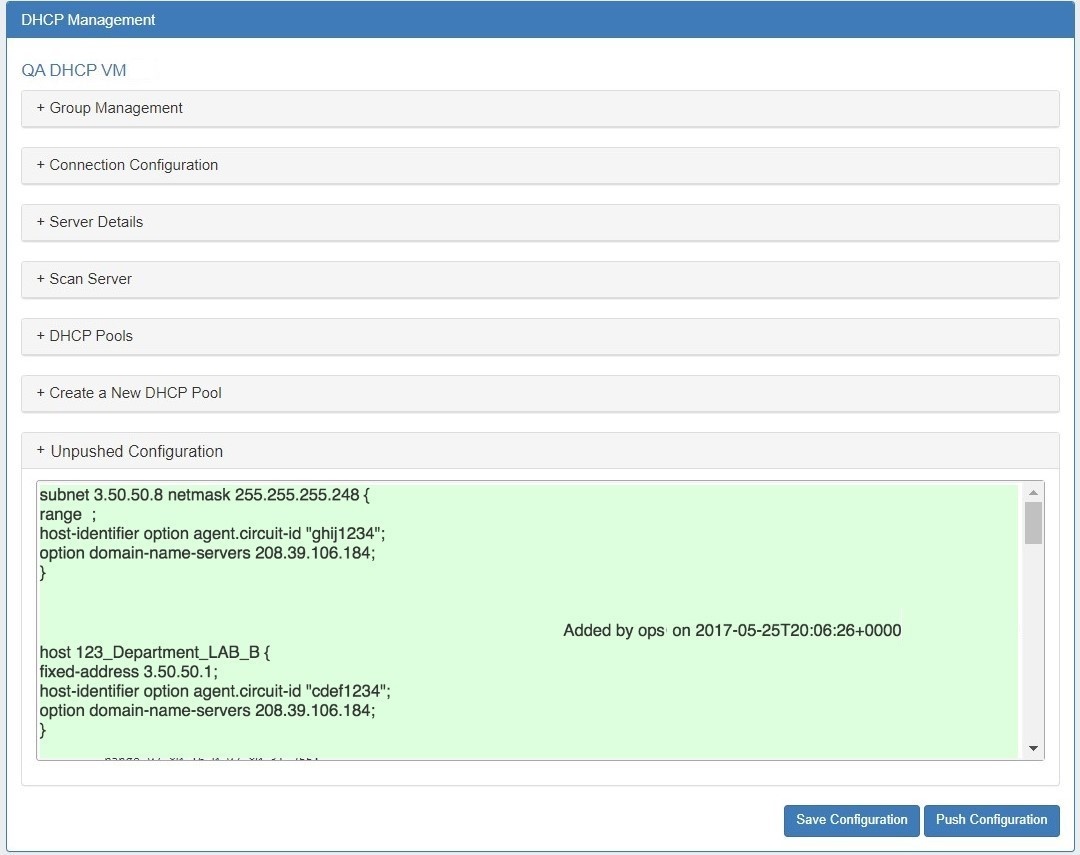
Additional sections may appear in the gadget once unpushed or pushed configurations are saved:

For detailed information on working with the DHCP Management Gadget, see DHCP Tab - Working with DHCP Gadgets.
DHCP Customer Configuration
The DHCP Customer Configuration Gadget allows users to assign IP aggregates to the DHCP server pools and generates DHCP Server Configuration changes depending on the tag(s) and DHCP options selected.
These configurations are then sent to the associated DHCP server Management Gadget as "Unpushed Configurations", where they may be held until a manual or schedule push occurs.
Before You Begin
Before using the DHCP Customer Configuration Gadget, the following should be set up in ProVision:
- The associated DHCP server should be created in ProVision and set up in the DHCP Management Gadget or DHCP Tab - DHCP servers list (See: DHCP Tab).
- Add the DHCP Customer Configuration Gadget to the desired section. You may want to create a specific "DHCP Customer" section for DHCP customer entries (See: Customizing Sections).
- Have, or set up APNIC Aggregates for DHCP use from the IPAM Tab with the desired IP space type, Region(s), Tags, and any desired VLAN criteria. Regions are a required field when assigning IPs from the DHCP Customer Configuration Gadget. Any APNIC aggregate may be used for DHCP, so you may want to create a "DHCP" IPAM tag to help denote the desired aggregate(s).
- If you are planning on Direct Assigning the DHCP blocks in the Customer Configuration Gadget, ensure that the desired blocks in the DHCP are split to individual /32 or /128 size. Smart Assign and Smart Browse will automatically split the block to assign the correct size.
Working with the DHCP Customer Configuration Gadget
Associate with DHCP Server
Once the gadget is enabled, the first step is to associate it with an already-created DHCP server in ProVision. Select the DHCP server to link to, and click "Continue".

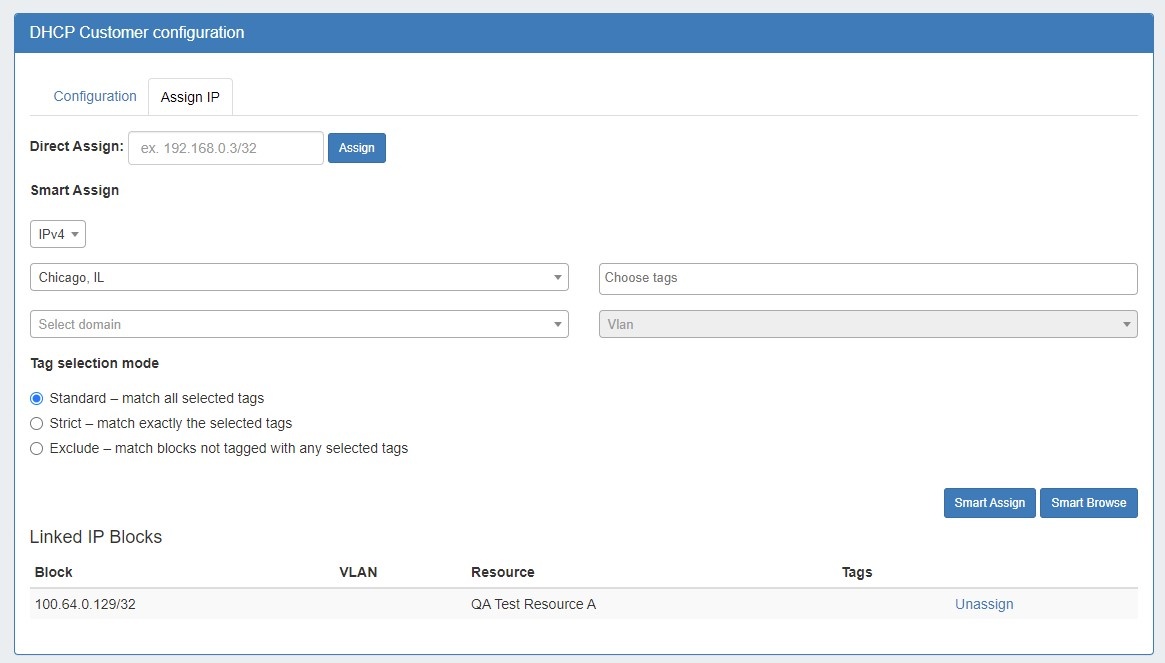
Assign IP's
Next, Assign IP's for pools from DHCP aggregates. You may Direct Assign, Smart Assign, or assign from Smart Browse based on the selected criteria.
Once assigned, a pool name will be automatically generated under "Resource". Pools may be unassigned by clicking the "Unassign" button.
Set up Configuration
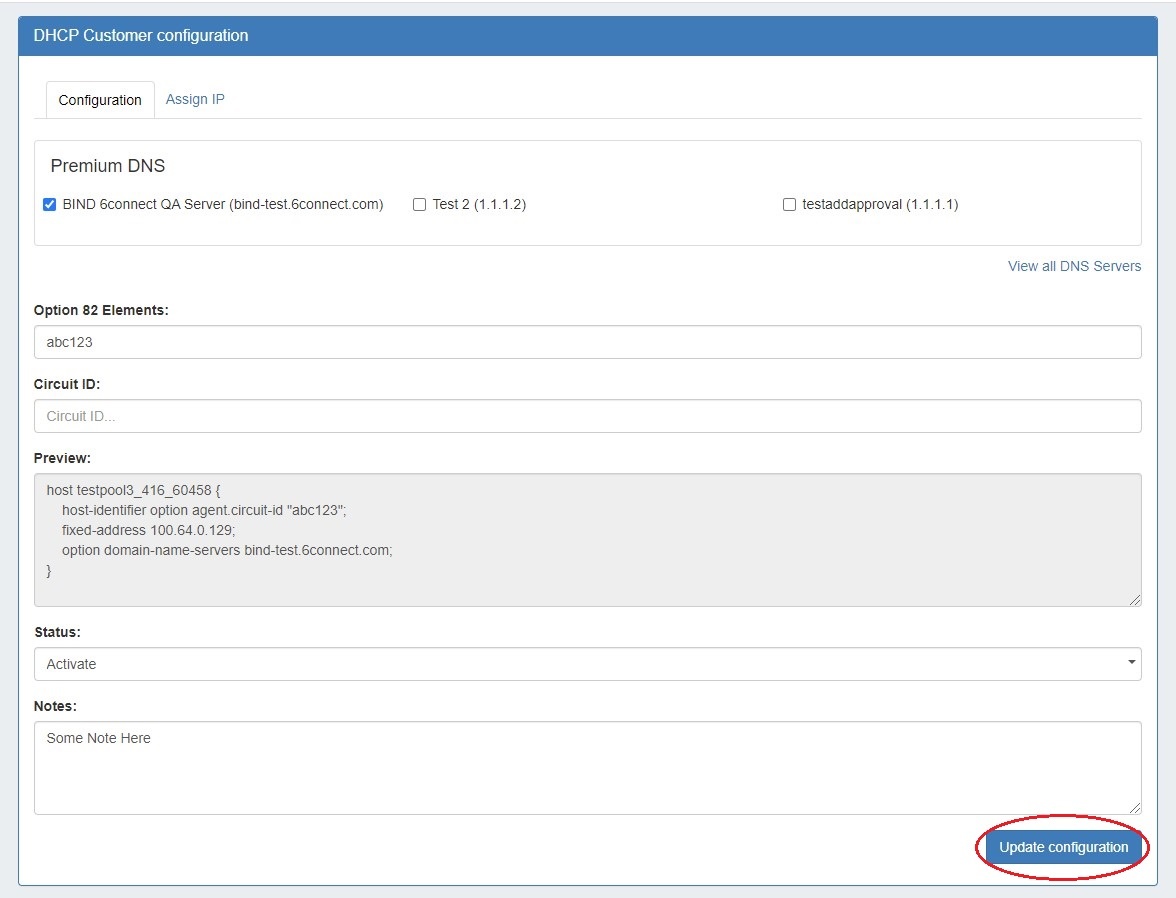
Once IP's have been assigned, the "Configuration" tab will appear. Click on the tab, and then select or deselect the DNS server associated with the Customer, add Option 82 Elements, Add Circuit ID text, and add notes if desired. Use the "Preview" field to confirm the accuracy of the data, and select the status as "Activate" or "Terminate".
When done, click "Update Configuration". The configuration will be sent to the associated DHCP server's DHCP Management Gadget.
Review and Push Configuration Updates
When a configuration has been saved from the DHCP Customer Configuration Gadget, it will appear as an "Unpushed Configuration" in the DHCP Management Gadget for the DHCP Server. If you expand that option, you will see the config elements highlighted – red are config elements that will be deleted, green are config elements that will be added.
At this point, an Admin user may manually push the updated configuration, or use a scheduled DHCP push task to automate the pushes.